How to DIY Your Mini Horse Barn full tutorial
Ever thought about taking that old dollhouse or horse stable that's looking a little rough and fixing it up? That's what I did with our mini horse barn, and the results were just what I was hoping for!
We've had this mini horse barn ever since my youngest sister moved in with us. It was hers, that she gifted too Evelyn. That, or maybe it just ended up in Evelyn's room? Either way. 😉
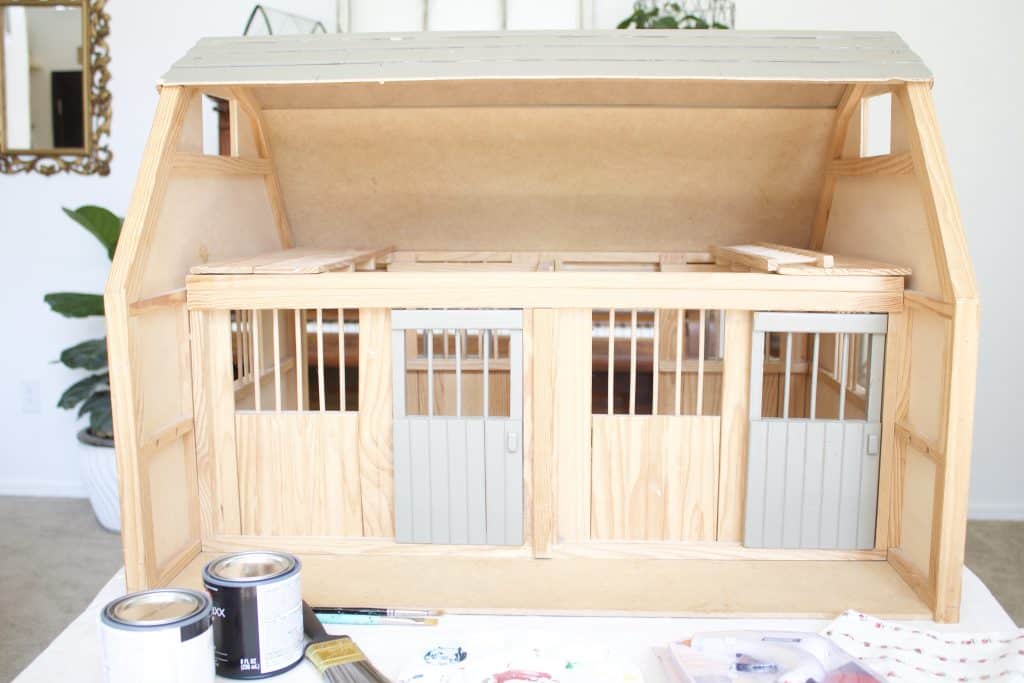
Mini horse barn project
This was a quality wood piece to begin with, which helped the paint project. I didn't prime it with anything, though if your project is compressed board, has stickers on it, or has been previously painted, I'd do a test spot. If the coverage isn't great I'd go ahead and use a primer such as Kilz, or something similar.

Painting the barn
This project was something I wanted a quick update on, without spending a ton. Let's face it, it's a child's toy. This barn will get used and abused so I didn't want to invest too much money. It's always a constant struggle with making something quality enough to last, without spending a small fortune.

This post contains affiliate links. For more information, see my disclosures here.
I walked into Fred Meyer, and went to their very small paint section. I knew I wanted to keep the barn colors simple. Whites and blacks for the win. You can accessorize in color right?
Krylon is knows for their spray paints, but I found these 8oz cans and picked up a few. These are high gloss, which I loved for this project. Gloss is easy to clean. I very rarely go for a matte finished on anything. I once used matte in my bedroom and anytime anyone touched the wall or I had to clean a spot, it looked forever different than the rest of the wall. That's a no-go in my books.
These cans were super inexpensive, but if you want to go for a specific color, a couple tester cans of any paint should get the job done, without having to purchase a whole gallon, which you will not need!
Tips on painting
Can you disassemble the barn to paint it? If so DO IT! The time consumer for my barn was painting the inside of the stalls. I also looked like I had intentionally painted my arms up to my elbows. Anytime I moved I was hitting my arm on an already painted wall. It was a tight space in those tiny stalls I'll tell ya!

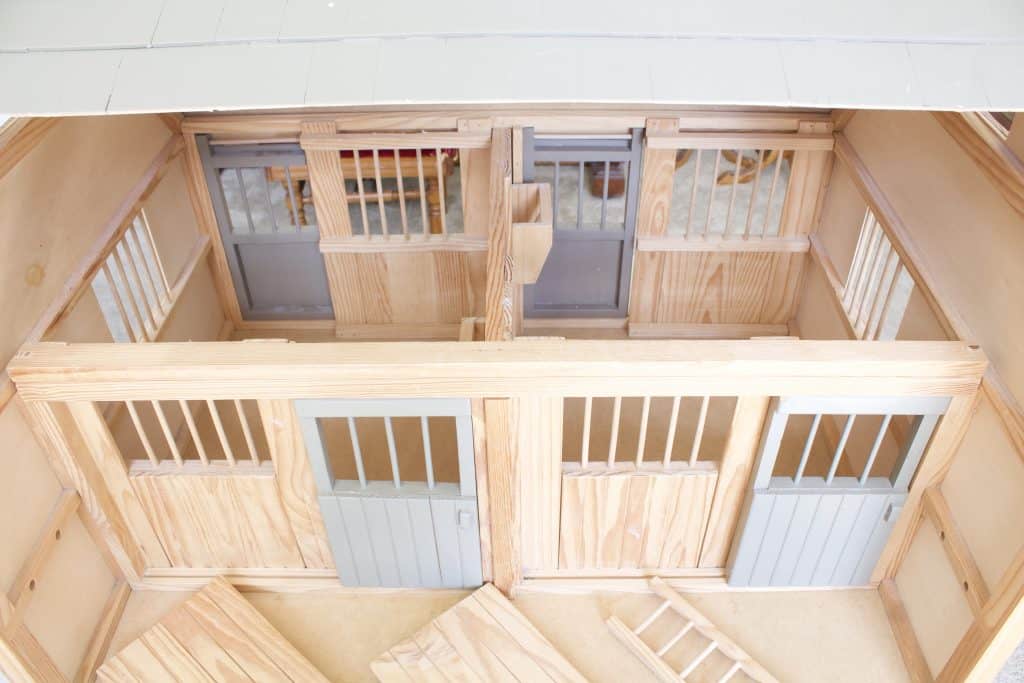
Use small brushes, and expect to paint anywhere between three to four coats. What I thought was going to be an afternoon project turned into two days, so know that doing in. There's a lot of watching the paint dry. Truly.


It's all in the details
Once the barn was painted, I attached the curtains. Evelyn had previously picked out the fabric from my stash. I simply cut them with fabric scissors, and glued them to the walls with an Arrow glue gun. Nothing fancy here!

For the stall door wreaths I also used the glue gun. I'm happy to report that three weeks later they are still holding on strong!

For all the other little extras I went to Hobby Lobby. The wreaths, windmill, grain sacks, and brooms worked perfectly to tie together our little project.


Evelyn was beyond excited to have her "new barn" as she called it, completely transformed. She's filled it with dolls and horses that rotate on an almost daily basis.


Do you have a doll house or barn sitting around that could use a quick update. Before sending it off to the Goodwill or selling it in a garage sale, think about purchasing a can of paint and getting creative. With care and love, this barn could easily be passed down to Evelyn's daughter some day. I just love that thought!
Happy DIYing friends! Make sure to tag me over on Instagram with the hashtag #homewitheryn so I can share and feature your projects!