Updating interior doors. Our hallway renovation.
Our hallway renovation is coming right along! I wanted new bedroom and bath doors but oh the cost! After researching I decided instead to work on updating our interior doors with molding, paint, and some new handles.
This is part one in a three part series on updating our hallway. To check out the other two parts to this series, click the links below:
2. How to hang wallpaper: Do it right the first time.
3. Faux Wainscoting tutorial: Wainscoting look without the cost

This post contains affiliate links. For more information, see my disclosures here.
I've seen many different molding options to update interior doors, some ornate and very beautiful. But, in the end settled on a simple double boxed pattern and sent Travis off to Home Depot for materials.
updating interior doors
What you'll need:
- wood glue
- tape to hold the wood in place while drying
- ½" flat moldings
- paint
- sandpaper (optional)
- caulking
- Handles (if needed)
Trimming out the doors
We needed enough materials for four doors and ended up getting eight, 10 foot pieces of ½" molding. They were 67 cents per foot. We used about two, 10 foot sticks per door for a total of $13 spent on wood for each one. This was just for the fronts of the doors, we didn't apply the moldings to the back.

Travis cut and measured the wood trim and taped them to the doors, and I came along after and glued them into place. I simply removed half of the tape, pulled the wood down, adhered the glue, and taped back into place. Make sure to wipe off any excess glue that shows around the moldings.
Depending on your door size, your two molding squares will vary in dimension from the ones we used. We place the moldings 5" in from each side of the door and 5" apart in the middle of the two squares.

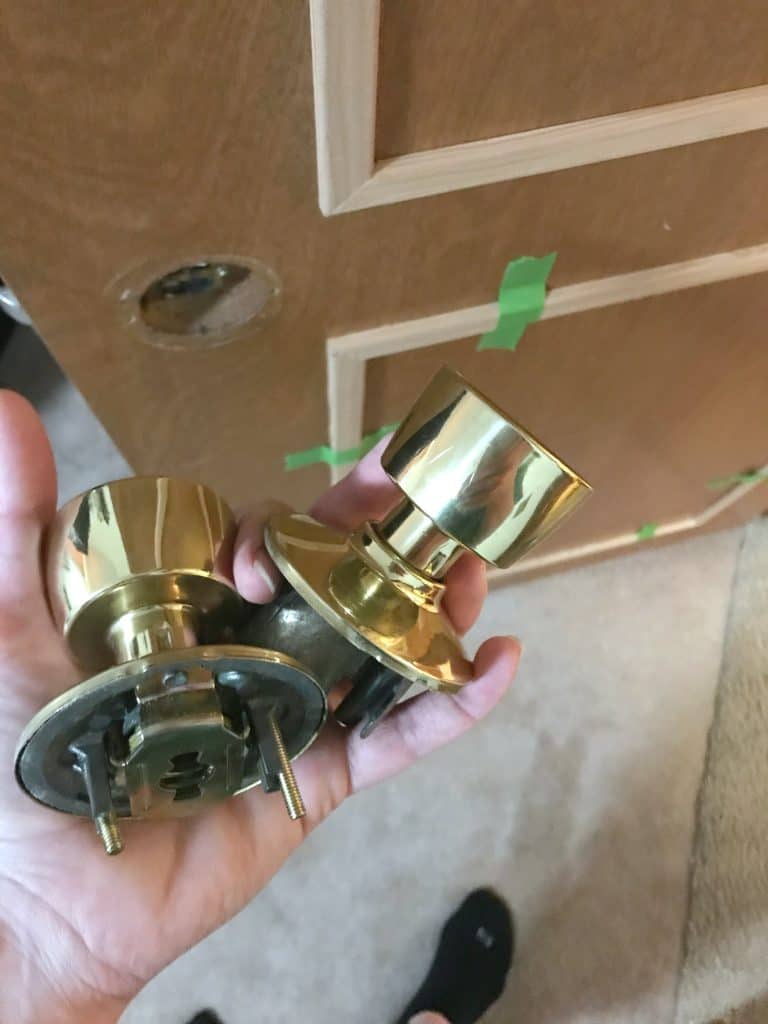
Let the glue set for 24 hours and then remove tape. Caulk any areas that you feel gap. Once that's dried it's time to paint. I went ahead and removed all the door knobs and threw them away since I knew we'd be replacing them anyhow. This also made it much easier to paint.
Painting the doors
Sherwin Williams is my go-to paint. My favorite color is reflective white. While I realize Sherwin William is on the pricy side, I've used several other brands and nothing stands up to the quality. Plus, they always have good sales if you sign up for their emails!
I did not sand, except in a few areas where kids had previous placed stickers on the doors and left a sticky film. There was also a couple rough spots on the trim from being rammed into before. As for primer, I didn't use it. I'm sure there's some out there who would disagree with that decision.
*Edited to add: Wow, there was A LOT of people that gave me some major flack for not using primer when this post was added to the Hometalk website. To defend myself slightly, if the doors were high gloss I most certainly would have sanded them down and used primer. But they weren't, so I didn't. Painters across the world are rolling their eyes at me, but in my defense, it's been four months and these door still look amazing.
Painters swear by Kilz It Primer, and I've used it in the past on other projects. Because my doors were so matte though, I saw it as an extra step that wasn't needed, and went straight in with the paint. I had no stain bleeding into the white paint. It did however, take four coats over the dark wood doors. I had expected as much going into it though. If you're in doubt, go ahead and use primer first.
Before

In progress

Installing the knobs
Once the doors were dry Travis went ahead and installed the doorknobs. We went with this exact door knob and love it. It closes and opens super easy. We bought the lock ones for our room and the bathroom, and the no-lock version for the kids rooms.

Per Door Cost

That's it for updating interior doors! A little time and elbow grease and we have amazing looking, quality doors. The total price per door was as follows:
Wood $13
Glue $4
One gallon paint which did 5 doors, so per door was $10
Doorknob $34 (You may not need a knob, and there are several options much cheaper available as well)
Total per door: $61
Again, if you just did the wood and paint it'd be much cheaper. I wanted quality parts and needed to update the handles and liked the look of this style, so we splurged a bit.
Have more questions about the door project? Let me know in the comments or Like my Instagram account and comment over on my Instagram post all about it and I'll be sure to respond!
Stay tuned for our final reveal post when the hallway is complete!

Shop this post:

You may also enjoy:
How to hang wallpaper: Get it perfect the first time. Removal & application
Faux wainscoting tutorial: Wainscoting look without the cost