How Not To Shiplap A Wall | Common Mistakes To Avoid
This weekend we took the wall behind our TV in the living room, and decided it needed a bit more character and pizzaz. What better way to do that than adding shiplap? Something about those even boards lining a wall softens it, while also adding a little somethin somethin. Know what I mean? It makes you perk up and take notice. We always knew we'd shiplap a wall or two in our home, and finally decided this would be our first attempt!
As it seems to go with DIY, we learned a thing or two in the process. Sadly we made a few mistakes. Not huge, and we'll know better next time! I want to save you the trouble we went through, by sharing what you should not do when you shiplap a wall.
All the fun with walls
We have had our fair share of fun with the walls in this home. We've done faux wainscoting in the hallway and downstairs bath, we've placed wallpaper in the upstairs hallway. We've even stenciled pretty gold bees in the guest bathroom for a glam farmhouse look. But this, this was the first time ever putting up shiplap!
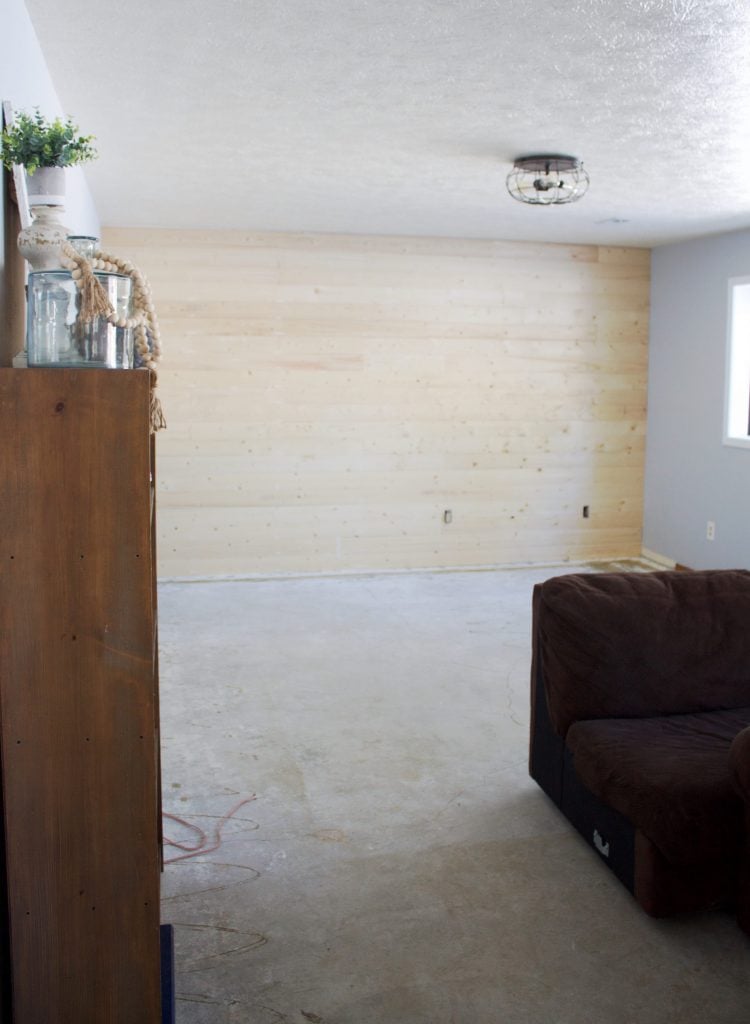
Before
The wall behind the TV was large and cold. And frankly, it just lacked character. It looked builder grade.

We didn't want to take away or compete with the TV, just complement it. The pattern of the shiplap wood is aesthetically pleasing to the eye yet doesn't distract. It's noticeable, but not loud. And it's just plain prettttttty.
I share here, how we painted the shiplap, but for now, make sure to avoid these small mistakes so the painting process goes smoother.
How Not To Shiplap A Wall:
Faux Shiplap or Real, mind the gap
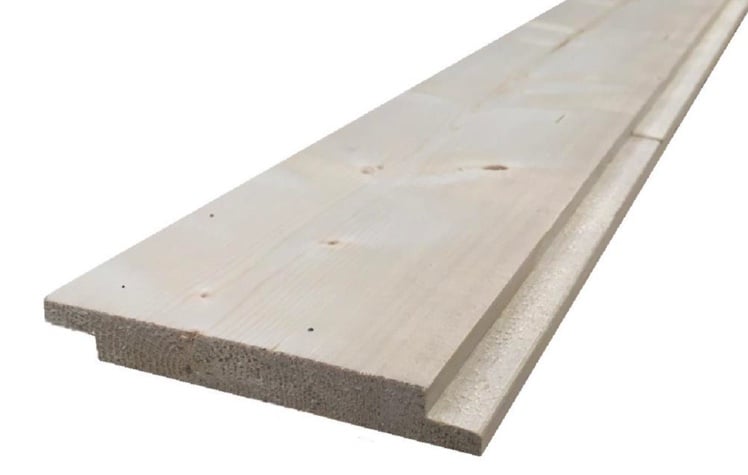
Faux shiplap is essentially a ⅕", 4 x 8 ft hardwood plywood board that is cut into long, 6" strips.
Real shiplap is a pine board that is milled with a halved groove called a rabbet. This is so the edges connect snugly together, one on top of the other, which leaves the distinctive reveal line between boards.
Now that we know the difference, let's make one thing clear: If you want that popular shiplap look, Chip and Joanna Gaines style, you'll want to make sure your gap between the boards is just right.
In all the many tutorial of applying faux shiplap, most say to use a penny, or tile spacers, to evenly space the boards apart. Giving it that true shiplap look.
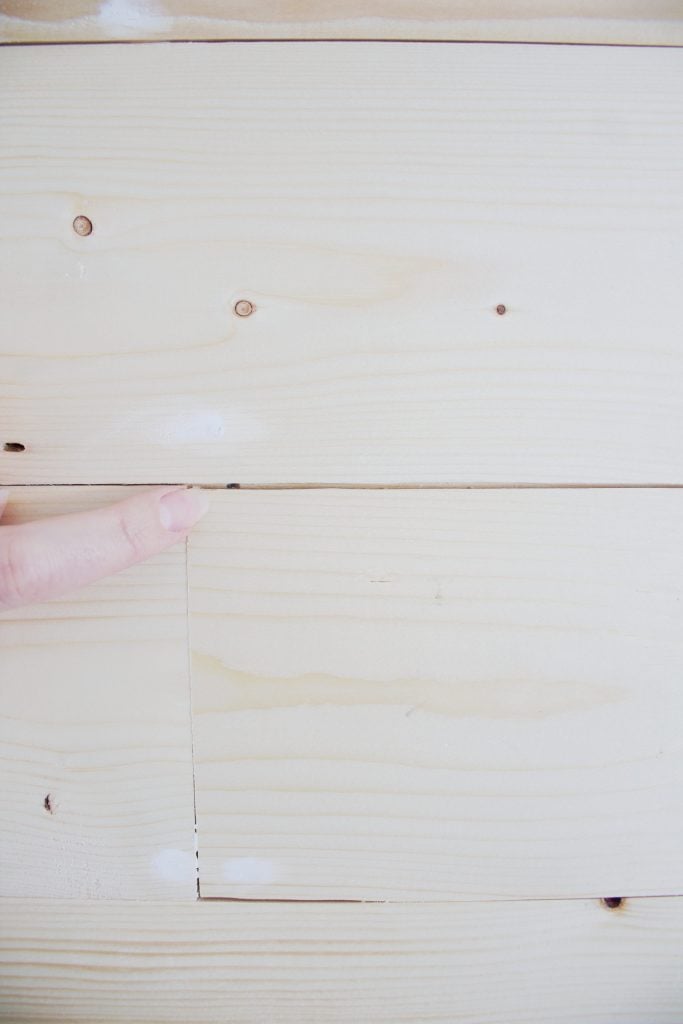
Well friends, the same rule applies when using true tongue and grooved boards. If you pace them too close together, you get little to no gab. Then it becomes just a wood wall, not a shiplap wall.
Example of boards too close together:

In our defense, I assumed if you purchase shiplap boards, when you put them together they'd just have the gap built in. Because . . . they're made for that right? Never assume, because it makes a . . . donkey's butt out of . . . well, just me in this example.
The different kinds of shiplap boards
You see, there are shiplap boards with beveled edges, so when placed together tightly they still have that shiplap gab. And then their are boards that are grooved without the beveled edge.
See both examples below:
Beveled edge

Straight edge
We didn't know that going into this. You'd think if I stopped for a second and stared at the boards I'd have an aha moment. But it didn't happen.
So we nailed them all together, stood back, and realized we were missing the pretty gaps.
Insert sobs here.
I'm working with it, and think I can still make it look good with a little extra work. If you take away nothing else from this entire post take away this: Still use spacers when using true shiplap boards unless the edges are beveled enough. And even then, still make sure.
Lesson learned. Moving on.
Don't forget to find the studs when you shiplap a wall
To make sure your shiplap has staying power, find and mark all the studs. The studs are where you're going to seam together your boards, so the ends are strongly secured to the wall. This is especially important with true shiplap boards, because the boards are much heavier than faux boards.

Our wall was 13.5' long, and the boards were 8'. So, we cut and staggered the seams throughout the wall so nothing looked too perfect. Remember, shiplap is not about perfection. When ending and starting a new board we always picked what seam we wanted them to connect ahead of time, and cut them to that size. You'll have some leftover pieces of wood at the end, but it's more important that you attach your shiplap to the studs securely and that they don't fall off the wall, than if you waist a few feet of board.
Don't use too many nails
If you're using true shiplap, this handy little trick will serve you well.
When attaching the shiplap to the wall, instead of having two visible nail holes you'll have to patch and sand, put one nail though the bottom of the board, and the other nail through the back lip of the board that you plan to cover with the other board when it fits over the top.
The board is nailed twice, but only one is visible.
Below the bottom nail is already puttied over, and the top nail is barely visible under the lip.
When you shiplap a wall, Don't start at the bottom
We started at the bottom, and lucky for us, it just happened to work out. However, if the ceiling was an inch or two shorter or longer we would have had to cut the width of our board, and then alllll I would have been able to see what how the top board was a different size that the others. And that would have ruined that whole calm, symmetrical look I was going for. However, if you had to cut a board to fit at the bottom, it would be much less noticeable!

Don't do it yourself, you need an accomplice
These boards are long, and if you want to get proper measurements and proper cuts, you'll need an assistant. I was the one that decided where I wanted the seams, Travis was the cutter. I held the pieces in place while he nailed them on. Teamwork makes the dream work!

Don't forget to sand and fill the wholes
How rustic do you want the shiplap to look? This right here is total personal preference. Some people like the super rustic look, where the nail holes, knots, cracks and all are visible. They give it a few coats of paint, but you can see all the character of the wood.
Others love to patch just the nail holes and other larger holes, and paint so it's a more natural look. Even others putty all flaws in the wood, sand them out, and end up with a perfectly looking piece of wood.
Before you start filling holes, decide on the look you're going for.
And those, my friends, are my six do's and don'ts I wish I'd known before starting. Hopefully you fine them helpful for you shiplap project!
And yes, we don't have flooring downstairs! We ripped up our ugly brown carpet when the dog dumped over a paint can. That's what spurred on this entire downstairs renovation. So do I say "thank you" or "bad dog" to our St Bernard Bruno? Either way, stay tuned as we finish up this space!
Be sure to follow me over on Instagram where I share all of our home DIY in real time, along with a little homeschooling, dessert making, and real life thrown in!