How To Host The Best Friendsgiving in 2025 | Ideas & Menu
When I first heard about Friendsgiving, my mind was blown. What? Thanksgiving Day but with friends? How much fun is that! I've gone on to host Friendsgiving three years running now, and I'm here to spill all the details so you can have a fun, yummy, successful event.

In this post, I'll share my best tips on what to do (and not), what food to include in your Friendsgiving menu, and a DIY tutorial for a fun Friendsgiving banner. Plus, I'm giving you free printables to help with planning your event. Grab your closest friends, take some notes, and get ready for an amazing Friendsgiving celebration!
What Is Friendsgiving?
Most of us attend a traditional Thanksgiving dinner every year, usually with blood relatives. But Friendsgiving is an exciting way to celebrate this fun and yummy holiday with your group of friends. It's especially popular among young adults and college students, but it's for anyone who loves to bring their real friends together during the holiday season.
Unlike the official date of Thanksgiving, which falls on the fourth Thursday of November, Friendsgiving can be hosted earlier in the month, or later. It doesn't replace Thanksgiving-it's just a great excuse to have much fun with your favorite people!
Pro Tip: Hosting early in November gives everyone enough time to plan, and it's less stressful with other holiday commitments.
(Updated: I've recently posted an updated addition about our third Friendsgiving that goes along great with this post! Make sure to check it out!)
Hosting Friendsgiving
Because the holidays get crazy, I send out my guest list and invites early in October, using social media (Facebook) to keep it casual. I created a simple sign-up sheet for food contributions to avoid duplicate dishes and make sure we had everything covered for the Friendsgiving meal.

Potluck Style Friendsgiving Menu
One of the best things about Friendsgiving is that it's very laid-back! We went potluck-style, and everyone brought their favorite Friendsgiving meals. Before assigning dishes, I asked if anyone had a particular main dish or side dishes they wanted to make.
Here's what we ended up with:
- Green bean casserole
- Stuffing
- A whole turkey
- Ham
- Gluten-free options like a vegetable tray and salad
- My mom's famous wassail (recipe below!)
- Mashed Potatoes & Gravy
- Green Bean Casserole
- Cranberry Sauce
- Sweet Potatoes
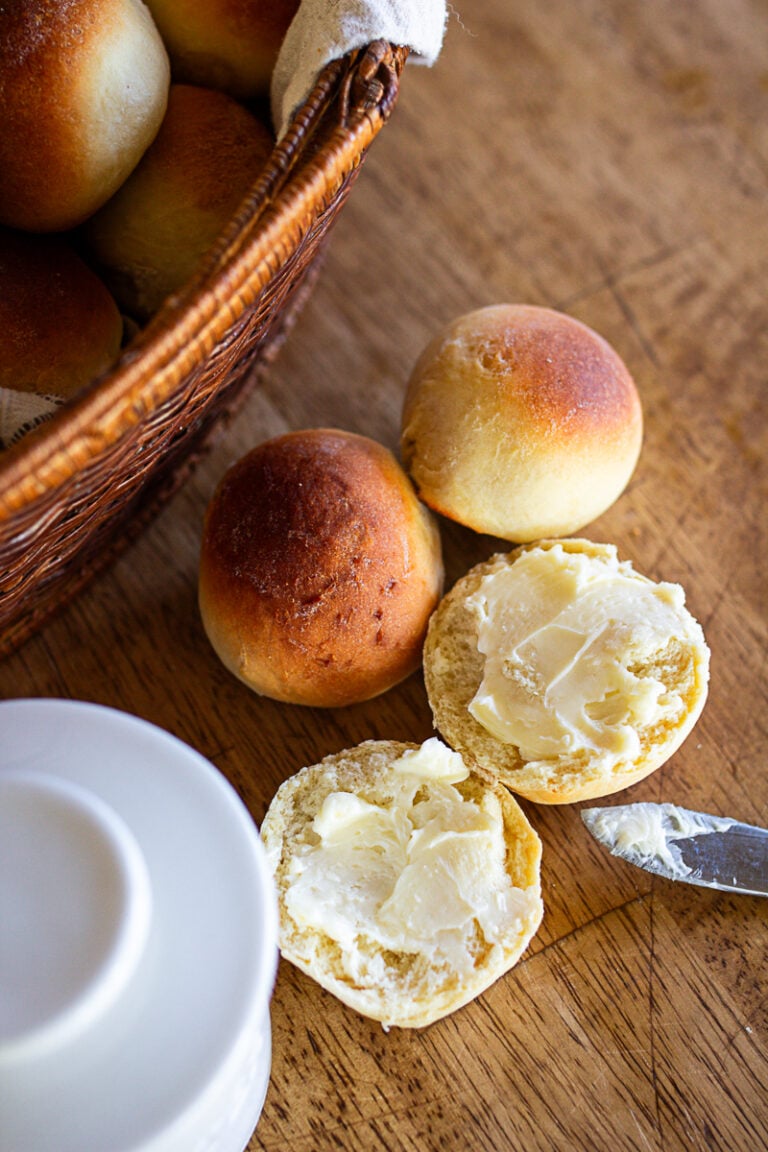
- Dinner Rolls
- Pumpkin Pie
- Apple Pie
- Roasted Vegetables (like carrots, Brussels sprouts, or squash)
Each couple was also encouraged to bring whatever drinks they wanted. We had a fun mix of cocktails, wine, and my favorite-the wassail.

Famous Wassail Recipe
Ingredients
- 1 gallon apple cider
- 1 teaspoon whole cloves
- 2 teaspoon whole allspice
- 2-3 cinnamon sticks
- ⅔ cup sugar
- 2 sliced oranges
Instructions
- Combine the apple cider, whole cloves, allspice, cinnamon sticks, sugar, and sliced oranges in a large crockpot.
Set the crockpot to "warm" and let the mixture simmer for about 3 hours, stirring occasionally.
Once the wassail is warm and fragrant, it's ready to serve. Keep it on the "warm" setting throughout the evening so guests can help themselves!
Notes
Feel free to adjust the sweetness by adding more or less sugar, depending on your taste.
For a fun twist, you can offer guests the option to add a splash of rum or bourbon for an adult-friendly version of this delicious drink.
Nutrition
Pro Tip: Oven Space
One of the biggest challenges for me was managing all the dishes that needed to be served warm. My stovetop was piled high with casseroles and stuffing while the ham was cooking. Next time, I'll assign some of the main event dishes like stuffing or mashed potatoes to guests, so they can bring them right out of the oven. Hosting a large group? Next time I'd consider using warming trays or chafing dishes.

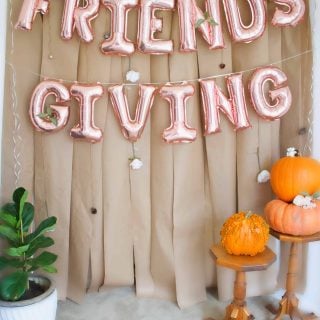
DIY Friendsgiving Banner Tutorial
For decorations, I wanted a simple yet bold statement. This DIY Friendsgiving banner was easy to put together and only took me about 45 minutes. It was the perfect backdrop for photos and gave the party that extra festive touch.
Here's what you'll need:
- Craft paper
- Twine
- Friendsgiving balloons
- Floral accents (optional)
Step 1: Measure the length of your wall and cut the craft paper into pieces that fit. I needed about five pieces for our banner area.
Step 2: Thread twine through the tops using a large needle or poke holes and pull the twine through.
Step 3: Hang the banner, and use tape to connect the pieces behind the paper. I added floral accents for an extra pop.
It was simple to make, but it added so much to the party! You don't have to go all out with Friendsgiving décor, but this was a great way to make a big impact without spending too much time or money.

Shop decorations:


Kids' Area and Entertainment
I wanted our party to be fun for everyone, so we made sure to have a designated area for kids. I found some fun Thanksgiving themed activity placemats, and used butcher paper as the table cloth so they could also color on that as much as they wanted. We placed pretty jars of crayons on the tables, and the kids thought it was so fun to eat and color their table at the same time.

Shop Kids Table:
You don't have to overthink it-just make sure the kids have things to do so the adults can relax and enjoy the evening.

We also set up games for the adults. At a Friendsgiving event, you need something for people to do after dinner! We played poker with a $5 buy-in, which was a hit with our group. If you're looking for other fun options, try Cards against humanity, Pictionary, Escape room in a box, Apples to apples, and the list goes on and on. Find something you think your crowd would appreciate.
Don't Forget the Mashed Potatoes!
Speaking of food, let me share one big mistake I made our first Friendsgiving: I didn't make mashed potatoes. I figured we had stuffing, green bean casserole, and other delicious sides, so no one would miss them. WRONG! Apparently, mashed potatoes are a non-negotiable for both Thanksgiving dinner and Friendsgiving meals. Lesson learned-next time, I made them every year following.

Wrapping Up: Enjoy Time with Good Company
At the end of the day, Friendsgiving is all about gathering with your best friends and real friends to enjoy each other's company. Whether you're hosting a small group or a lot of people, take a moment during the party to appreciate the memories you're making. These are your people-the ones you laugh with, celebrate with, and cherish.
Before the night ends, look around at your group of friends and soak in the fun. This is what Friendsgiving is all about-good food, great memories, and time spent with the ones you love.

How To Throw An Epic Friendsgiving
Ingredients
- 1 group of friends
- 1 potluck-style meal coordinated with a sign-up sheet
- 1 whole turkey or your choice of main dish
- 5-10 side dishes mashed potatoes, stuffing, green bean casserole, etc.
- 3-6 desserts pumpkin pie, apple pie, etc.
- Assorted drinks wine, cocktails, or homemade wassail
- Games and entertainment poker, Pictionary, or a bad movie marathon
- Fun décor DIY Friendsgiving banner, balloons, and floral accents
Instructions
- 2-3 weeks ahead:
Create a guest list of your closest friends and send out invites. A casual social media event or group message works great!
Use a sign-up sheet to coordinate dishes and avoid duplicate dishes. Make sure everyone knows what to bring to complete your Friendsgiving menu. - 1 week before:
Plan your decorations, such as a DIY Friendsgiving banner and any additional festive touches like balloons or floral accents.
Shop for your ingredients, including the main event like a whole turkey and staples like green bean casserole, stuffing, and gluten-free options if needed. - The day before:
Prepare any dishes that can be made ahead of time, such as pies or appetizers. - Set up your dining space and kid-friendly area if needed.
- Organize games or entertainment (don't forget that $5 buy-in for poker if you're playing!).
- The day of:
Start cooking your main dish (like the turkey) early, and ensure you have enough oven space. You can use slow cookers or warming trays to keep food warm on the counter. - Welcome your guests and have them place their potluck dishes on a designated table. Keep drinks handy in a cooler or serve a signature drink like Teri's Wassail.
- Once everyone is settled, serve up the feast! Don't forget the mashed potatoes-they're a Friendsgiving essential!
- After the meal:
Transition into games or entertainment to keep the energy up. Whether it's Pictionary, poker, or a worst movie marathon, have something planned to keep your guests engaged and laughing.
Enjoy:
Take a moment to look around, savor the good food, and enjoy the good company. This is what Friendsgiving is all about-great food, wonderful friends, and lifelong memories.
Notes
Decorations can be simple or over the top. Even a small statement like a DIY banner will make your space feel festive!
Make it your own: Tailor the menu, games, and vibe to fit your crowd's personality. This event is all about making memories with your real friends.
Free Party Planning Printables
Need help planning your Friendsgiving celebration? Download my free printable party planning checklist to stay organized and make sure you don't forget any important details, like creating your guest list or coordinating your Friendsgiving menu.

Need something to help organize your thoughts and ideas? Enjoy this free printable when planning your next party!
You might also enjoy:


Friendsgiving has become one of my absolute favorite traditions. There’s something so special about gathering friends around the table before the busy holiday season begins — the laughter, the mismatched dishes, the smell of wassail simmering away. I’ve hosted this for years now, and every time feels a little different, but just as meaningful. If you make my mom’s wassail for your celebration, I hope it fills your home with the same warmth and joy it brings to ours.
I usually host a friendgiving! skipped it this year but such great ideas for years to come! 🙂
That Friendsgiving banner is so cute!
You have given some great tips - especially about assigning food. This is inspiring me to maybe plan a Friendsgiving next year!
It was so fun to host! You'll love it!
I’m in love with that banner! It’s so perfect! I also love the potluck idea too. I’m always the one trying to cook everything! It would definitely make the day more enjoyable!
We've been saying for years that we want to host a Friendsgiving...now I'm really feeling inspired. Love this decor!
Such cute ideas!! Love the banner!!
This is such a great idea! Thank you for sharing!
this is so awesome. I'm hosting one this year so this is so helpful!
Potatoes or not it was still fun and amazing! ??
I'm glad you had fun! xoxo