Simple Homemade Chocolate Syrup Recipe | Easy & Quick
There's something deeply satisfying about making even the simplest things from scratch. Especially when it turns out better than anything you'd buy at the store. This homemade chocolate syrup recipe is rich, smooth, and made with just a few pantry staples. No preservatives, no mystery ingredients, just real chocolate flavor you can drizzle, stir, or gift. It's quick to make, easy to store, and the kind of recipe that turns everyday moments into something a little sweeter.
It's part of my Harvest Jar Gift Series, alongside other favorites like easy caramel sauce, homemade vanilla extract, and rosemary herb salt. These small-batch recipes are perfect for holiday gifting, or just stocking your pantry with cozy essentials.
A Quick Look at This Homemade Chocolate Syrup
🍫The Flavor: Rich, deep cocoa balanced with a warm touch of vanilla.
✨The Texture: Smooth, glossy, and perfectly pourable for milk, ice cream, and desserts.
⏰Time: 10 minutes of hands-on cooking, followed by about 30 minutes to cool.
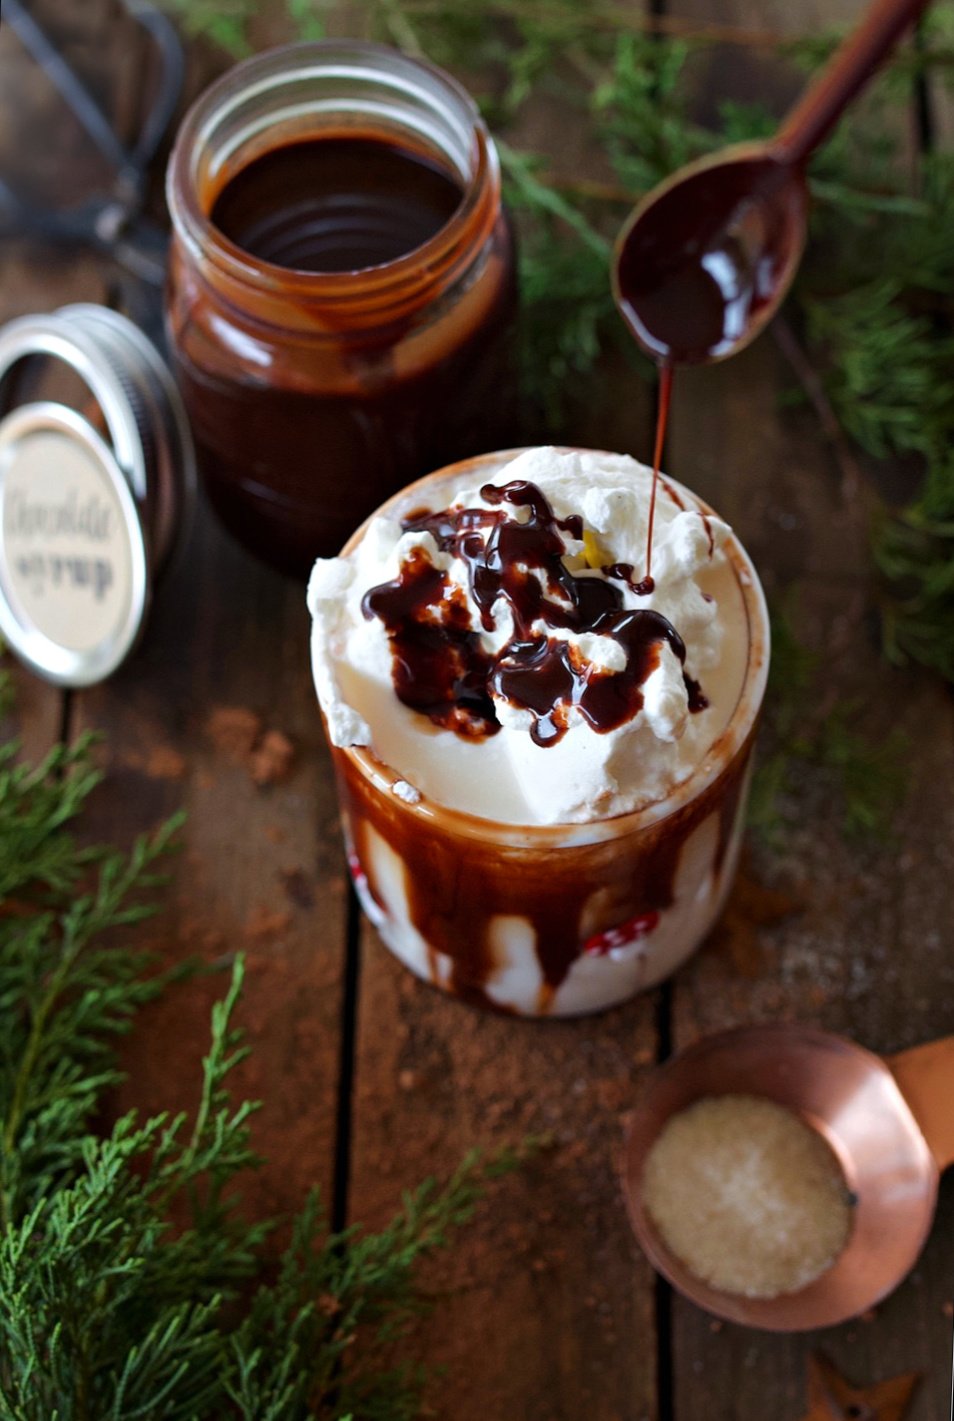
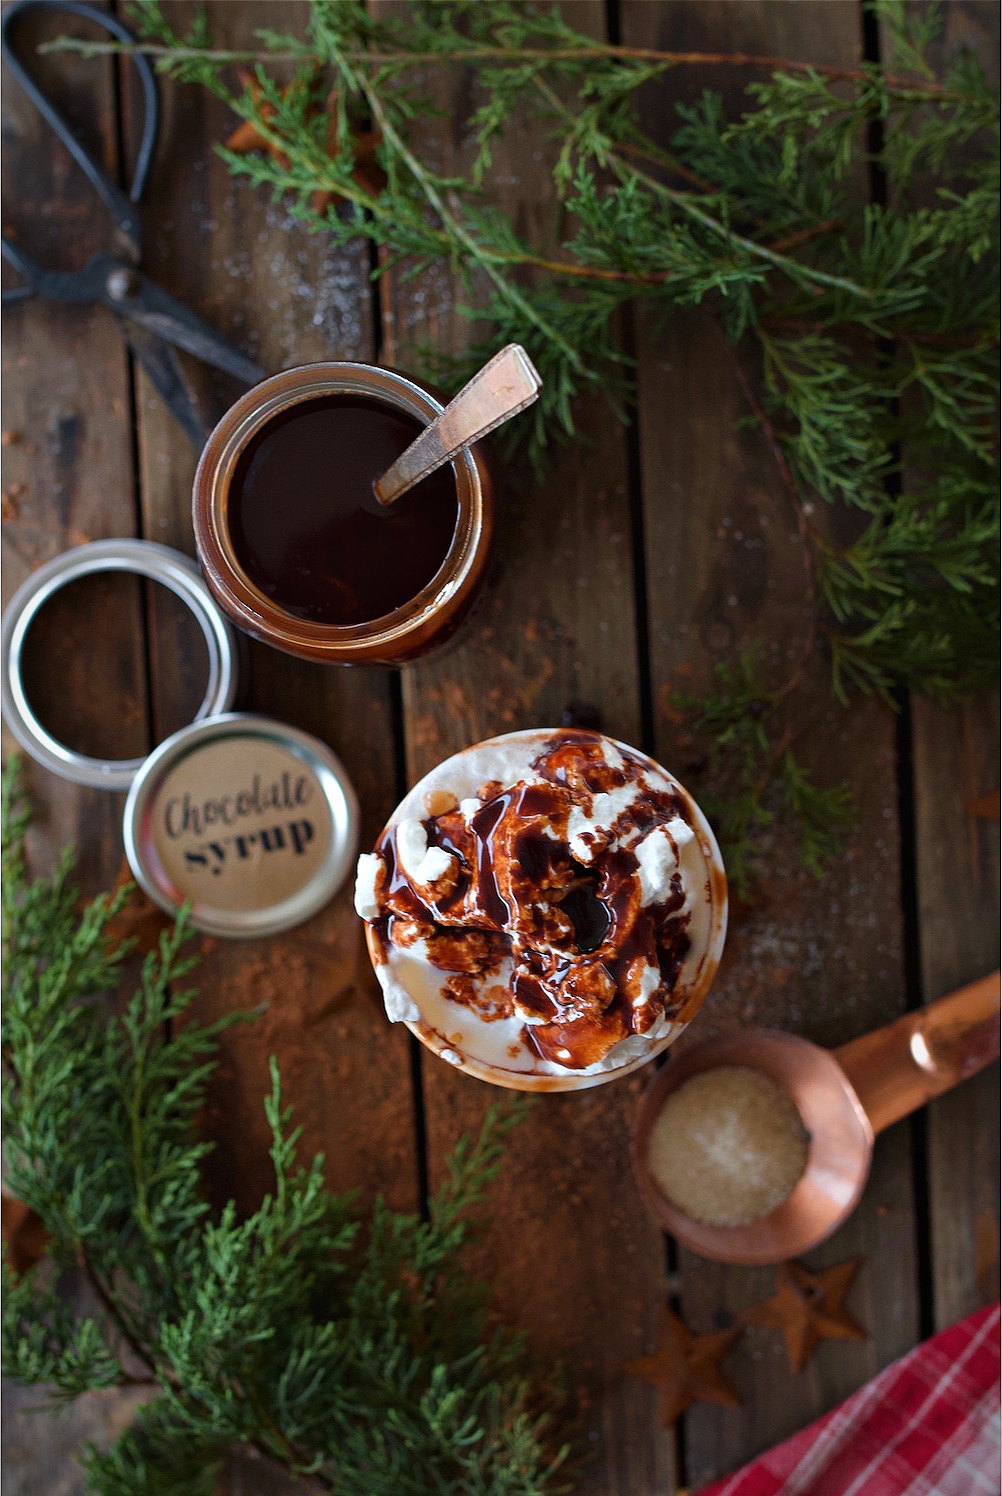
🎁Versatility: Perfect for homemade chocolate milk, drizzling over desserts, stirring into coffee, or gifting in a pretty glass bottle.
SUMMARIZE & SAVE THIS CONTENT ON
Jump to:
- A Quick Look at This Homemade Chocolate Syrup
- Why Make Your Own Chocolate Syrup?
- Why You'll Love This Homemade Chocolate Syrup
- Ingredient Notes + Substitutions
- Making Your Own Syrup Benefits:
- How to Make Homemade Syrup
- Variations or Different Ways to Use It
- Storage + Reheating Tips
- Chocolate Syrup FAQ
- Other Simple Staples To Try:
- Chocolate Syrup
Why Make Your Own Chocolate Syrup?
Most store-bought chocolate syrups are packed with preservatives and artificial ingredients. Not because they taste better, but because they're cheaper to make and last longer on shelves. This homemade version skips all that. It's made with real, simple ingredients and still keeps well in the fridge for up to two months. Though around here, it rarely lasts that long.
We've been making this homemade chocolate syrup for years, and it's become a staple in our kitchen. The kids can't tell the difference from the store-bought kind, and honestly, I think it tastes even better.
Why You'll Love This Homemade Chocolate Syrup
Store-bought chocolate syrup can't compete with the rich, balanced flavor of a homemade version. This one is smooth, perfectly chocolaty, and made with just five pantry staples-no preservatives or mystery ingredients.
- Takes less than
- Made with real ingredients
- Naturally dairy-free
- Perfect for gifting or everyday use
- Keeps in the fridge for up to 2 months
Ingredient Notes + Substitutions
- Unsweetened cocoa powder - Quality matters here. I use Anthony's Organic cocoa for bold, rich flavor.
- Organic cane sugar - Adds clean sweetness. You can sub granulated sugar or coconut sugar.
- Water - The base that blends everything together.
- Salt - Just a pinch to enhance the cocoa. I use Redmond Real Salt.
- Vanilla extract - This is my Homemade vanilla recipe, but store-bought works great too.
Optional swaps: Maple syrup or agave can be used in place of sugar, though it will slightly change the final consistency.
Making Your Own Syrup Benefits:
I love making this syrup, and not just because it's delicious. When you make your own chocolate syrup, you're in control of the quality of the ingredients-no more worrying about what's lurking in those store-bought bottles!
Plus, you avoid high fructose corn syrup and get to enjoy a clean recipe with real food. Here are just a few reasons why this is a favorite in my kitchen:
- Simple Ingredients: Just five pantry staples you probably already have, including unsweetened cocoa powder and sugar.
- Long Shelf Life: This syrup stores well in the fridge for weeks, making it an easy go-to when the craving for chocolate hits.
- Versatility: Use it as an ice cream topping, stir it into hot chocolate, or drizzle it on fresh fruit.
- Homemade Tastes Better: The rich, chocolaty flavor is far superior to anything you can get at the grocery store.

How to Make Homemade Syrup
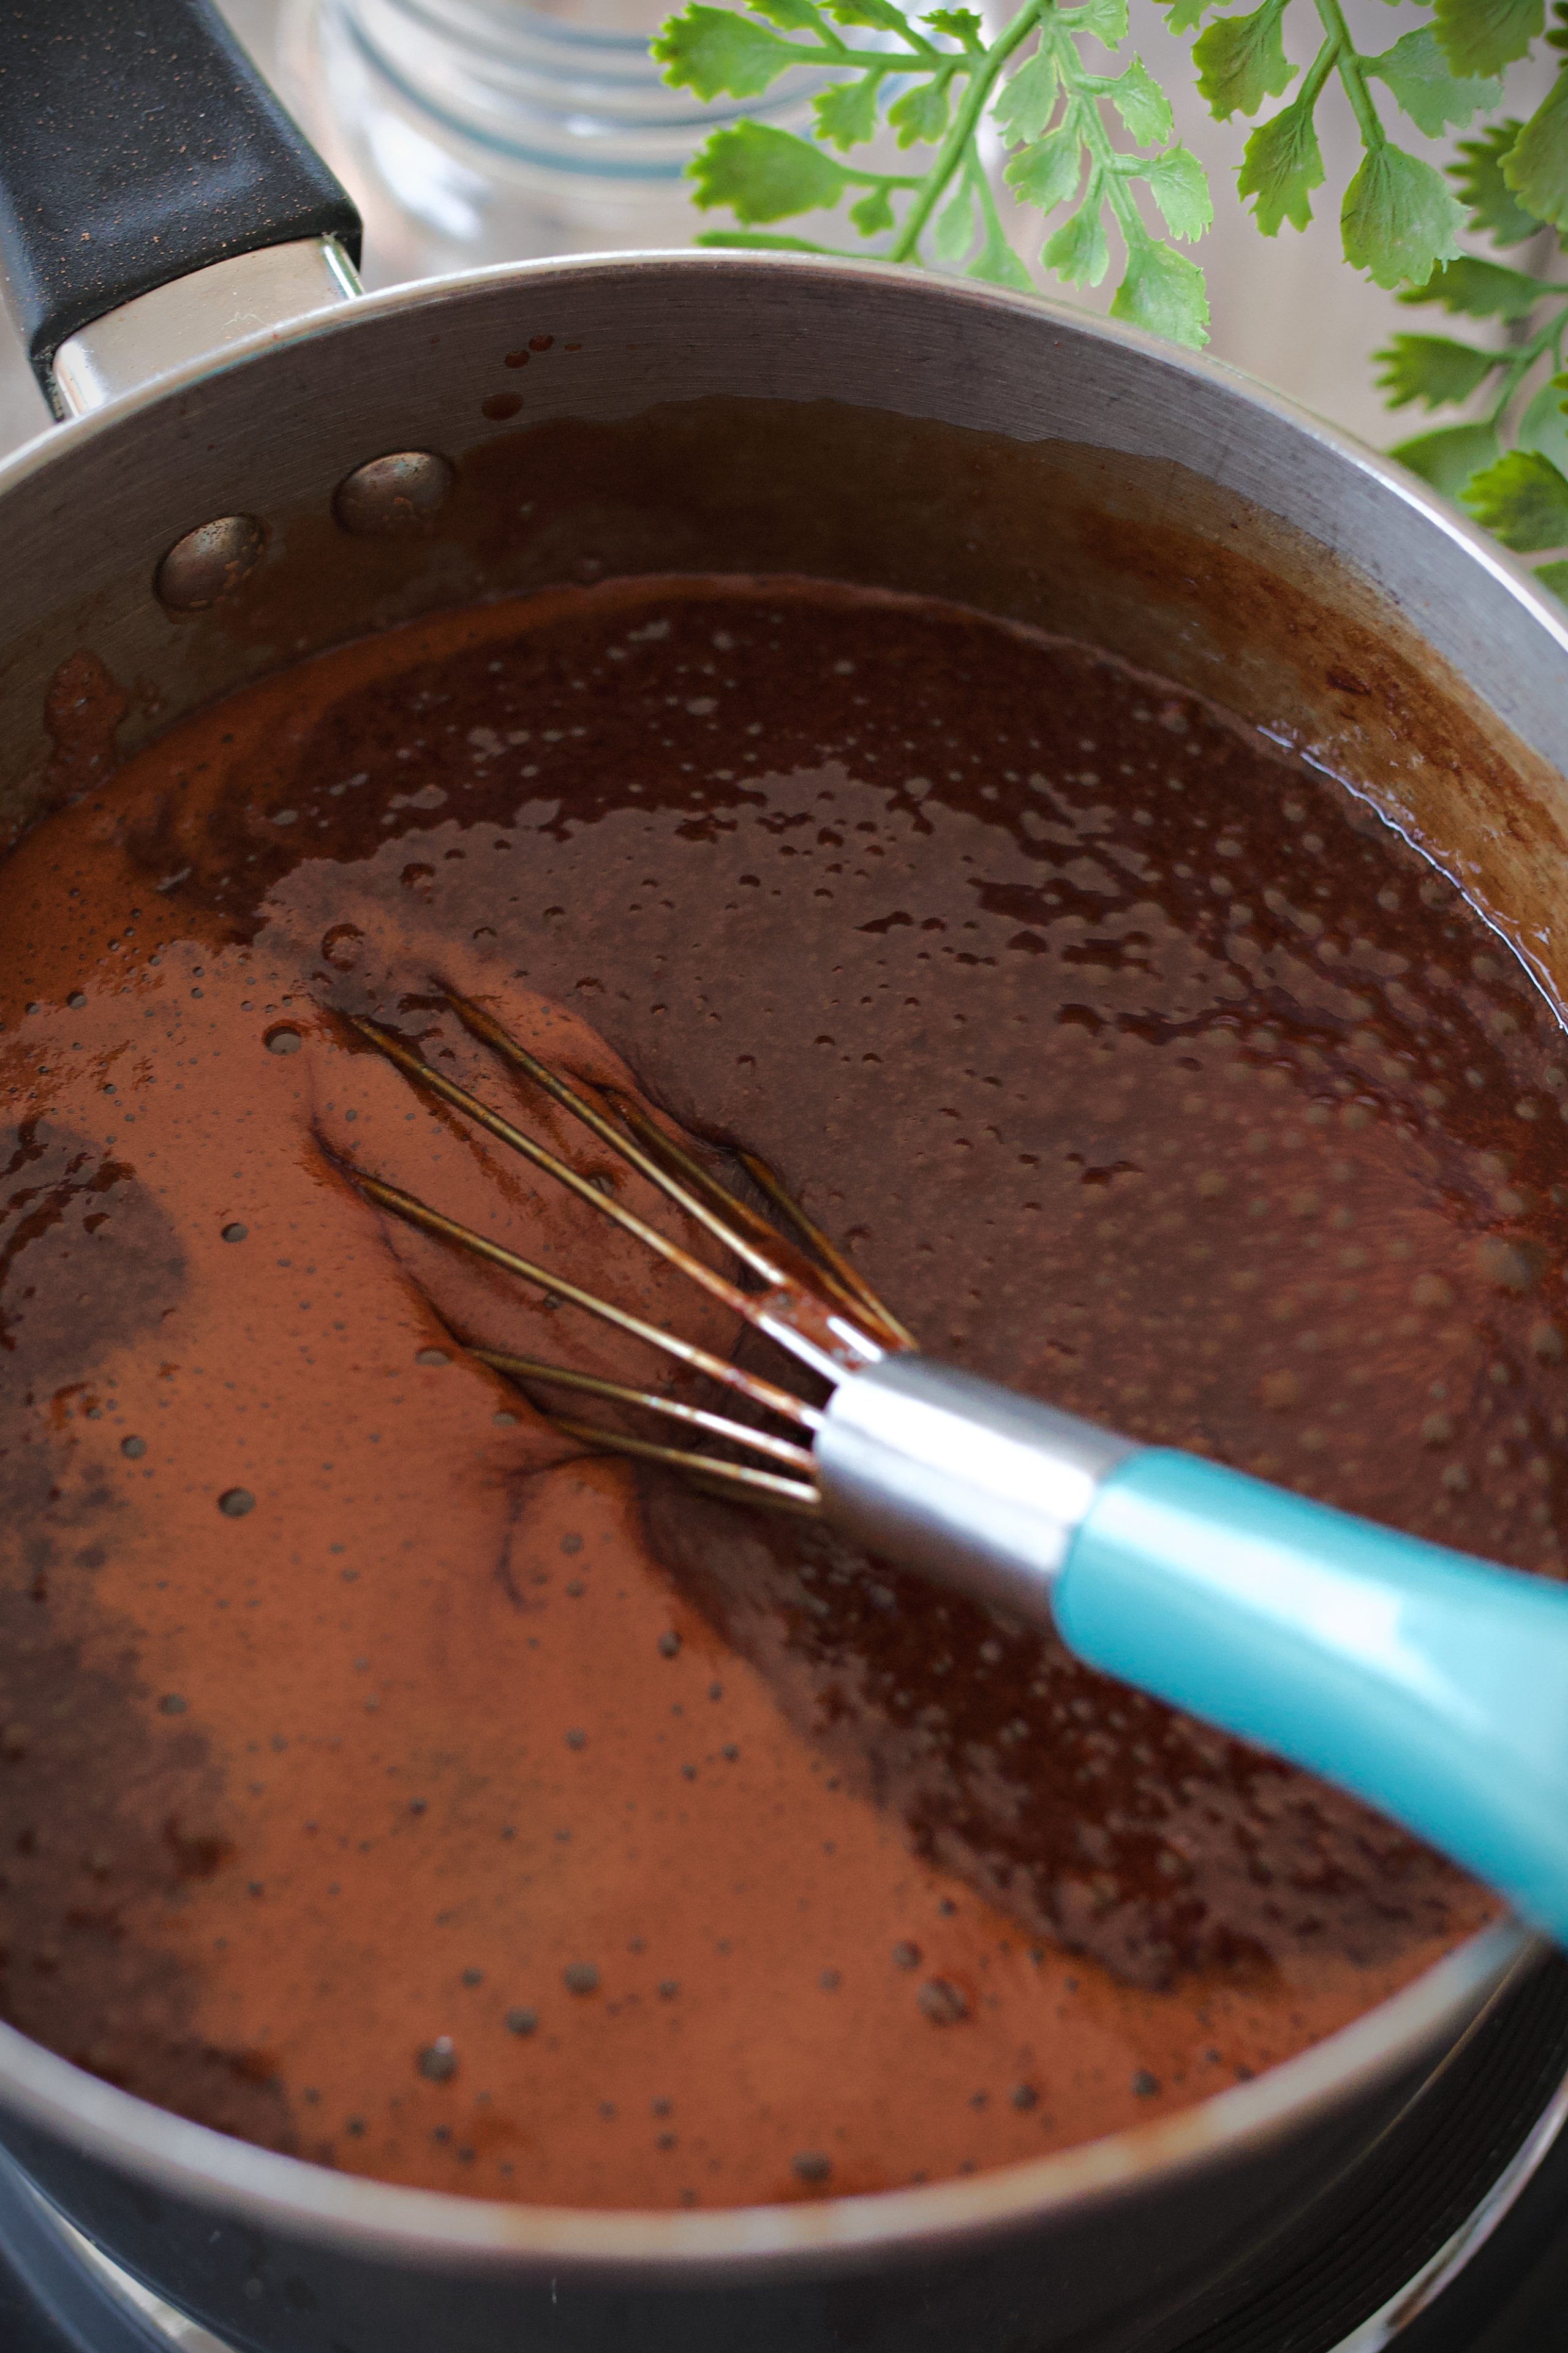
Start by whisking cocoa powder, sugar, and water together in a saucepan until smooth. Bring to a gentle boil over medium heat, stirring constantly so nothing scorches. Once it bubbles, let it simmer for 2-3 minutes. Remove from heat, stir in the salt and vanilla, and allow it to cool before pouring into a clean jar.
Tip: The syrup will thicken slightly as it cools, so don't worry if it looks thin right off the stove.
Variations or Different Ways to Use It
- Mocha-style syrup - Add a spoonful of instant coffee for café vibes
- Peppermint twist - A few drops of peppermint extract for a holiday treat
- Spiced version - Try a pinch of cinnamon or cayenne for warmth
- Chocolate gravy - Serve warm over biscuits for a southern-inspired breakfast
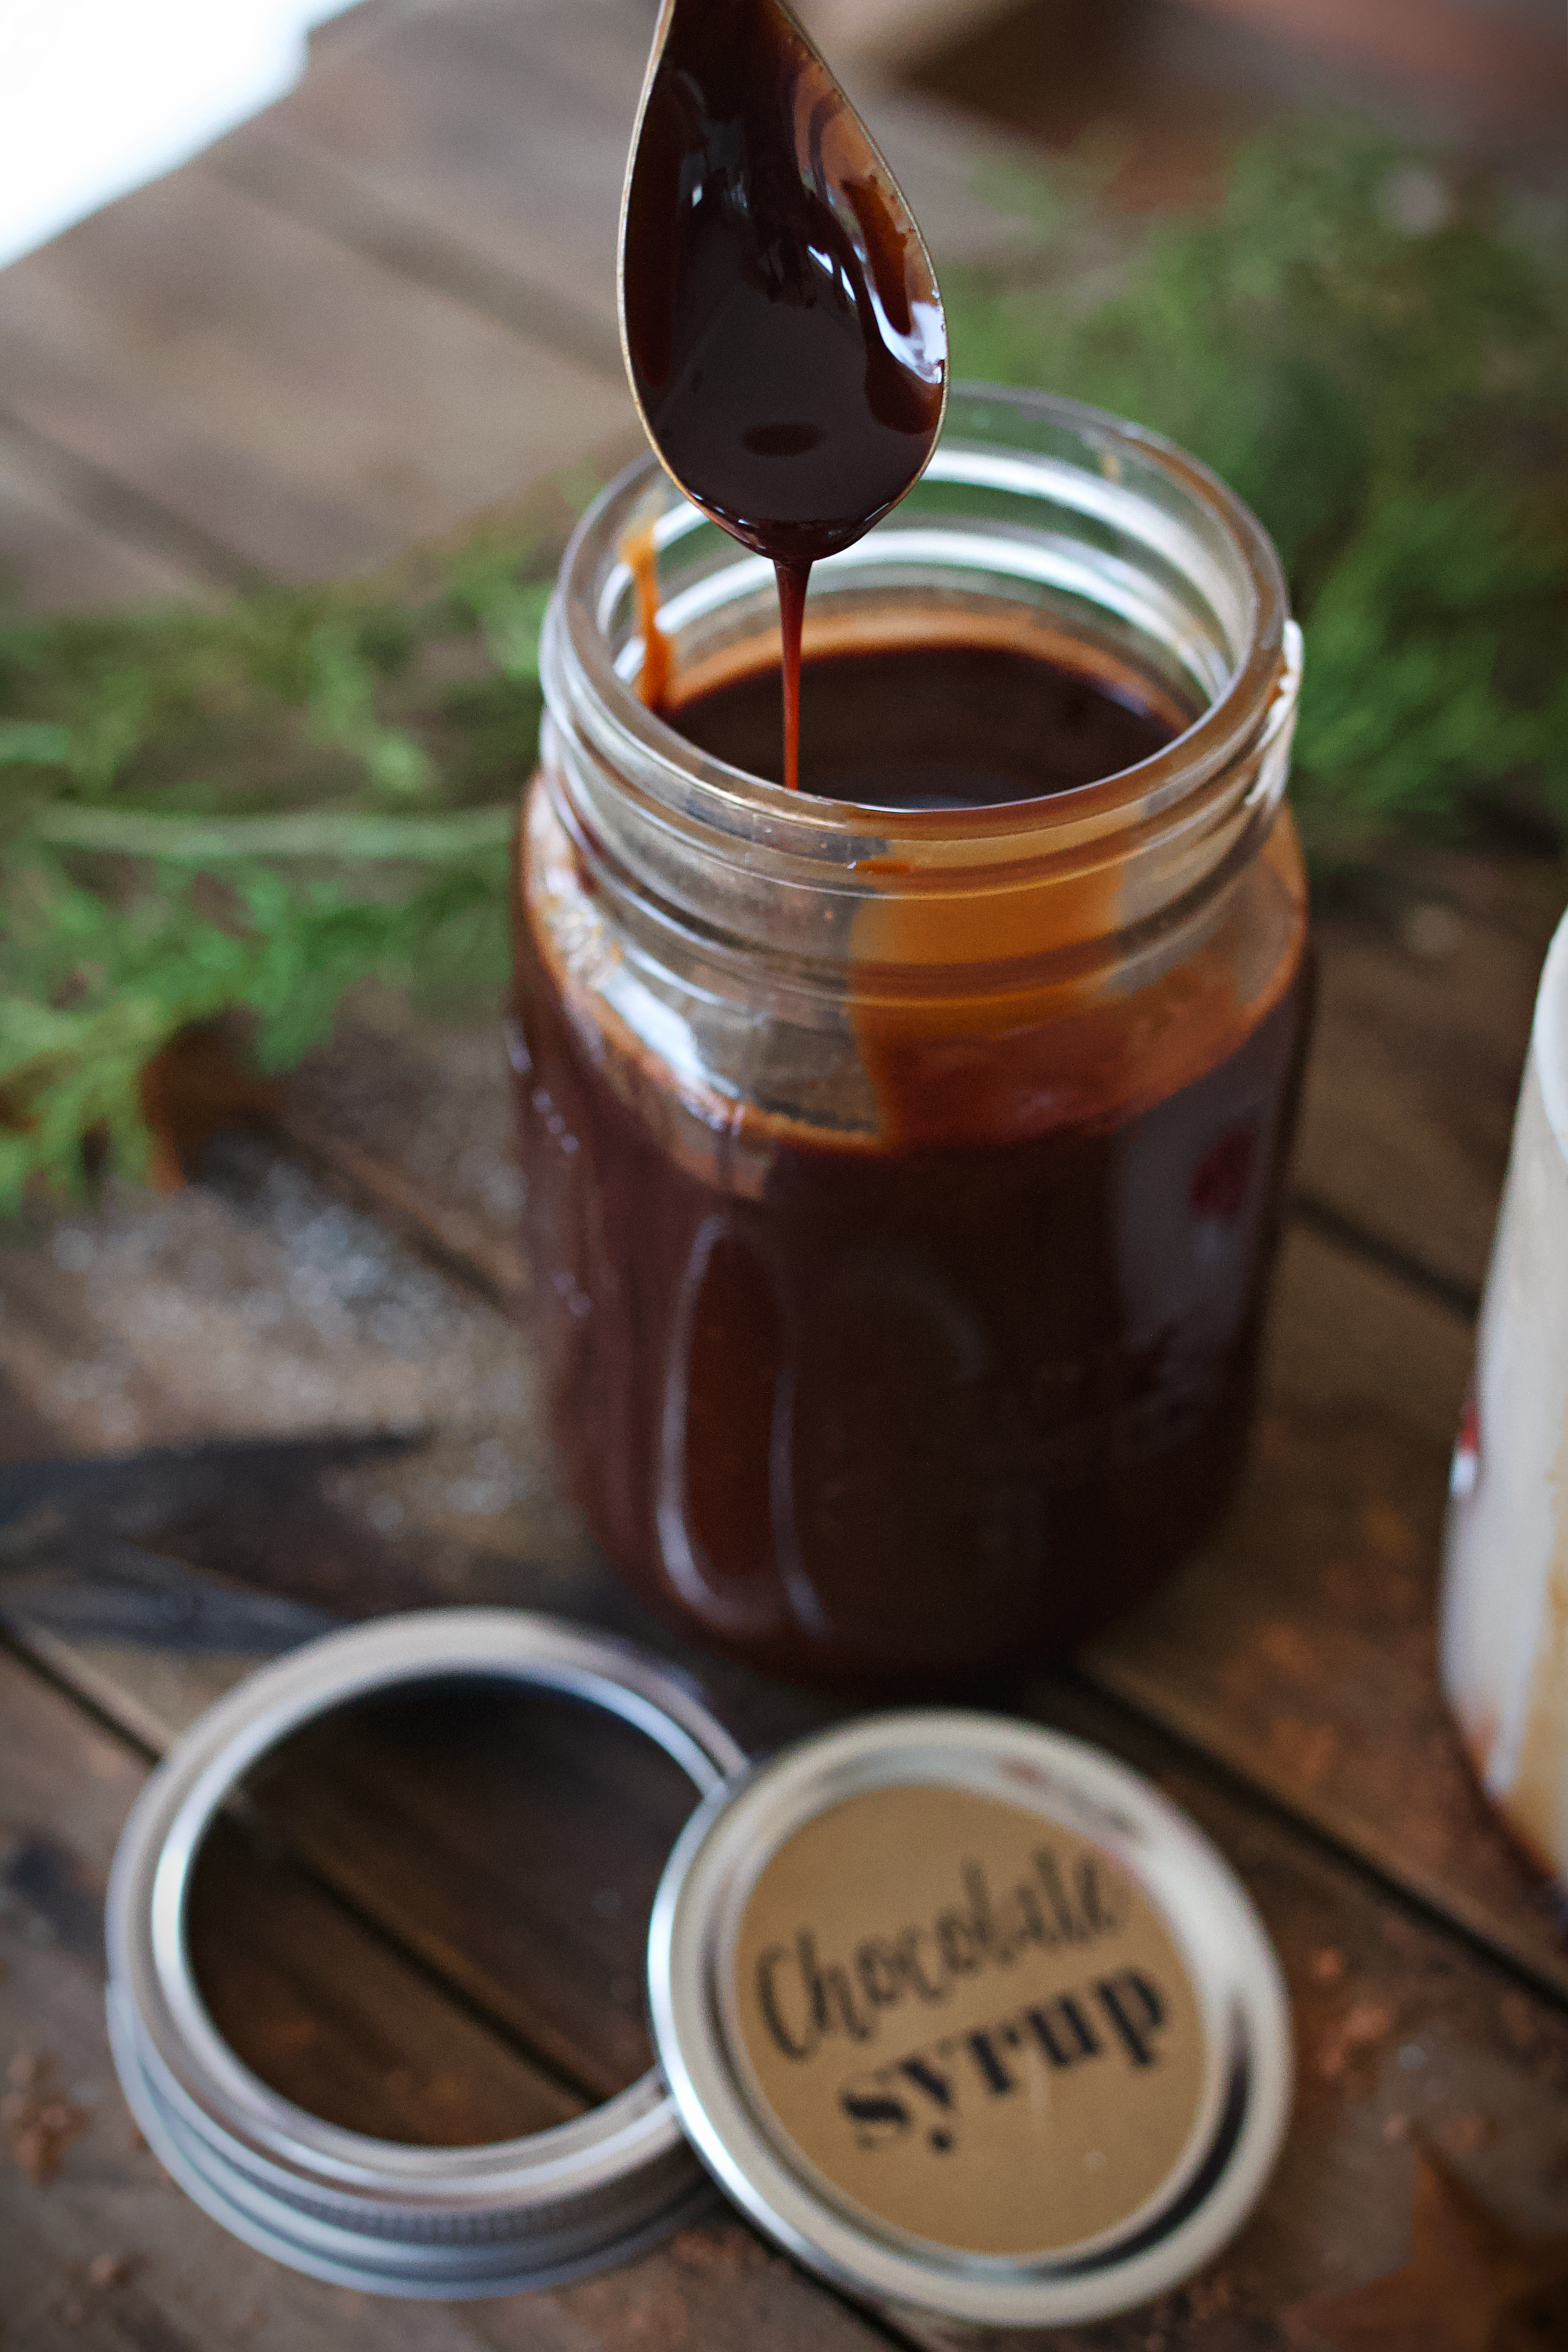
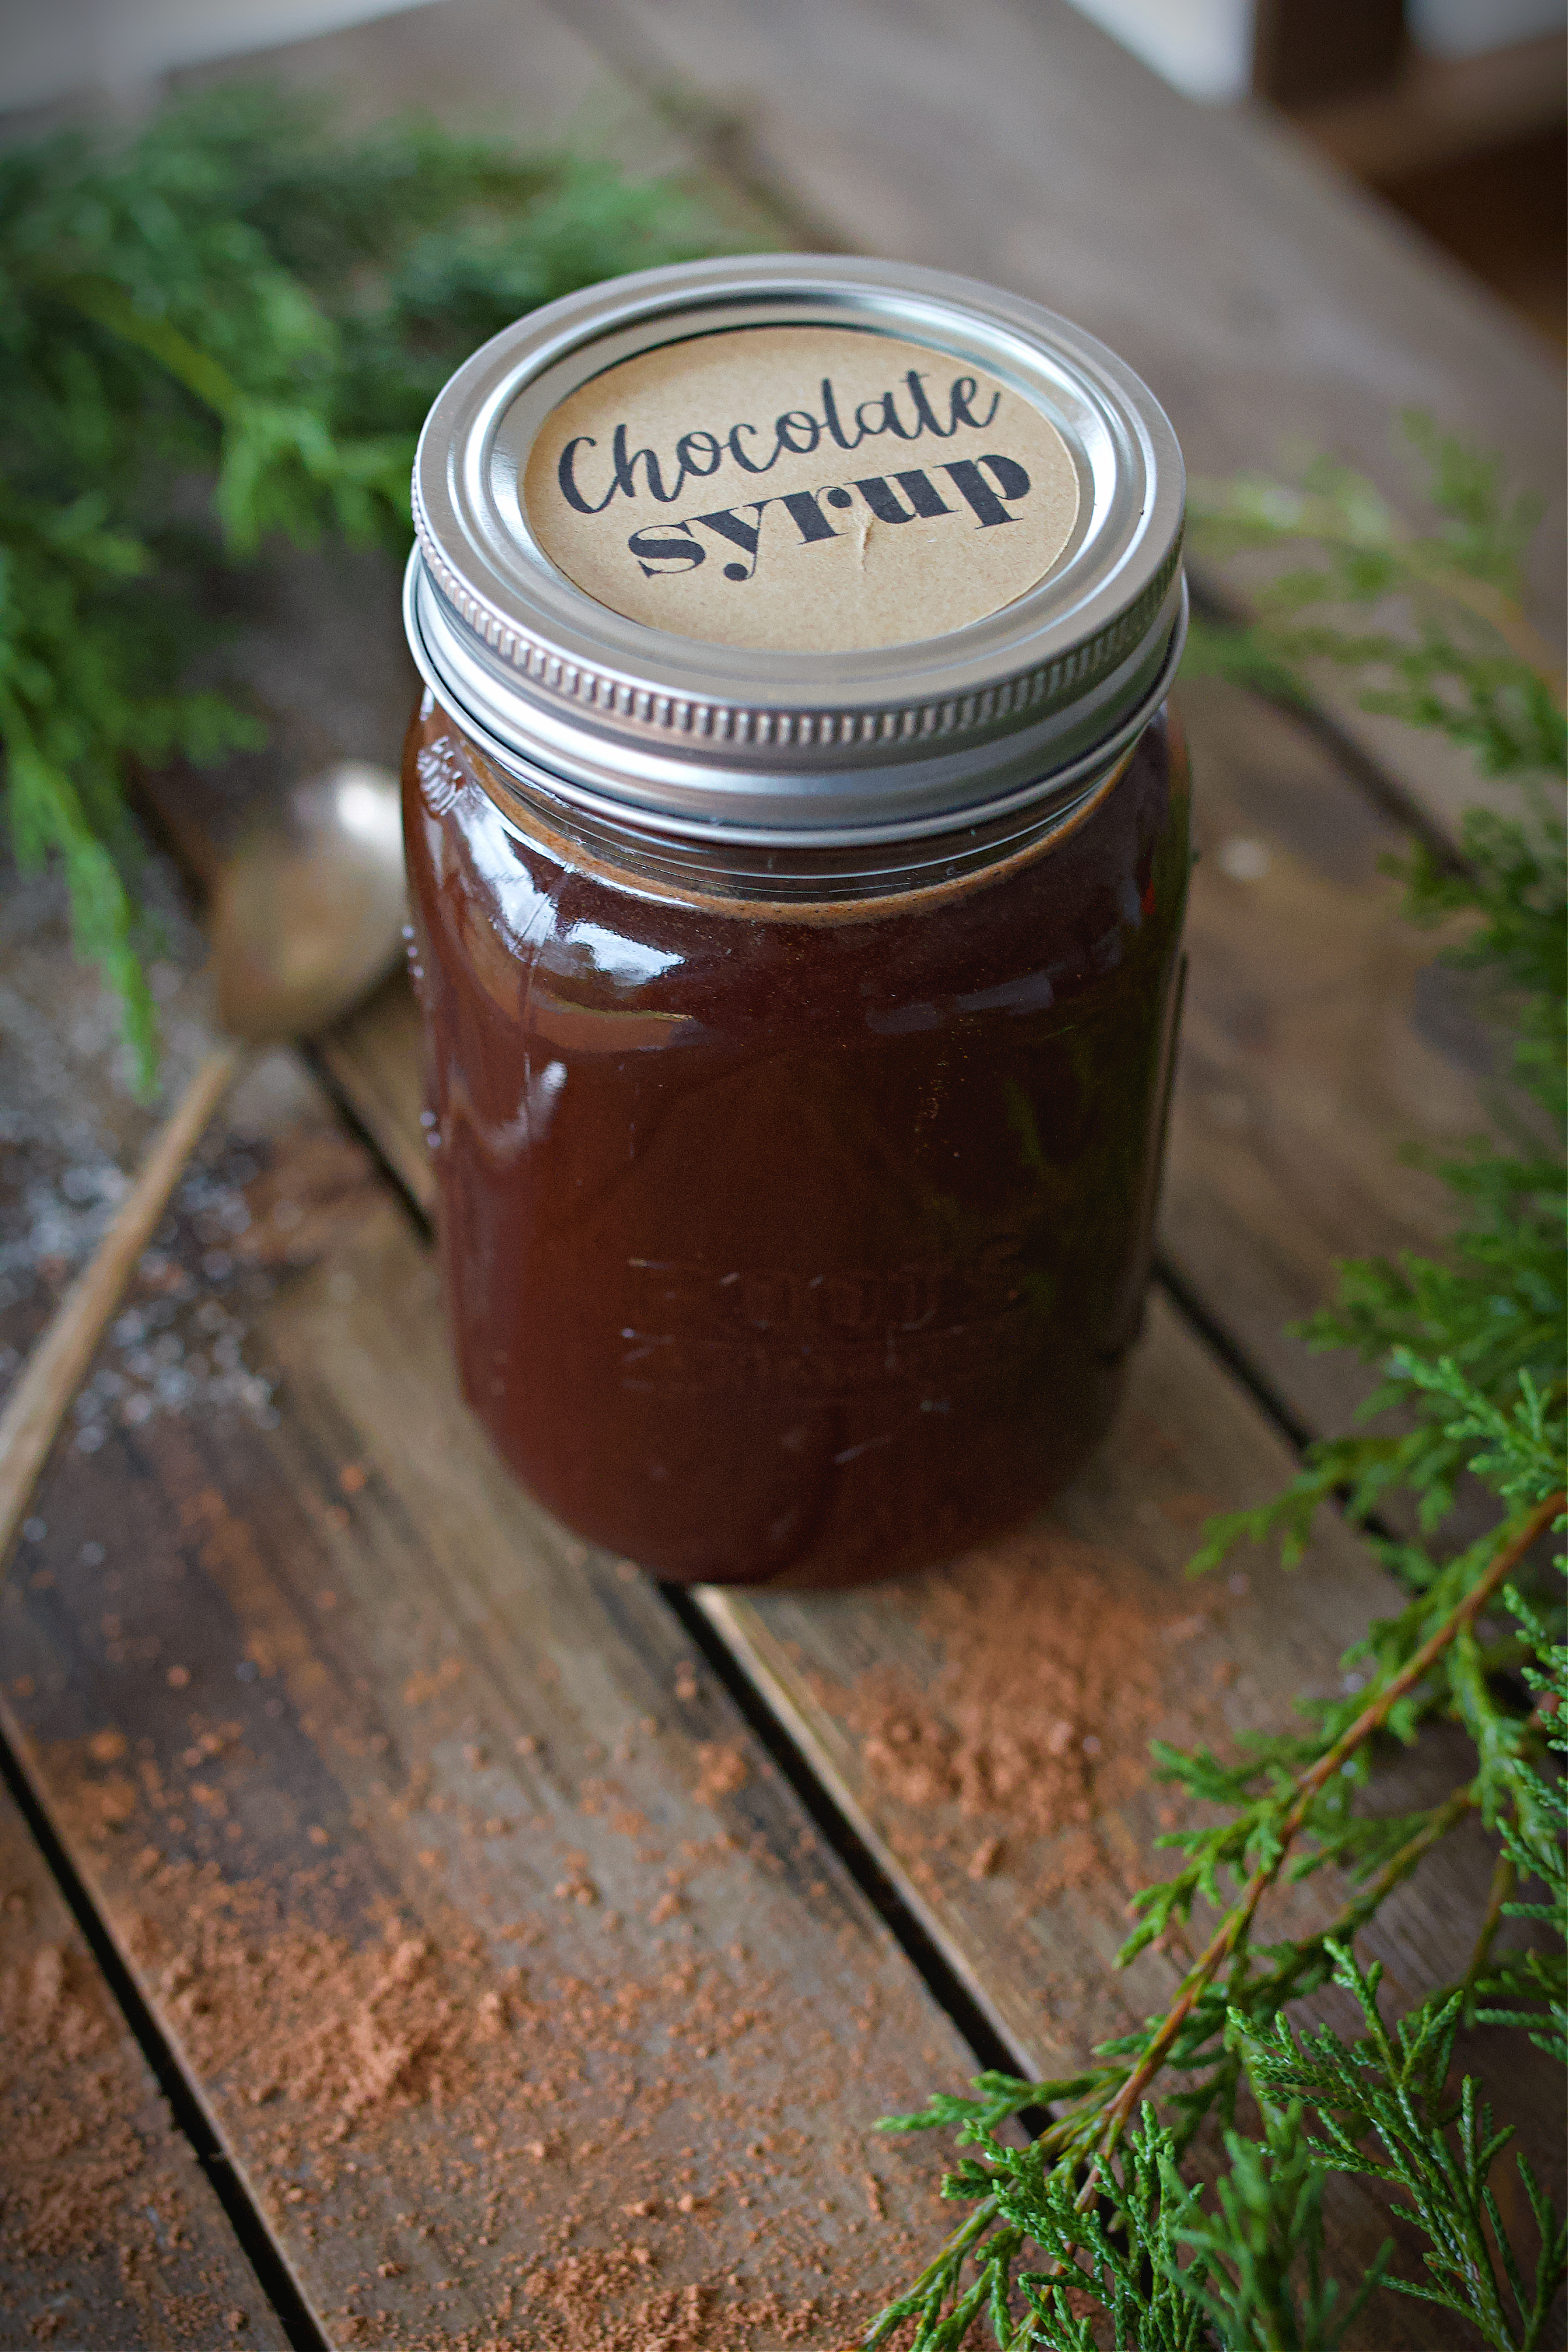
- Gift version - Pour into a mason jar, tie with ribbon, and label for a simple, heartfelt gift
Storage + Reheating Tips
- Fridge: Store in a sealed glass jar or squeeze bottle for up to 2 months
- To reheat: Place jar in warm water for 10-15 minutes or gently heat on the stove
- Tip: Stir before each use, especially if any settling occurs
- Favorite containers: Mason jars for gifting, squeeze bottles for everyday use
Chocolate Syrup FAQ
Chocolate syrup is easy to make at home with just a few pantry staples. Whisk cocoa powder, sugar, and water together in a saucepan until smooth, then bring to a gentle boil. After a couple minutes of simmering, stir in a bit of salt and vanilla. Let it cool, pour into a jar, and refrigerate. That's it-simple and delicious.
Chocolate syrup is typically thinner and made without cream or butter. It's pourable, great for stirring into drinks, and ideal for drizzling. Chocolate sauce is usually thicker and richer, often made with cream, making it more dessert-like and spoonable.
Stored in a sealed jar, homemade chocolate syrup will last for up to 2 months in the fridge. Because it's made with real ingredients and no preservatives, refrigeration is key-but honestly, it usually disappears long before then.
Yes, and it's one of the best ways to enjoy it. Simply stir a spoonful or two into warm milk for an instant homemade hot chocolate with deep cocoa flavor. You can adjust the amount based on how rich or sweet you like it, and even add a splash of cream or a pinch of cinnamon for an extra cozy touch. Or make our dry hot cocoa mix and add a splash of syrup to it.
Yes. Since there are no preservatives, store it in the fridge for freshness.
Freezing isn't necessary. This chocolate syrup keeps beautifully in the fridge for up to two months. Just store it in a sealed jar, and it'll be ready whenever a craving hits.
Other Simple Staples To Try:


Chocolate Syrup
Ingredients
- ½ cup quality unsweetened cocoa powder
- 1 cup water
- 2 cups organic cane sugar
- ⅛ teaspoon salt
- ¼ teaspoon vanilla extract
Instructions
- In a medium saucepan, whisk together the unsweetened cocoa powder, sugar, and water until smooth.
- Place the saucepan over medium heat and bring the mixture to a simmer, stirring constantly to help the sugar dissolve.
- Let it boil for 2-3 minutes, stirring frequently to prevent burning.
- Remove from heat and stir in the salt and vanilla extract. Let cool completely before transferring to an airtight container like a mason jar.


This homemade chocolate syrup has become a total staple in our house, I make it year-round. It’s rich, smooth, and so much better than anything store-bought. We use it for everything from chocolate milk and lattes to drizzling over brownies or ice cream. Once you taste how deep and real the chocolate flavor is, it’s hard to imagine ever buying a bottle again.