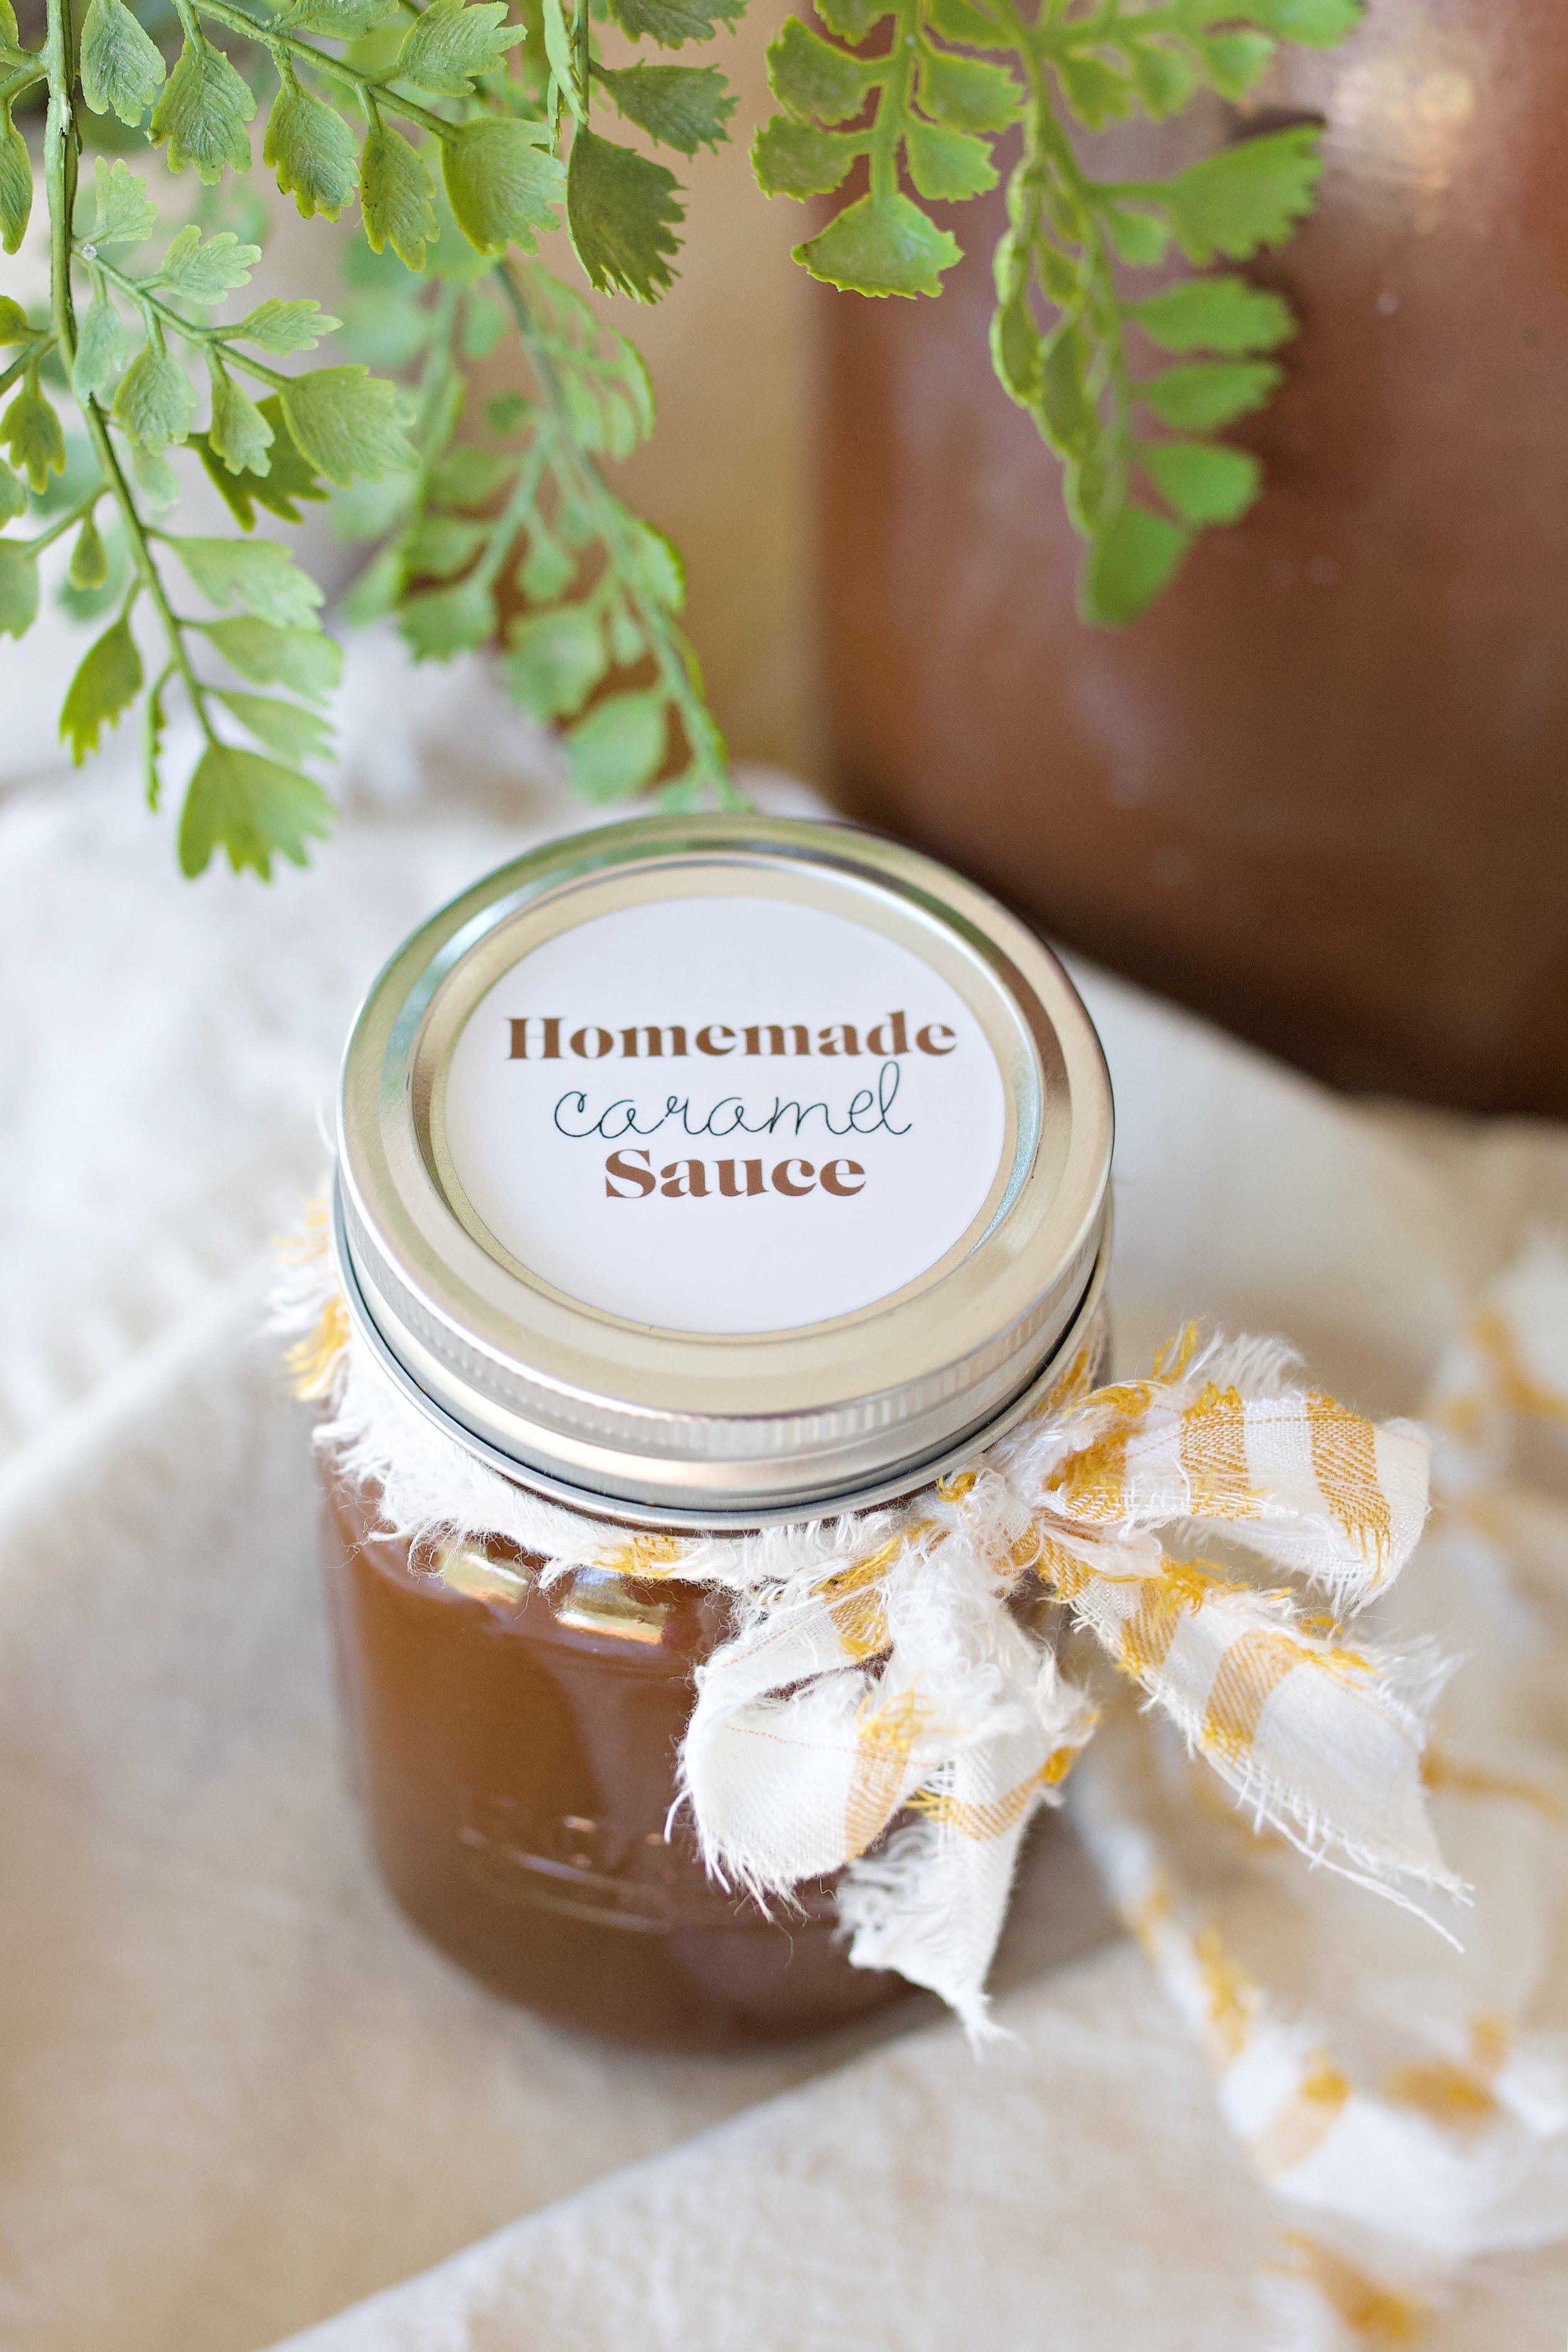
Homemade Caramel Sauce Recipe (Only 3 Ingredients)
This homemade caramel sauce recipe uses just three simple ingredients: sugar, butter, and cream to create a rich, silky caramel sauce in under 20 minutes. It's perfect for ice cream, cheesecake, apple desserts, coffee drinks, and holiday gifting.
This simple sauce tastes worlds apart from anything on a store shelf and pairs beautifully with so many of the recipes my family loves. If you enjoy from-scratch pantry staples, you might also want to try my Easy Homemade Candy Caramel, Simple Chocolate Syrup, or Apple Cinnamon Muffins as you fill your kitchen with homemade treats.

Quick Look
- Pro Tip: Measure and set out all ingredients before you begin. Once the sugar melts, caramel moves quickly.
- Hands-On Time: 15 minutes
- Total Time: About 20 minutes
- Cost to Make: Low
- Cook Temperature: Medium-low on the stovetop
- Texture: Smooth, glossy, and pourable while warm
- Skill Level: Beginner-friendly
- Best Uses: Ice cream, pies, coffee drinks, and baked desserts
SUMMARIZE & SAVE THIS CONTENT ON
Why You'll Love This Caramel Sauce Recipe
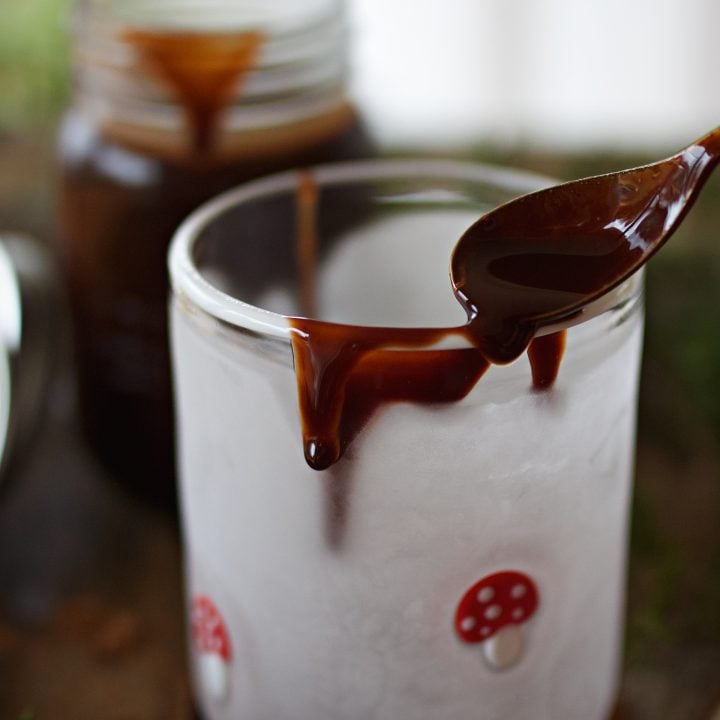
This caramel sauce recipe is rich, deeply flavored, and made with only three everyday ingredients. The dry-sugar method gives the sauce a bold, classic caramel flavor you just can't get from pre-made versions. No additives or odd stabilizers, just sugar, butter, and cream working together into something silky and golden.
It's a quick project that elevates even the simplest dessert. It also solves a practical problem: using up the cream that's already in your fridge. And because it keeps beautifully in a jar, it's an easy go-to homemade gift during the holidays.

Ingredient Notes + Substitutions
White sugar
Creates the deep caramel flavor. Organic cane sugar works perfectly here as well.
Butter
Salted butter adds balance and depth. If using unsalted, add a pinch of fine salt at the end.
Heavy cream or half & half
Cream gives the richest result, but half & half makes a lovely sauce as well. Make sure it's room temperature to prevent seizing.
Vanilla & salt (optional)
Add these off the heat for extra flavor. Just a tiny pinch of salt sharpens the caramel notes.
Equipment
A heavy saucepan helps prevent hot spots, and a wooden spoon or whisk is easiest for stirring as the caramel develops.
Step-by-Step: How to Make It
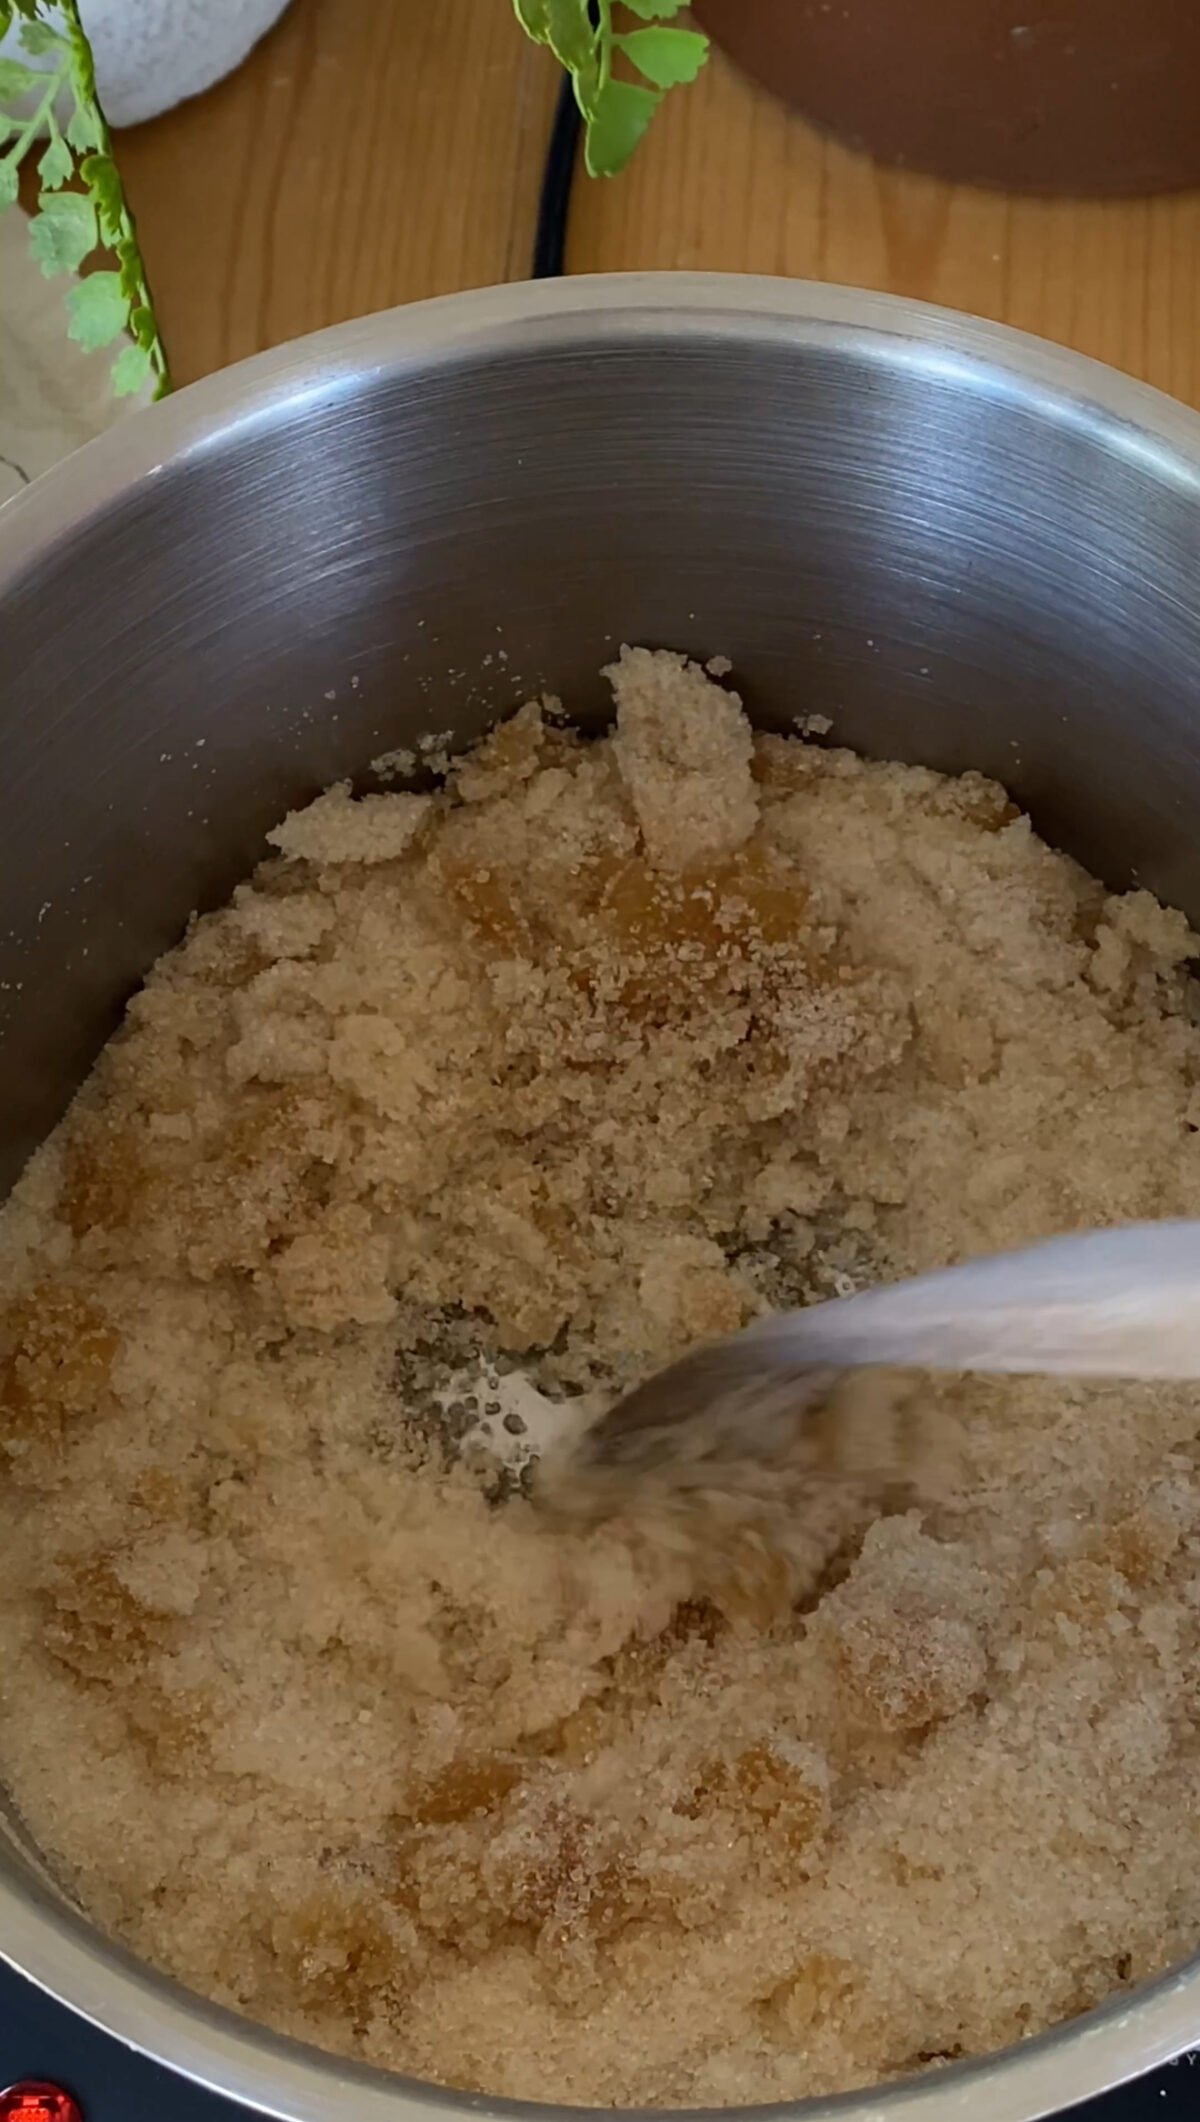
- Sugar begins in a dry pan over medium-low heat. It always clumps before it melts, that part is completely normal. Gentle, occasional stirring helps it break down evenly and prevents hot spots along the bottom of the pan.
- As the sugar warms, the clumps melt at different speeds. Keep stirring lightly and watch for that deep amber color to develop. The mixture will look uneven for a moment before it smooths into liquid caramel.
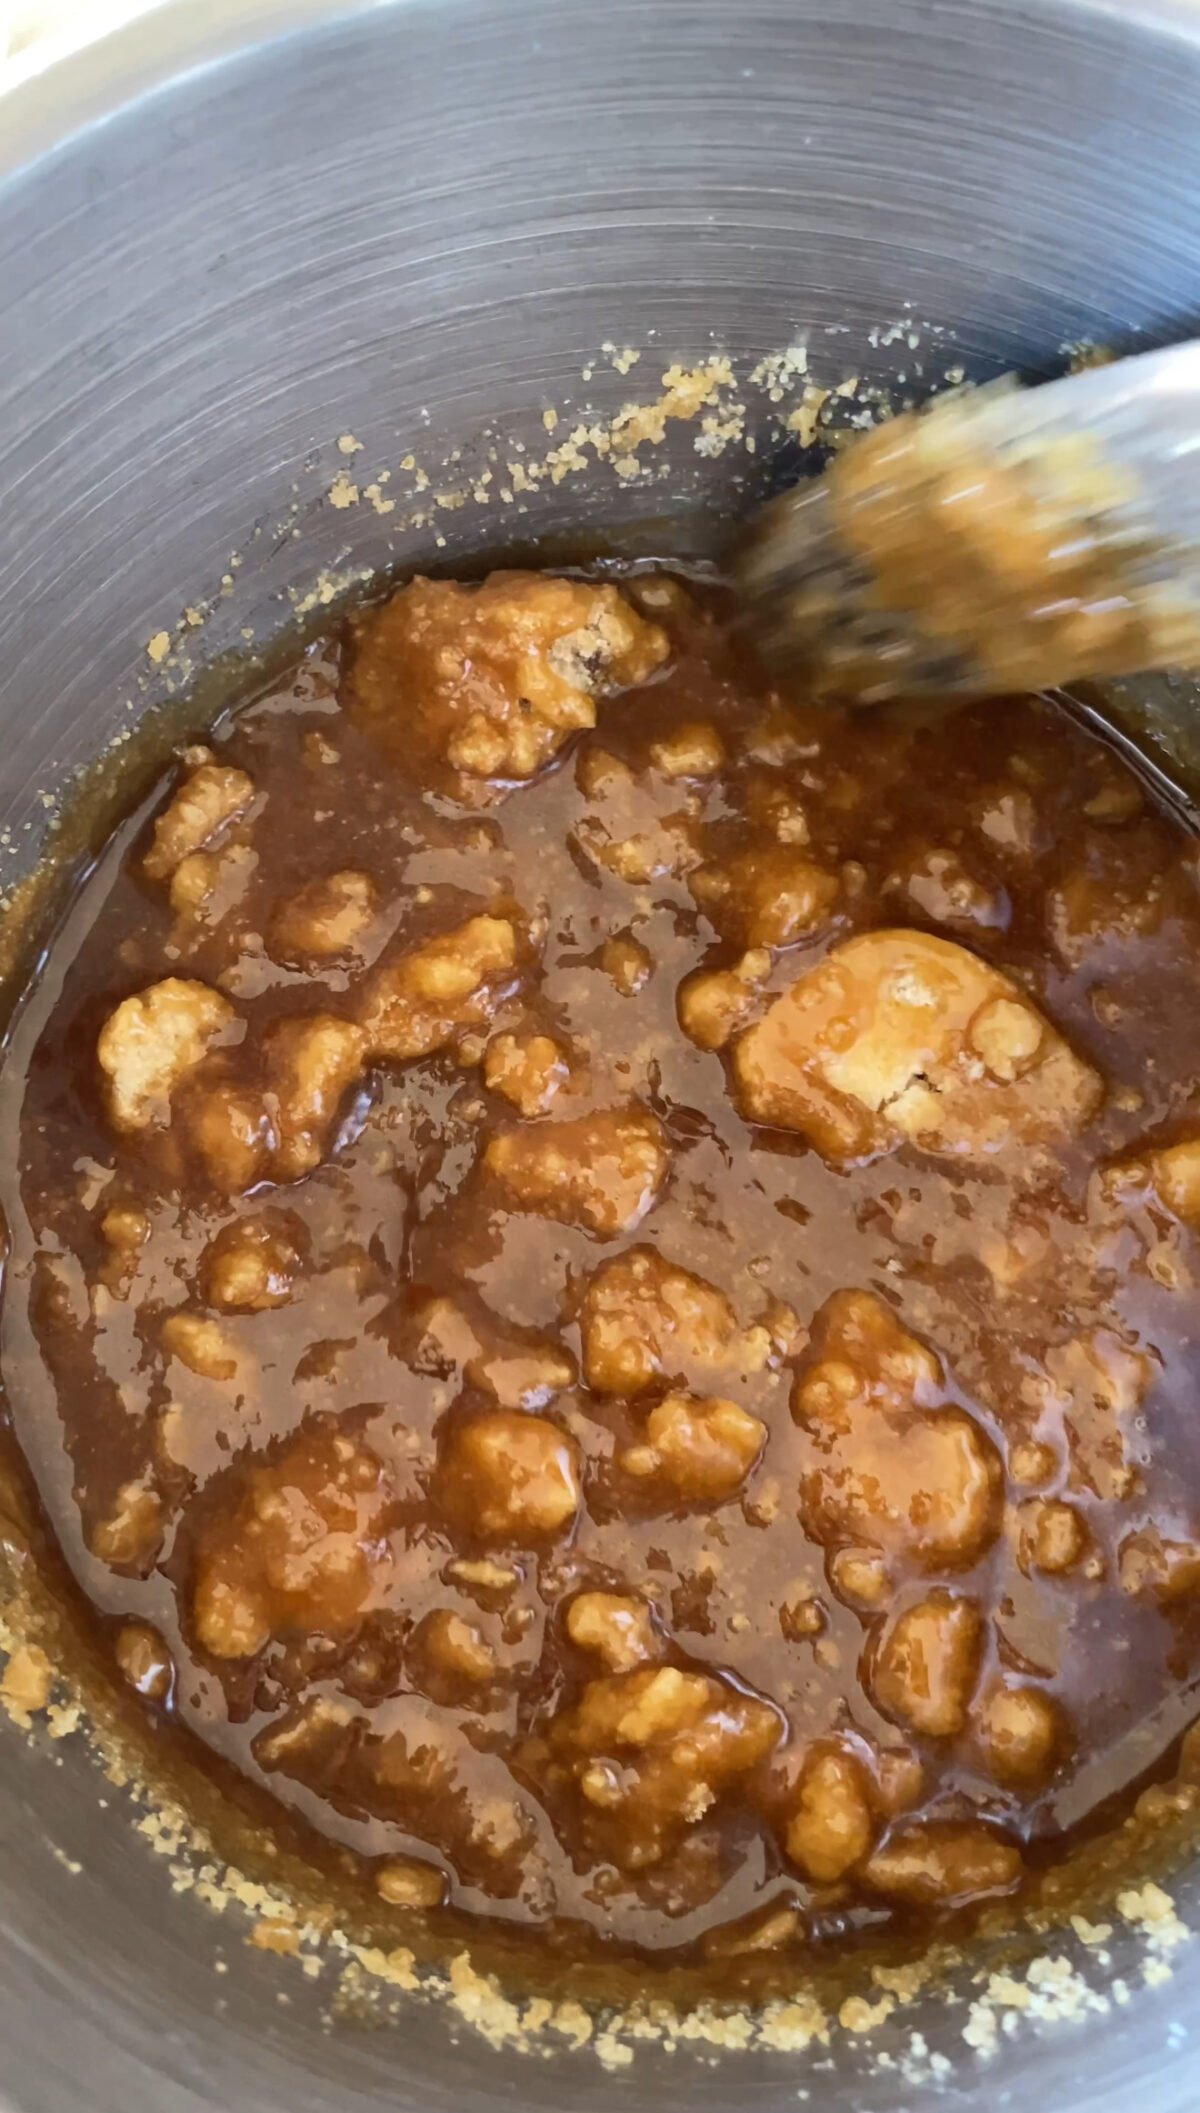
- Once the sugar reaches a deep amber color, the butter goes in. Add it in a few pieces, and keep stirring as it melts into the caramel. The mixture will bubble vigorously at first, then settle into a smooth, glossy base. This step softens the sharpness of the melted sugar and builds that classic caramel flavor.
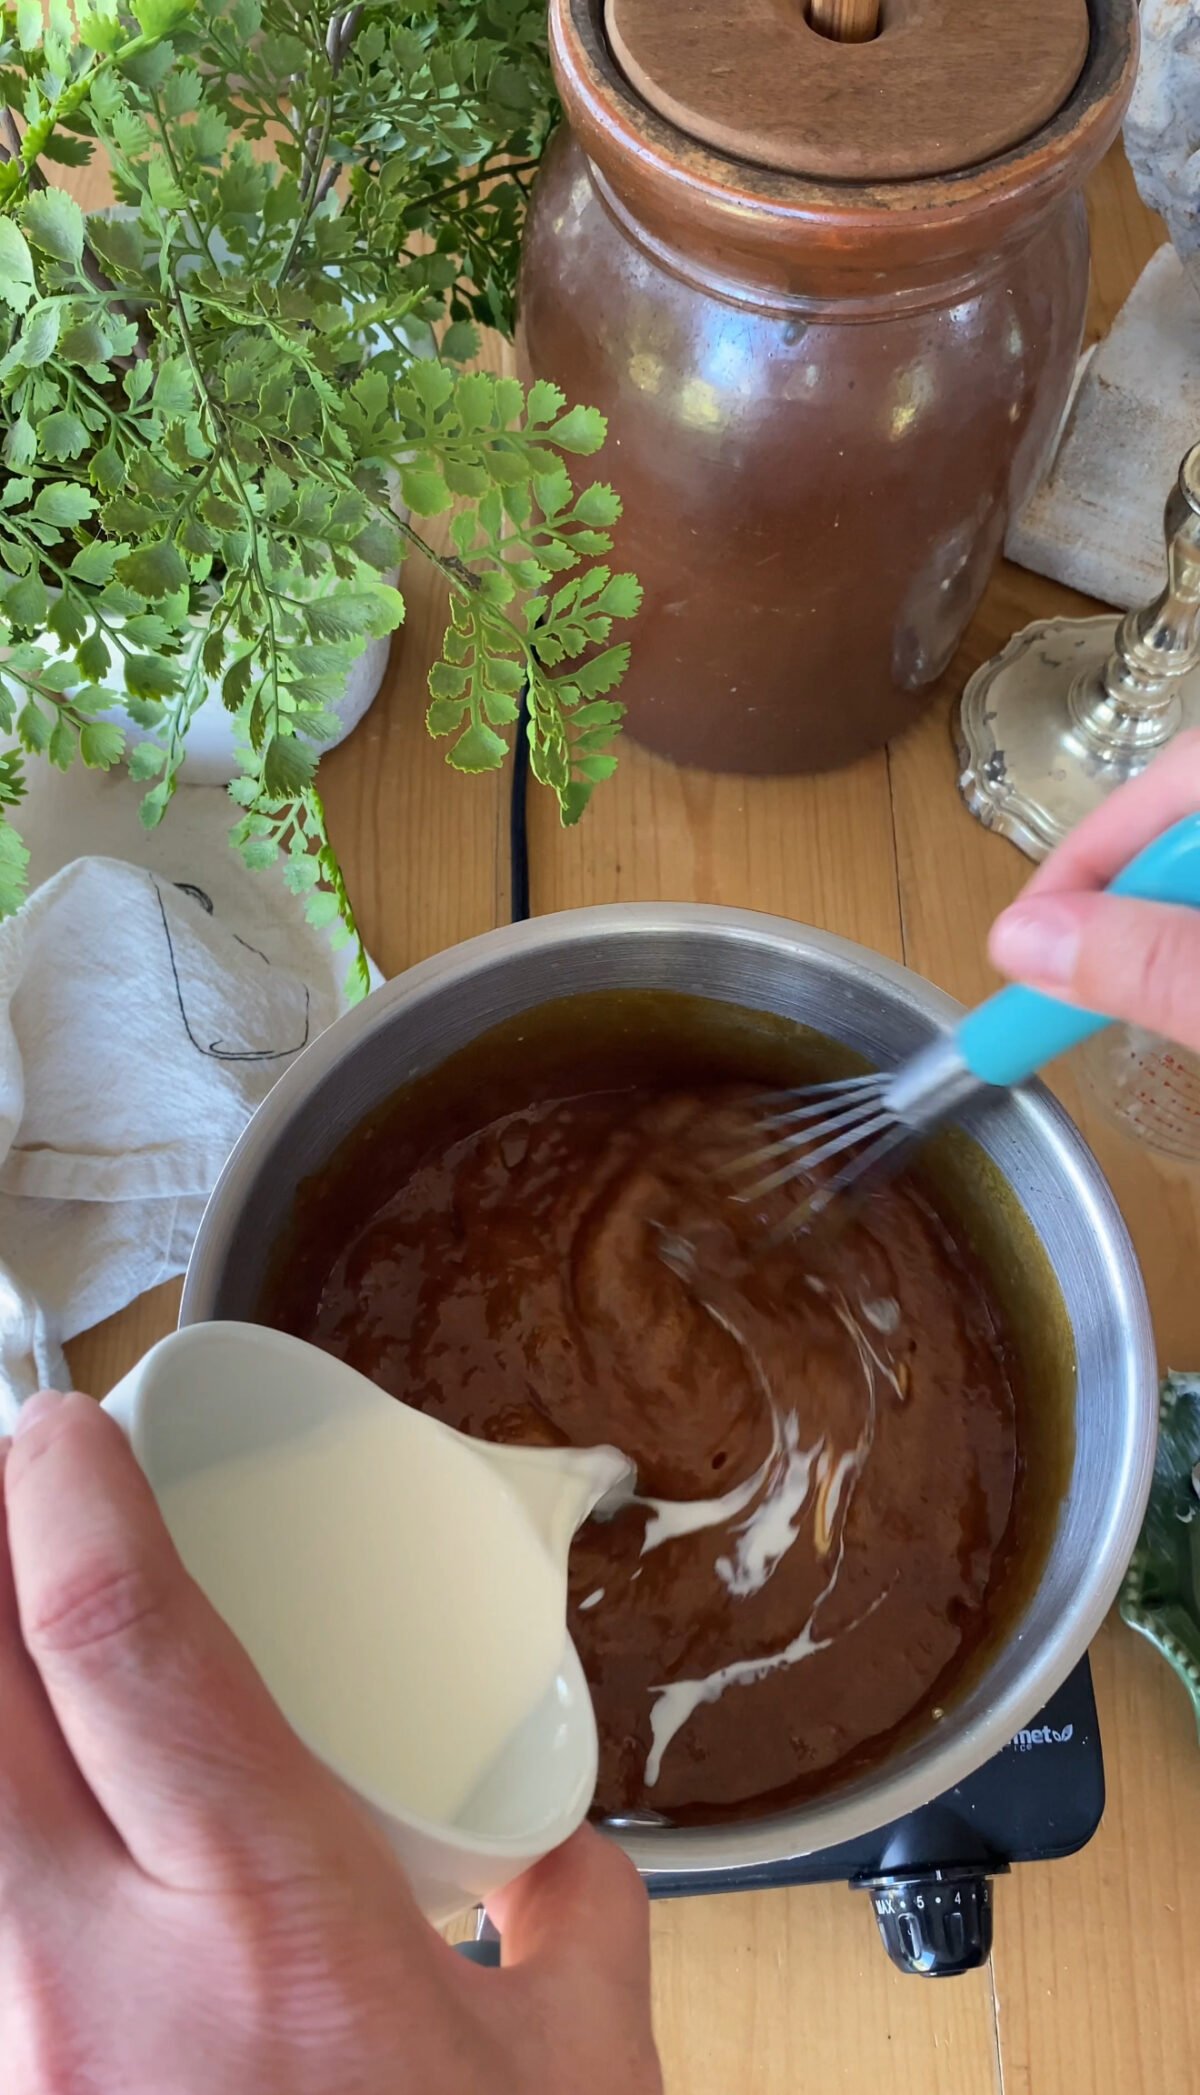
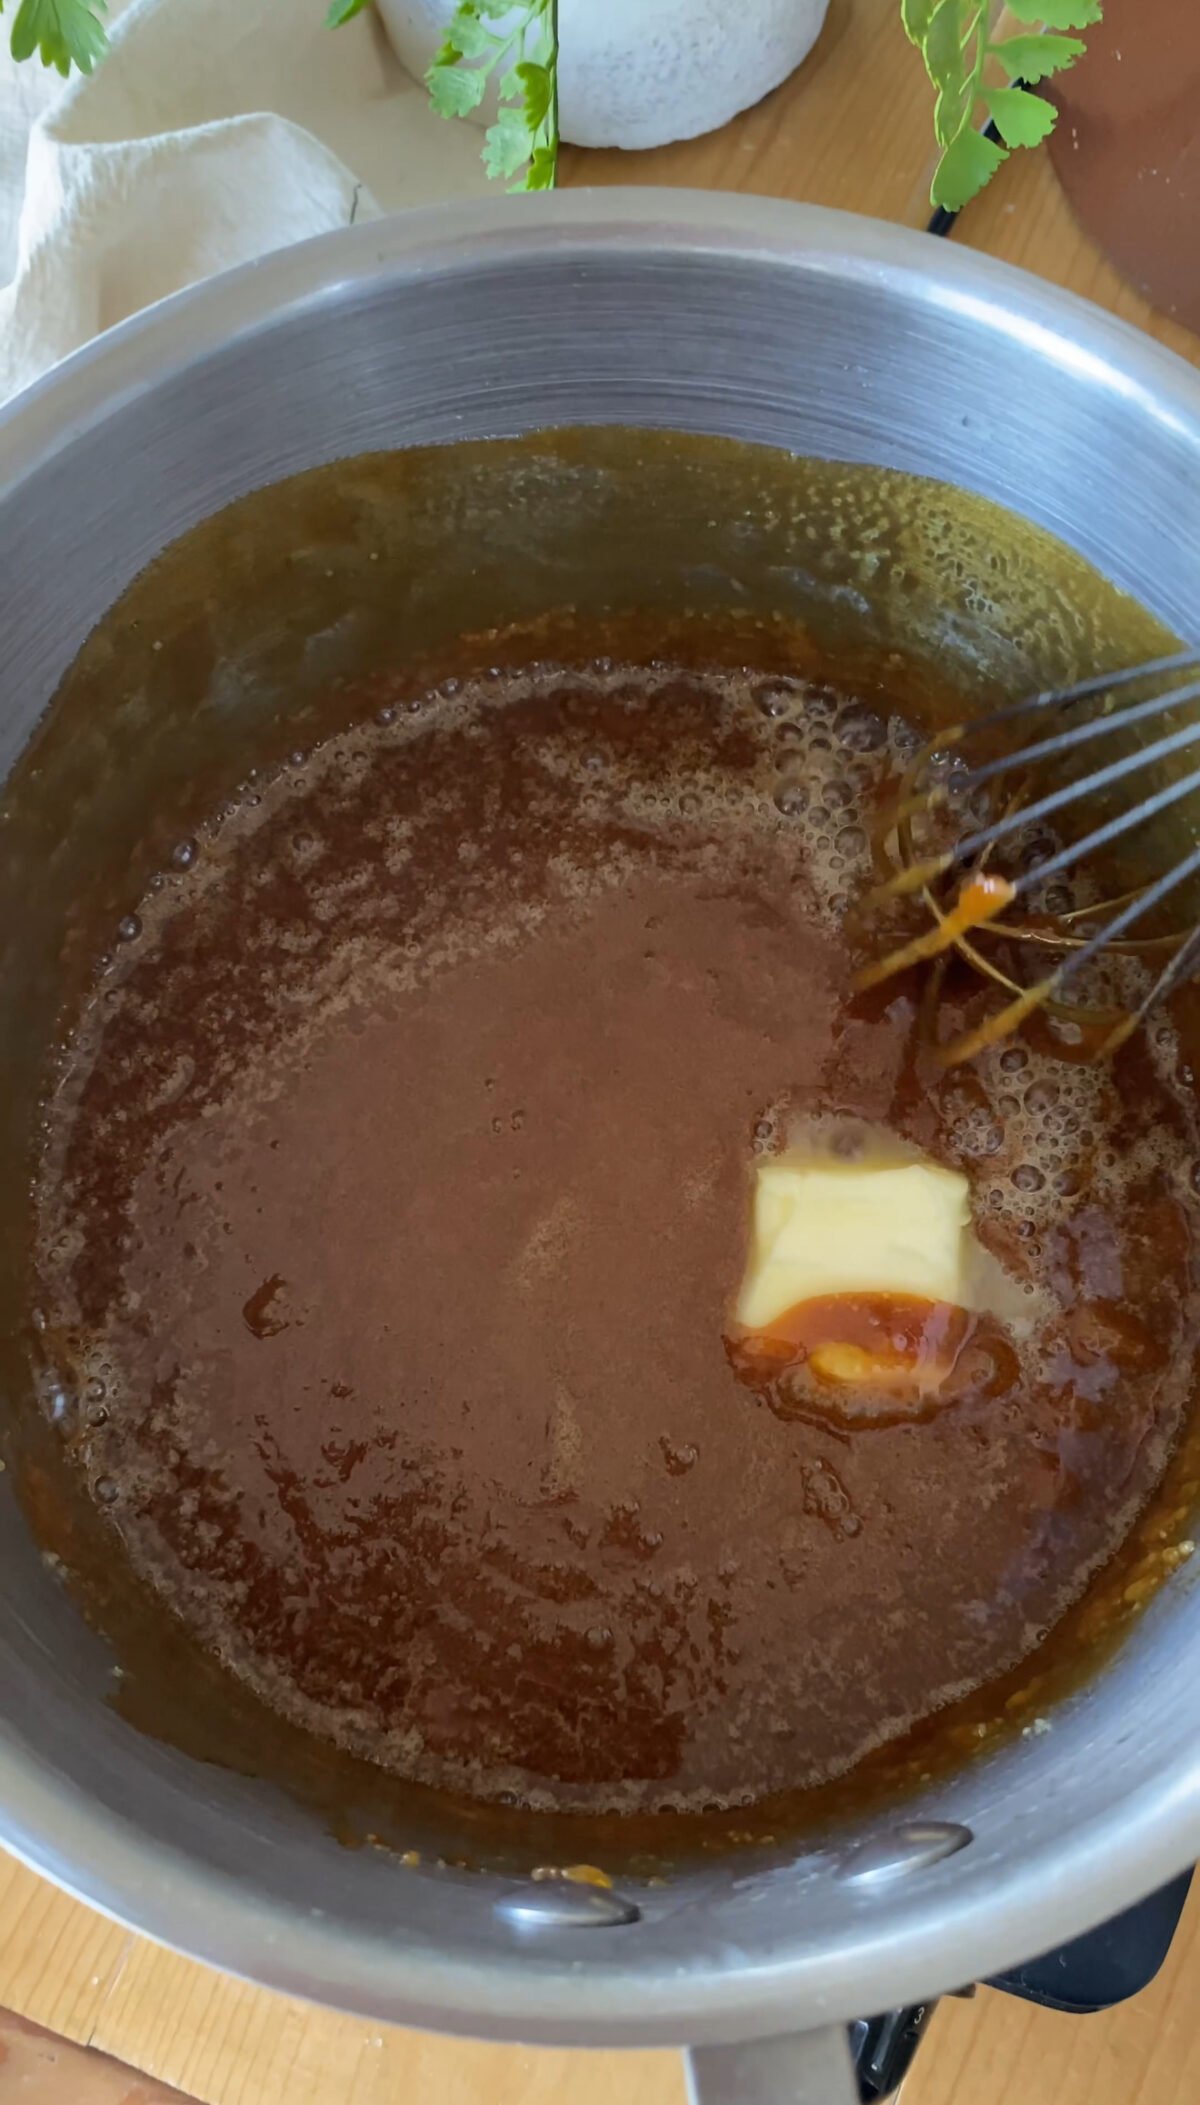
- With the butter fully melted, slowly pour in the cream while whisking. The caramel will rise and steam for a moment before coming together into a silky sauce. Gentle whisking helps everything blend smoothly and prevents any seizing as the temperature changes.
Let it rest for a few minutes before pouring into jars. The sauce thickens more as it cools.
Variations or Different Ways to Use It
Salted caramel
Add a pinch of flaky or fine sea salt once the heat is off.
Butterscotch-style
Swap in light or dark brown sugar for a richer, deeper flavor.
Coffeehouse caramel
Stir a spoonful into lattes, hot chocolate, or chai.
Dessert topping
Drizzle over pancakes, bread pudding, brownies, or apple crisp.
Gift-ready caramel jars
Pair with homemade cookies or include in a holiday baking basket.
FAQ and Problem Solving Issues
1. Why does my caramel have sugar crystals?
Sugar crystals can form when the sugar mixture isn't properly dissolved, leading to a grainy texture in the final sauce. This can happen if there's moisture on the sides of the pan or if you stir the sugar too much while it's melting. To prevent this, use a pastry brush dipped in water to gently clean the sides of the pan as the sugar melts.
If your caramel crystallizes after cooling, it's usually a sign that the sugar wasn't fully dissolved during cooking. Always cook the sugar over medium-low heat and make sure to stir gently as it melts.
Caramel can go from perfect to burnt in just seconds. When you're cooking the sugar to a deep amber color, it's crucial to pay close attention. Keep the heat at medium-low to ensure the sugar melts evenly without burning. Don't walk away while cooking. Eyes on the prize until ititss done for this recipe!
If the caramel turns dark and smells bitter, it's likely burnt. Unfortunately, once caramel is burnt, you can't salvage it, so it's best to start again. A helpful tip is to remove the pan from heat just before the caramel reaches your desired color since it will continue to cook for a few seconds off the heat.
Caramel can sometimes thicken too much as it cools, especially if it's overcooked. To fix this, gently reheat the caramel on the stove or microwave and stir in a small amount of heavy cream or whole milk. This should loosen it up and bring it back to the perfect consistency.
It's also important to note that the caramel will naturally thicken as it cools. So, if you want a thinner sauce, you may want to reduce the cooking time slightly or add an extra tablespoon of cream.
When using the dry method to make caramel, the sugar dissolves and gradually melts into a liquid as it heats up. You'll know the sugar is properly melted when there are no more granules, and the liquid has turned a smooth, golden amber color.
If you're unsure, a candy thermometer can help. The sugar should reach about 225-230°F (110°C) when fully melted and ready for the next step. Be careful during this stage, as hot caramel can be dangerous if it splatters.
If your caramel sauce isn't thick enough, it may not have cooked long enough to reach the right temperature. A candy thermometer can help with this. Ideally, the caramel should reach about 225-230°F (107-110°C) for the perfect consistency.
If you don't have a thermometer, watch for visual cues. The sauce should bubble up and thicken slightly after adding the cream. If it's still too runny after cooling, you can return it to the stove and cook it for a little longer until it reaches your desired consistency.
For the best texture and flavor, stick with heavy cream or heavy whipping cream. The fat in the cream is what gives caramel its silky, velvety texture and helps it stay smooth instead of turning grainy or sticky. You can use half & half if that's what you have, though the sauce will turn out a bit thinner. I don't recommend milk on its own, it just doesn't have enough fat to balance the melted sugar and butter, which can cause the caramel to separate or lose that rich, buttery finish.
Yes, you can! A candy thermometer is helpful but not essential. To judge when your caramel is ready, look for visual cues. The sugar mixture will turn a deep amber color, and the bubbling will slow down as it thickens. With practice, you'll get a feel for when it's ready to remove from the heat. If you're worried about getting it just right, though, a candy thermometer can take out the guesswork and ensure perfect caramel every time.
You May Also Want To Try:

Homemade Caramel Sauce
Ingredients
- 2 cup White sugar (Organic if possible)
- ½ cup Salted butter
- ⅔ cup + 2 tablespoon heavy cream or half & half
Instructions
- In a medium sauce pan, melt the white sugar over medium-low heat, stirring occasionally with a wooden spoon. When the sugar turns a deep amber color, add the butter and stir until melted.
- Slowly pour in the heavy cream, whisking constantly. Let the mixture boil for 1-2 minutes until thickened.
- Remove from heat, allow to cool slightly, and transfer to an airtight glass container. Store in the fridge for up to 3 weeks.
Video

Notes
Once your caramel sauce has cooled, transfer it to a glass jar or airtight container and store it in the fridge. Properly stored, caramel sauce will last for up to 3 weeks. When you're ready to use it, gently reheat it on the stove or microwave. If you're gifting the caramel, make sure to include a note about refrigeration. You can also suggest adding the sauce to caramel apples, apple pie, or as a drizzle for vanilla ice cream and pumpkin pie.
Nutrition
This easy caramel sauce recipe is sure to impress. With just a few simple ingredients and a little patience, you can create a delicious caramel sauce that will elevate any dessert. Plus, making your own caramel sauce is a great way to avoid the processed ingredients found in store-bought caramel. Try it out for your next dessert or gift idea, and let me know what your favorite way to use it is by tagging me over on Instagram!
Meet Eryn
Eryn Whalen is a homestead blogger and recipe developer with decades of hands-on experience in gardening, home canning, animal husbandry, and traditional kitchen skills. On her family's 100-acre Tennessee farmstead, she shares the daily beauty of homestead life: from milking cows at sunrise to filling the pantry with homegrown food and baking from scratch in her farmhouse kitchen. Read more about Eryn here


First time successfully making caramel sauce! This recipe was very simple, and very yummy! I did add vanilla at the end and I regret doing that since I didn’t taste it first. It is also possible that I am tasting a burnt flavor 😖
Hi Jessica, congratulations on your first batch, that’s a big win!
That slight burnt taste usually comes from the sugar cooking just a bit too far before adding the cream or butter. It can happen quickly, especially right after it turns that deep amber color. If the heat is a touch too high or it sits even 30–60 seconds too long, it can tip into that bitter edge.
A couple things that help next time:
Pull it off the heat as soon as it reaches a rich amber, not dark brown
Keep the heat at medium, not high
Add the cream right away to stop the cooking process
The vanilla wouldn’t cause a burnt flavor, it likely just made that deeper caramel taste more noticeable.
Even with that hint of bitterness, it sounds like you did a great job for your first time 👏
I make this caramel sauce all year long. it’s too good to save just for the holidays. It’s rich, buttery, and perfectly smooth, with a depth of flavor no store-bought version can touch. I keep a jar in the fridge at all times for drizzling over ice cream, stirring into my coffee, or gifting to friends. It’s one of those simple, from-scratch recipes that never fails to impress.