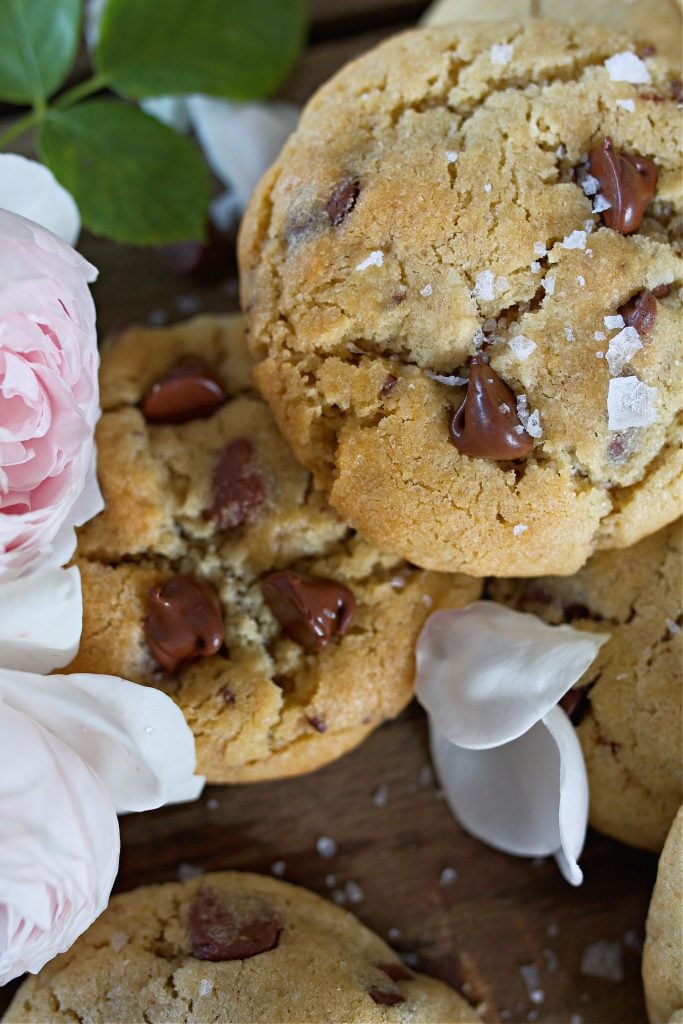
The Best Chocolate Chip Cookies. A Tried & True Recipe.
Every home needs a reliable, go-to chocolate chip cookie recipe. For over ten years, this recipe has filled our homestead cookie jar. These cookies feature golden crispy edges and soft, chewy centers.
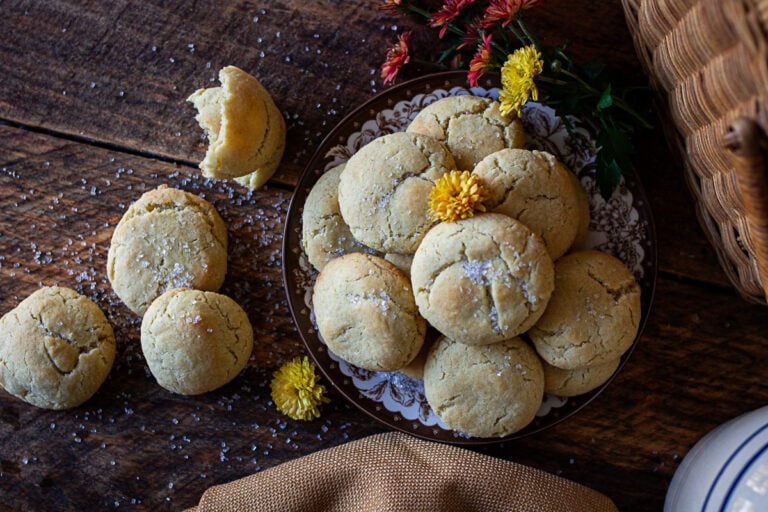
Making delicious treats from scratch is a core part of farmstead life. Simple, high-quality ingredients turn everyday baking into a comforting tradition. If you love classic homestead sweets, try my Frosted Homemade Cookie Bites or these Traditional Chewy Snickerdoodle Cookies.
Quick Recipe Overview
⏱️ Time to Table: 19 Minutes (10 mins prep, 9 mins bake)
🍪 Yield: 20 Golden, Chewy Cookies
✨ The Vibe: Warm, gooey centers with crisp, buttery edges
🌾 Homestead Special: Tested & perfected in our farm kitchen for over 10 years
🥛 Best Paired With: An ice-cold glass of fresh milk or afternoon coffee
🧊 Baker's Shortcut: Freezer-friendly dough for instant warm cookies on demand
📦 Freshness: Stays soft for 7 days in the cookie jar
Jump to:
SUMMARIZE & SAVE THIS CONTENT ON

Why You'll Love This Recipe
- Crispy Edges with Soft Centers: Delivers the perfect contrast between buttery edges and dense, chewy middle bites.
- Simple Pantry Ingredients: Uses real butter, pure vanilla, and organic flour without artificial additives or artificial flavors.
- No Mandatory Chill Time: Bakes directly after mixing, while still offering option to chill for extra thickness.
- Freezer-Friendly Dough: Roll dough balls ahead of time to freeze and bake hot, fresh cookies on demand.

Ingredients & Equipment
Key Ingredients & Why They Matter
- Salted Butter: Adds rich creaminess and balances sweetness. Using room temperature butter allows sugars to blend smoothly.
- Light Brown & White Sugars: Brown sugar creates chewy moisture, while white sugar produces lightly crisped, golden edges.
- Fresh Farm Egg: Binds dough together. Using a room-temperature egg prevents cold pockets from hardening the creamed butter.
- Pure Vanilla Extract: Adds depth and rich aromatic flavor. Avoid artificial vanilla for the best taste.
- Unbleached All-Purpose Flour: Provides structure. Choose flour with a strong protein content for ideal chewy texture.
- Real Mineral Salt: Highlights sweet chocolate flavor while balancing richness throughout dough.
- Semi-Sweet Chocolate Chips: Delivers rich chocolate pockets without overpowering the buttery cookie base.
Essential Equipment
- Stand Mixer or Hand Mixer: Creams butter and sugars thoroughly to incorporate tiny air pockets for lift.
- Baking Sheets & Parchment Paper: Prevents sticking and promotes even browning on cookie bottoms.
- Medium Cookie Scoop: Ensures uniform dough balls so every cookie bakes at the exact same rate.

Step-by-Step Instructions
Step 1: Cream Butter and Sugars
In a stand mixer bowl, beat room temperature salted butter until creamy. Add brown and white sugars. Beat on medium-high speed for 3 minutes until light and fluffy.
Step 2: Add Egg and Vanilla
Add room temperature egg and pure vanilla extract to butter mixture. Beat on low speed until combined, scraping down bowl sides.
Step 3: Combine Dry Ingredients
Whisk flour, baking soda, and salt in a separate bowl. Slowly mix dry ingredients into wet dough on low speed until combined.
Step 4: Fold in Chocolate Chips
Gently stir semi-sweet chocolate chips into cookie dough using a rubber spatula or low mixer speed.
Step 5: Scoop and Space Dough
Use a cookie scoop to drop dough balls onto parchment-lined baking sheets, leaving two inches between cookies.
Step 6: Bake and Cool
Bake at 350°F for 9 to 10 minutes until edges turn light golden. Let rest on sheet for 2 minutes, then cool on wire rack.

Variations & Substitutions
- Sea Salt Top: Sprinkle flaky sea salt over warm cookies immediately after removing them from oven.
- Dark Chocolate Chunks: Swap standard semi-sweet chips for chopped dark chocolate bars to create melted pools.
- Cinnamon Spice: Add a small dash of ground cinnamon to dry ingredients for subtle warmth.
Storage & Reheating Tips
- Room Temperature: Store cooled cookies in an airtight container for up to 7 days.
- Bread Crust Trick: Place a slice of plain sandwich bread in container to keep cookies extra soft.
- Freezing Baked Cookies: Freeze baked cookies in airtight bags for up to 3 months.
- Freezing Raw Dough: Freeze dough balls on a tray, then store in freezer bags for 3 months. Bake frozen balls by adding 2 minutes to cook time.

FAQ
Warm butter or hot baking sheets cause excess spreading. Ensure butter is soft, not melted, and let sheets cool between batches.
Yes. Chilling dough in fridge for 2 hours hydrates flour and creates thicker, chewier cookies with richer flavor.
Salted butter provides consistent flavor without managing multiple butter sticks. Simply adjust added salt in recipe to compensate.

Final Thoughts From The Homestead
Slicing fresh apples or pulling warm cookies from the oven brings instant warmth to our farmstead kitchen. Seeing the kids' faces when fresh chocolate chip cookies are cooling on the rack is one of my favorite simple pleasures. Grab a glass of milk, grab a warm cookie, and enjoy a cozy moment together around the table.
Other Cookies To Try:

Perfect Chewy Chocolate Chip Cookies
Ingredients
- 1 cup butter room temperature
- ¾ cup brown sugar
- ½ cup white sugar
- 2 teaspoon vanilla extract
- 1 egg
- 2 ¼ cup white flour
- ½ teaspoon salt
- 1 teaspoon baking soda
- 1 bag chocolate chips we use semi-sweet or 2.5 cups
Instructions
Preheat the oven to 350°F (175°C). Line a baking sheet with parchment paper for easy cleanup.
Cream the butter and sugars:
- Place the room temperature butter in the bowl of a stand mixer fitted with the paddle attachment. Start mixing the butter on medium speed until it's creamy. Slowly add the brown sugar and white sugar, and beat on medium-high speed for about 3 minutes, until the mixture is light and fluffy. This step is crucial as properly creaming the butter and sugars creates tiny air pockets that give the cookies their soft, chewy texture. Don't rush this part-take your time!
Add the egg and vanilla:
- Once the butter and sugars are well creamed, add the egg and pure vanilla extract. Mix on low speed until fully combined, scraping down the sides of the bowl as needed.
Mix in dry ingredients:
- In a separate bowl, whisk together the salt, baking soda, and flour. With the mixer on low speed, slowly add the dry ingredients to the wet mixture. Stop occasionally to scrape down the sides of the bowl to ensure everything is well combined. Be careful not to overmix, as this can make the cookies tough.
Fold in the chocolate chips:
- Once the dough is smooth, add the chocolate chips on low speed, mixing until they are evenly distributed throughout the dough.
Shape and bake:
- Use a cookie scoop or spoon to drop spoonfuls of dough onto the prepared baking sheet, spacing them about 2 inches apart. I typically bake 9 cookies per sheet to allow enough space for them to spread.
Bake:
- Place the cookies in the preheated oven and bake for 9 to 10 minutes, or until the edges are a light golden brown. The centers should still look slightly underbaked for a soft, chewy texture.
Cool and enjoy:
- Remove the cookies from the oven and let them cool on the baking sheet for 2 minutes before transferring them to a cooling rack to cool completely. Enjoy warm or let them cool fully for the best texture!


These truly are the best chocolate chip cookies! The texture is spot on — crisp edges with soft, chewy centers that stay perfect even the next day. I love the balance of brown and white sugar and how the salted butter gives them that extra depth of flavor. They bake up beautifully every single time, and I always freeze a few dough balls for fresh cookies on busy evenings. A forever favorite in our house!
Made these for memorial BBQ all I can say is Yum Yum, everyone was asking for the recipe! You always have my favorite cookie recipes. Thanks for sharing!
Awe, I'm so glad they were a hit! Thank you for letting me know! xoxo