Easy Homemade Orange Marmalade Recipe | No Pectin
January is citrus season, which makes it the perfect time to make this easy homemade orange marmalade recipe. Using whole oranges, simple pantry ingredients, and no added pectin, this marmalade delivers a bright, sweet-tart flavor with the classic citrus peel texture marmalade is known for. Perfect to enjoy on a cold winter day.
I've made this orange marmalade recipe many times now, and it's become a winter staple in my canning kitchen. After years of preserving jams and jellies, this method consistently produces a marmalade that sets beautifully, spreads easily, and stores well. If you enjoy preserving seasonal flavors, you'll also love my honeysuckle jam, strawberry jam, and peach jalapeño jam. All tried-and-true favorites here at home.
At a Glance: Easy Homemade Orange Marmalade
- Yield: 7 half-pint jars
- Prep Time: 30 minutes
- Cook Time: 2-3 hours (plus overnight soak)
- Total Time: About 1 day
- Method: Water bath canning
- Pectin: None (natural citrus pectin)
- Best Oranges: Sumo, Valencia, or Seville
- Texture: Soft-set with tender citrus peel
SUMMARIZE & SAVE THIS CONTENT ON
Jump to:
- At a Glance: Easy Homemade Orange Marmalade
- Why You'll Love This Orange Marmalade Recipe
- Ingredients You'll Need
- Easy Substitutions & Variations
- How to Make Homemade Orange Marmalade
- Canning the Orange Marmalade
- FAQ About Orange Marmalade
- How to Store Homemade Orange Marmalade
- Other Fruit Recipes To Try:
- Orange Marmalade Recipe
Why You'll Love This Orange Marmalade Recipe
- Made with whole oranges for classic marmalade flavor and texture
- No added pectin-the natural citrus pectin does the work
- Sweet, tangy, and balanced without being overly bitter
- Reliable set every time using a tested method
- Perfect for canning, gifting, or everyday use
- A great way to preserve citrus season during the winter months
This is the kind of marmalade recipe you can make confidently year after year.
Store-bought marmalades are often loaded with preservatives, colorants, and other less-than-desirable ingredients that mask the natural flavors of the fruit. But when you make marmalade at home, you control the amount of sugar, highlight the fresh fruit juice, and create a spread with a depth of flavor that's impossible to find in a store-bought jar. Whether you're using sweet oranges, mandarin oranges, or even bitter Seville oranges, homemade orange marmalade captures the vibrant essence of citrus like nothing else.
Ingredients You'll Need
You only need a handful of simple ingredients to make homemade orange marmalade:
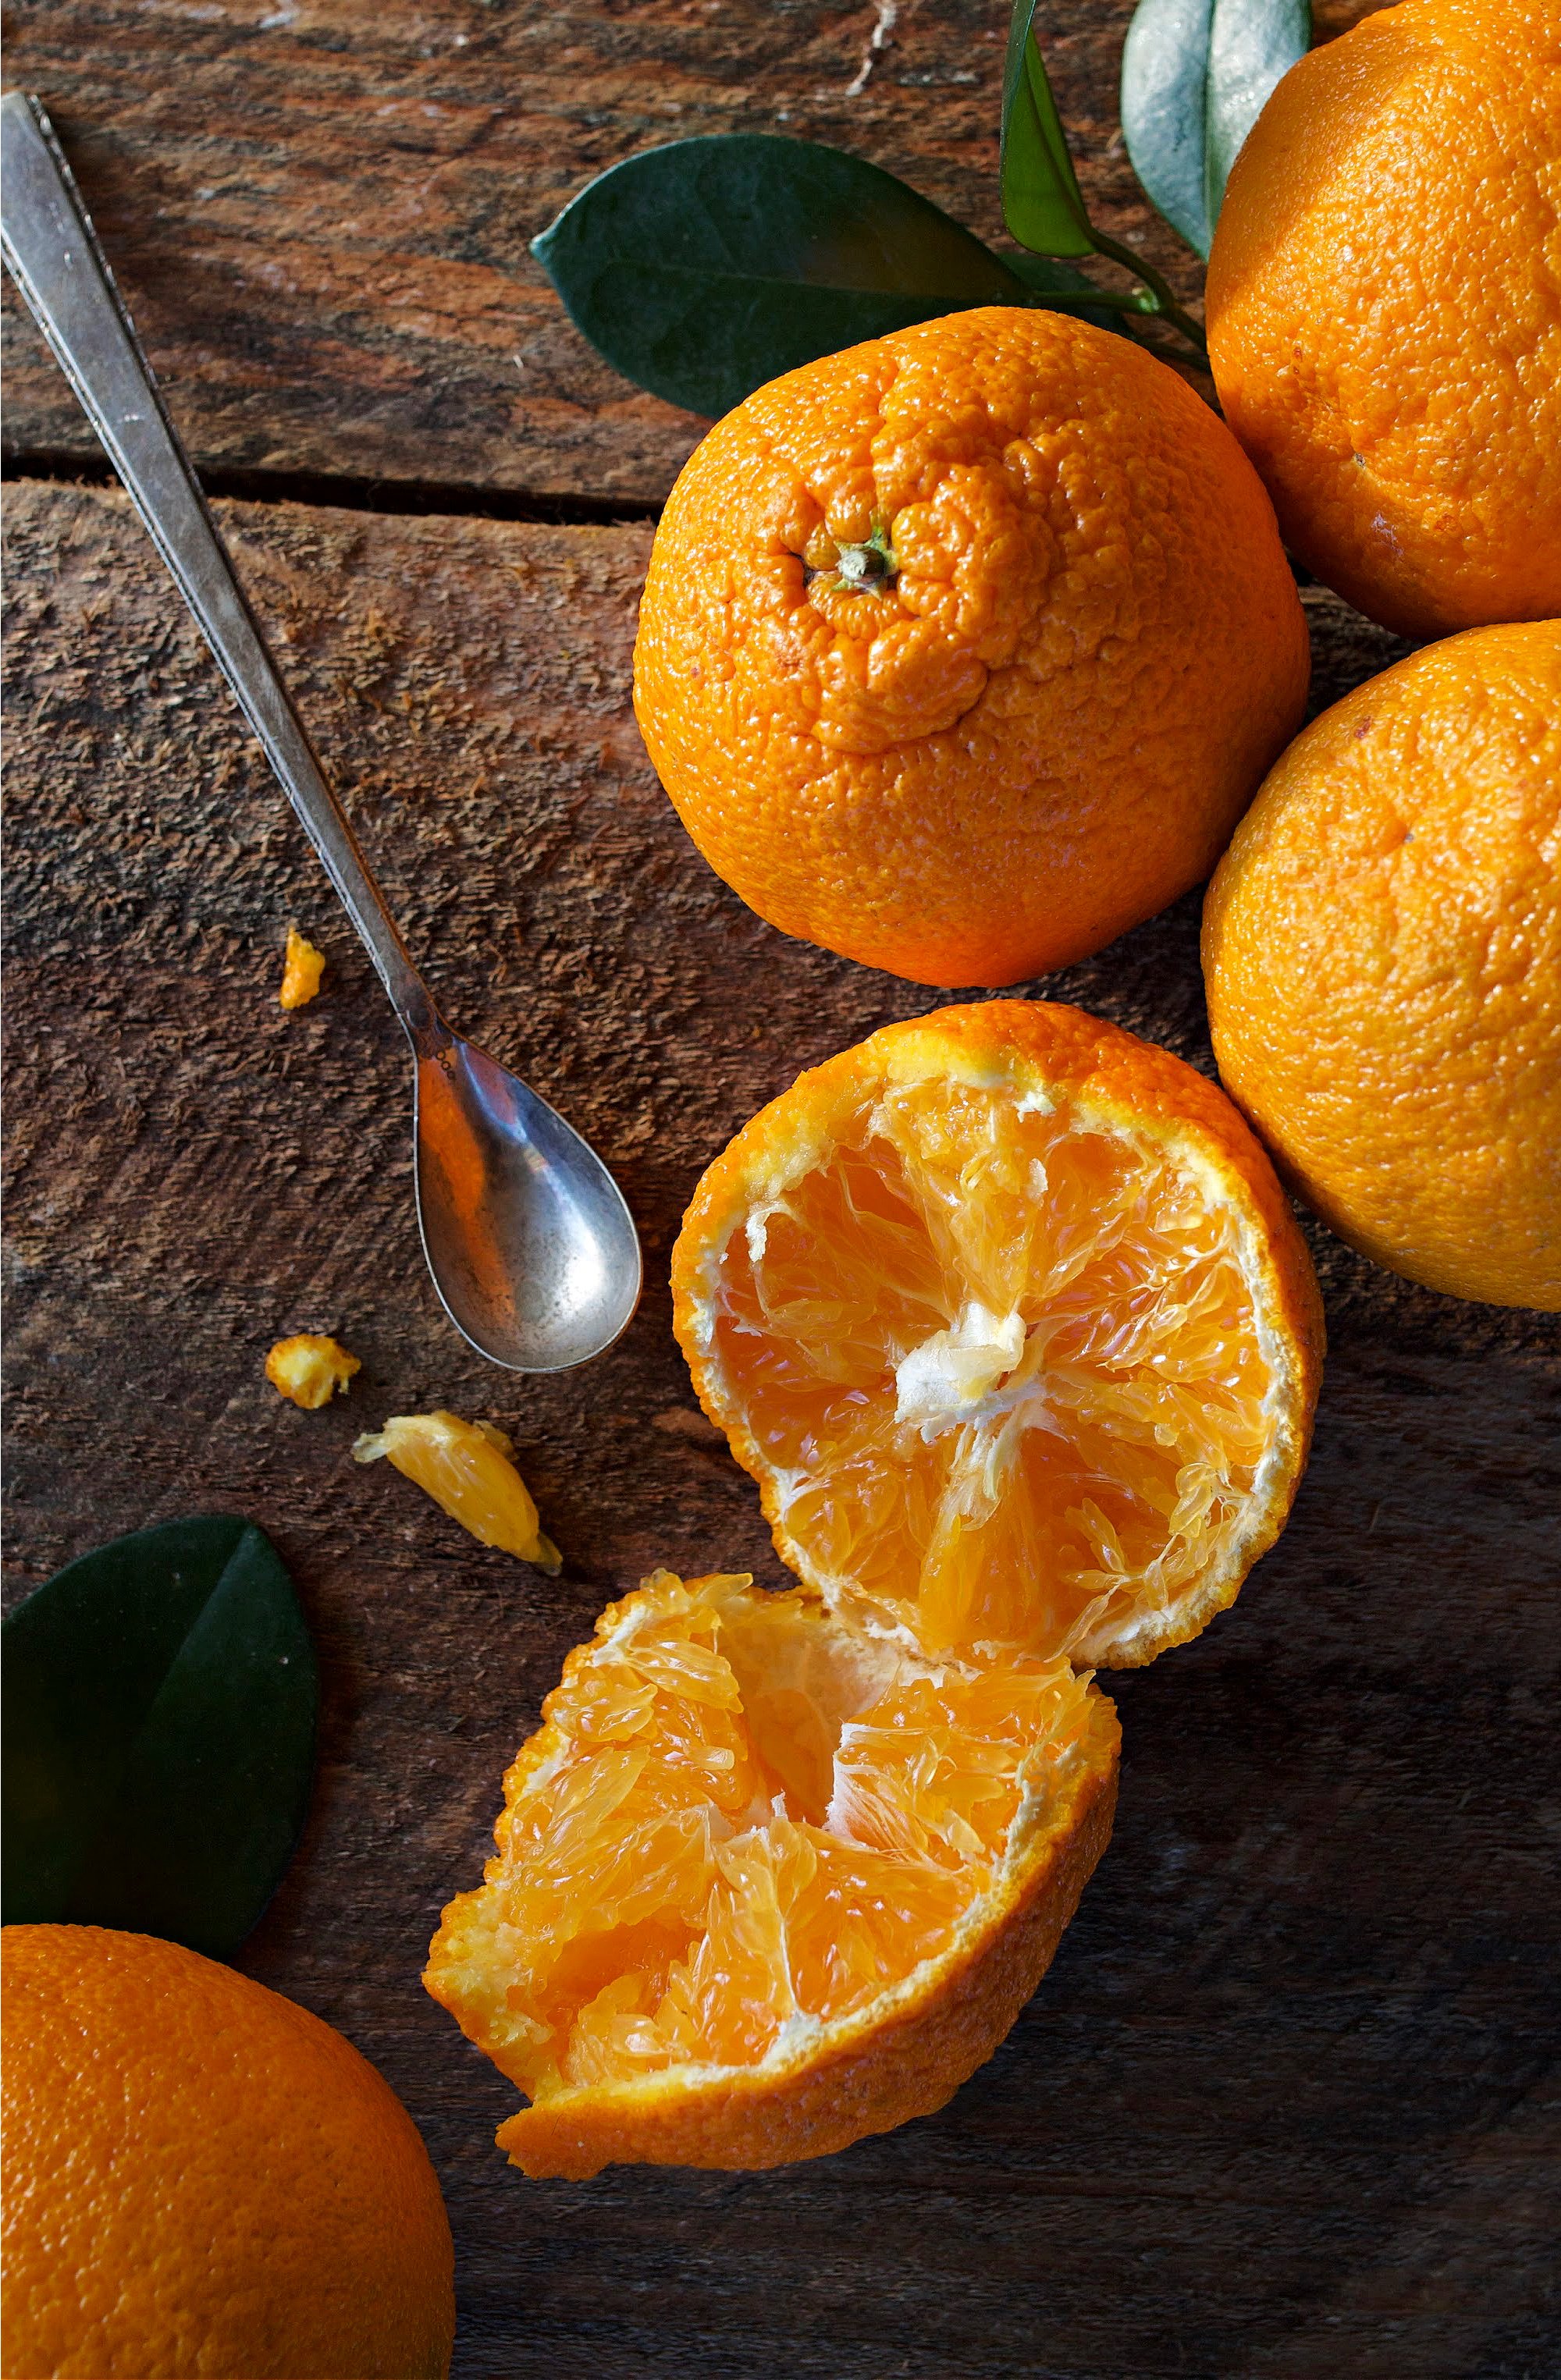
- Oranges - Whole oranges, including peel, pith, and flesh
- Lemon - Adds natural pectin and balances the sweetness
- Water - Helps soften the citrus and extract pectin
- Granulated sugar - Preserves the marmalade and creates the proper set
Using the whole fruit is what gives marmalade its signature flavor and texture.
Easy Substitutions & Variations
Types of Oranges:
- Sumo oranges (sweet and mild)
- Valencia oranges (classic and balanced)
- Navel oranges (easy to find, slightly sweeter)
- Seville oranges (traditional and more bitter)
Sugar Adjustments:
You can slightly reduce the sugar, but keep in mind that sugar plays a key role in both setting and preserving marmalade.
Texture Options:
- Leave the fruit hand-chopped for a rustic marmalade
- Blend part of the mixture with an immersion blender for a smoother spread
Flavor Add-Ins:
- A small amount of cinnamon or cardamom
- A splash of vanilla
- A pinch of ginger
How to Make Homemade Orange Marmalade
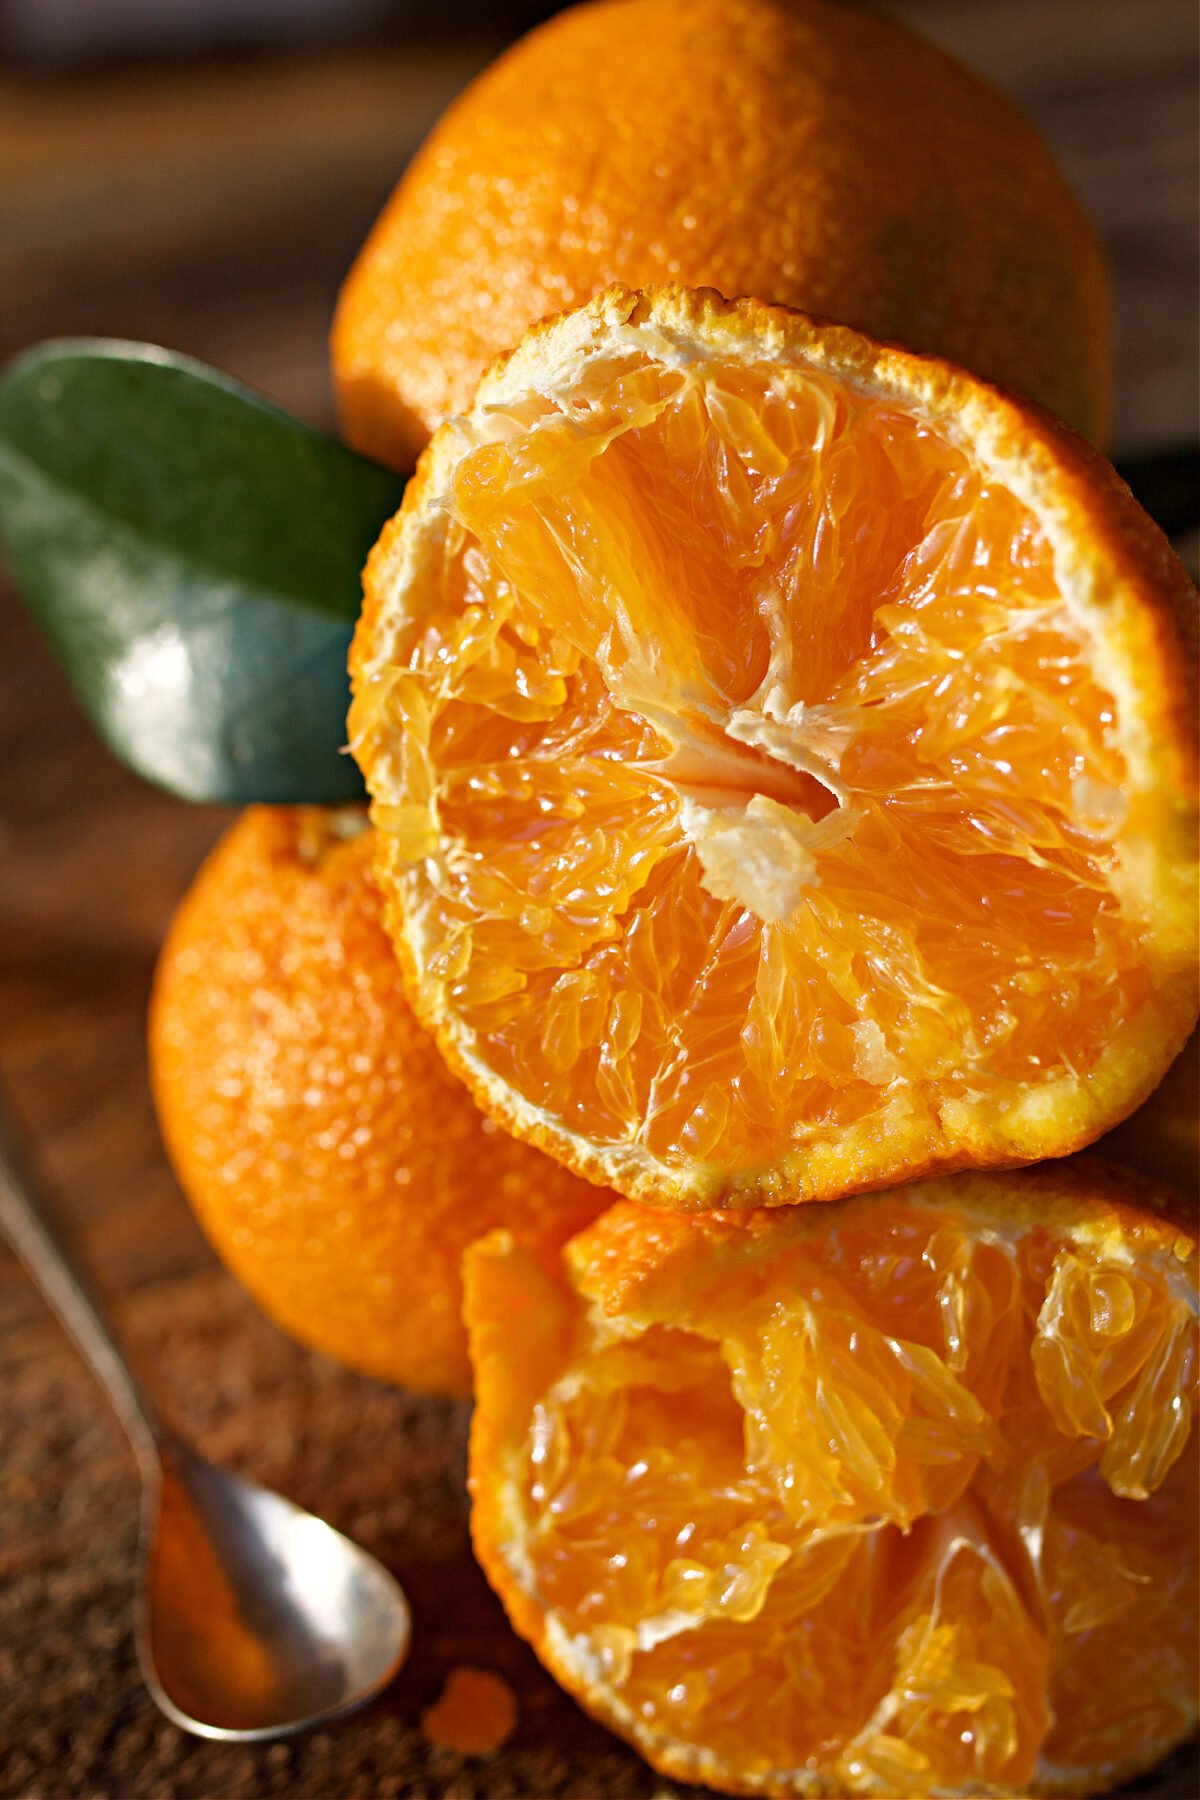
Step 1: Wash the oranges and lemon thoroughly to remove any wax or residue. Chop the whole oranges into small pieces, discarding seeds. The peel, pith, and flesh will all be used.
Step 2. Combine the chopped fruit, lemon juice, and water in a large pot. Bring to a boil, then remove from heat, cover, and let sit overnight at room temperature. This softens the peels and releases natural pectin.
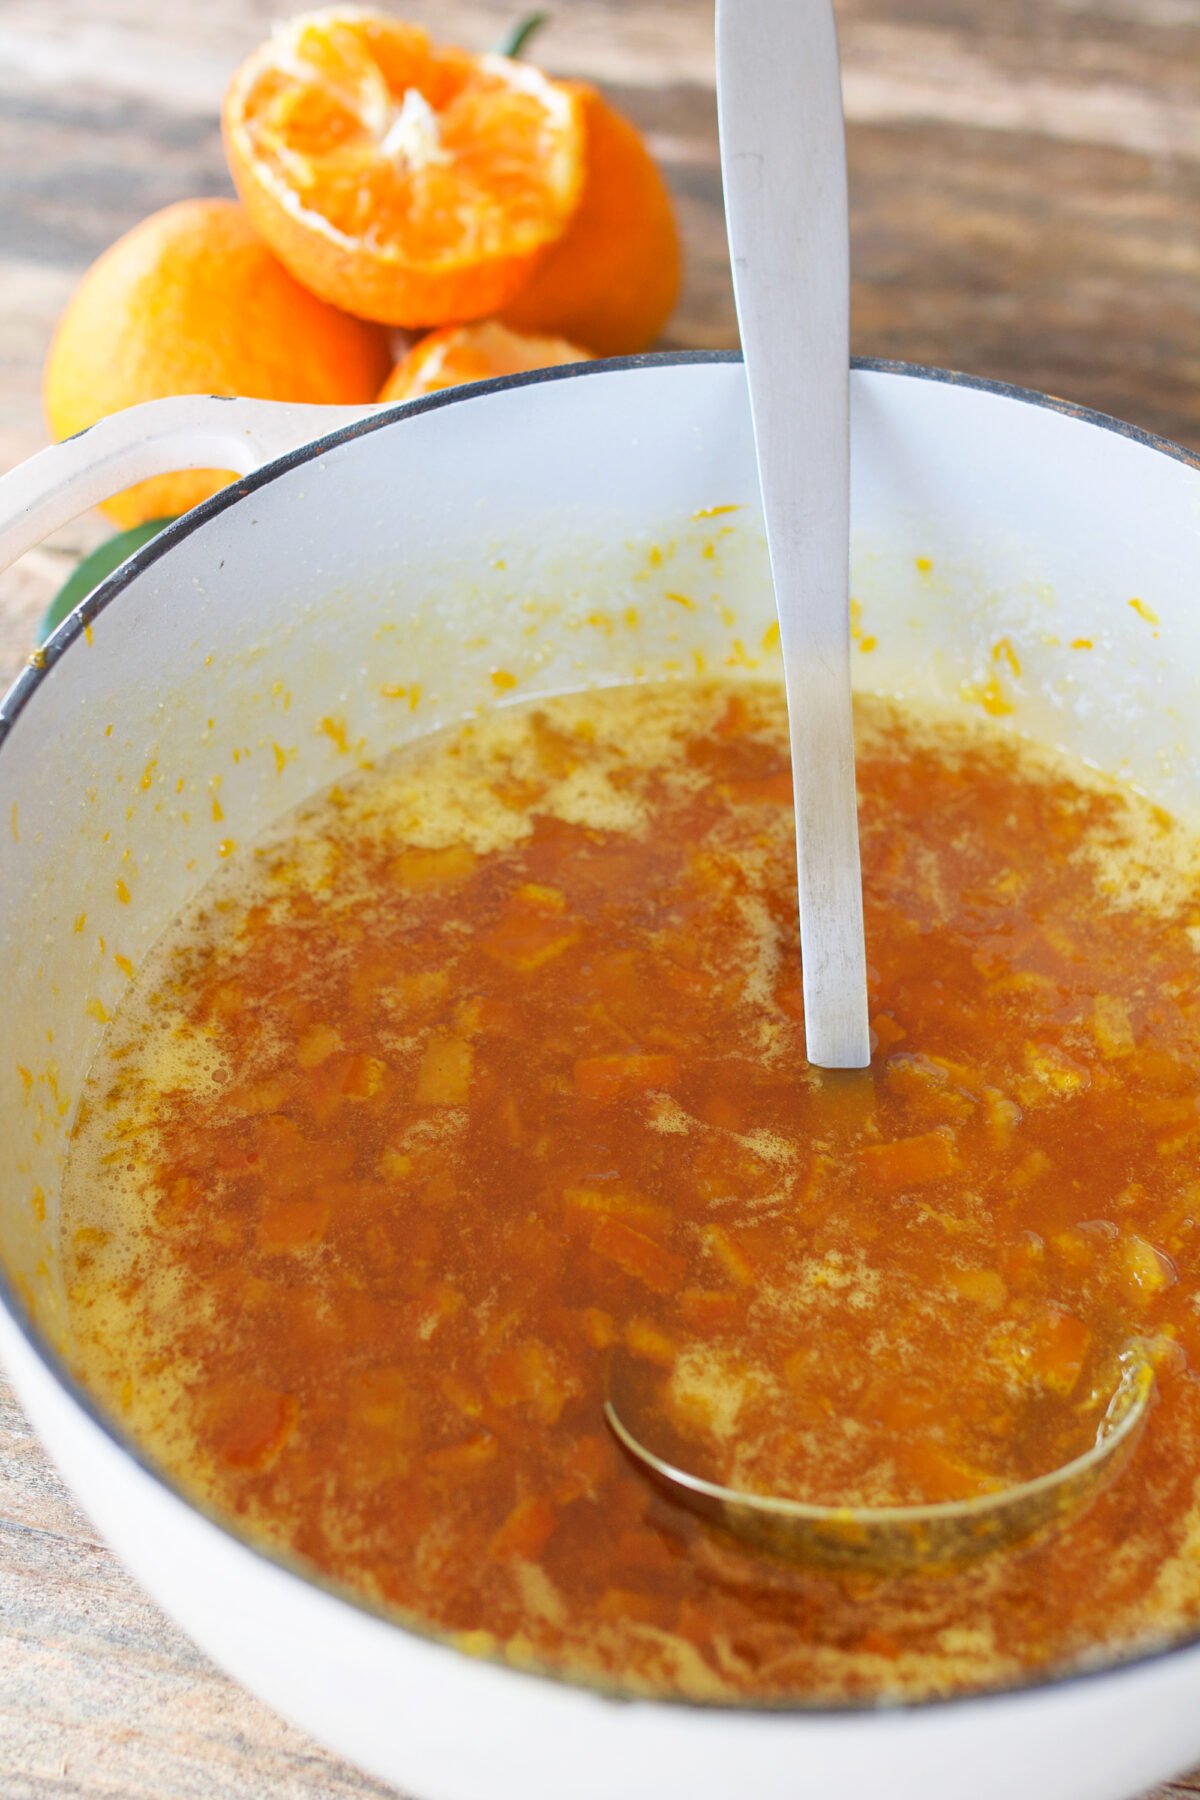
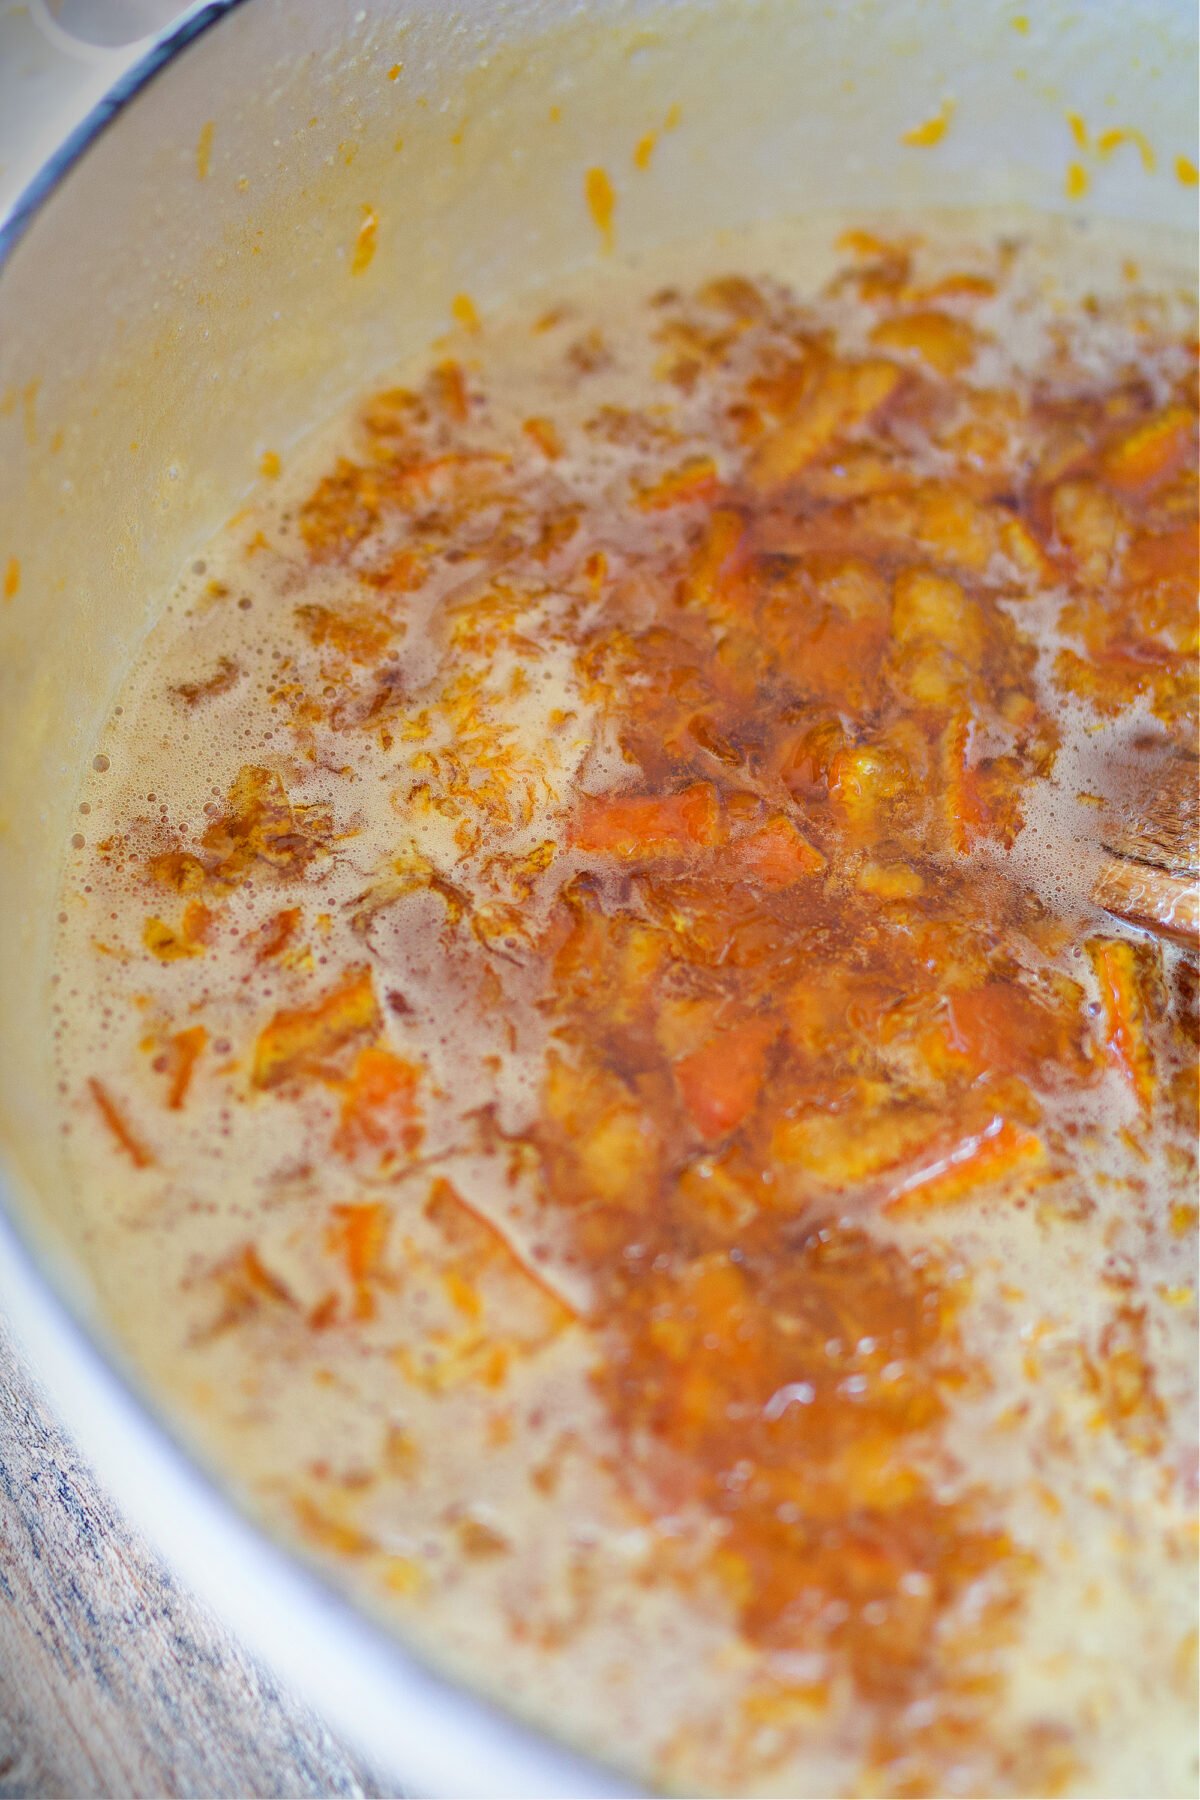
Step 3: Cook the Marmalade - Bring the mixture back to a rolling boil, then reduce to a steady simmer. Cook until the fruit is tender and the mixture begins to thicken.
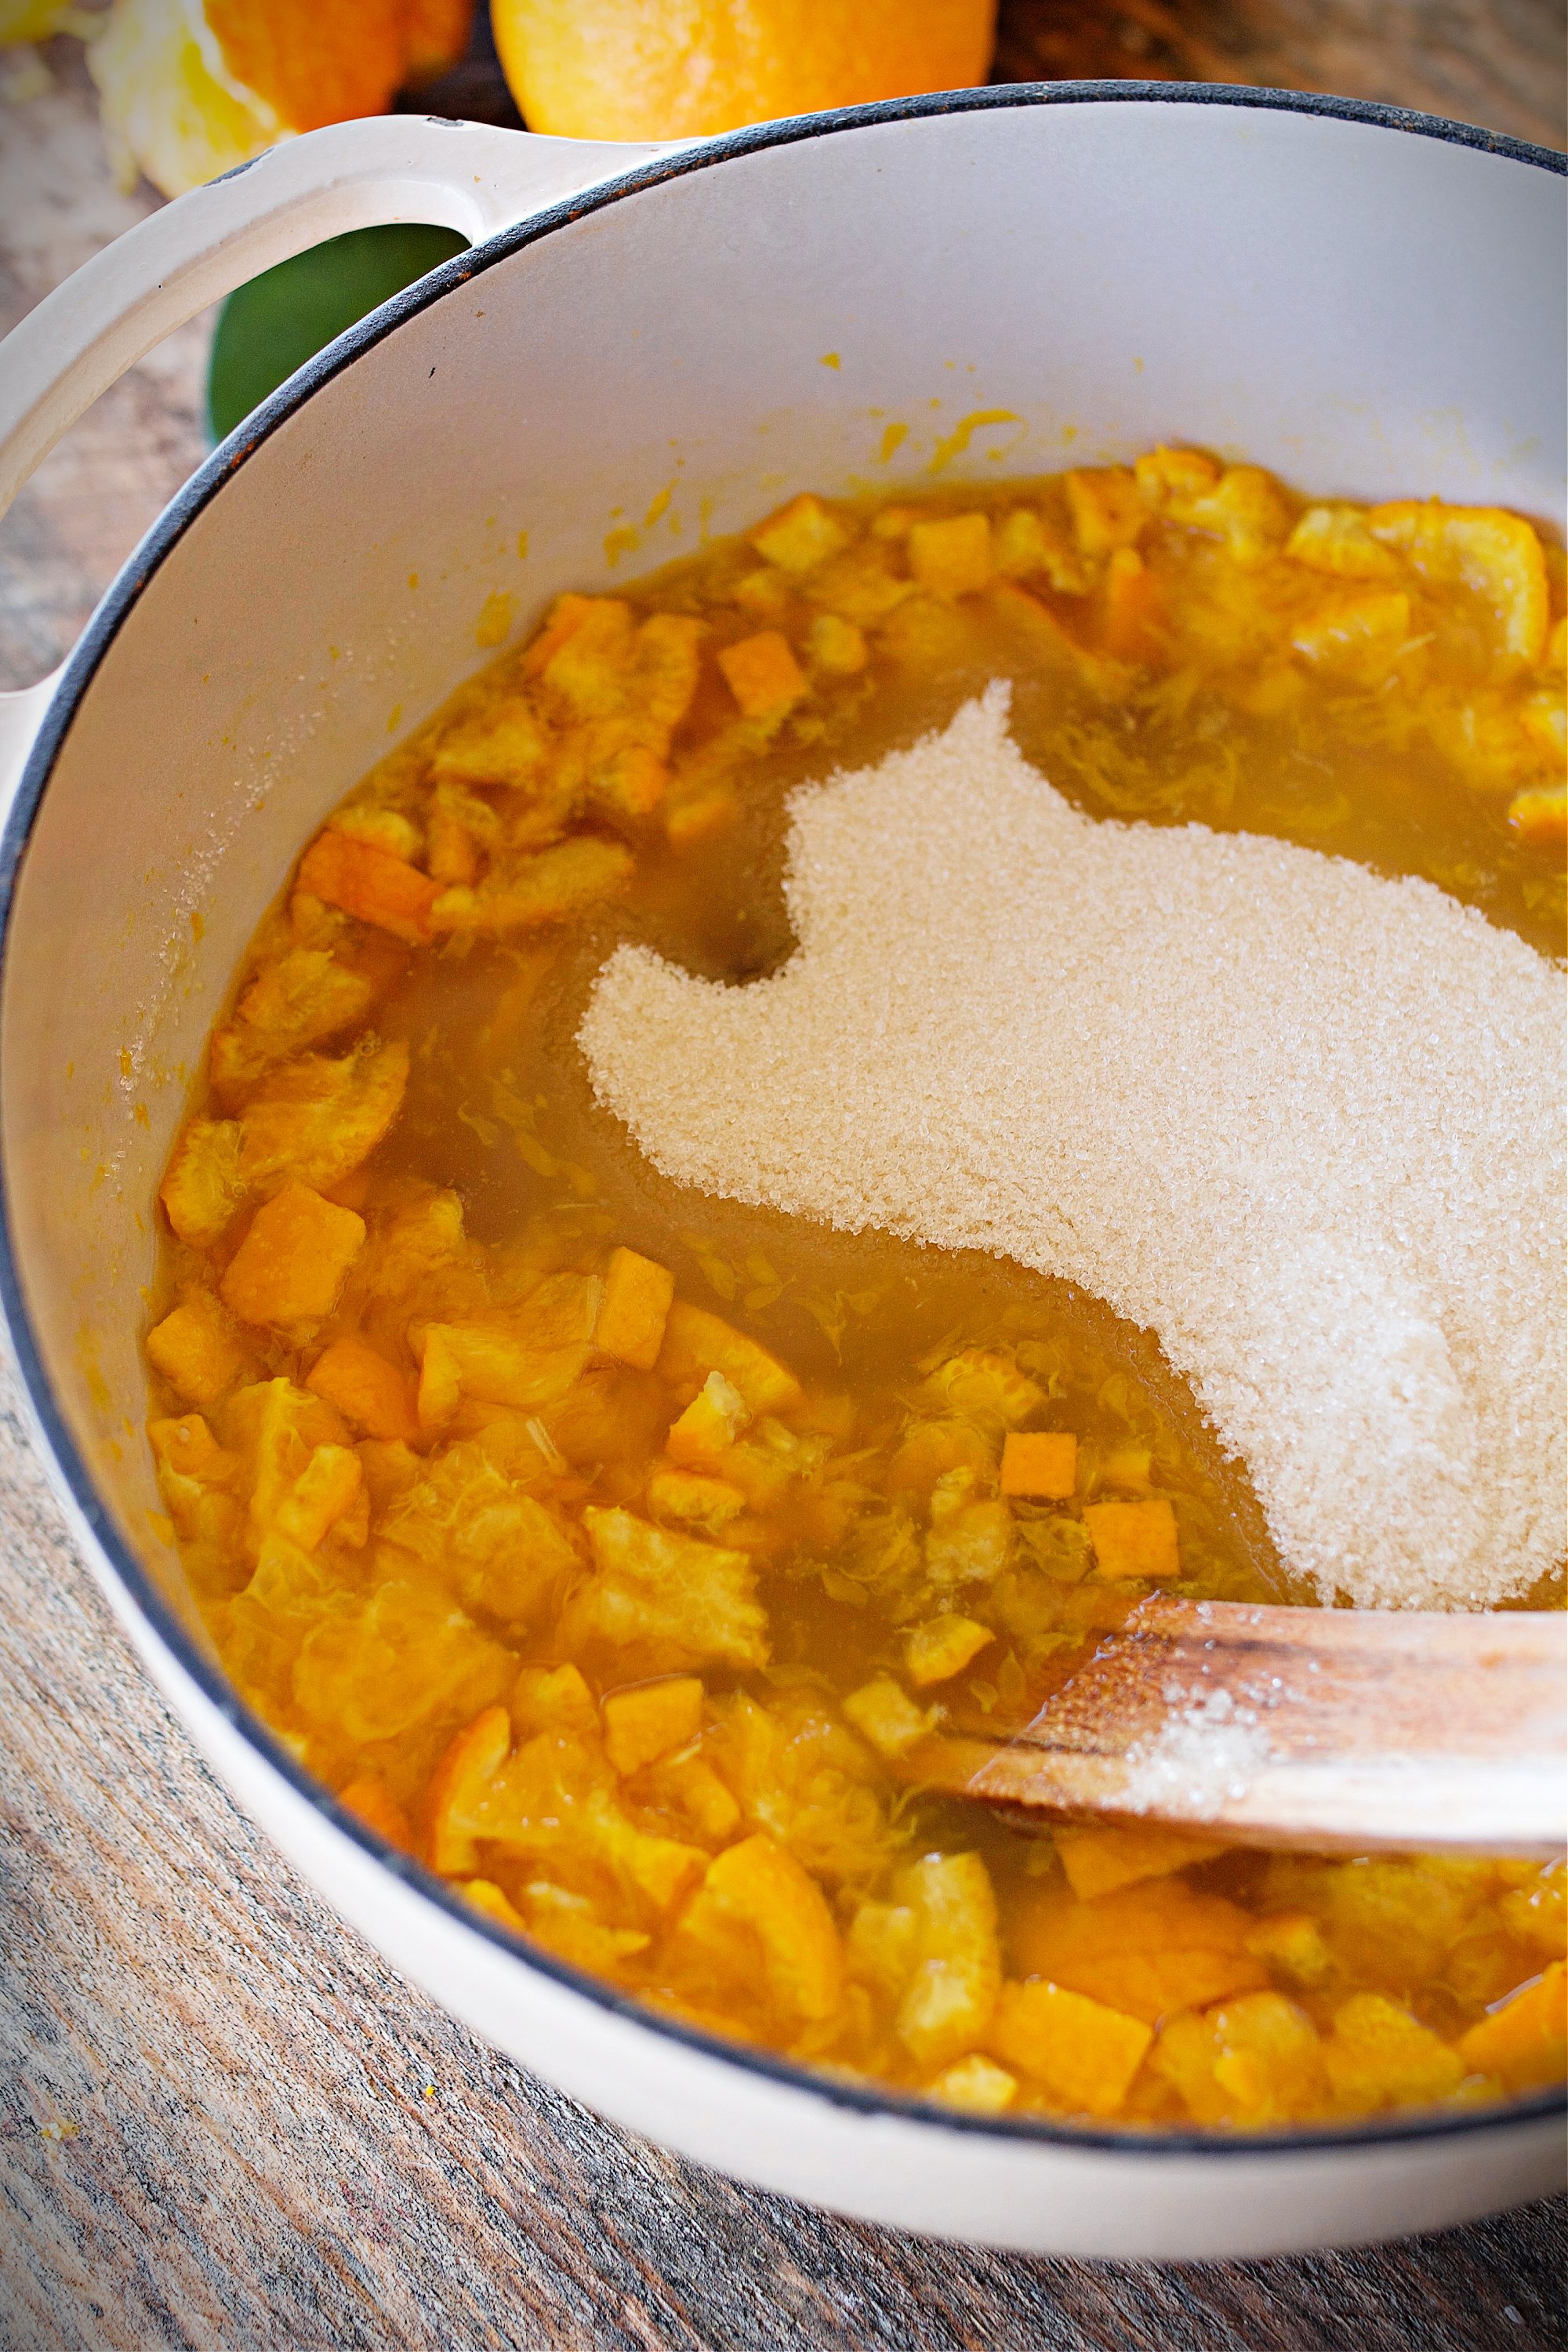
Step 4: Add Sugar and Thicken - Stir in the sugar until fully dissolved. Continue simmering, stirring frequently, until the marmalade reaches 220°F and thickens.
Step 5: Blend for Texture
Use an immersion blender to lightly blend part of the mixture, leaving some visible citrus peel for texture. This is the immersion blender I love and use almost daily in my kitchen.
Step 6: Test for Doneness
A good marmalade requires patience, as it takes time to reach the right consistency. Keep an eye on the temperature for proper setting. If you don't have a candy thermometer, you can use the cold-plate test:
- Place a small plate or frozen plate in the freezer for 5 minutes.
- Drop a spoonful of the marmalade onto the plate.
- Wait a few seconds, then push the edge of the marmalade with a metal spoon. If it wrinkles and holds its shape, it's ready.
Canning the Orange Marmalade
Once the marmalade has reached the proper set, it's time to preserve it for long-term storage using a water bath canner.
Start by washing your jars, lids, and rings in hot soapy water. Place the jars in boiling water to sterilize and keep them hot until ready to fill. This prevents cracking and helps ensure a proper seal.
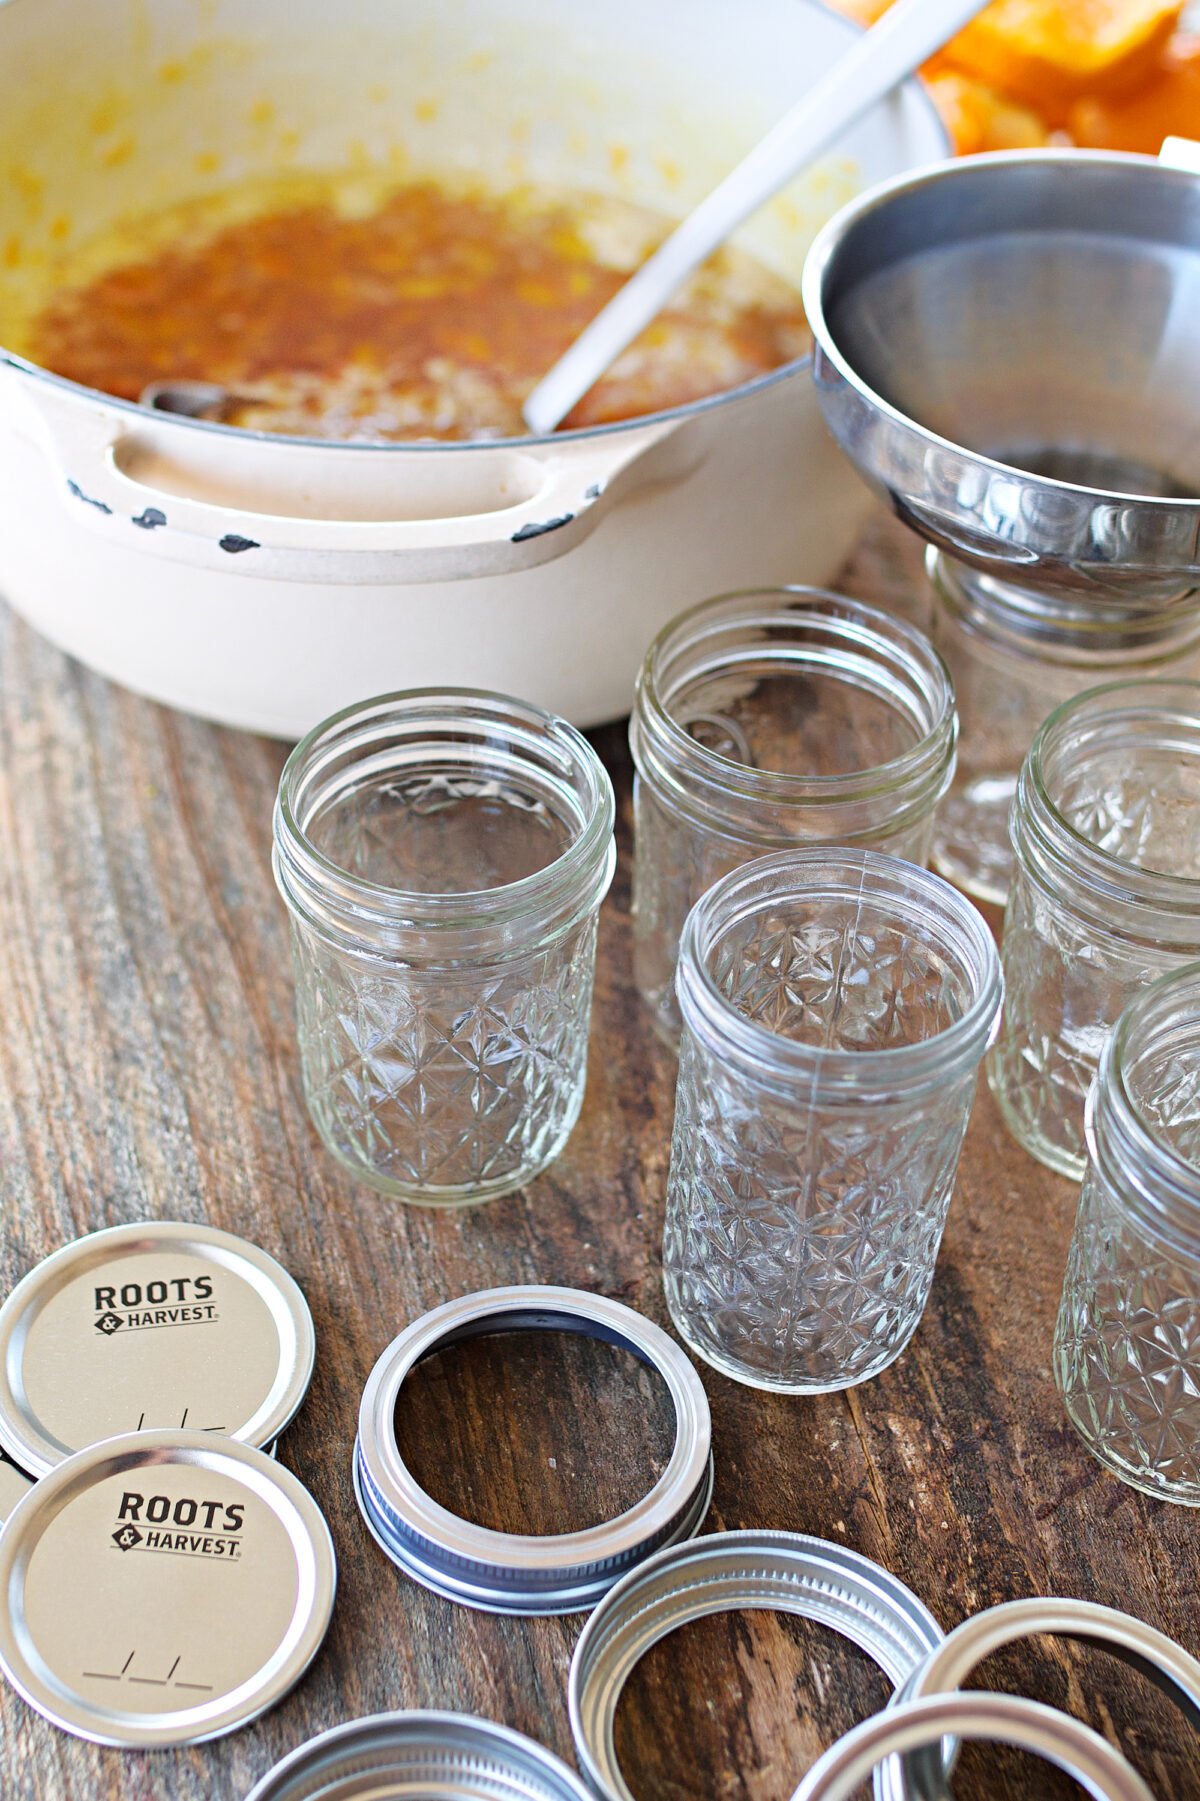
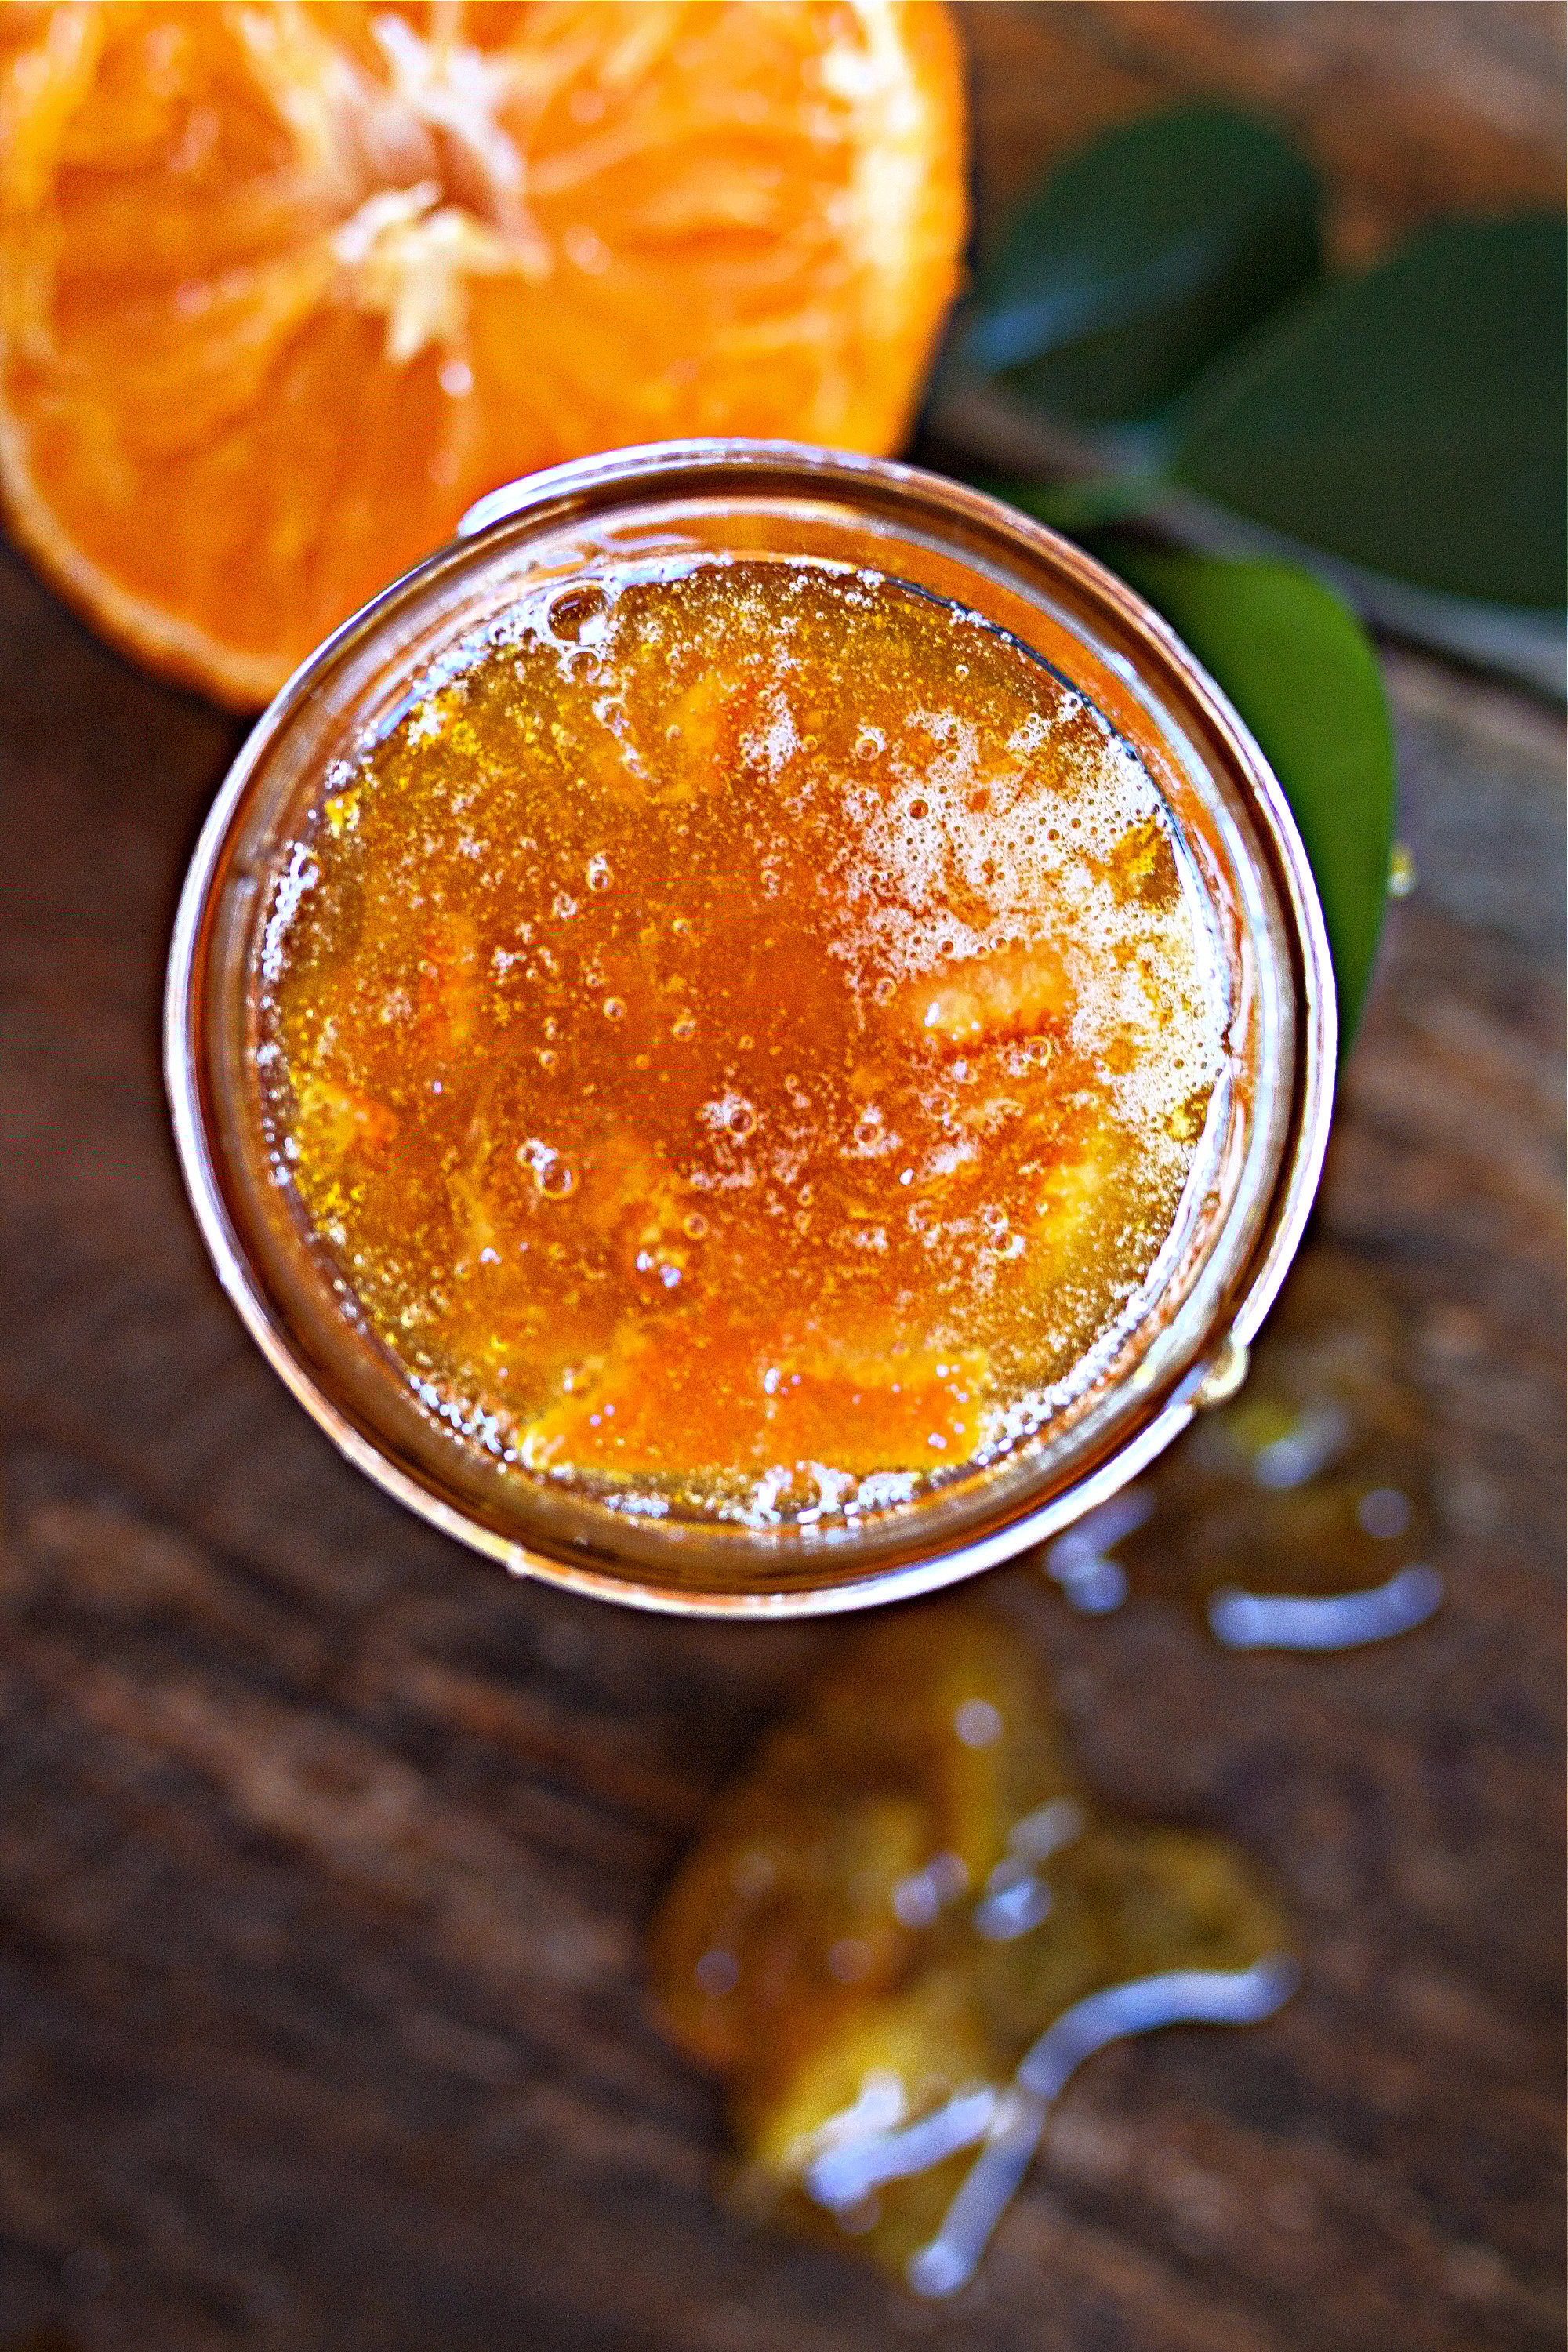
Using a ladle and funnel, carefully fill the hot jars with the hot marmalade, leaving ¼ inch of headspace at the top. Wipe the rims clean with a damp kitchen towel to remove any sticky residue, then place the lids on and screw the rings on fingertip-tight.
Lower the filled jars into a boiling water bath canner, making sure they are fully submerged with at least one inch of water covering the tops. Process the jars for 10 minutes, adjusting for altitude if needed.
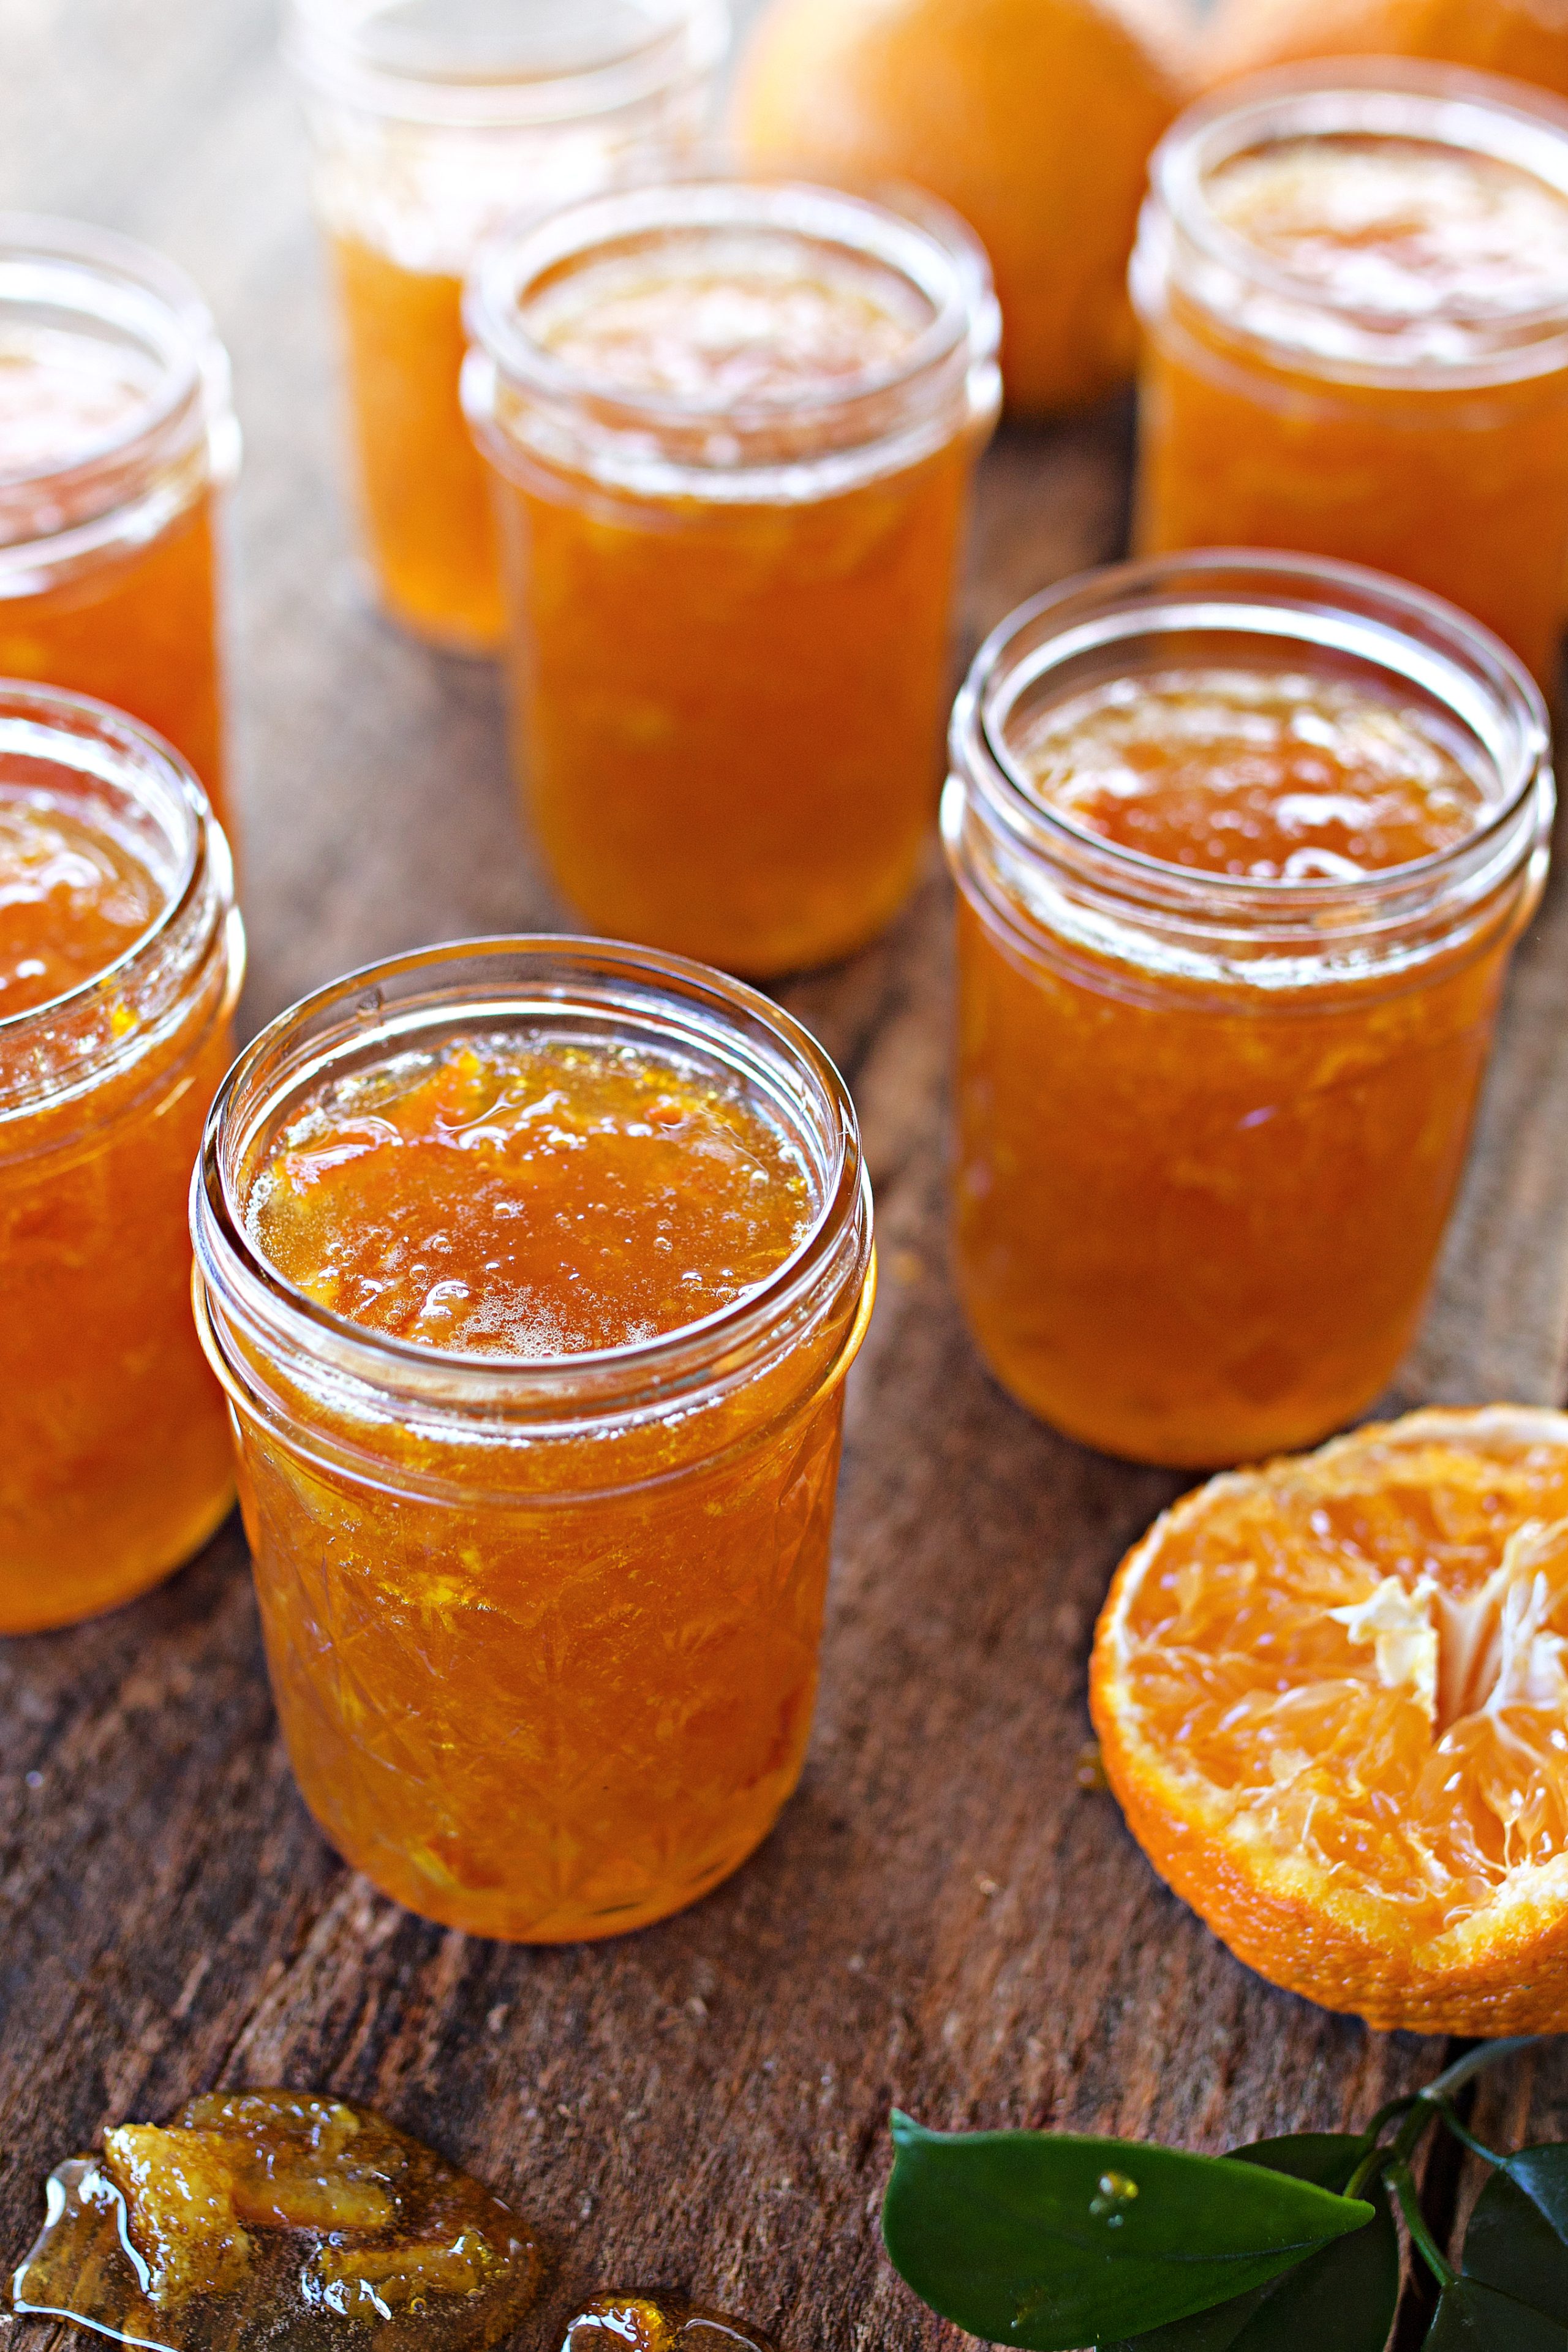
Once processing is complete, carefully remove the jars using a jar lifter and place them on a towel-lined counter in a draft-free area. Allow the jars to cool undisturbed for 12-24 hours. As they cool, you should hear the lids "ping," indicating a proper vacuum seal.
After cooling, check the seals by pressing the center of each lid. Properly sealed jars will not flex. Store sealed jars in a cool, dark place for long-term storage.
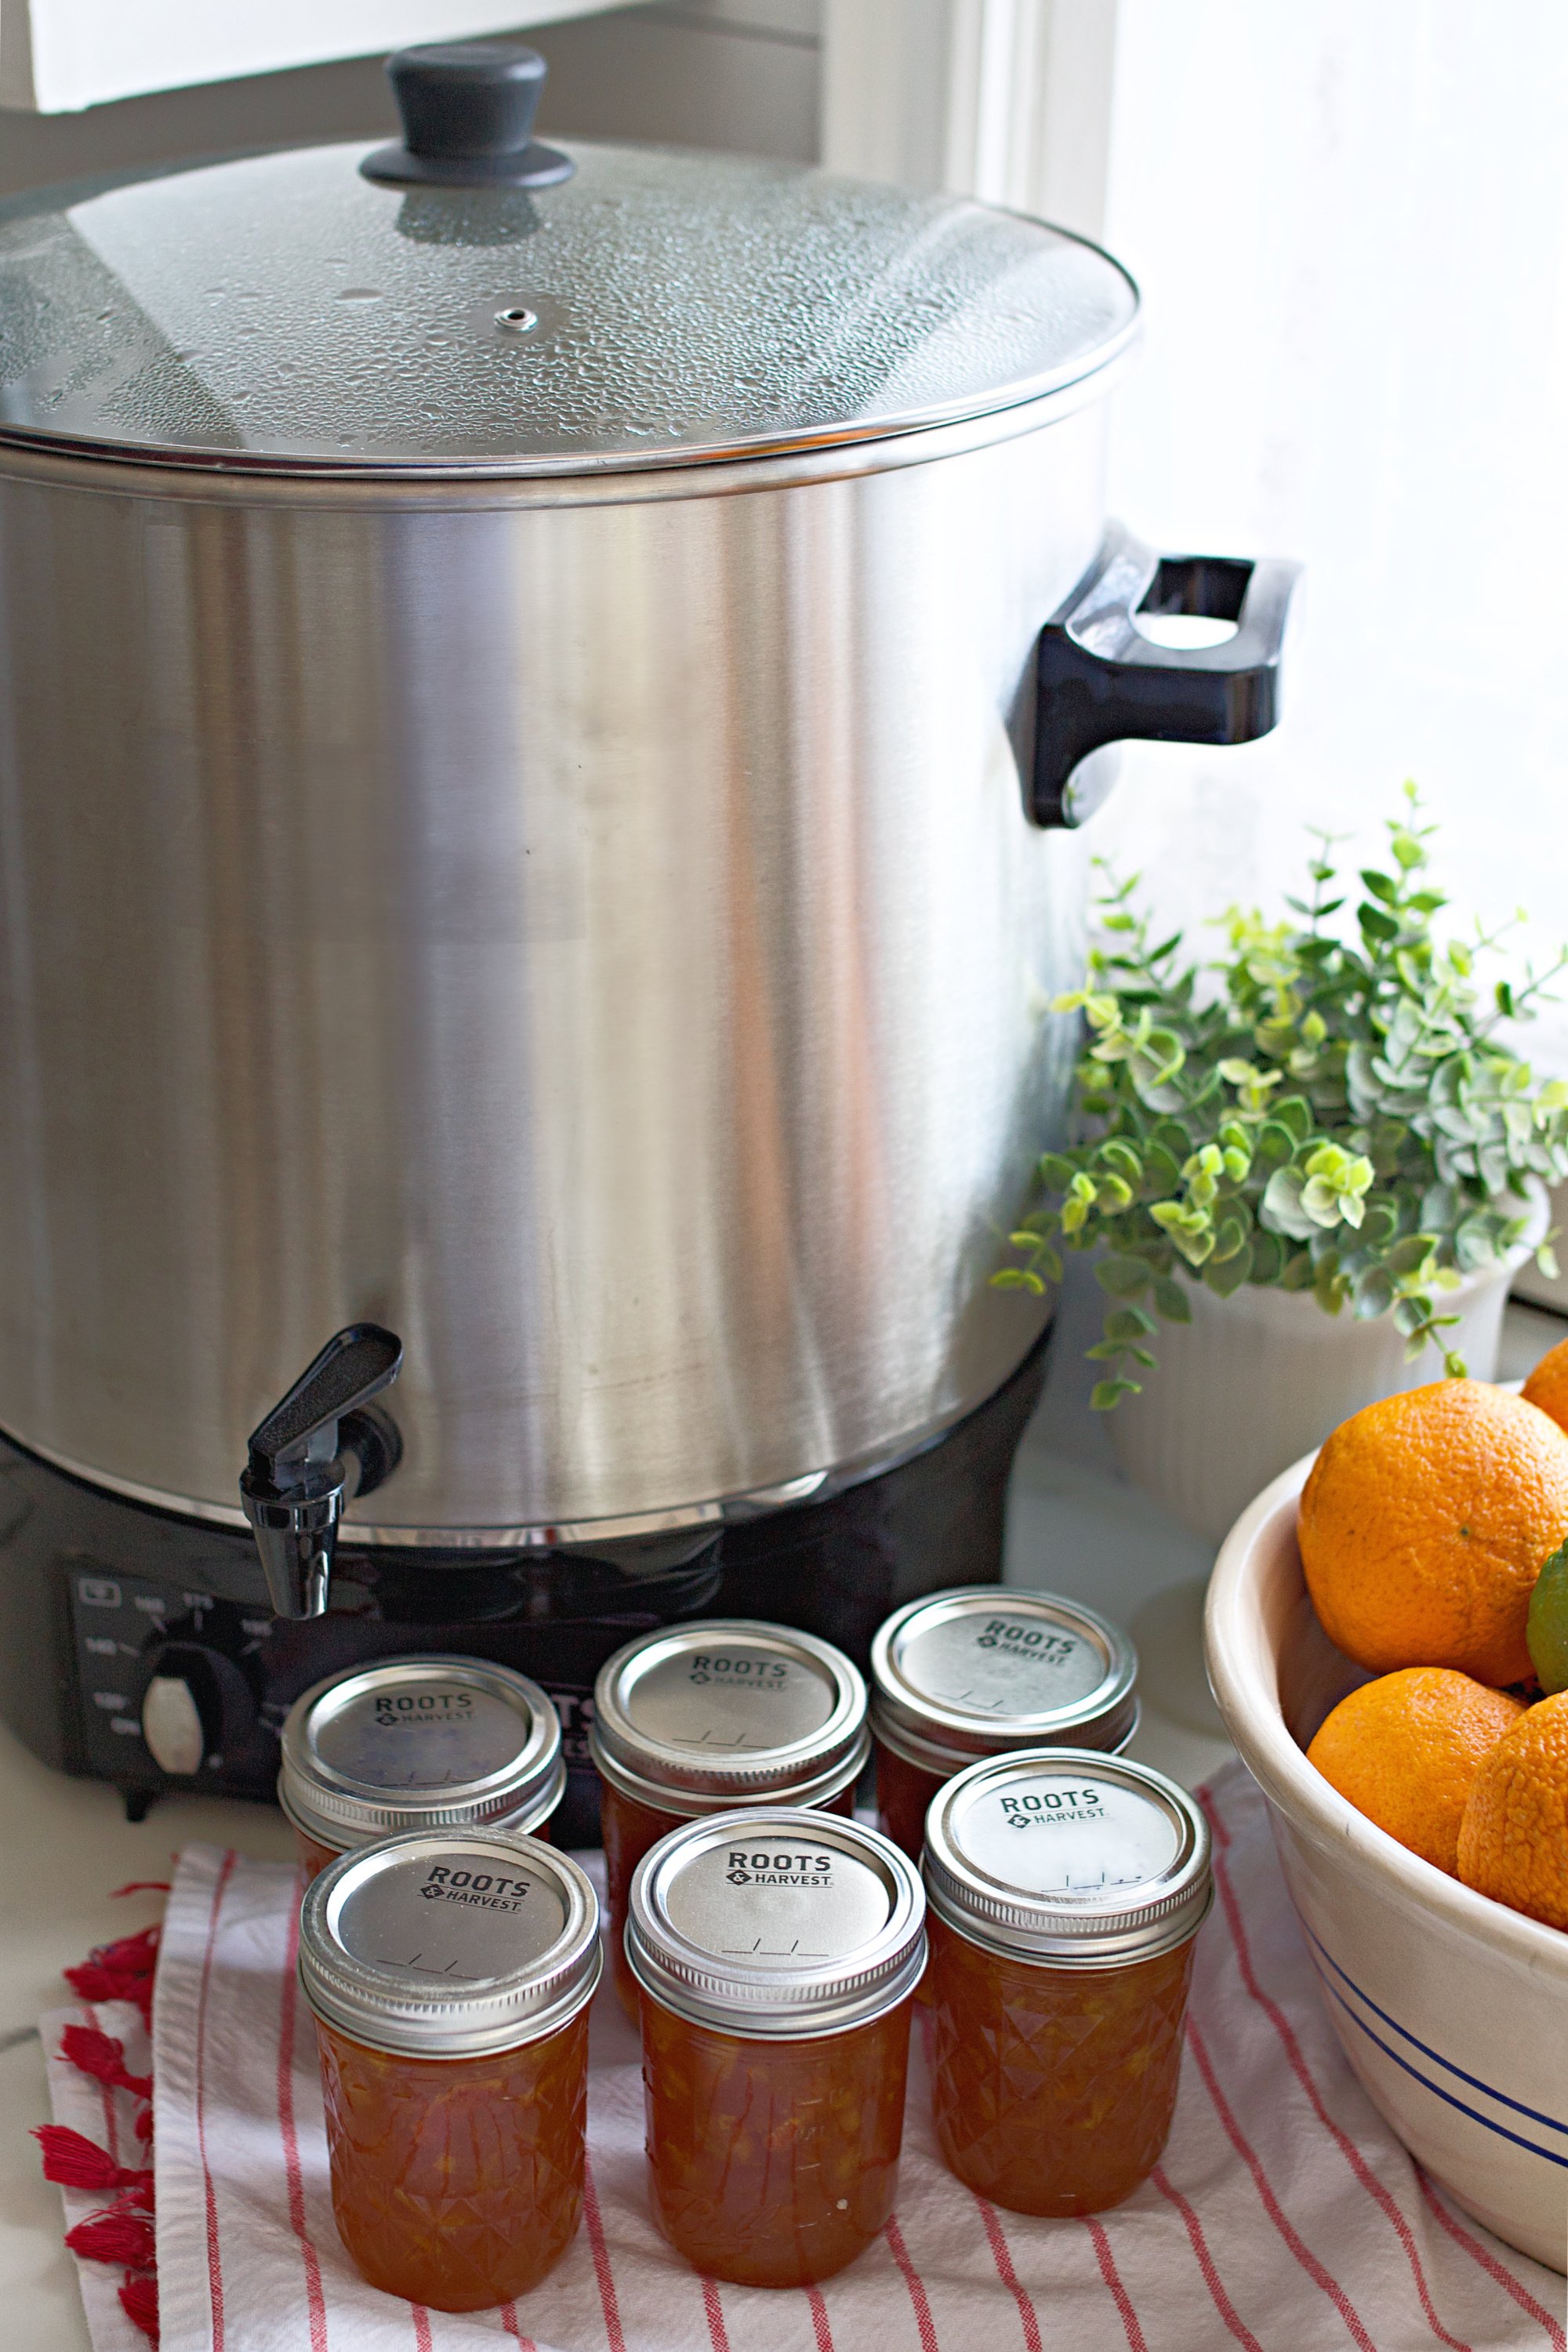
Canning with My Electric Water Bath Canner
When it comes to preserving homemade goodies like this orange marmalade, my electric water bath canner from Roots & Harvest is my go-to tool, and honestly, my favorite way to can. It makes the entire process so much easier and more efficient, no more hovering over a stovetop trying to keep the water at just the right temperature. With its built-in temperature control and large capacity, I can process multiple jars at once, ensuring perfect vacuum seals every time. If you're new to canning or looking for a reliable upgrade, I can't recommend this canner enough. (This post is in partnership with Roots & Harvest, a brand I trust for all things homesteading!)
FAQ About Orange Marmalade
Marmalade uses the entire citrus fruit, including the peel, while jam is typically made with fruit flesh only.
Bitterness comes from the peel and pith. Soaking the fruit overnight helps soften the peel and balance the flavor.
Yes. You can reboil it and cook longer until it reaches the proper temperature.
No. Citrus naturally contains pectin, especially when using lemons and whole oranges.
It thickens as it cools and will fully set within 24 hours, with many batches setting in about 12 hours.
How to Store Homemade Orange Marmalade
- Water bath canned: Shelf-stable for up to 1 year
- Refrigerated: Store opened jars in the fridge for up to 3 weeks
- Frozen: Can be frozen for longer storage if not canned, up to 12 months in a freezer safe container.
Always store jars in a cool, dark place and check seals before use.
Other Fruit Recipes To Try:

Orange Marmalade Recipe
Ingredients
- 3 fresh oranges we used sumo oranges, but any type of orange works!
- 1 lemon adds natural pectin and a hint of tartness (optional)
- 6 cups of water
- 6 cups of sugar
Instructions
- Wash and Prepare the Fruit: Wash oranges and the lemon thoroughly in hot soapy water to remove any wax or residue. No need to peel the oranges, just chop the whole fruit into small chunks, discarding any seeds. The orange rind, pith, and flesh will all cook together, giving the marmalade its classic flavor and texture.
- Soak the Fruit Overnight: In a medium saucepan, combine the orange chunks, lemon juice, and 6 cups of water. Heat to boil. Once boiling, remove from heat, cover, and let sit at room temperature overnight. This step helps soften the orange peels and release natural pectin, which will help the marmalade set. It also helps to remove the bitterness from the pulp.
- Cook the Mixture: The next morning, place the saucepan over medium-high heat and bring the mixture to a full rolling boil. Once it boils, reduce to medium heat and let it simmer for 1-1.5 hours, stirring occasionally. The orange mixture will begin to soften, and the peels will become tender.
- Add the Sugar and Simmer: Stir in the 6 cups of sugar, ensuring it dissolves completely. Continue to simmer the mixture on medium heat for another 1-2 hours, or until it begins to thicken and reaches 220°F. Stir frequently to prevent sticking.
- Blend for the Perfect Consistency: Once the marmalade has thickened, use an immersion blender directly in the pot to blend about half of the mixture. This creates a perfect balance-smooth enough to spread easily, but with small pieces of orange rind for texture.
- Perform the Cold-Plate Test: Place a small, frozen plate in the freezer for 5 minutes. Spoon a small amount of marmalade onto the cold plate, wait a few seconds, and push it with a spoon. If the marmalade wrinkles, it's ready!
- Can the Marmalade: Wash jars, lids, and rings in hot soapy water, then sterilize them in boiling water. Ladle the hot marmalade into hot jars, leaving ¼ inch of headspace. Wipe the rims clean with a kitchen towel, place the lids on, and secure the rings.Using a jar lifter, lower the jars into a boiling water bath and process for 10 minutes. Once done, remove the jars and let them cool completely. The vacuum seals will form as they cool.


Instructions were incredibly misleading. “Easy” except you need a specific type of canner, perfect temperature control, and the ability to read between lines. Disappointing. Look elsewhere.
Hi there, I’m really sorry this felt frustrating, that’s never my goal.
Canning does require specific equipment and proper temperature control to be done safely. Those aren’t extras, they’re what prevent spoilage and foodborne illness. I’d rather be very clear about that than risk someone getting sick.
For beginner canners, this is a very simple recipe to help dip their toes into the process once those basics are in place. 🙂
I forgot to boil it before I left it overnight. Can I still prepare it minus the overnight boil.
Yes that's completely fine! Just make sure to boil it in the next step and you should be good.:)
This marmalade is sunshine in a jar! The flavor is bright and tangy, and it spreads like a dream over warm sourdough. I never realized how easy marmalade could be until I made this recipe. It tastes like something straight from an old-fashioned tea room. Absolutely delicious!