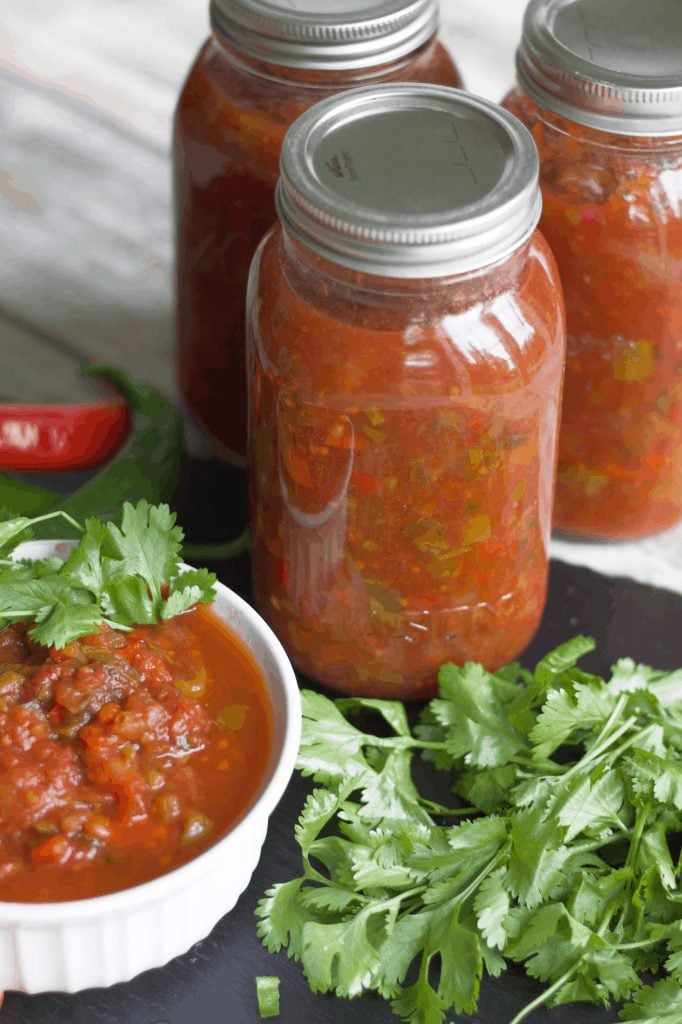
Best Homemade Salsa Recipe for Canning (Step-by-Step)
I have been incredibly blessed to grow up with homemade canned salsa always lining our pantry shelves. Every year at the end of summer, my mom and dad would take a weekend to tag-team the kitchen, canning a massive batch of spicy goodness fresh from the garden.
There is absolutely nothing like cracking open a summer jar of salsa in the dead of winter. If you are looking for the ultimate way to use up a bumper crop of fresh Roma tomatoes, this step-by-step guide will walk you through the water-bath canning process seamlessly. And when you're done with this recipe use your leftover tomatoes to whip up a batch of this delicious homemade canned pizza sauce, or can your tomatoes whole or halved.
A Quick Look at This Canned Salsa Recipe
- 🍅 Texture: Perfectly chunky and robust with thick, meaty pieces of Roma tomatoes, finely diced onions, and crisp garden peppers.
- 🏡 Style: Traditional, scratch-made farmstead canning passed down through generations, balanced perfectly for water bath safety.
- ⏱️ Time: 1 hour active prep (washing, peeling, chopping), 20+ minutes simmering, and 15 minutes processing.
- ☀️ Best For: Preserving a massive late-summer garden tomato harvest, effortless holiday gifting, and cracking open fresh summer flavor in the dead of winter.
A Family Tradition born in the Heat
My parents have always been big canners. My dad has a lifelong passion for gardening, tending his plot all year long. Come harvest time, he and my mom would tag-team the kitchen to put up the ultimate salsa recipe to get us through another year. While they tried different variations every now and again, this bold, simple recipe is the one they always came back to.
Ingredients
Choosing the right produce makes all the difference when preservation canning. Plum or paste tomatoes like Romas or San Marzanos are the absolute best choice because of their dense, meaty texture, low moisture content, and well-balanced natural sugars and acids. Sweeter onions like Vidalia or red onions add a beautiful, crisp crunch without being sharp, while apple cider vinegar provides the mandatory safety acidity alongside a mellow depth of flavor.
- Tomatoes (Roma or paste varieties)
- Onions (Sweet or red)
- Hot Peppers (Jalapeño and Anaheim)
- Bell Peppers
- Apple Cider Vinegar (5% acidity)
- Canning Salt
- Black Pepper
- Fresh Cilantro
Instructions
I remember walking into the kitchen during salsa canning weekends and barely being able to breathe! The fresh onions and hot jalapeños being sliced would make the air thick with heat, and my eyes would instantly water. But we couldn't be without our hot salsa-corn chips and salsa were daily snacks in our home.
Step 1: Prep and Scald Tomatoes
Gently cut an "X" into the bottom of each tomato. Lower them into a large pot of rolling boiling water for about 10-20 seconds until you see the skin roll back from the "X." Immediately transfer them to an ice water bath. Grab the skin-it should slide right off. Chop the skinless tomatoes and place them in a large stockpot to begin simmering and cooking down.
Step 2: Chop and Add Produce
While the tomatoes are simmering, finely chop your onions and peppers. (Always wear gloves during this step!). Add the chopped onions, peppers, canning salt, black pepper, and apple cider vinegar to the simmering tomatoes.
Step 3: Cook to Desired Thickness
Simmer all the produce together until you achieve your preferred thickness. Depending on how juicy your tomatoes are, this may take up to a few hours to reduce down nicely. If you are using cilantro, stir it in during the last few minutes. Once thick, let the mixture undergo a low boil for 10 minutes.
Step 4: Water Bath Process
Pack the hot salsa into clean, hot quart jars (or pint jars for easy gifting), leaving a ½-inch of headspace. Wipe the rims completely clean, apply the lids, and twist the bands to fingertip tight. Process for 15 minutes in a simmering hot-water bath canner.
Hint: When processing is done, remove the canner lid and allow the water to come to a complete stop before lifting the jars out. Place them on a folded kitchen towel on the counter, cover with another towel, and leave undisturbed for 12-24 hours. You'll hear that sweet "ping!" of success over the next few hours!

Substitutions
If you need to adjust this recipe based on what you have growing in your garden or due to dietary restrictions, here are a few tested options:
Onions - White onions or yellow cooking onions can seamlessly replace sweet or red onions without affecting the safety or chemistry of the can.
Peppers - If you don't have access to Anaheim peppers, you can swap them one-for-one by weight with extra bell peppers for a milder batch, or more jalapeños if you want it extra spicy.
Variations
Growing up, my dad would eat this salsa roaring hot with nothing added, whereas my mom, my sister, and I loved to add a dollop of sour cream to our bowls to smooth out the fiery bite. Here are a few ways you can customize your jars to suit your family's palate:
Pantry Play Style - Want to recreate our childhood pantry favorites? Use a perfect mix of red, yellow, and green peppers to make the prettiest, most colorful jars on your shelves.
Extra Spicy - Keep the seeds entirely inside your jalapeños when chopping them, or throw a couple of finely minced habaneros into the pepper weight mix.
Mild & Sweet - Core and completely deseed all of your jalapeños and Anaheims, and lean heavily into sweet red and yellow bell peppers for your 4-pound pepper total.

Equipment
Using a proper heavy-bottomed stainless steel stockpot is incredibly important for this recipe; thin aluminum pans can easily scorch the tomatoes during a long reduction simmer.
You will also need a standard Water Bath Canner with a Rack and a reliable Canning Essentials Toolkit, which includes a jar lifter and a headspace measuring tool to make sure your processing day runs seamlessly.

Storage
When properly processed and sealed, your homemade canned salsa will safely last in a cool, dark place like a pantry or cellar for up to 1 year.
Always check that the lids are properly indented before placing them on your shelves. If a jar fails to seal during the cooling process, simply pop it straight into the refrigerator and consume it fresh within 2-3 weeks.

Top Tip
Never change the overall weight proportions of tomatoes, peppers, and onions when canning salsa. Keeping a precise 10:4:2 pound ratio ensures that the pH environment remains highly acidic and completely safe from botulism. If you want to experiment with heat, you can safely swap hot peppers for mild peppers, but never alter the total weight of the vegetables!
FAQ
Yes! You can pulse your peppers and onions in a food processor to save time. Just be careful not to over-process them into a puree, or your finished canned salsa will lose its signature chunky texture.
Bottled vinegar has a guaranteed, regulated 5% acidity level, which is critical for safe water bath canning. Fresh limes can vary significantly in acidity, which can throw off the safe pH level of your jars.
You may also enjoy:


The Easy and Best Homemade Salsa Recipe for Canning
Ingredients
- 2 lbs Onions
- 4 lbs peppers of choice: Jalapeños, Anaheim, Bell Peppers, of a mix of all three.
- 10 lbs Tomatoes
- 6 teaspoon Salt
- 1 teaspoon Pepper
- 2 cups vinegar
- ¼ cup Cilantro Diced Optional
Instructions
- Begin by peeling or scalding off the skins of the tomatoes if desired. Finely chop the 10 pounds of fresh tomatoes and place them in a large stockpot, initiating a simmer to reduce the tomatoes.
- While the tomatoes simmer, finely chop the 2 pounds of onions and 4 pounds of peppers of your choice. For those with sensitive skin, use gloves and ensure thorough handwashing before any contact.
- Add the chopped onions, peppers, and other ingredients (6 teaspoon salt, 1 teaspoon pepper, 2 cups vinegar) to the simmering tomatoes. Allow the mixture to simmer until your preferred thickness is achieved; this may take a few hours. If using cilantro, it's best added towards the end of the process. Once the desired thickness is attained, let the mixture undergo a low boil for 10 minutes.
- Pack the salsa into clean, hot quart jars, or adjust the quantity by halving the recipe and using pints if preferred, leaving a ½-inch headroom. Seal the jars and process them for 15 minutes in a simmering hot-water bath. This process ensures a safe seal, and a flavorful and well-preserved homemade salsa.
Notes
Nutrition
About Eryn
Eryn Whalen is a homestead blogger and recipe developer with a lifetime of hands-on experience in gardening, home canning, animal husbandry, and traditional kitchen skills. From preserving homegrown harvests to baking sourdough from scratch, she shares her family's journey of intentional living on their 100-acre Tennessee farmstead. Recently, Eryn has expanded her homesteading life to include caring for a family milk cow, sharing the learning process and daily joys of small-scale dairying. Read more about Eryn here


Just wondering, if you wanted to do lemon juice instead of vinegar…would you do equal amounts or how much bottled lemon juice should I do?
Hi Eva, that’s a great question! For water bath canning, vinegar is used because it guarantees the salsa has enough consistent acidity to keep it safe on the shelf. Bottled lemon juice doesn’t have the same pH level as vinegar, and using it in place of vinegar could make the recipe unsafe for long-term storage.
The good news is, the vinegar flavor really mellows out during processing and storage - you won’t notice a strong “vinegary” taste in the finished salsa. It just tastes fresh and delicious.
If you’d prefer a recipe that specifically calls for bottled lemon juice, I’d recommend finding one that’s tested and written with that in mind. For this recipe though, vinegar is the best option to make sure it’s both safe and shelf-stable. - Eryn 🙂
Hi! Can white vinegar be used? Or is that too strong? Thank you!
Hi! Yes, you can use white vinegar, but it does have a sharper flavor than what the recipe calls for.
If you go that route, I’d recommend sticking to the same amount for safety, but just know the finished salsa may taste a bit more tangy. Some people like that, others find it a little strong.
If you want a milder flavor, the original vinegar listed will give you a more balanced result.- Eryn 🙂
Why no garlic? Is there a problem with canning?
You can definitely add a few cloves! It's just not part of the traditional recipe we use in our home, but there is no harm in adding a few cloves! I'd recommend 8 to start and see how the flavor works for you. 🙂
Can you add cilantro?
Of course you can! 🙂
So delicious and a perfect amount! Thank you!
Recipe Only calls for aneheim. Can I use bell and jalapeños and keep it at 4 lbs.
Yes that's completely fine. 🙂
Finally! A recipe using quart jars - thank you!! I've had a devil of a time finding a recipe that doesn't "only" suggest pints.
Pint jars just aren't big enough for how much salsa we go through in our house! 😉 Quart is where it's at!
YESSSSSSSSSSSSSS!
I need this in my life! Thanks for the amazingness friend!
karianne