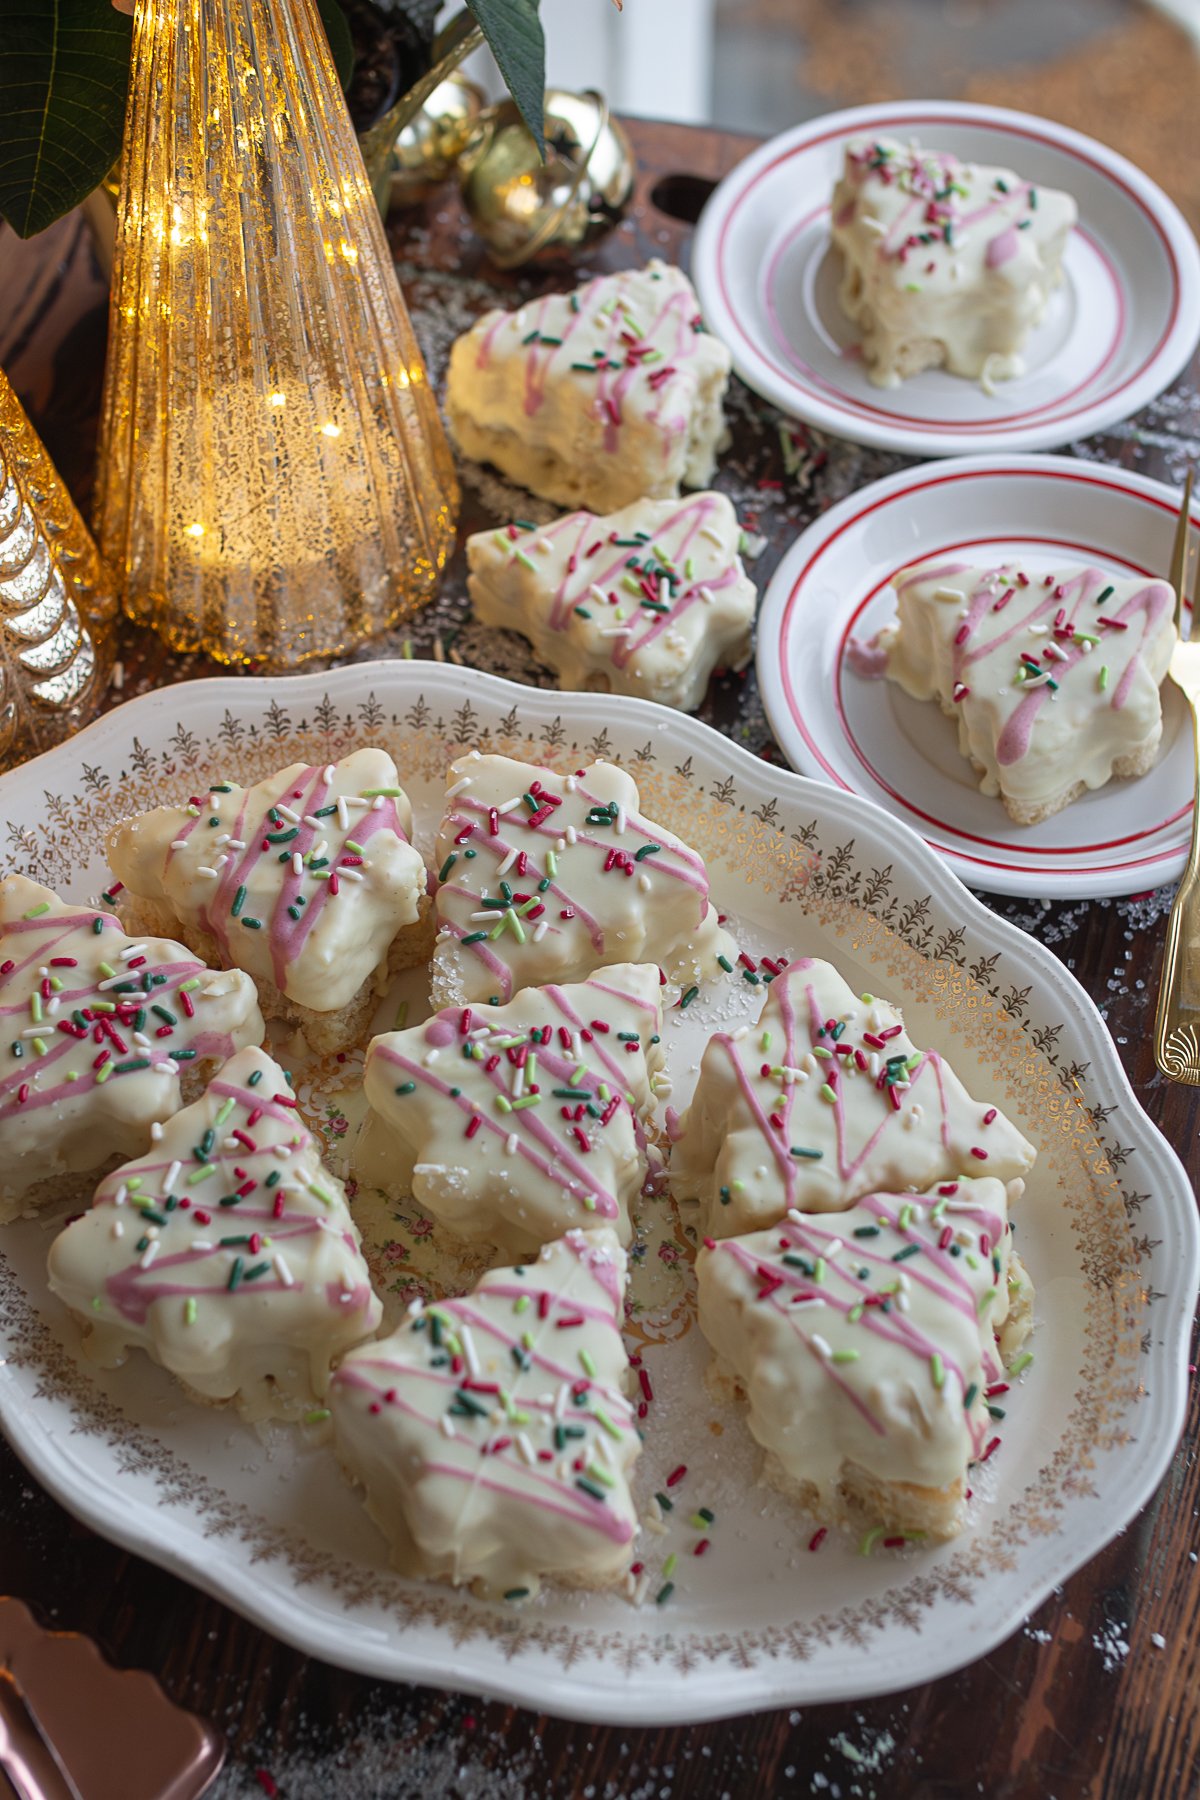
Homemade Christmas Tree Cakes | Clean Ingredients, No Artificial Dyes or Flavors
The kitchen always feels a little brighter as Christmas gets close. Around here, the days are busy with baking and preparations. And there's something sweet about whipping up a treat during this festive time that feels straight out of childhood. These Homemade Christmas Tree Cakes bring back every bit of that nostalgia, only this time, made entirely from scratch with no artificial flavors, no artificial dyes, and ingredients you can find at any grocery store.
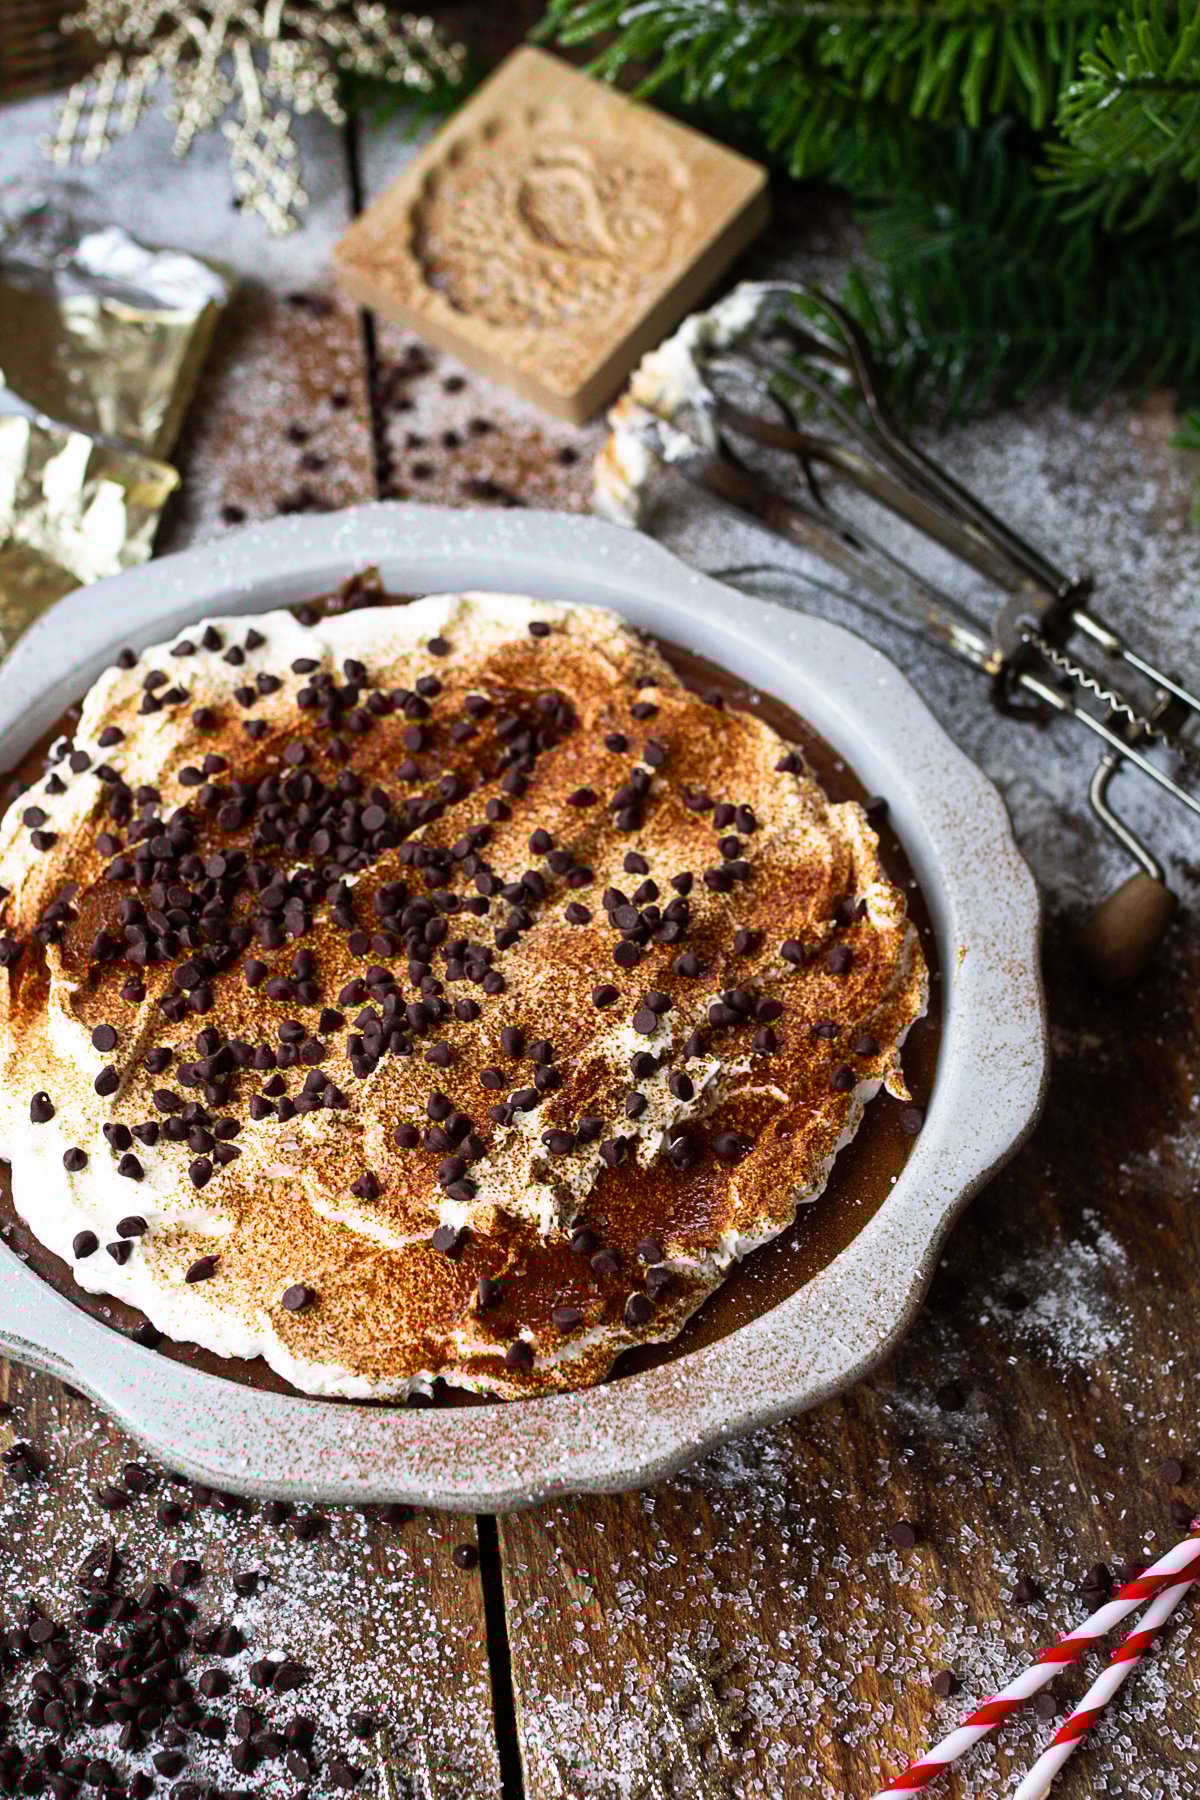
If you grew up eating those iconic Little Debbie snack cakes, this copycat version tastes like the best parts of the original, only cleaner, softer, and made with real ingredients. And if you love nostalgic holiday baking, you might also enjoy the Best French Silk Pie Recipe, DIY hot chocolate spoons, or meltaway brownie cookies.
Quick Look
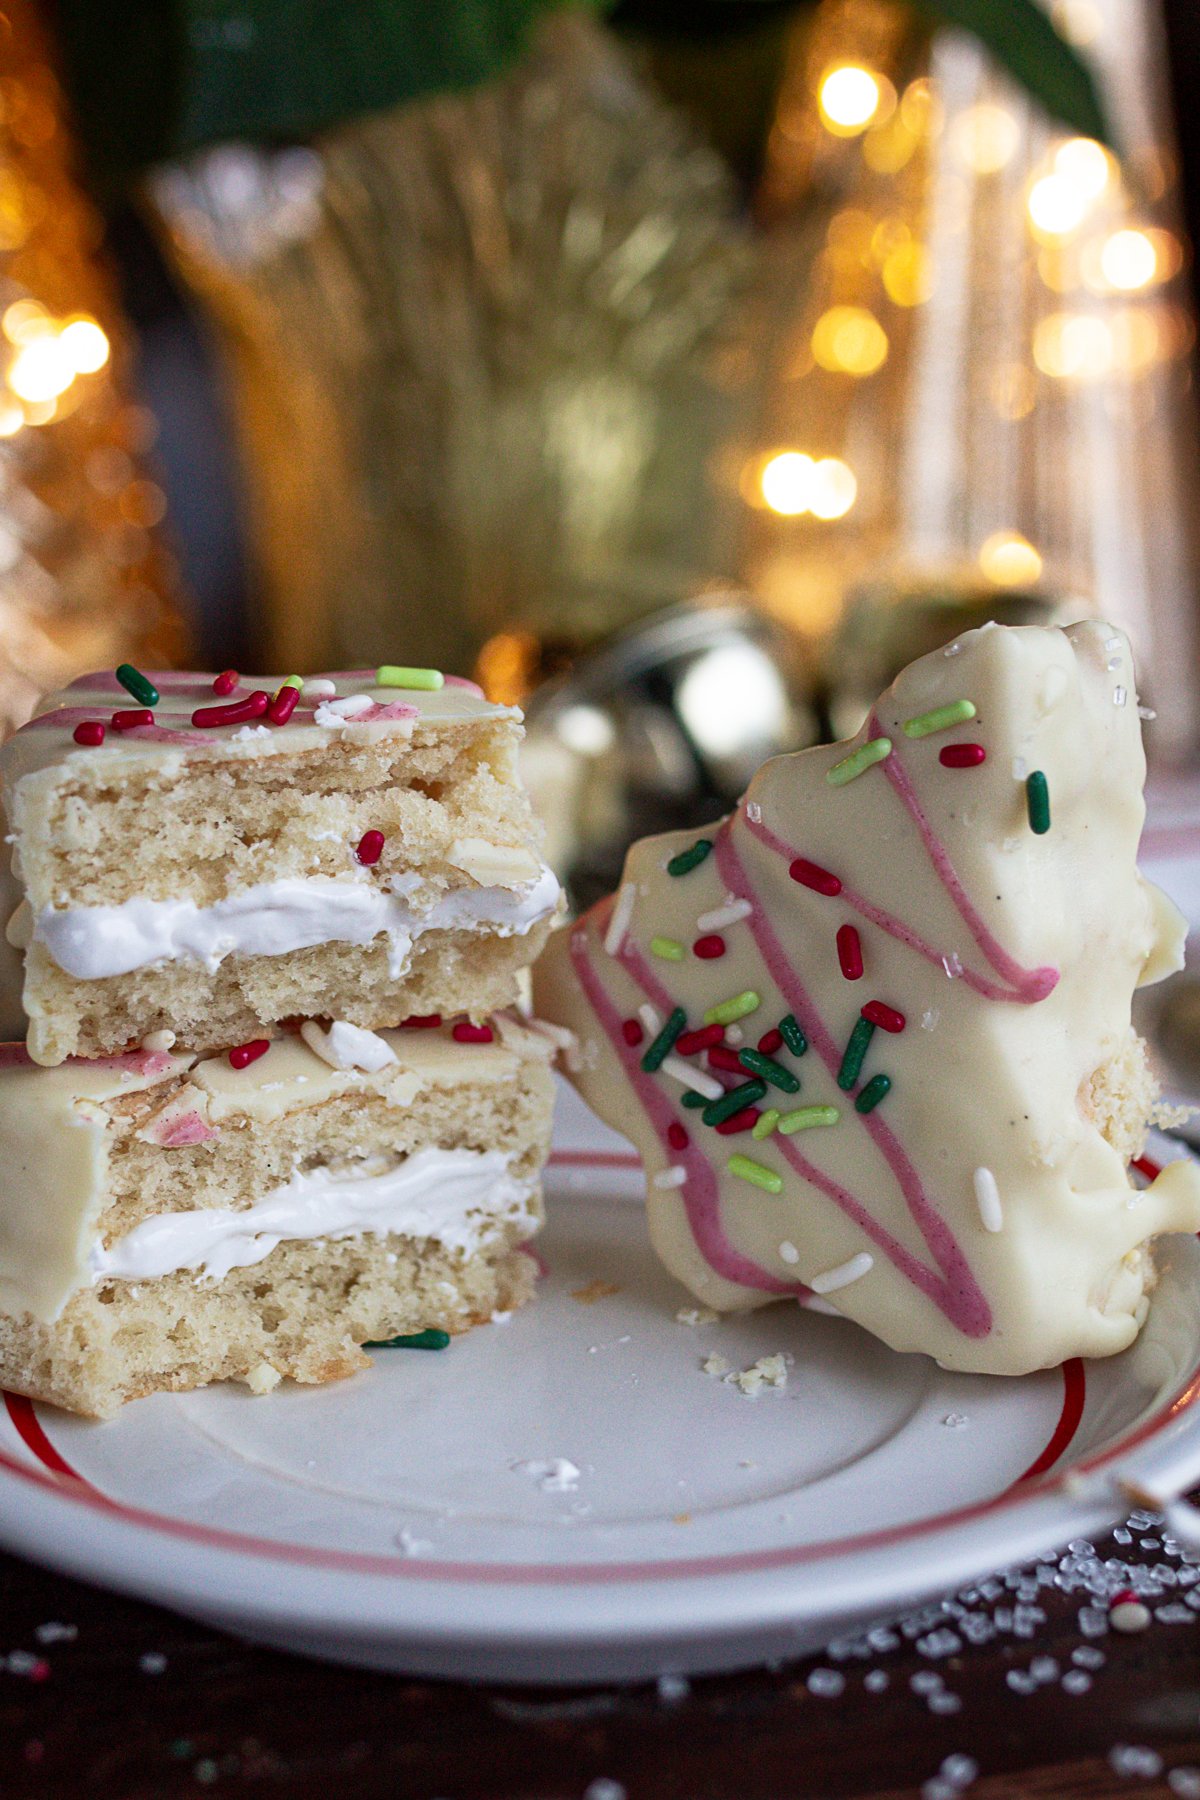
Flavor: soft vanilla sponge cake, fluffy center, creamy white chocolate shell
Time: about 1 hour baking + assembly
Cost: moderate
Baking Temp: 350°F
Texture: tender cake + marshmallow-light filling
Skill Level: intermediate
Best For: the holiday season, kids' treats, gifting
Pro Tip: freeze the cut cakes before dipping - helps the coating set perfectly without crumbs and keeps the top of the filling smooth
SUMMARIZE & SAVE THIS CONTENT ON
Why You'll Love These Homemade Christmas Tree Cakes
These Homemade Christmas Tree Cakes are everything people love about the store-bought classic, only better. The cake stays soft thanks to buttermilk and sour cream, the filling is that nostalgic cloud-light seven-minute frosting, and the coating is silky melted white chocolate instead of artificial "white coating."
And unlike packaged versions, these are:
- 100% artificial-dye free (a pinch of beet powder gives the classic frosting lines)
- 100% artificial-flavor free. Quality Vanilla Extract helps so much here.
- dipped in real white chocolate, not melted candy coating
- topped with natural dye sprinkles
- crafted with simple, wholesome ingredients
Holiday treats don't need perfection, just heart, flavor, and the real deal ingredients that make them memorable. These check every box and are a great thing to add to your cookie trays.
Ingredient Notes + Substitutions
High-quality white chocolate
Use chocolate made with cocoa butter instead of white chocolate chips or almond bark. It melts smoother and gives a cleaner flavor.
Beet powder
Creates bright red cookie icing stripes without food coloring.
Natural sprinkles
Naturally dyed options still give the classic look from last year's boxed cakes.
Buttermilk + sour cream
Creates that soft, tender homemade cake texture Little Debbie is known for.
Avocado oil or coconut oil
Keeps the cake moist and helps thin the melted chocolate for dipping.
Seven-minute frosting
The fluffy cream filling that gives the cakes their signature bite. Beat on medium speed, then high speed until glossy peaks form.
Step-by-Step: How to Make Them

- Step 1: Mix the Cake Batter: Start by creaming the butter and sugar together until pale, fluffy, and well aerated. This step matters more than it seems, taking the time here gives the cake its light, tender texture. Add the avocado oil next, followed by the eggs, mixing well. Scrape down the bowl as needed, then blend in the vanilla extract.
- In a separate bowl, whisk together the flour, baking powder, baking soda, and salt. With the mixer on low speed, begin adding the dry ingredients to the batter, alternating with the sour cream and buttermilk. Mix just until everything is incorporated and smooth. Avoid overmixing; you want a soft, pourable batter with no dry pockets, but not one that's been beaten excessively.
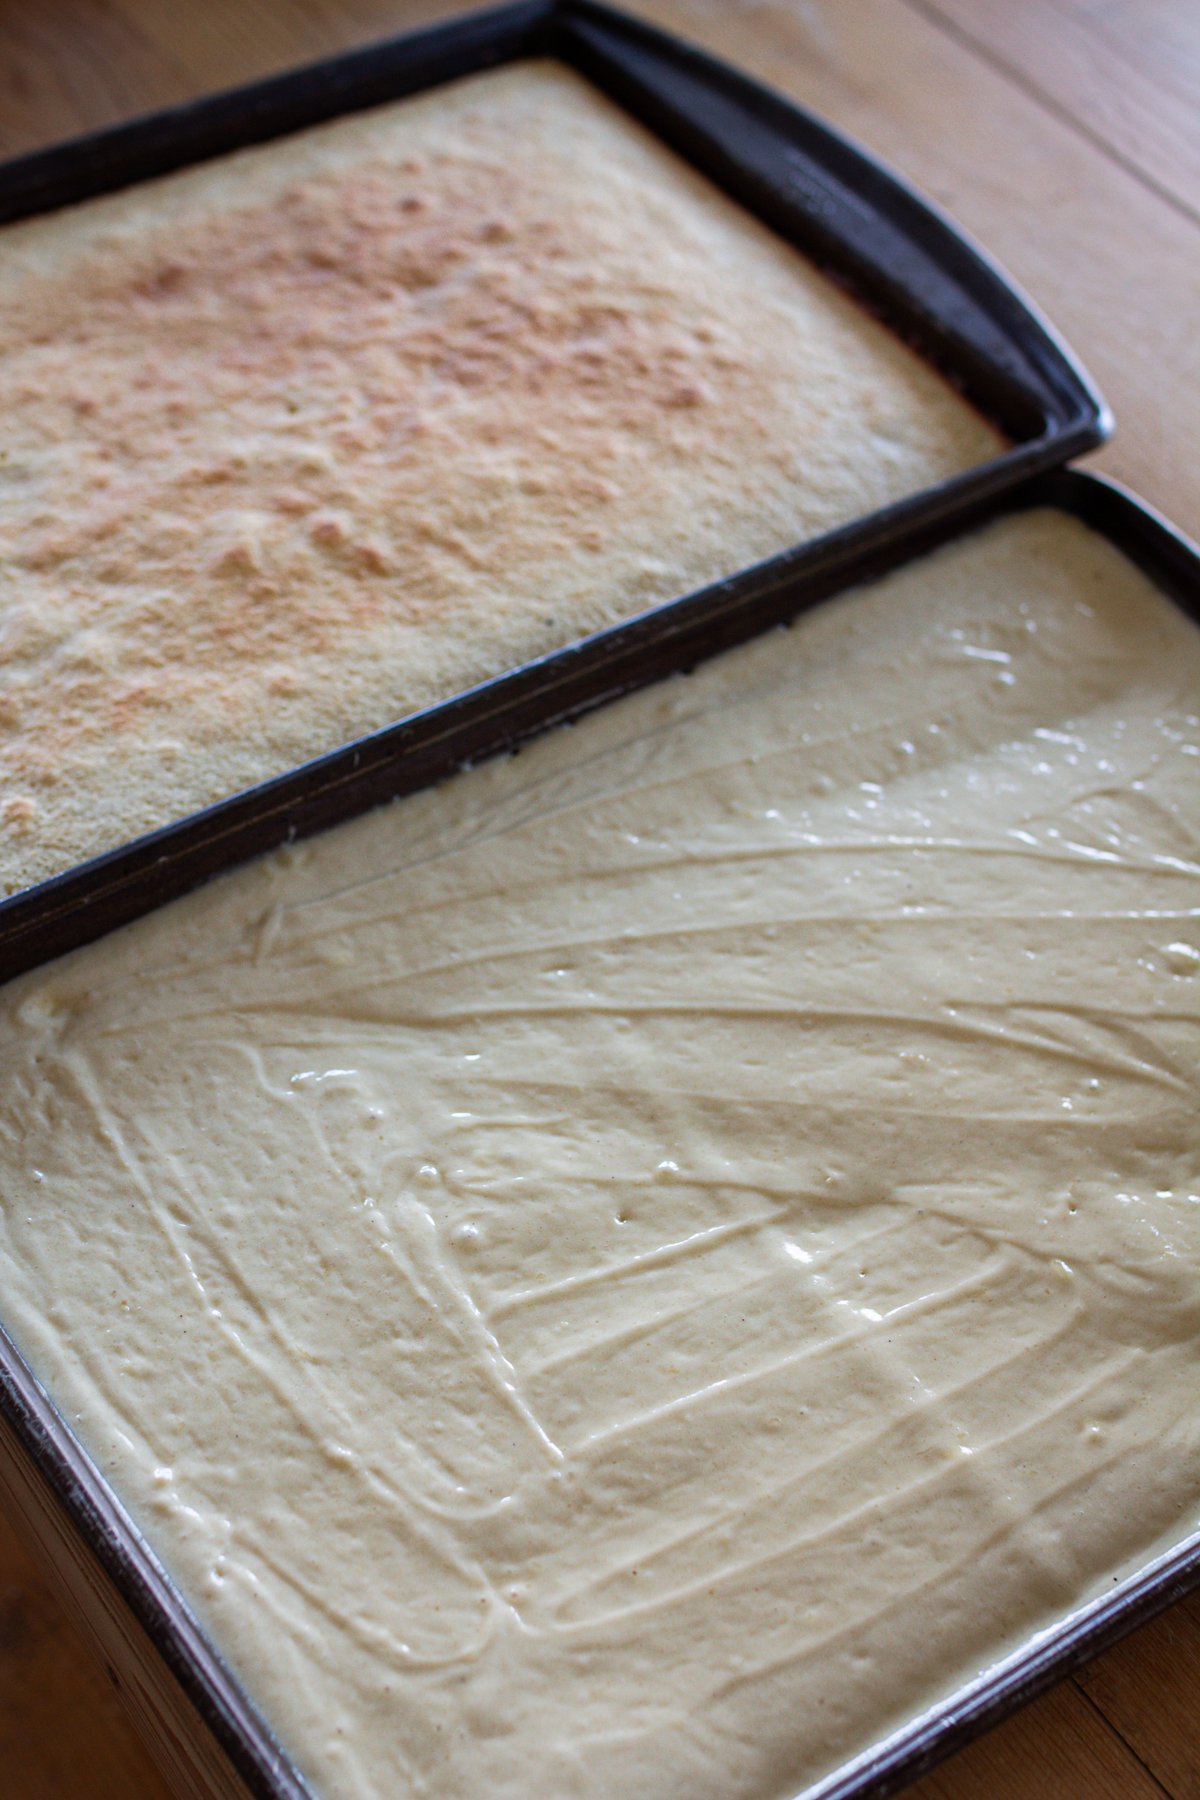
- Step 2: Prepare the Cake Layers. Divide the batter evenly between two parchment-lined baking sheets, spreading it into thin, even layers. Smooth the tops as much as possible, then gently tap the pans on the counter to release any air bubbles.
- Because these layers are thin, they bake quickly. Bake for 10-12 minutes, just until the center comes out clean when tested with a toothpick. The cake should be set but still soft and springy, not browned.
- Chill, Cut, and Prepare the Filling
Once the cake layers have cooled, place them in the freezer for a short chill. This step isn't required, but it makes a noticeable difference, firmer cake layers cut more cleanly with the tree-shaped cutter and hold their shape beautifully. While the cake chills, prepare the seven-minute frosting.
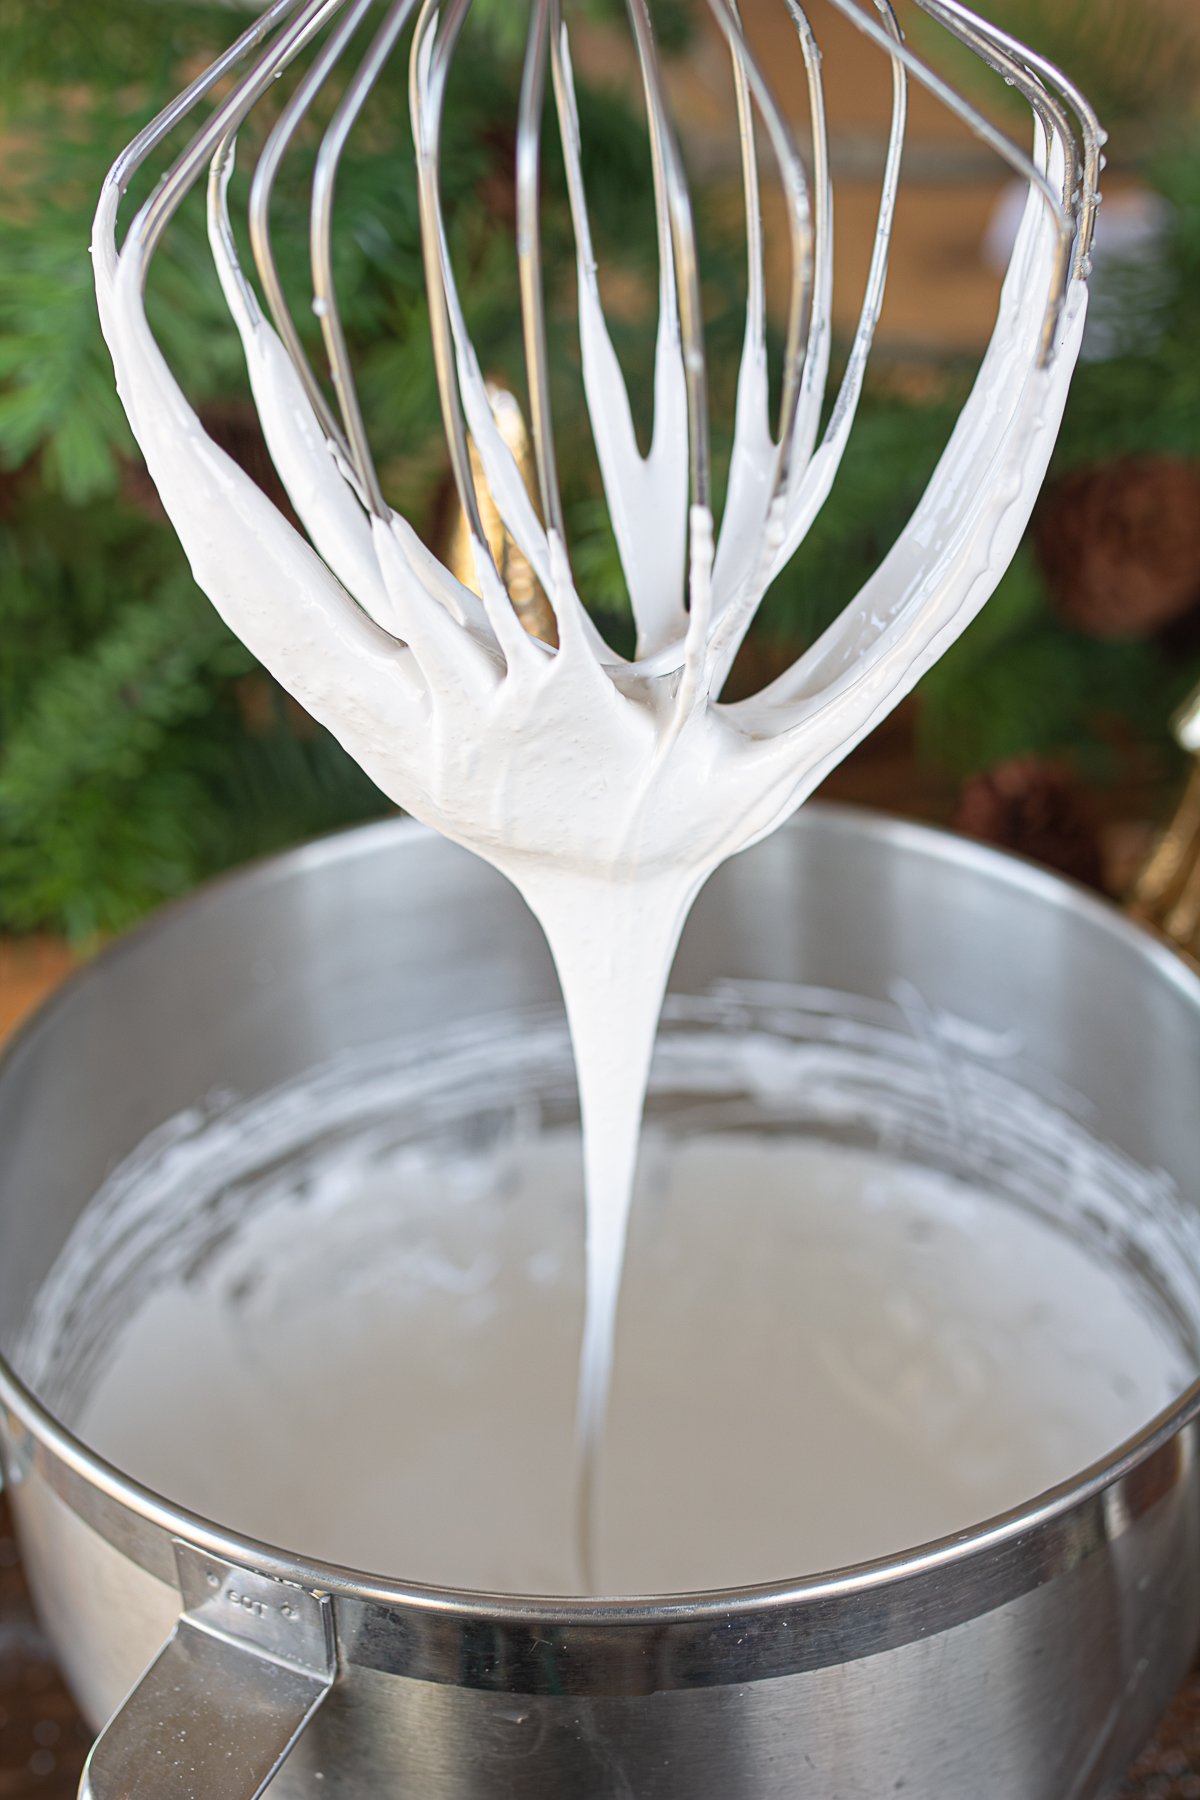
- Step 3: Make the Seven-Minute Frosting Filling: While the cake layers chill, prepare the seven-minute frosting. Add the egg whites, sugar, water, cream of tartar, and salt to a heavy bottom saucepan and set it over medium-low heat. Whisk constantly as the mixture heats, keeping it moving so the egg whites warm gently and evenly. You're looking for the mixture to reach 140°F, with the sugar fully dissolved and the texture foamy but smooth. This step ensures the frosting is glossy, stable, and safe to use.
- Once it reaches temperature, immediately transfer the frosting to your stand mixer. Beat on high speed for a full 7 minutes, until the frosting becomes thick, bright white, and holds soft but sturdy peaks. The bowl should feel cool to the touch by the time it's done. Add the vanilla extract and mix for just a few more seconds to finish.
- For easy assembly, transfer the frosting to a piping bag. I like to set the piping bag inside a quart jar while working, it keeps things tidy and makes filling the cakes much easier as you go.

- Step 5: Fill, Stack, and Freeze Again
Working on parchment paper, place one cake cutout down and add the cream filling to the top. You can spread it gently or use a piping bag for a neater finish. Place the second cake layer on top and press very lightly to seal. Transfer the filled cakes back to the freezer for at least 30 minutes, up to 1 hour. This second freeze is essential, it firms the filling so the cakes stay intact when dipped into the melted white chocolate coating.
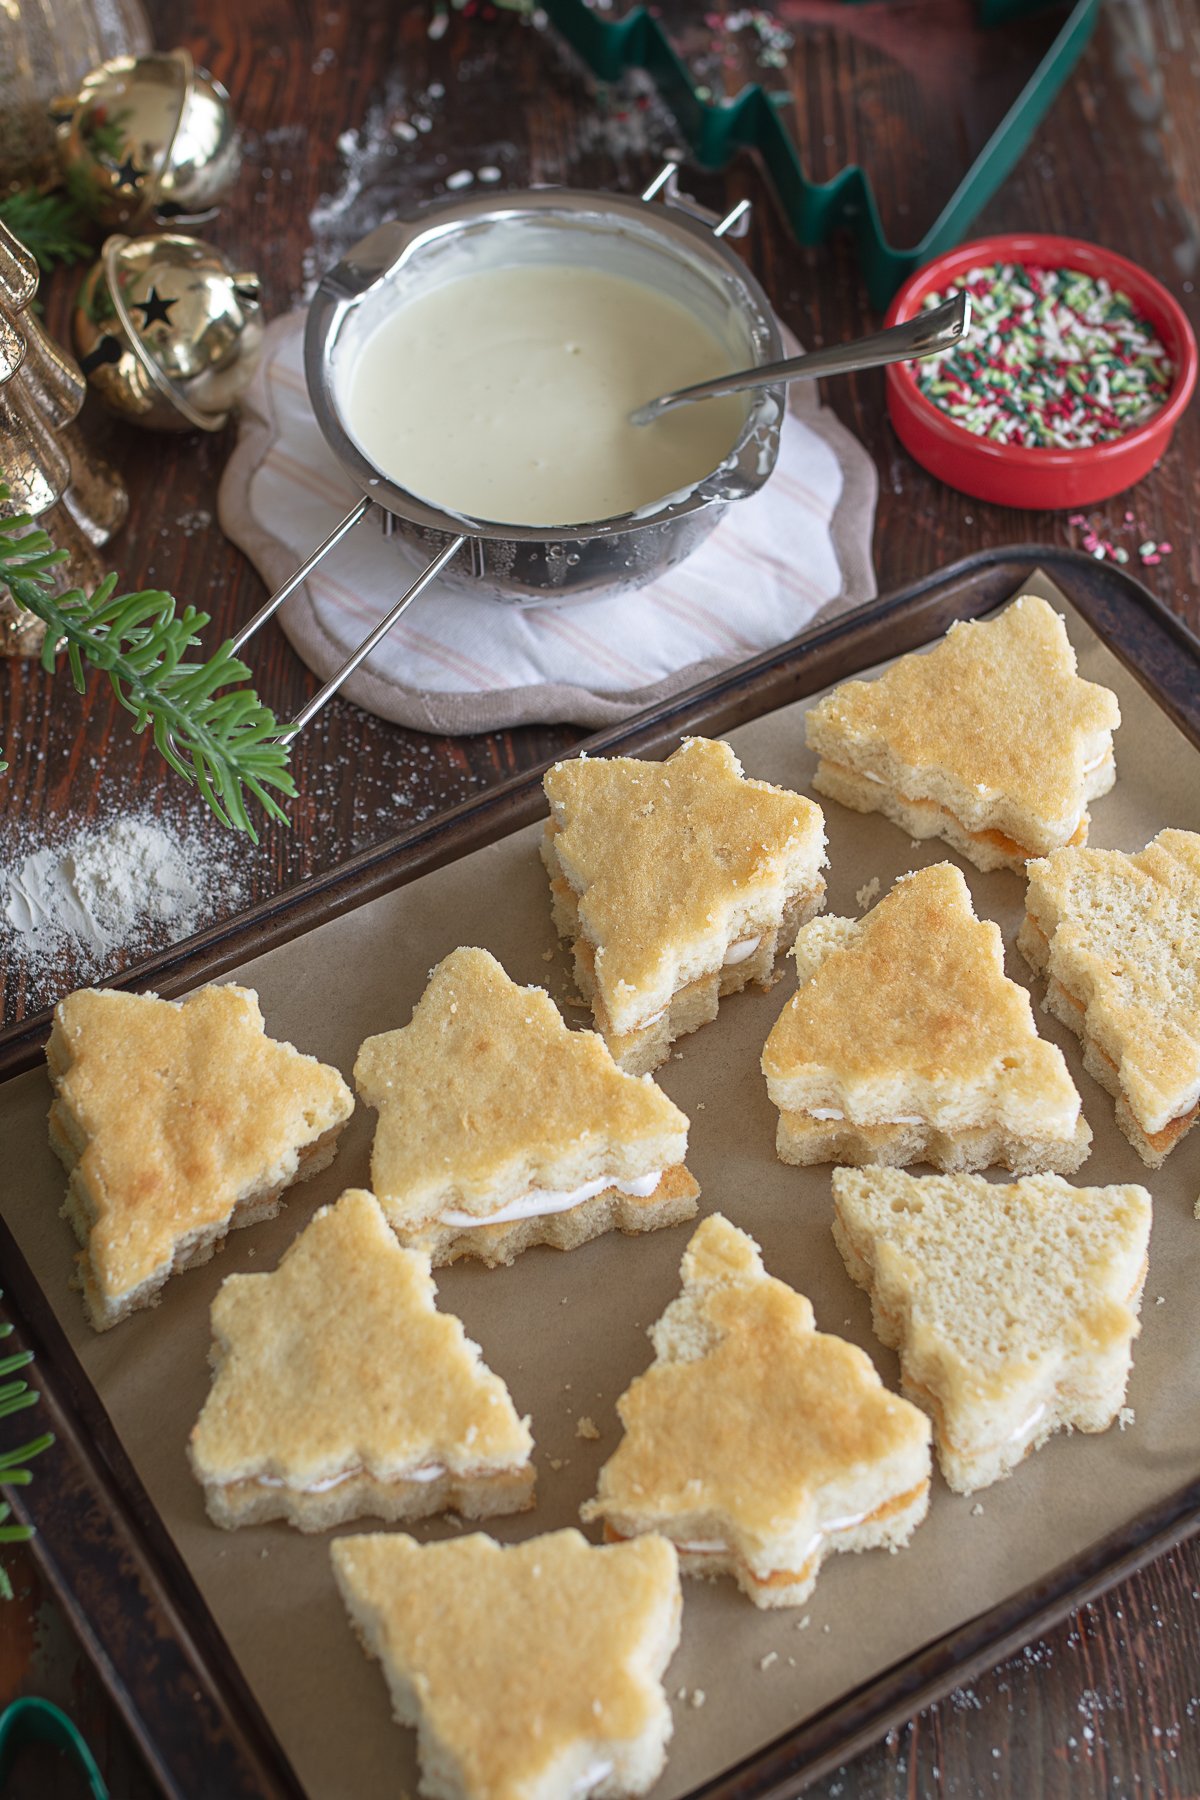
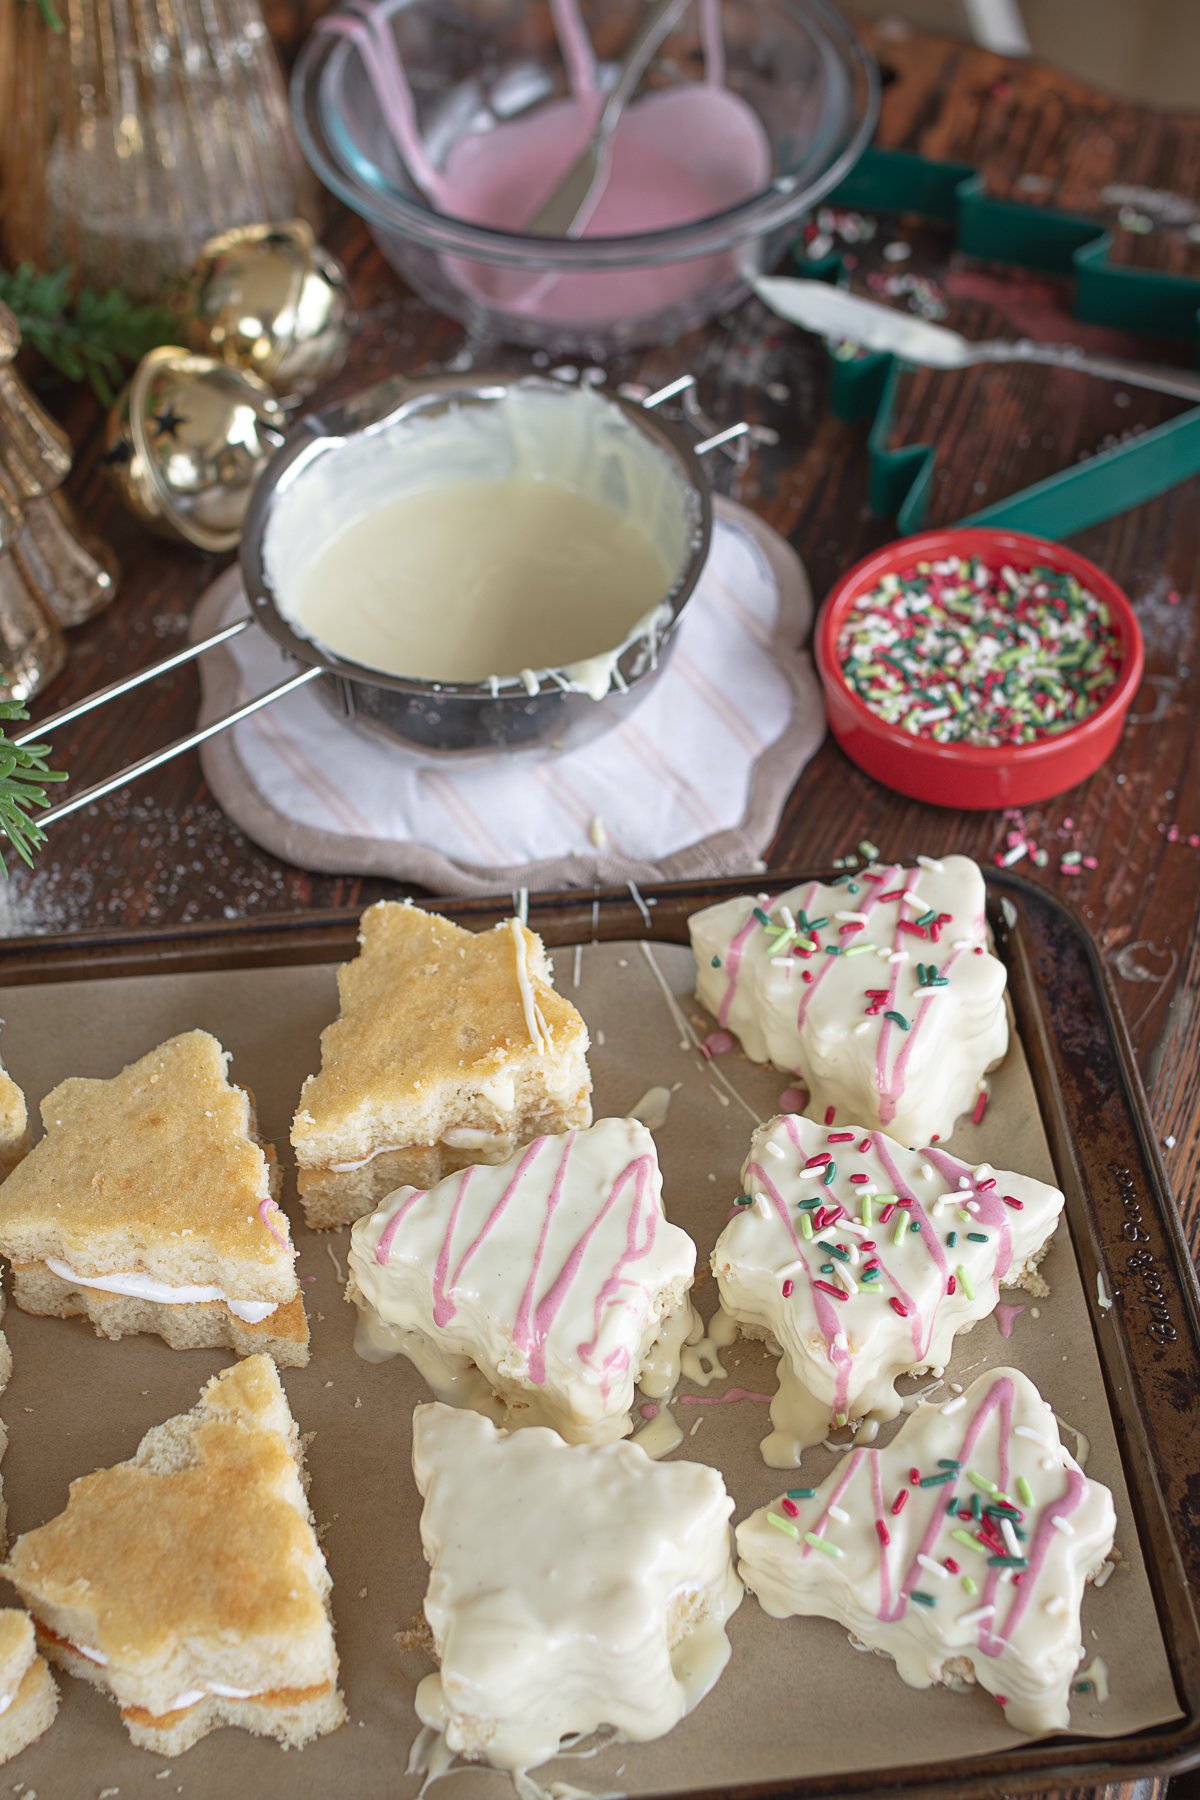
- Step 6: Melt the White Chocolate Coating
While the cakes are chilling, prepare the coating. Melt the white chocolate gently in a double boiler with a small amount of avocado or light olive oil, stirring until smooth and fluid. I found it worked best to melt the chocolate in two batches, my double boiler comfortably holds about 12 ounces at a time, and once you start dipping, you'll go through it quickly. A small dash of vanilla adds warmth and rounds out the flavor.
For reference, it took just under 2 pounds of white chocolate to coat about 22 Christmas tree cakes. Keeping the chocolate fresh and fluid as you work makes dipping much easier.
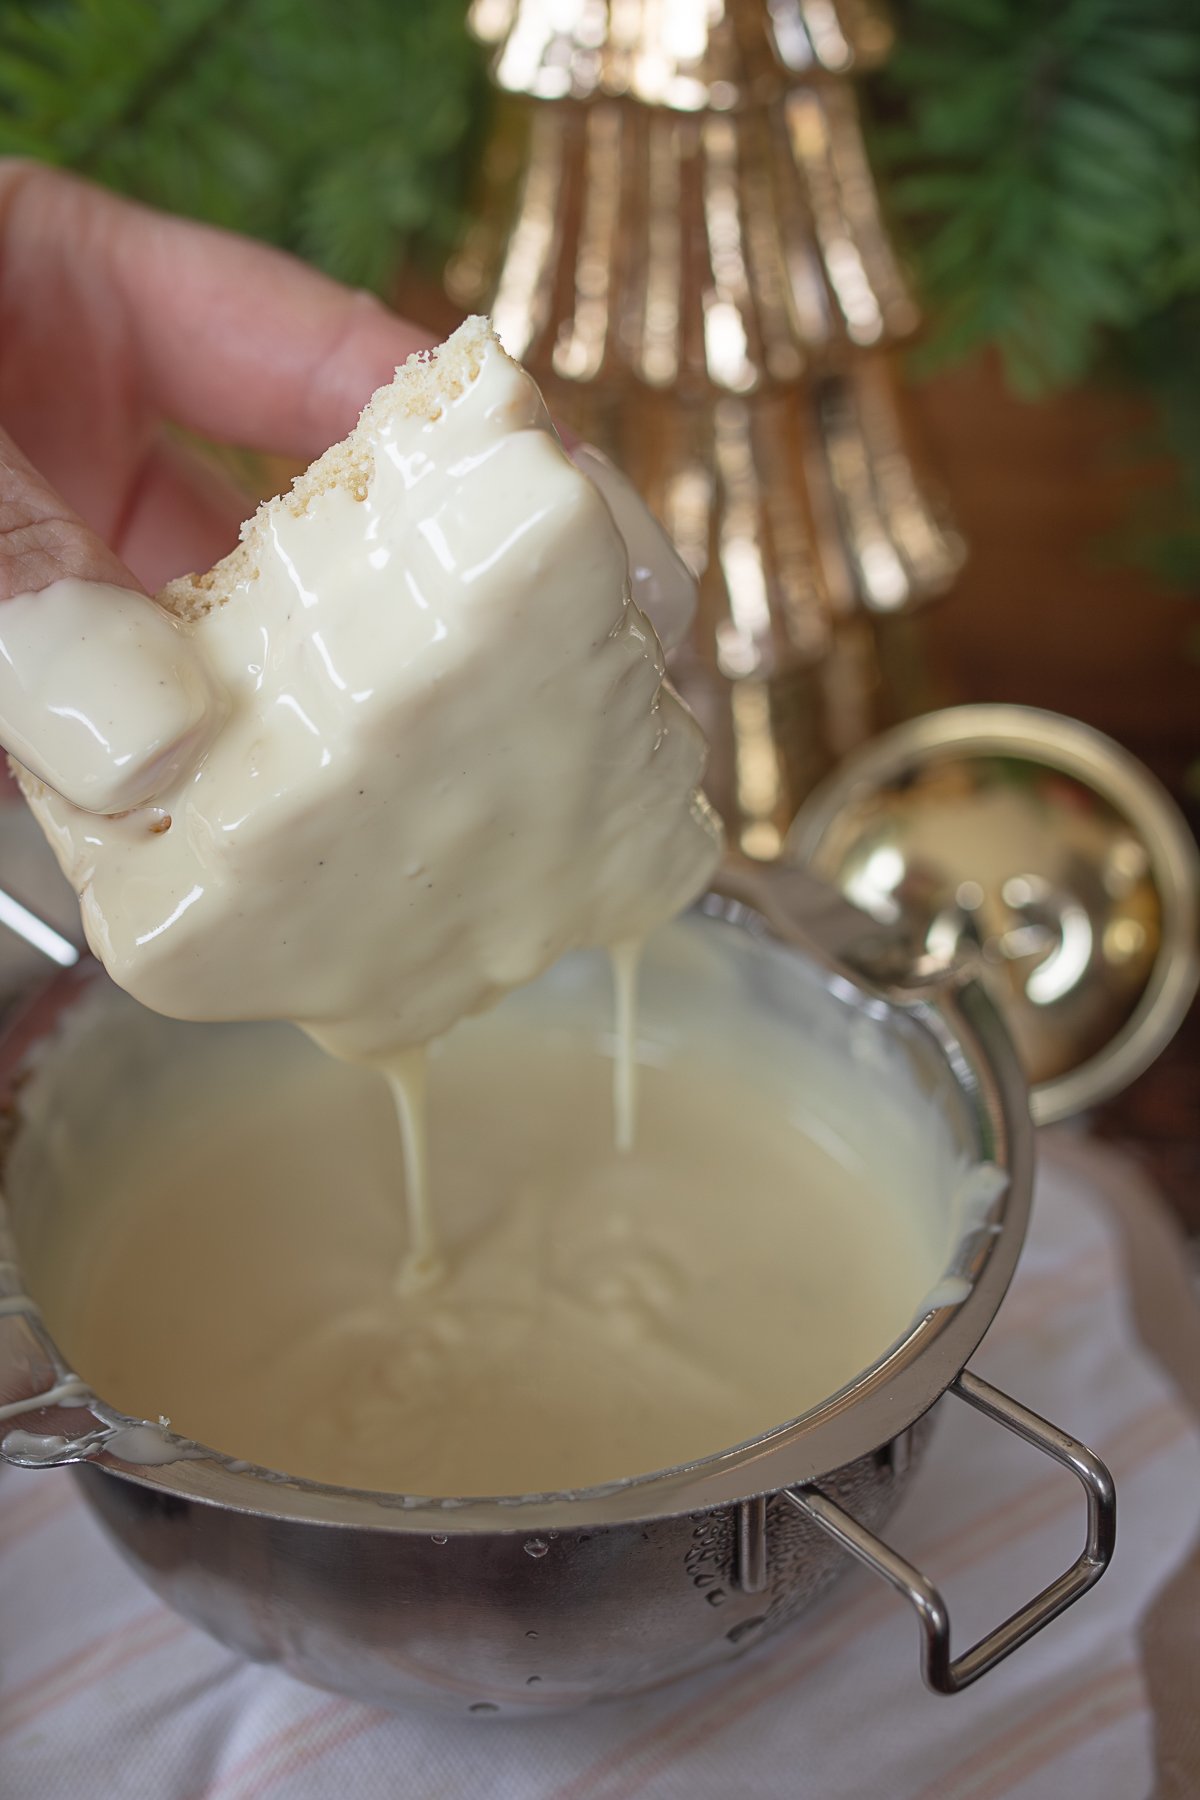
- Step 7: Dip the Cakes: Working with the cakes straight from the freezer, lower each tree into the melted white chocolate and lift it out, letting the excess drip back into the bowl. This step is naturally a little messy, and that's part of the charm. The coating may not cover every edge perfectly, especially along the sides, and that's okay. The finished cakes have a soft, rustic look that feels homemade and festive rather than factory-perfect.
- Return each dipped cake to parchment paper as you go. If the chocolate starts to thicken, give it a gentle stir or place back on top of sauce pan to keep it fluid.
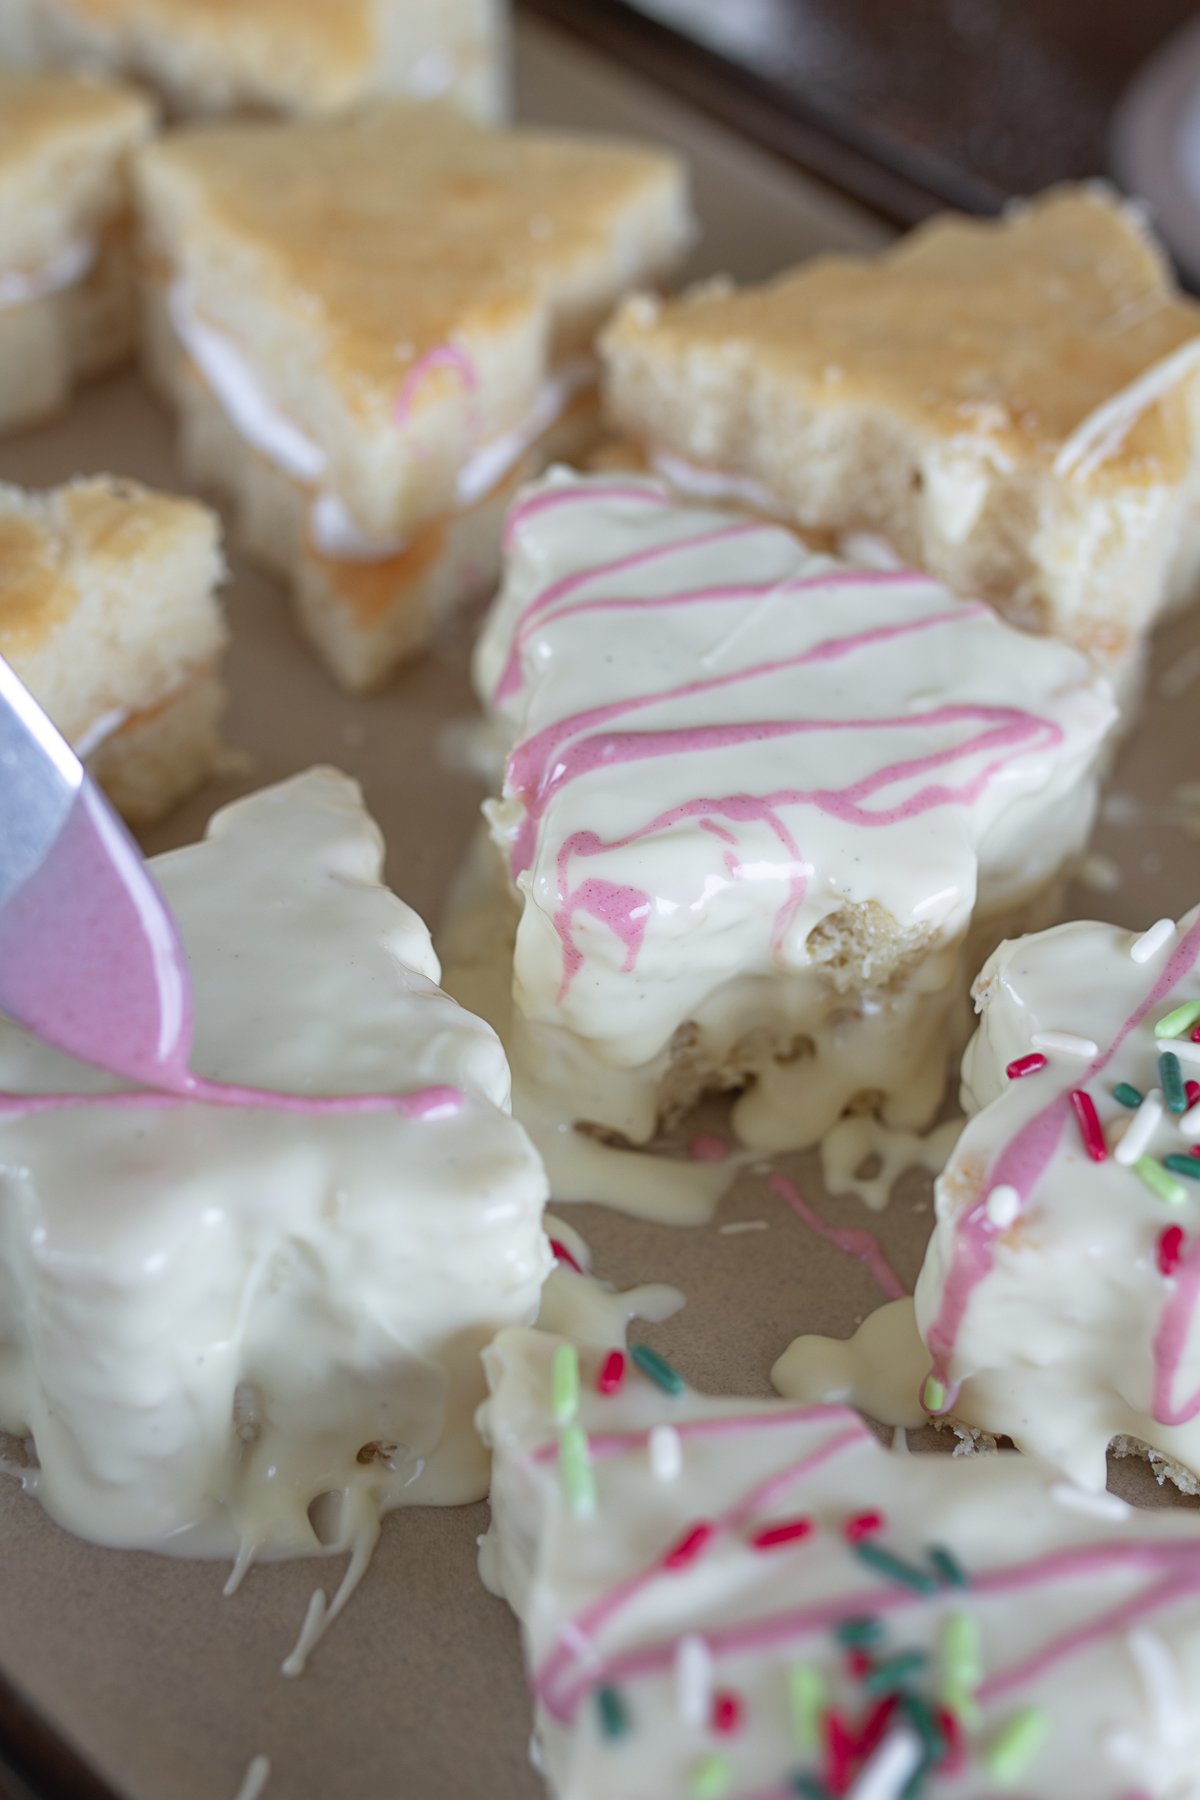
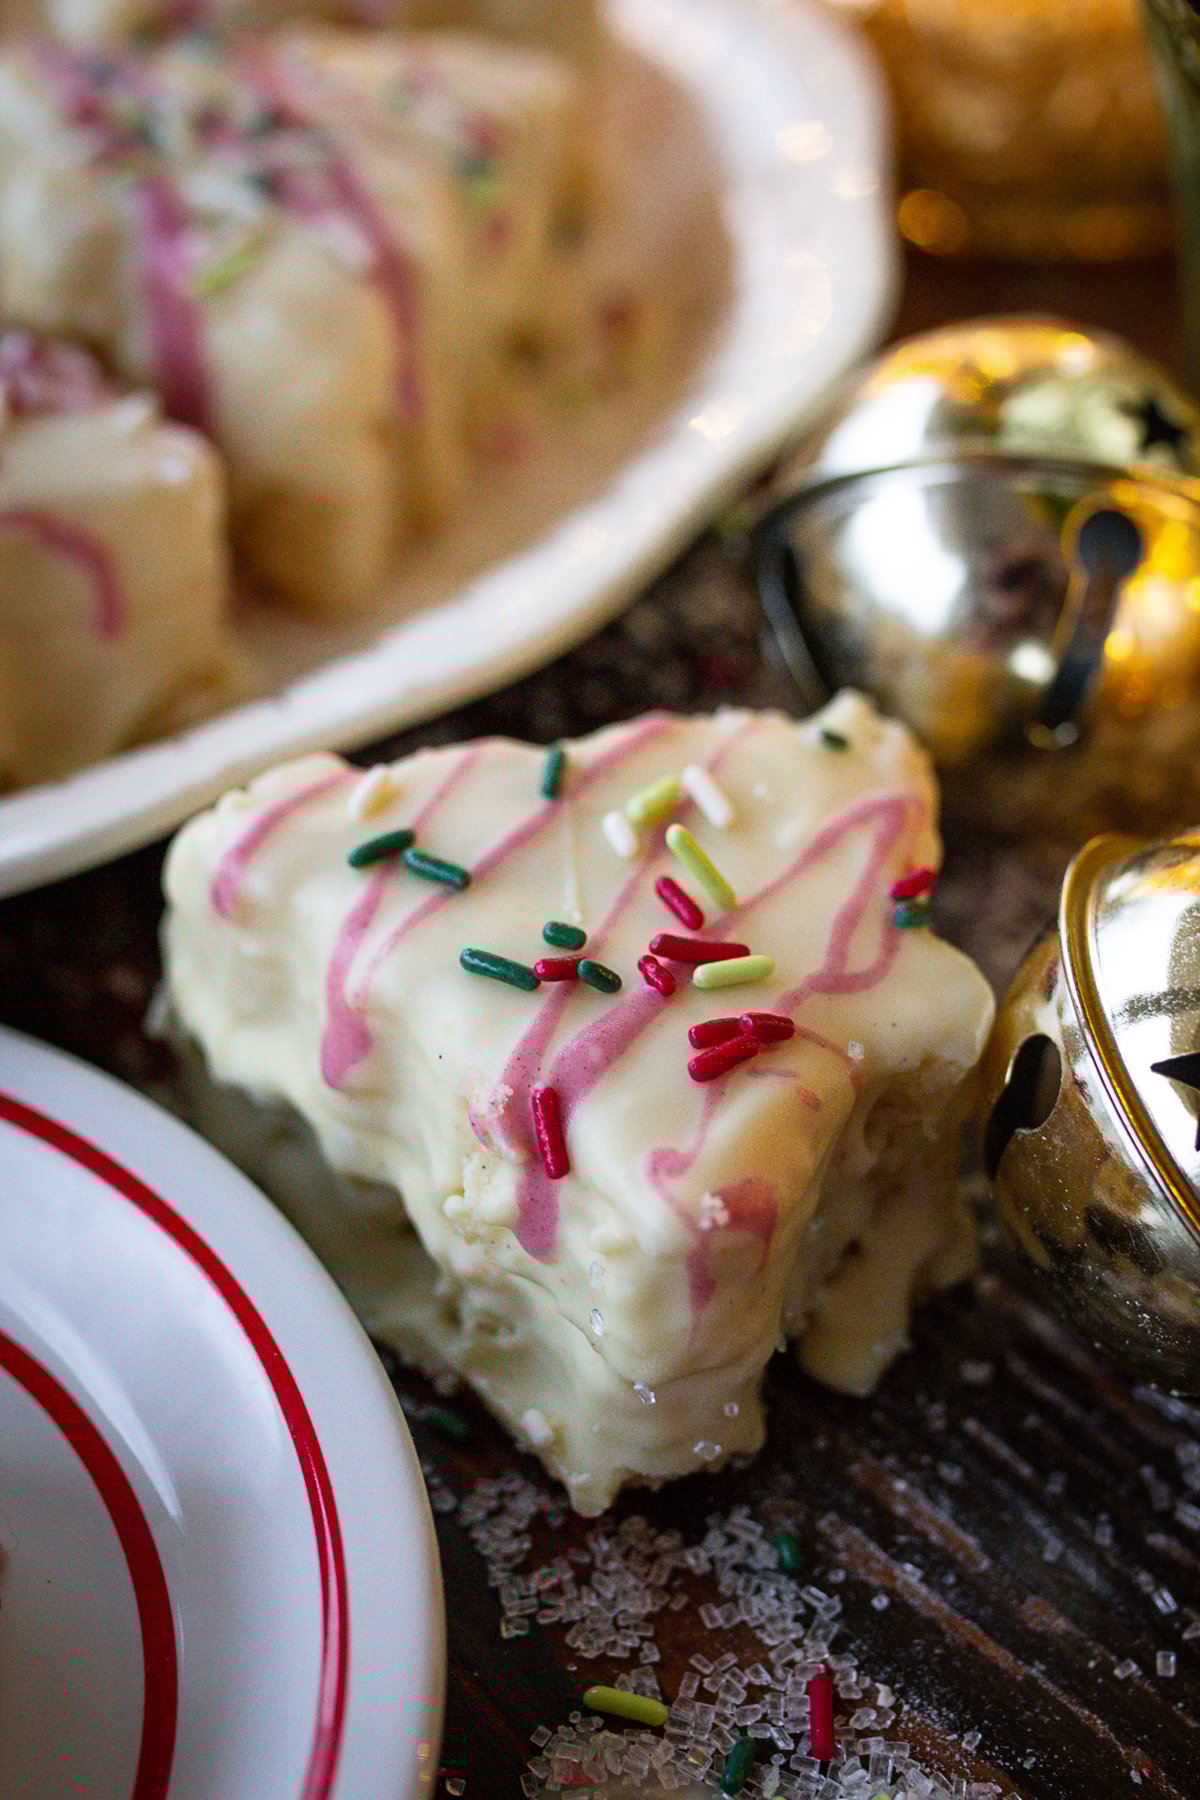
- Step 8: Once all the trees are dipped, use the remaining melted white chocolate for the drizzle. Stir in beet powder until it's as richly colored as possible. Because beet powder is a natural dye, the color will lean more pink than bright red, and that's perfectly okay. If the mixture thickens as it sits, add a small splash of avocado oil to thin it slightly so it drizzles smoothly across the tops.
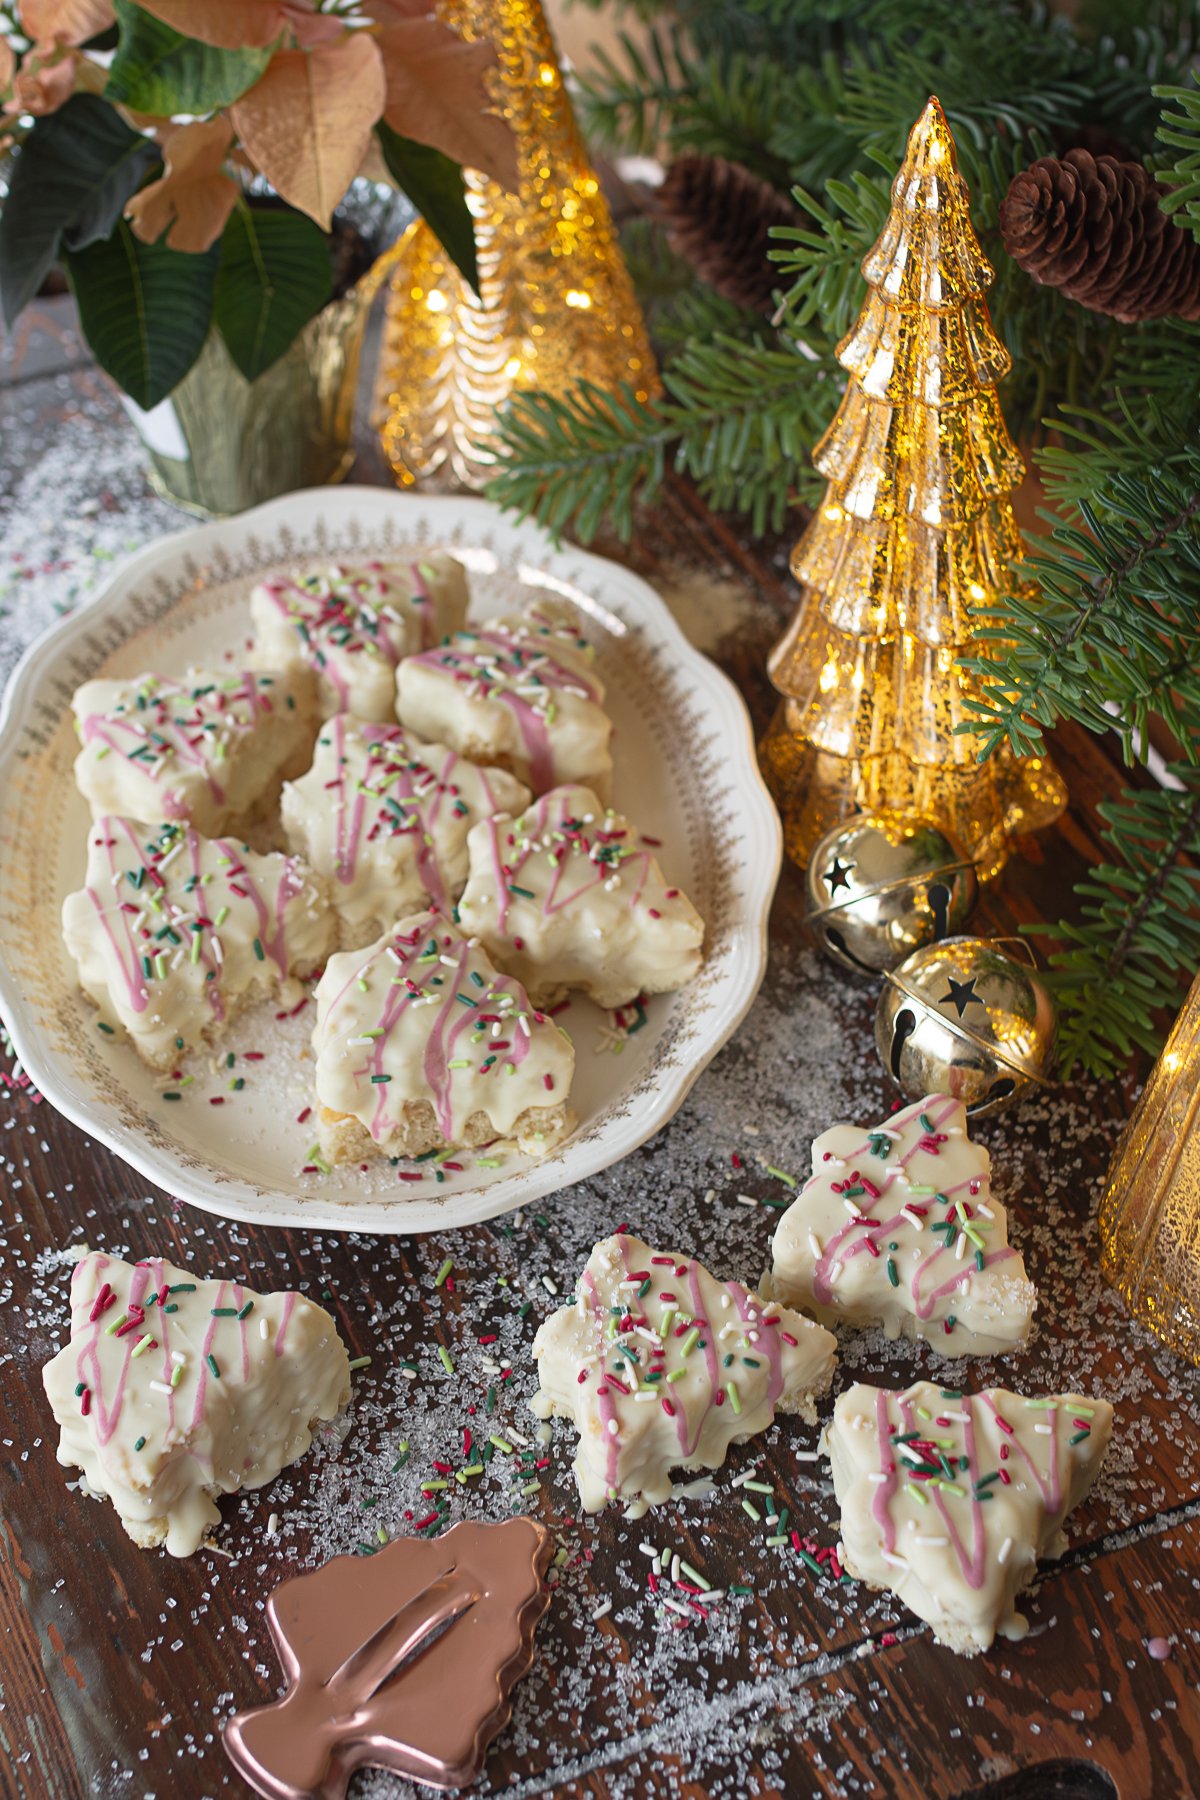
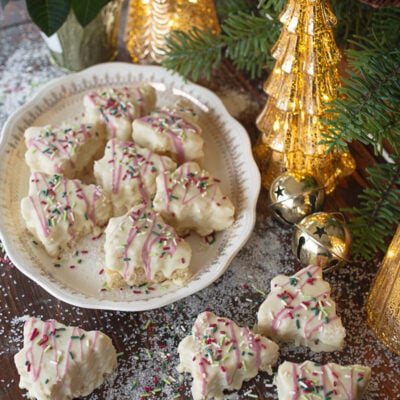
- Drizzle the tinted chocolate over the tops in simple lines, then sprinkle immediately so everything adheres. This part doesn't need to be precise, a little uneven drizzle and a few stray sprinkles add to the charm and reinforce that these are homemade Christmas tree cakes, not factory-perfect replicas.
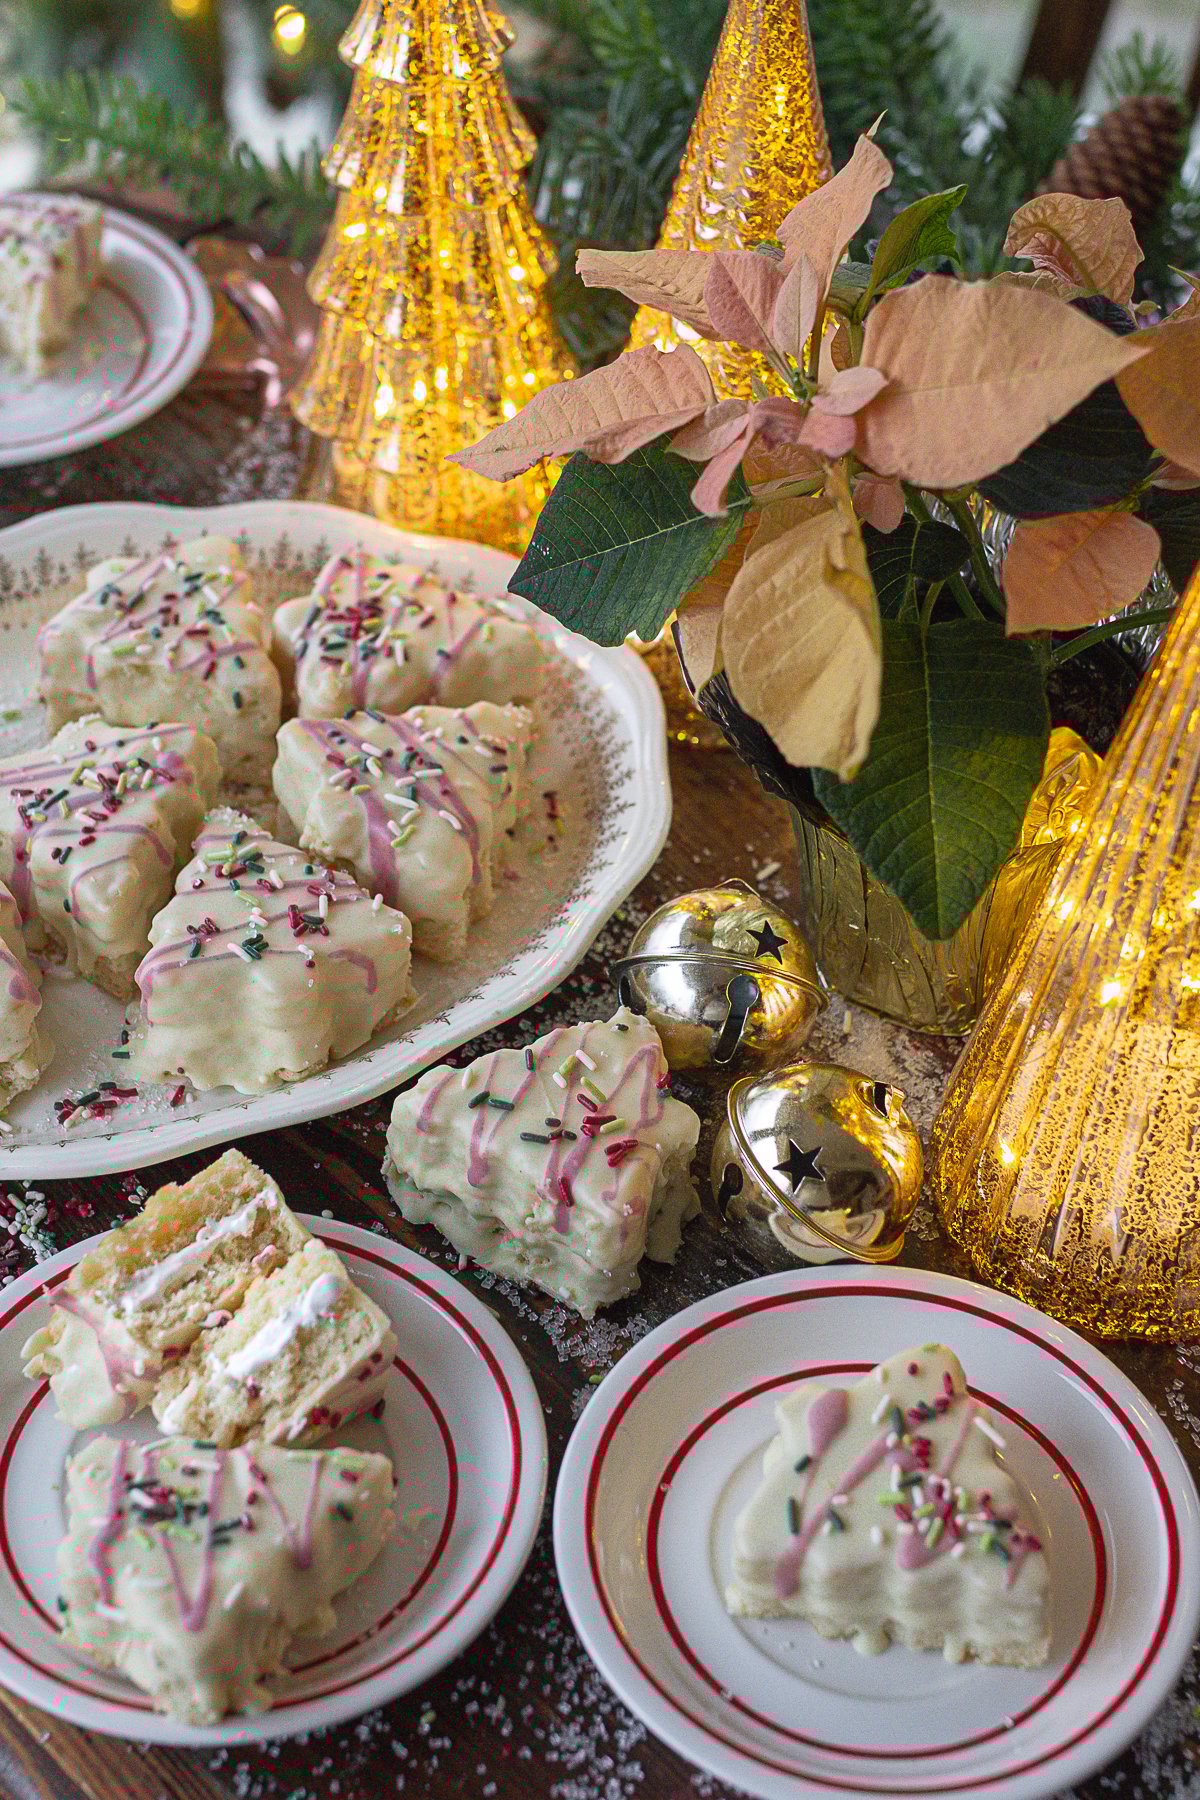
- Step 9: Set and Store
- After decorating, return the cakes to the freezer for at least 10 minutes to help the coating fully firm up. Once set, they're ready to enjoy or store.
- These are made with a real cake base, so storage matters. Unlike the store-bought versions (which somehow seem to last forever), homemade cakes will naturally dry out over time - even with a chocolate coating.
- Room temperature: up to 2 days
- Refrigerator: up to 1 week in a sealed container
- Freezer: up to 2 weeks for best texture
- If freezing, let them thaw in the fridge so condensation doesn't affect the coating.
- They're meant to be enjoyed fresh, shared generously, and savored - not tucked away for years like the boxed originals (which, let's be honest, feel a little immortal).
Variations + Fun Twists
- Add a touch of almond extract for a bakery-style flavor
- Make a Chocolate Christmas Tree Cake version with dark chocolate coating
- Turn leftover scraps into a Little Debbie Christmas Tree Cake dip
- Use yellow cake mix for a shortcut easy recipe
FAQ
Traditional Little Debbie Christmas Tree Cakes are made with yellow cake, a fluffy creme filling, artificial flavors, artificial dyes, and a palm-oil based outer coating. My Homemade Christmas Tree Cakes keep the same nostalgic flavor but swap in clean, real-food ingredients, high-quality white chocolate, natural sprinkles, beet powder for the red lines, and a soft homemade sponge cake layered with cream filling.
Store-bought cakes use a "white coating" made from oils, stabilizers, and artificial flavors. This recipe uses real white chocolate melted with a little avocado or coconut oil. The flavor is richer, smoother, and far more authentic.
They're known for a soft yellow cake, sweet creme filling, and a sugary white outer shell with red and green sprinkles. This homemade version keeps that classic sweet treat flavor but with a softer crumb, a real chocolate coating, and no artificial dyes or flavors.
Little Debbie first released their Christmas Tree Cake in 1985. Fun fact from me: 1985 is also my birth year, so recreating these cakes always feels extra nostalgic, a little nod to childhood and the treats we grew up with.
They have the same flavor profile as the original snack cake, but richer and more homemade.
Storage Tips
On counter:
Keep on counter in sealed container for up to two days.
Refrigerator:
Keep in a sealed container for up to 4 days. The coating protects the cream filling and sponge cake.
Freezer:
Freeze on a tray first, then transfer to a container for up to 2 months. Let thaw in the fridge.
Traveling with them:
Place parchment between layers on your sheet pans so nothing sticks.
Once the chocolate has set, these Christmas tree cakes are ready to be enjoyed. They're a fun, familiar holiday treat that feels right at home in a busy December kitchen. Make them, share them, and enjoy them while the season is here.
Other Christmas Deserts To Try:


Homemade Christmas Tree Cakes
Ingredients
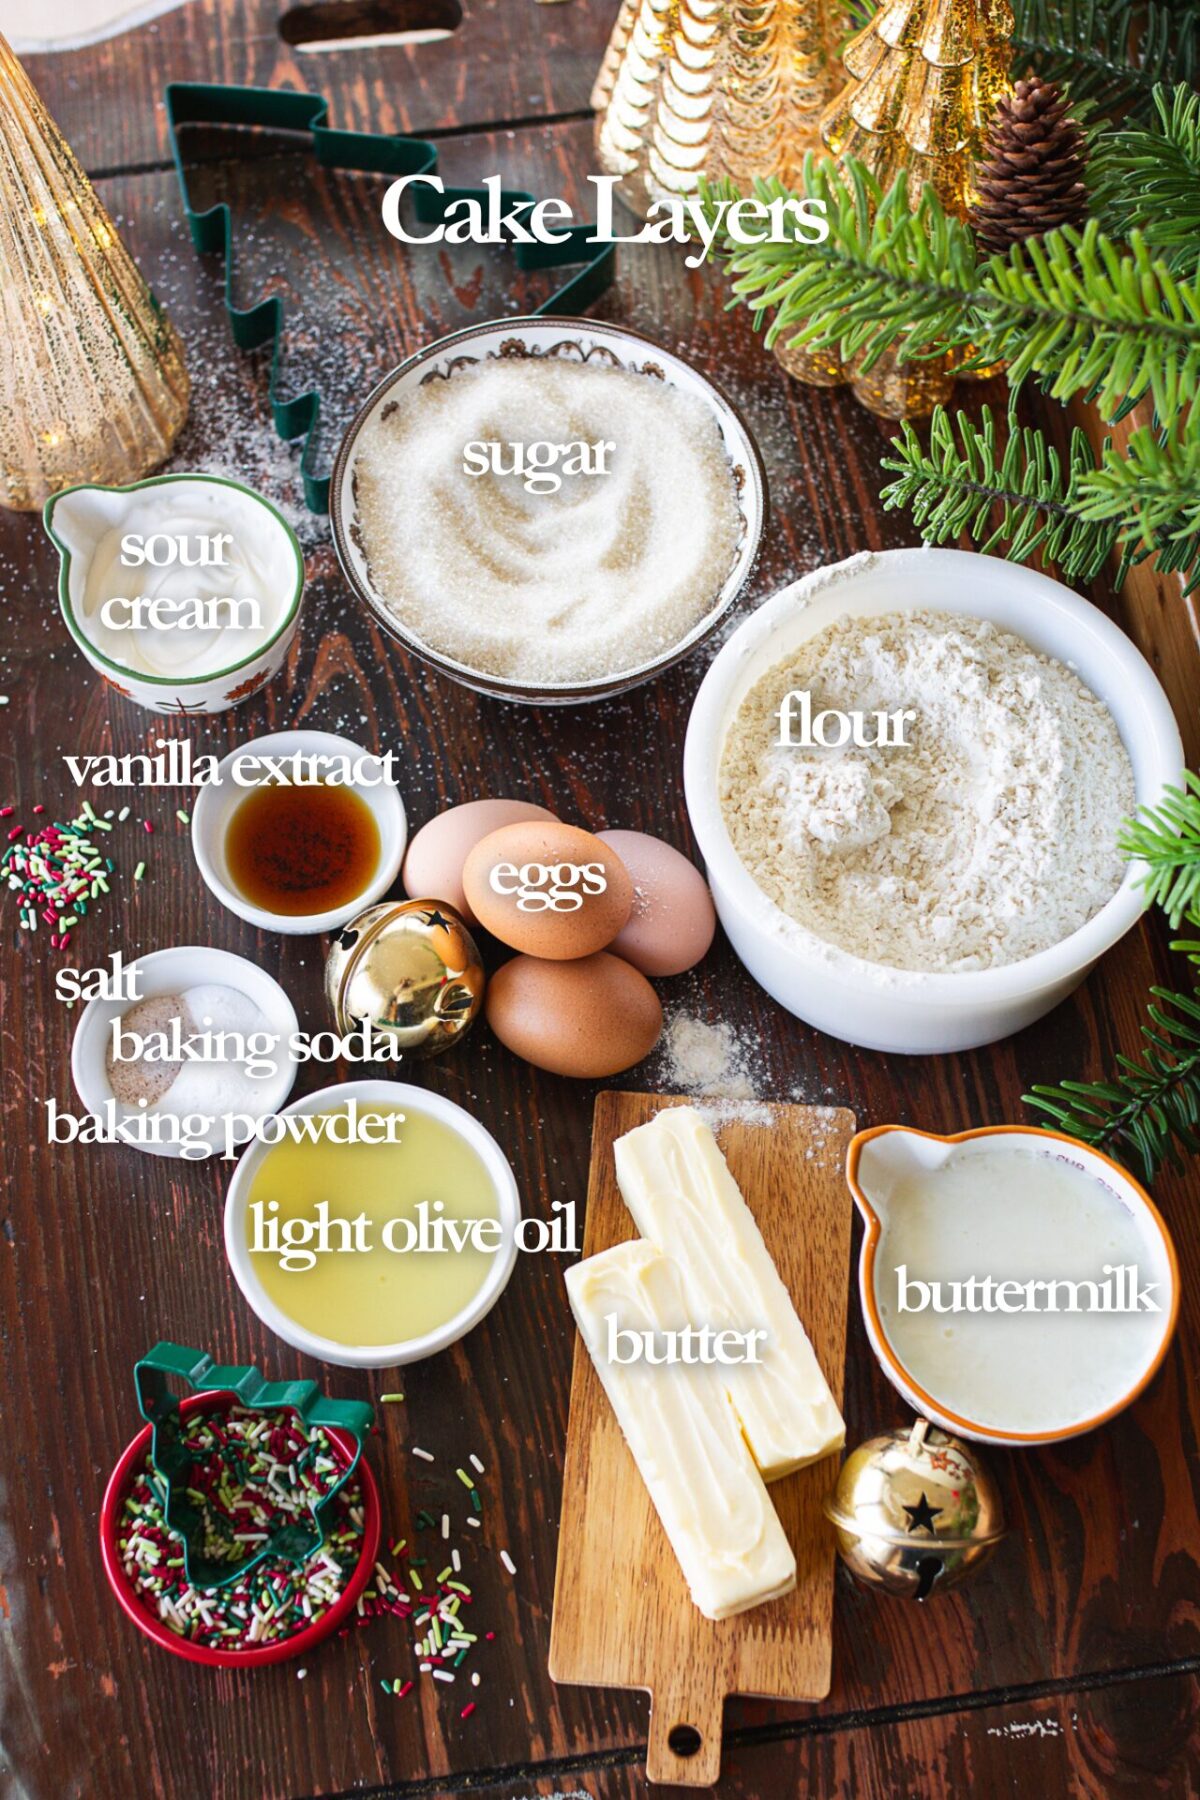
cake
- 1 cup salted butter room temp (220g)
- 2 cups granulated sugar 400g
- ½ cup avocado oil or light olive oil 110ml
- 4 large eggs room temp
- 1 tablespoon vanilla extract
- 3 ¼ cups all purpose flour 435g
- 2 ½ teaspoon baking powder
- ½ teaspoon baking soda
- 1 teaspoon salt
- ½ cup full fat sour cream room temp (125g)
- 1 cup buttermilk room temp (225ml)
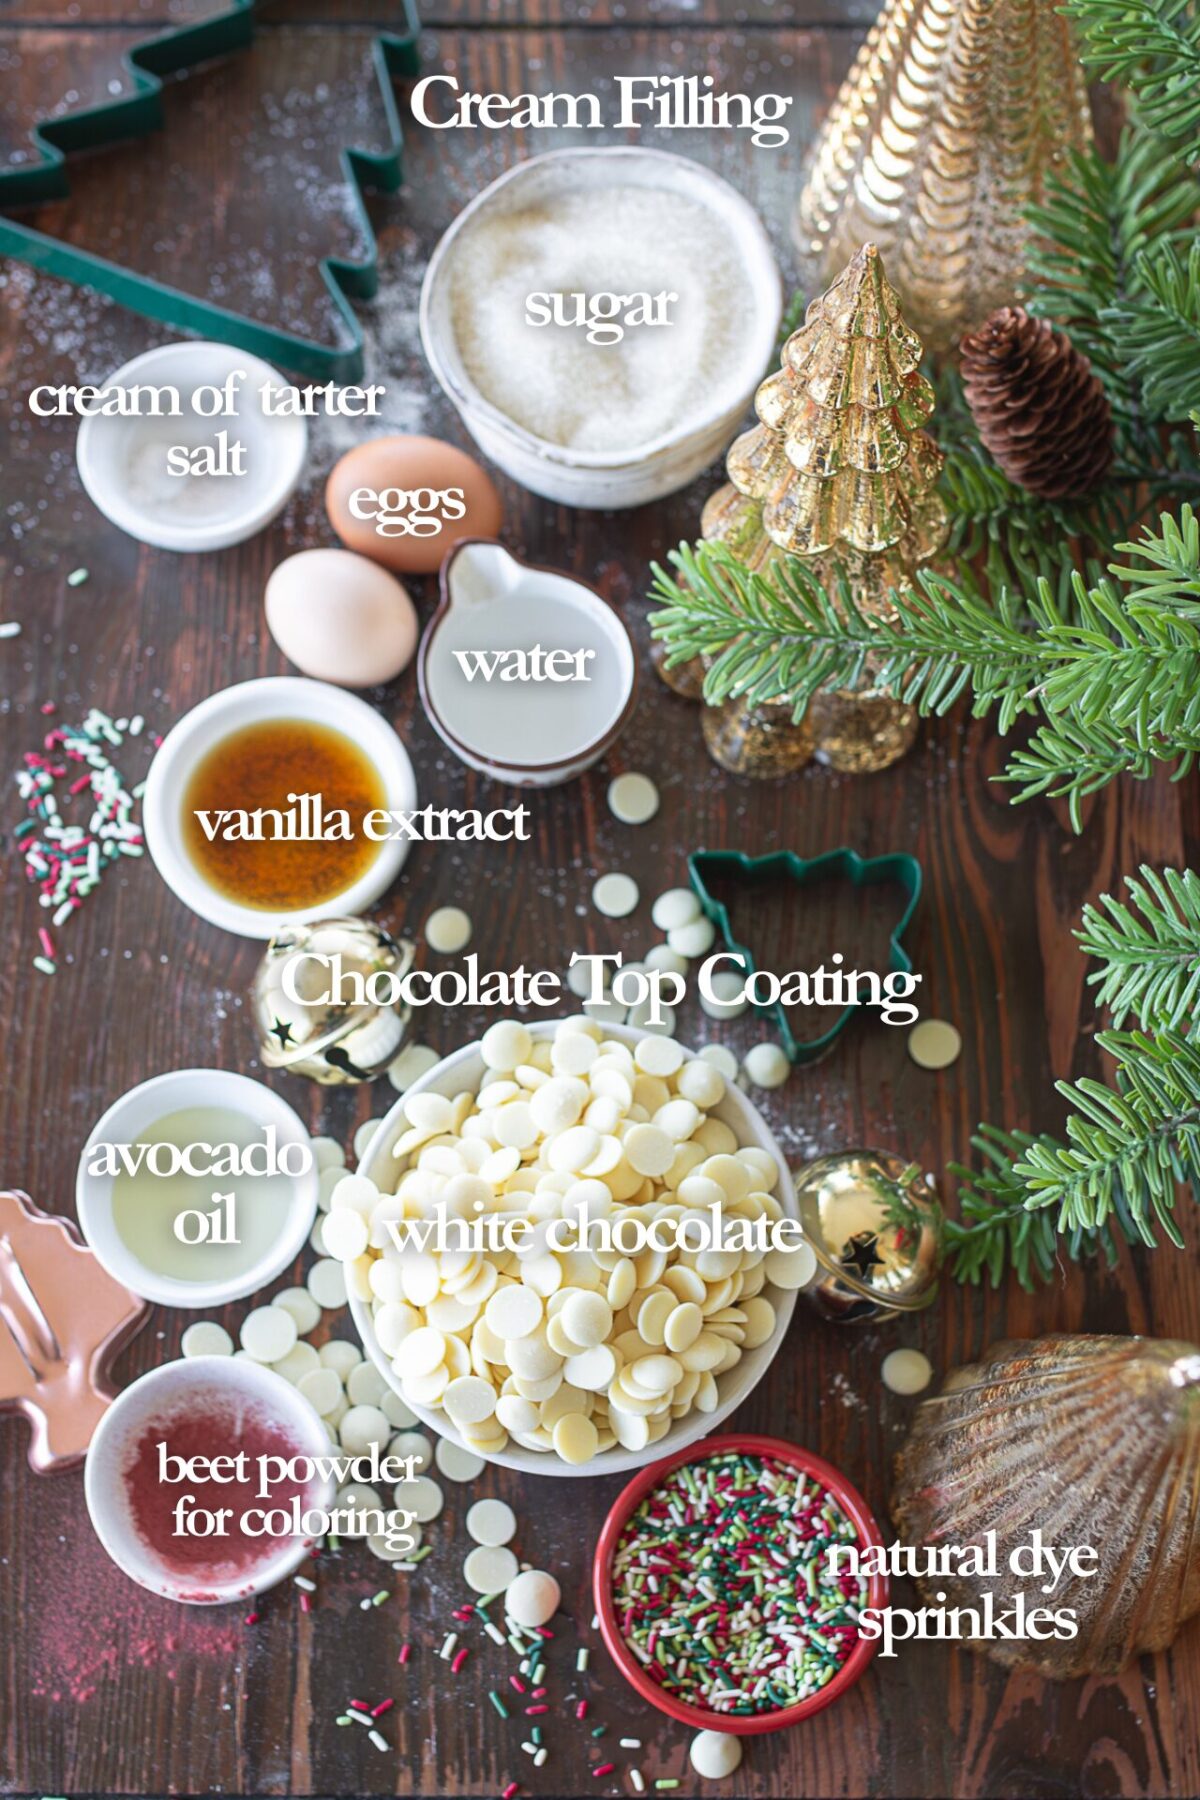
Filling: 7 Minute Frostin
- 2 large egg whites room temperature
- 1 ½ cups granulated sugar
- ⅓ cup water
- ¼ teaspoon cream of tartar
- ⅛ teaspoon alt
- 1 teaspoon vanilla extract
White Chocolate Coating
- 1 lb High-quality white chocolate
- 1-2 teaspoon avocado oil per cup of chocolate
- 4 tablespoon Natural sprinkles
- 1 teaspoon Beet powder for red stripes
Instructions
Make the Cake
- Preheat oven to 350°F. Line two baking sheets with parchment paper.
- Cream butter and sugar until pale and fluffy. Add avocado oil, then eggs one at a time, mixing well. Stir in vanilla.
- In a separate bowl, whisk flour, baking powder, baking soda, and salt.
- With the mixer on low, alternate adding dry ingredients with sour cream and buttermilk until just combined.
- Divide batter evenly between the two prepared pans. Smooth into thin, even layers and tap pans gently to release air bubbles.
- Bake 10-12 minutes, just until set and a toothpick comes out clean. Do not overbake.
- Cool completely, then chill briefly in the freezer for cleaner cutting.
Make 7 Minute Frosting
- In a heavy-bottom saucepan, combine egg whites, sugar, water, cream of tartar, and salt.
- Heat over medium-low, whisking constantly, until mixture reaches 140°F and sugar is fully dissolved.
- Transfer immediately to a stand mixer and beat on high speed for 7 minutes, until thick, glossy, and holding soft peaks.
- Add vanilla and mix briefly. Transfer frosting to a piping bag and keep upright in a jar while assembling.
Assemble the cakes
- Cut cake layers into Christmas tree shapes.
- Place one tree cutout on parchment, pipe or spread frosting on top, then gently sandwich with a second tree.
- Freeze assembled cakes 30-60 minutes, until firm.
Coat and Decorate
- Melt white chocolate with avocado oil in a double boiler, working in two batches (about 12 oz at a time). Add a dash of vanilla if desired.
- Dip frozen cakes into melted chocolate, letting excess drip off. Place on parchment.
- Stir beet powder into remaining melted chocolate until pink-red. Thin with a little more oil if needed.
- Drizzle over cakes and immediately add sprinkles.
- Freeze 10 minutes to fully set.


These Homemade Christmas Tree Cakes bring all the nostalgia of the childhood favorite, but with real ingredients and none of the artificial dyes or flavors. The vanilla sponge stays incredibly soft, the seven-minute frosting is cloud-like and light, and the white chocolate coating sets up beautifully without tasting waxy. They feel special and festive, yet completely homemade in the best way, a sweet December project that tastes even better than the original.