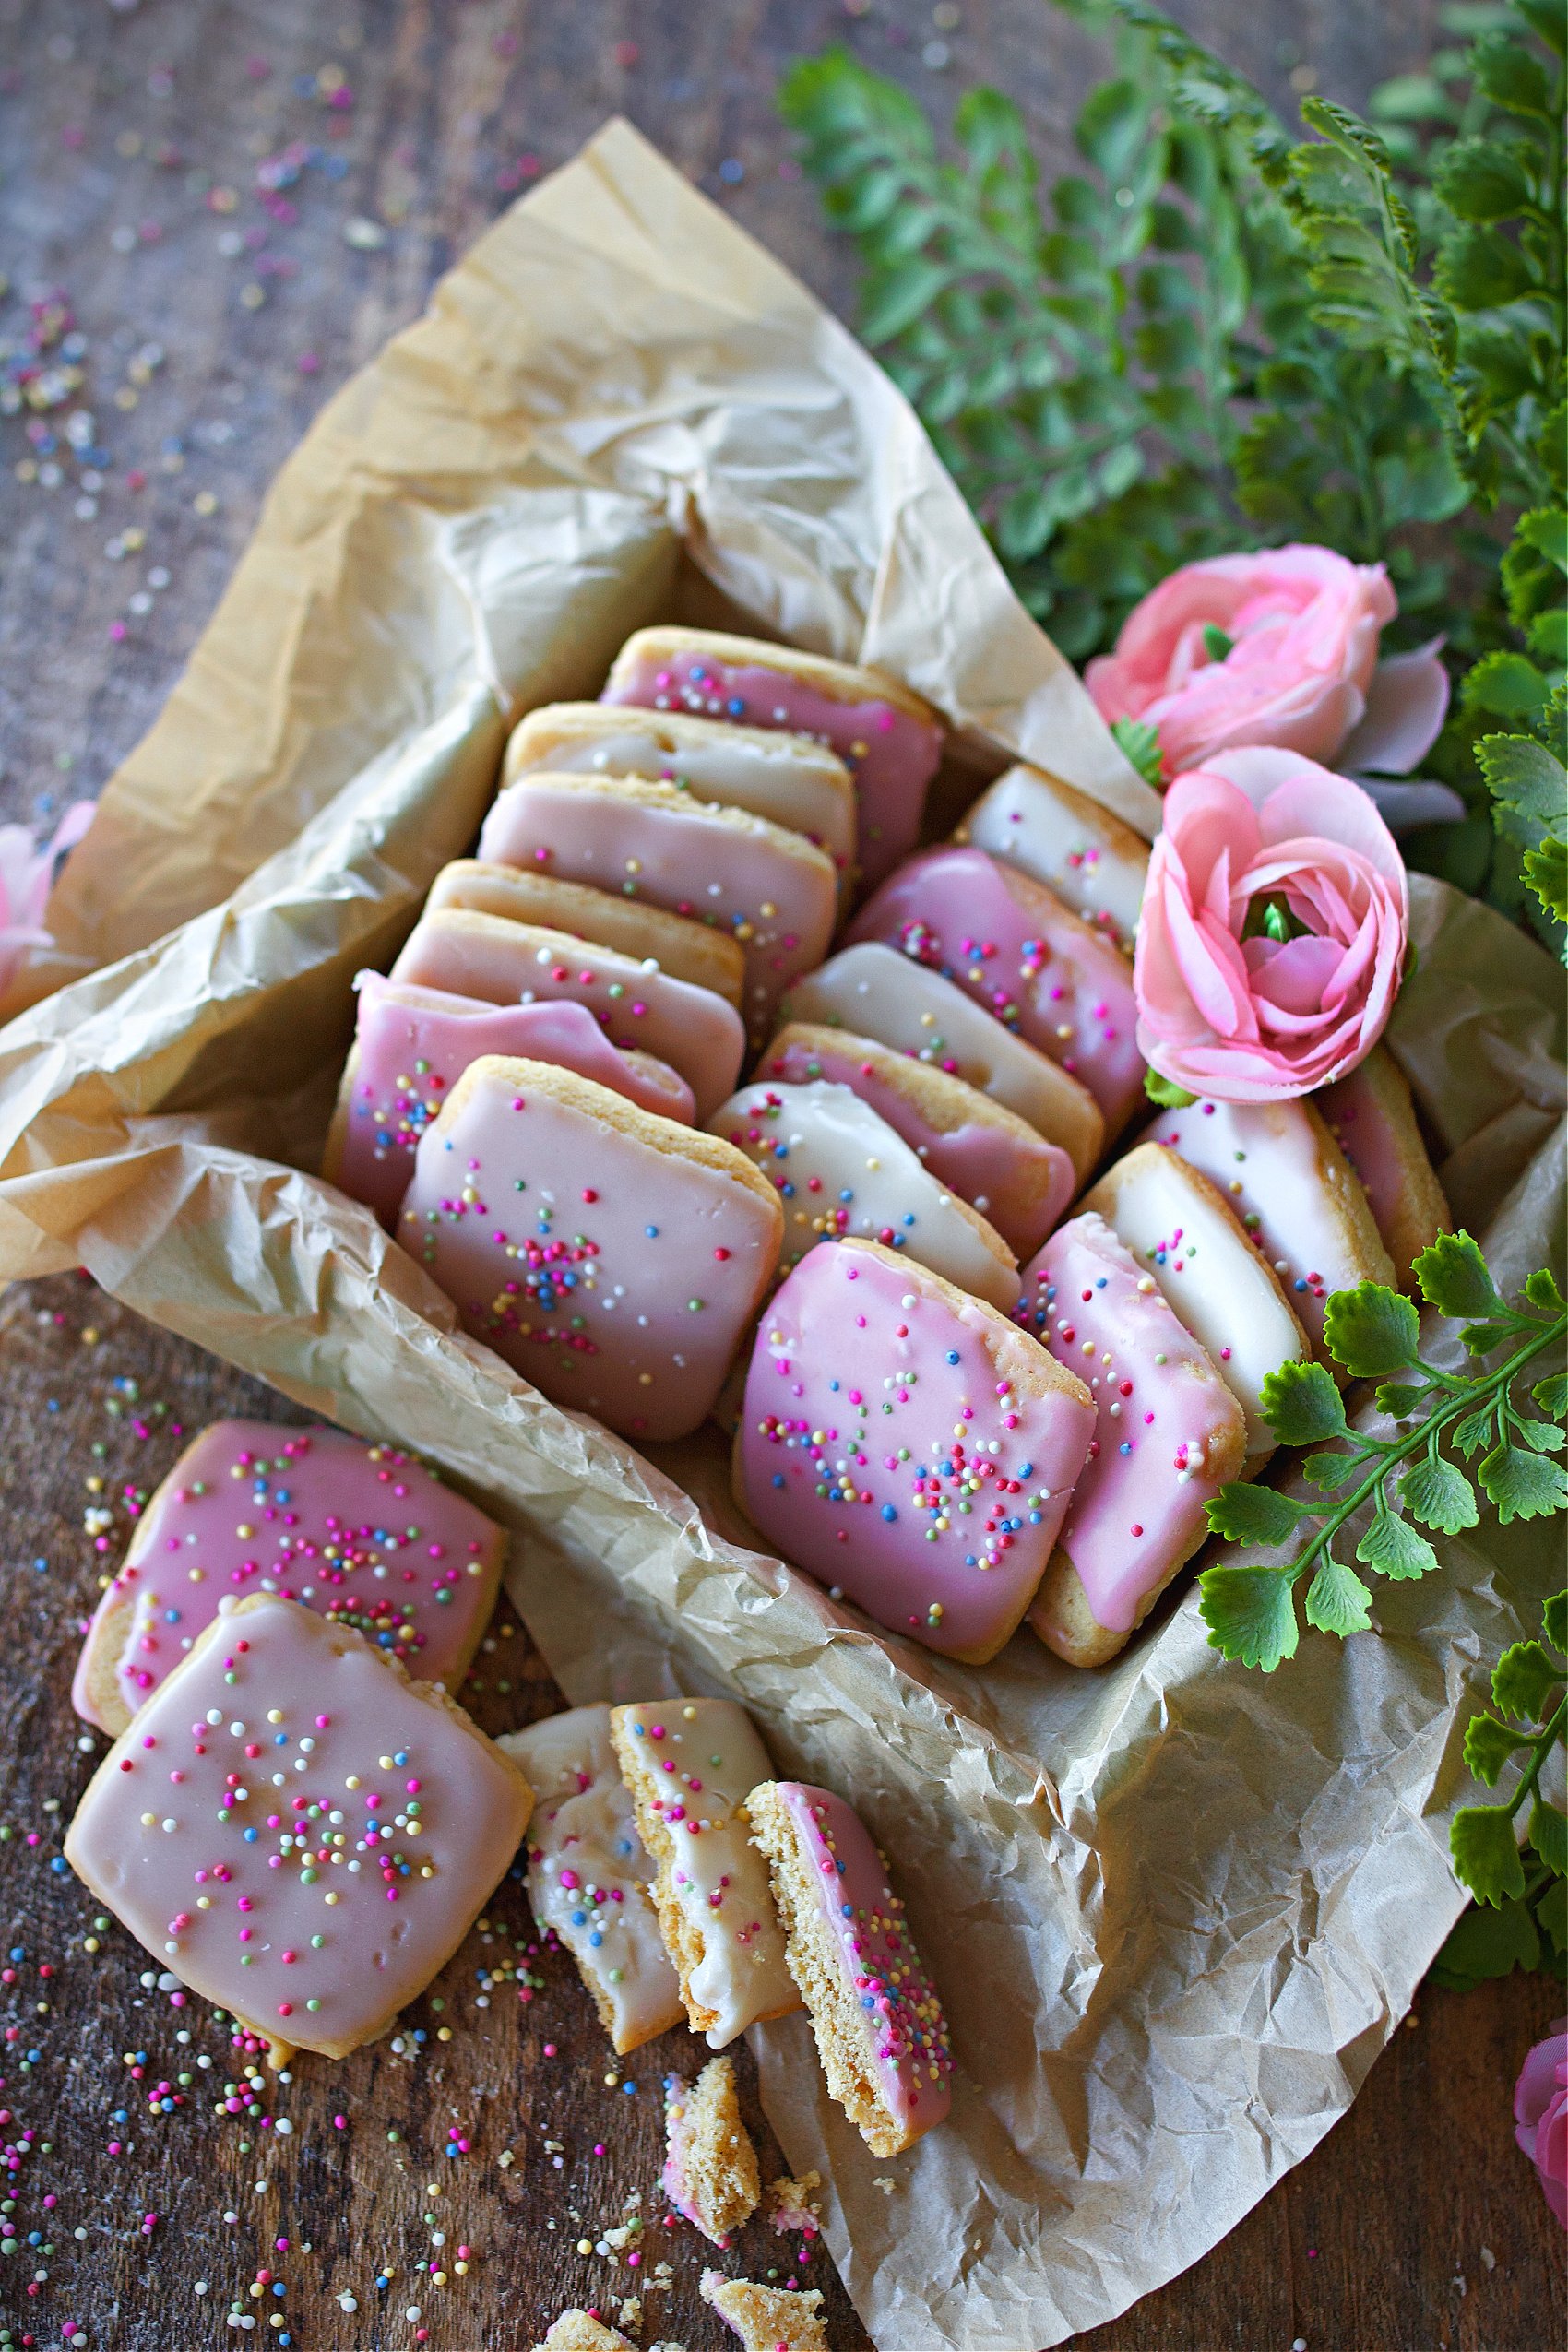
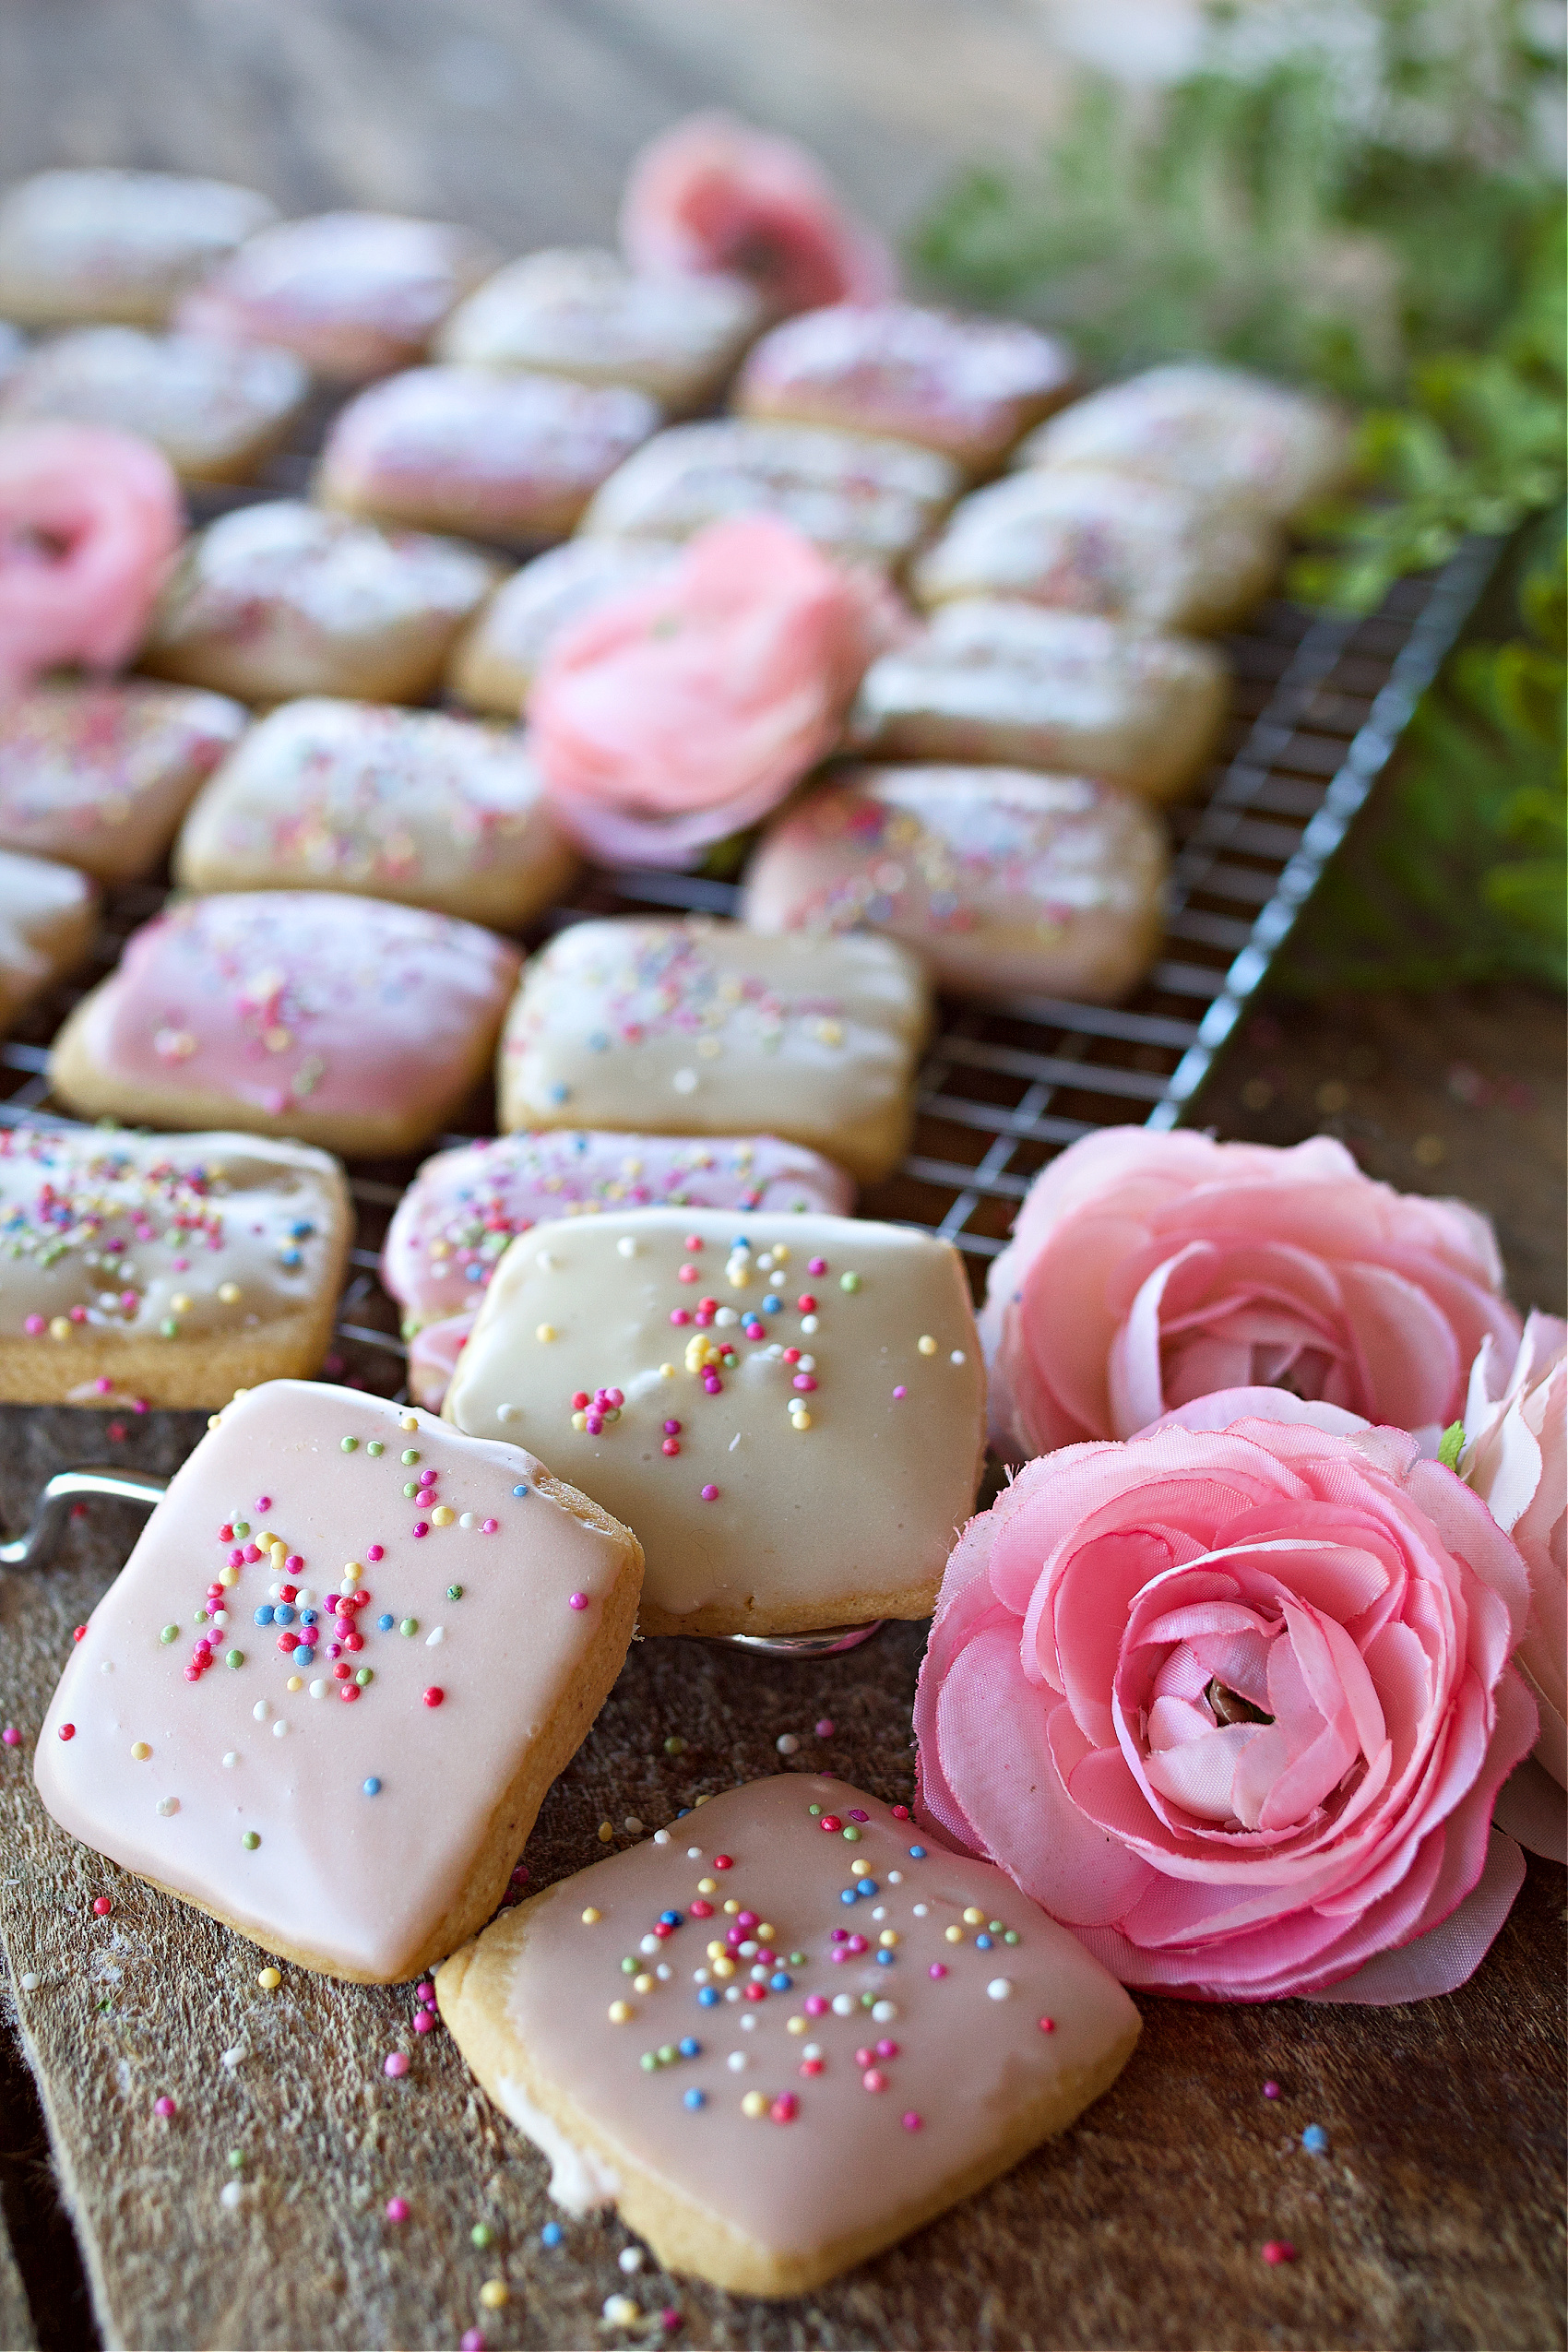
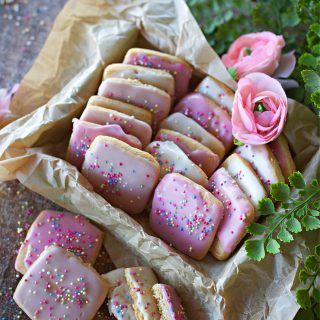
Homemade Frosted Cookie Bites | Just Like Animal Cookies!
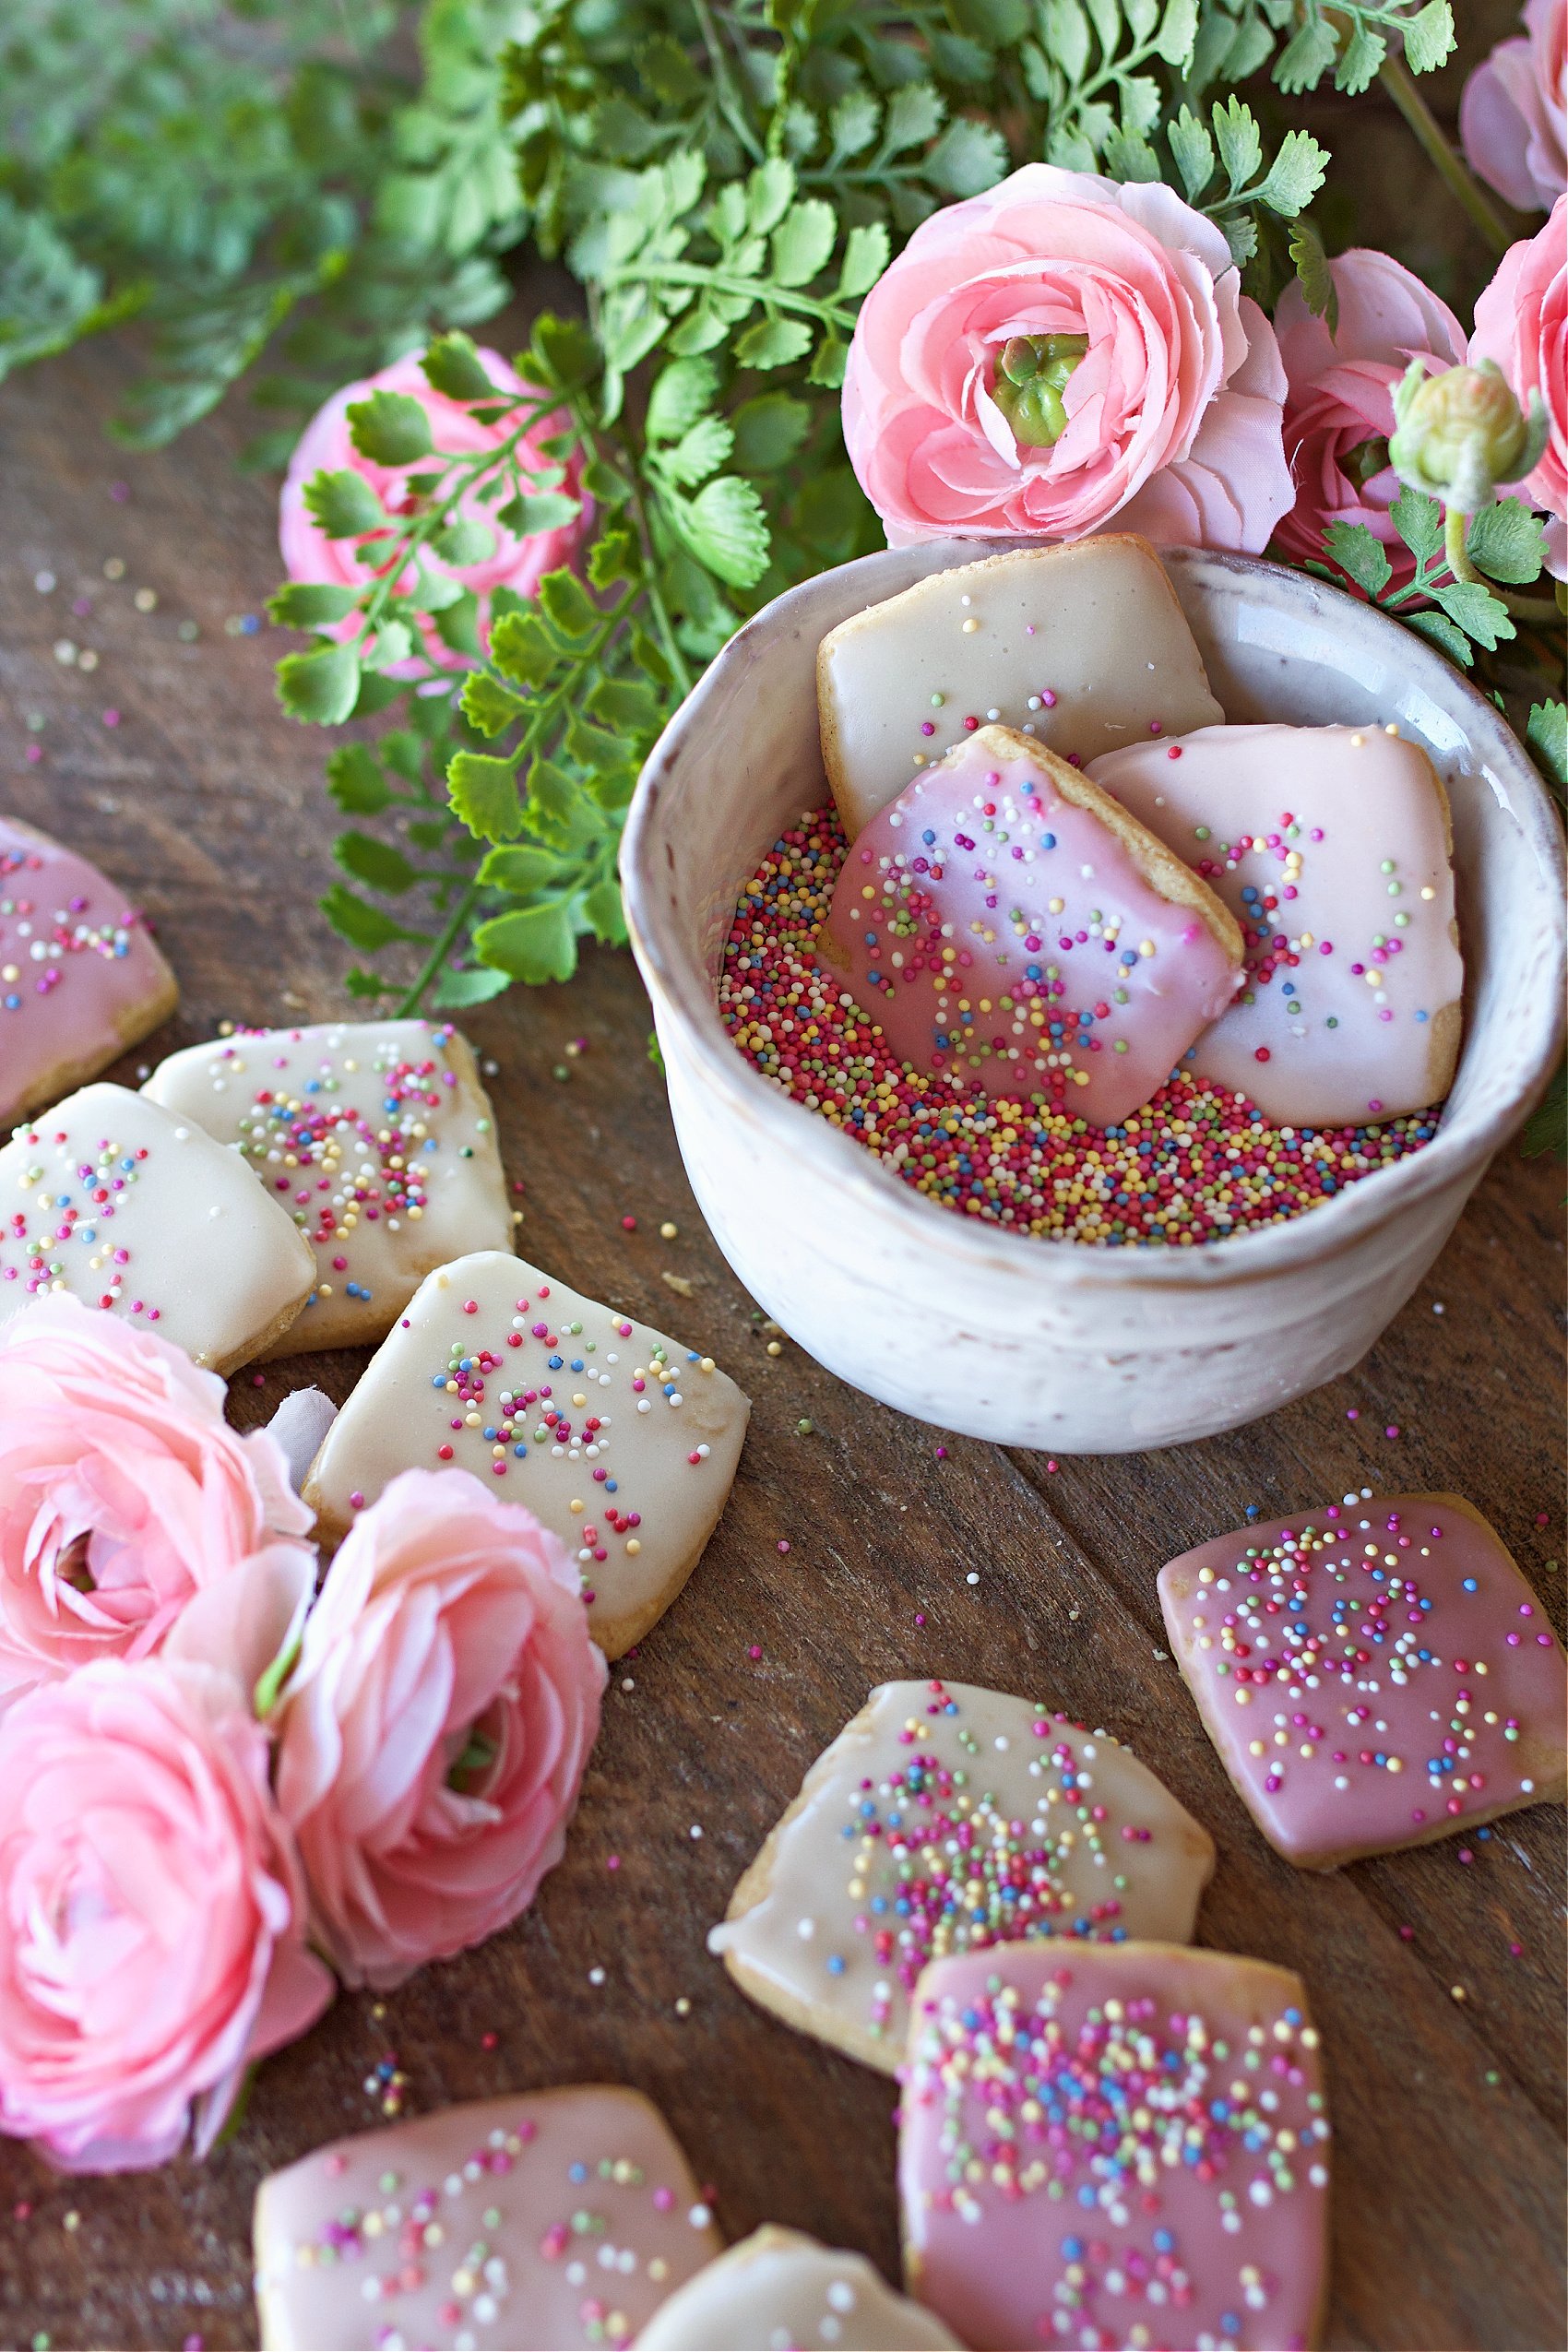
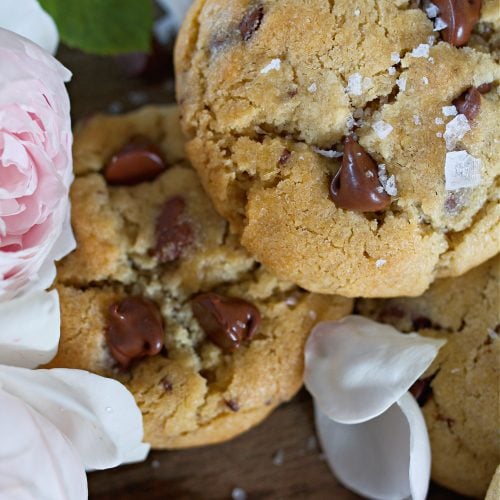
Growing up, my sister and I were completely obsessed with circus animal cookies. The tiny pink and white frosted cookies, the crunchy sprinkles, and that crinkly ribboned bag showed up at birthday parties, holidays, and all the small moments that felt extra special as kids. They're still one of those nostalgic treats that instantly take me back. And that playful, bakery-style sweetness is something I love recreating at home, just like with my chocolate crinkle cookies, Valentine's cookies with orange zest raspberry frosting, and sourdough discard pop-tarts.
I wanted to recreate that classic animal cookie flavor without artificial dyes or complicated decorating. Instead of animal shapes, I cut the dough into tiny squares, keeping all the things people love: the buttery cookie, smooth frosting, and sprinkles, while making them far easier to make in a real home kitchen.
A Quick Look at the Recipe
- Recipe Name: Homemade Frosted Cookie Bites (Just Like Animal Cookies)
- Ready In: About 50 minutes
- Yields: 50+ mini cookie squares
- Flavor Profile: Buttery vanilla cookie with a hint of cinnamon and smooth, set frosting
- Texture: Crisp through centers, frosting that sets just right
- Best For: Valentine's Day, birthday parties, baby showers, or filling the cookie jar
- Make Ahead: Dough freezes beautifully; baked cookies can be frozen frosted or unfrosted
- Skill Level: Beginner-friendly and fun for baking with kids
- Pairs Well With:
- Fruit dish
- A cozy cup of coffee or milk
SUMMARIZE & SAVE THIS CONTENT ON
Jump to:
- A Quick Look at the Recipe
- Why You'll Love These Homemade Frosted Cookie Bites
- A Simpler Take on Classic Animal Cookies
- What I used to make these cookies:
- Ingredient Notes & Helpful Tools
- Pro Tips for the Best Results
- FAQ About Cookies
- Try These Fun Variations!
- Did You Love These Delicious Sweet Snacks?
- You May Also Enjoy:
- Pink & White Frosted Cookie Bites
Why You'll Love These Homemade Frosted Cookie Bites
- They taste just like classic animal cookies, but better. If you want more of a sugar cookie base, my classic sugar cookie recipe will also work for these.
- No artificial dyes or strange ingredients
- Simple square shapes mean no specialty cutters. Or if you want to take it to the next level and use animal cookie cutters, that's an option too!
- The frosting sets beautifully without complicated decorating
- Perfect for gifting, parties, or filling a cookie jar along side other classics like this homemade toffee, and these adorable mini chocolate chip cookies.
A Simpler Take on Classic Animal Cookies
Instead of traditional animal shapes, these cookies are rolled out and cut into small squares. That small change cuts down on time while keeping everything people love about frosted animal cookies.
Roll, slice, bake, dip, sprinkle, and you're done.
They have the same familiar flavor as the store-bought version but with a softer bite and a richer, more balanced sweetness.
What I used to make these cookies:
Ingredient Notes & Helpful Tools
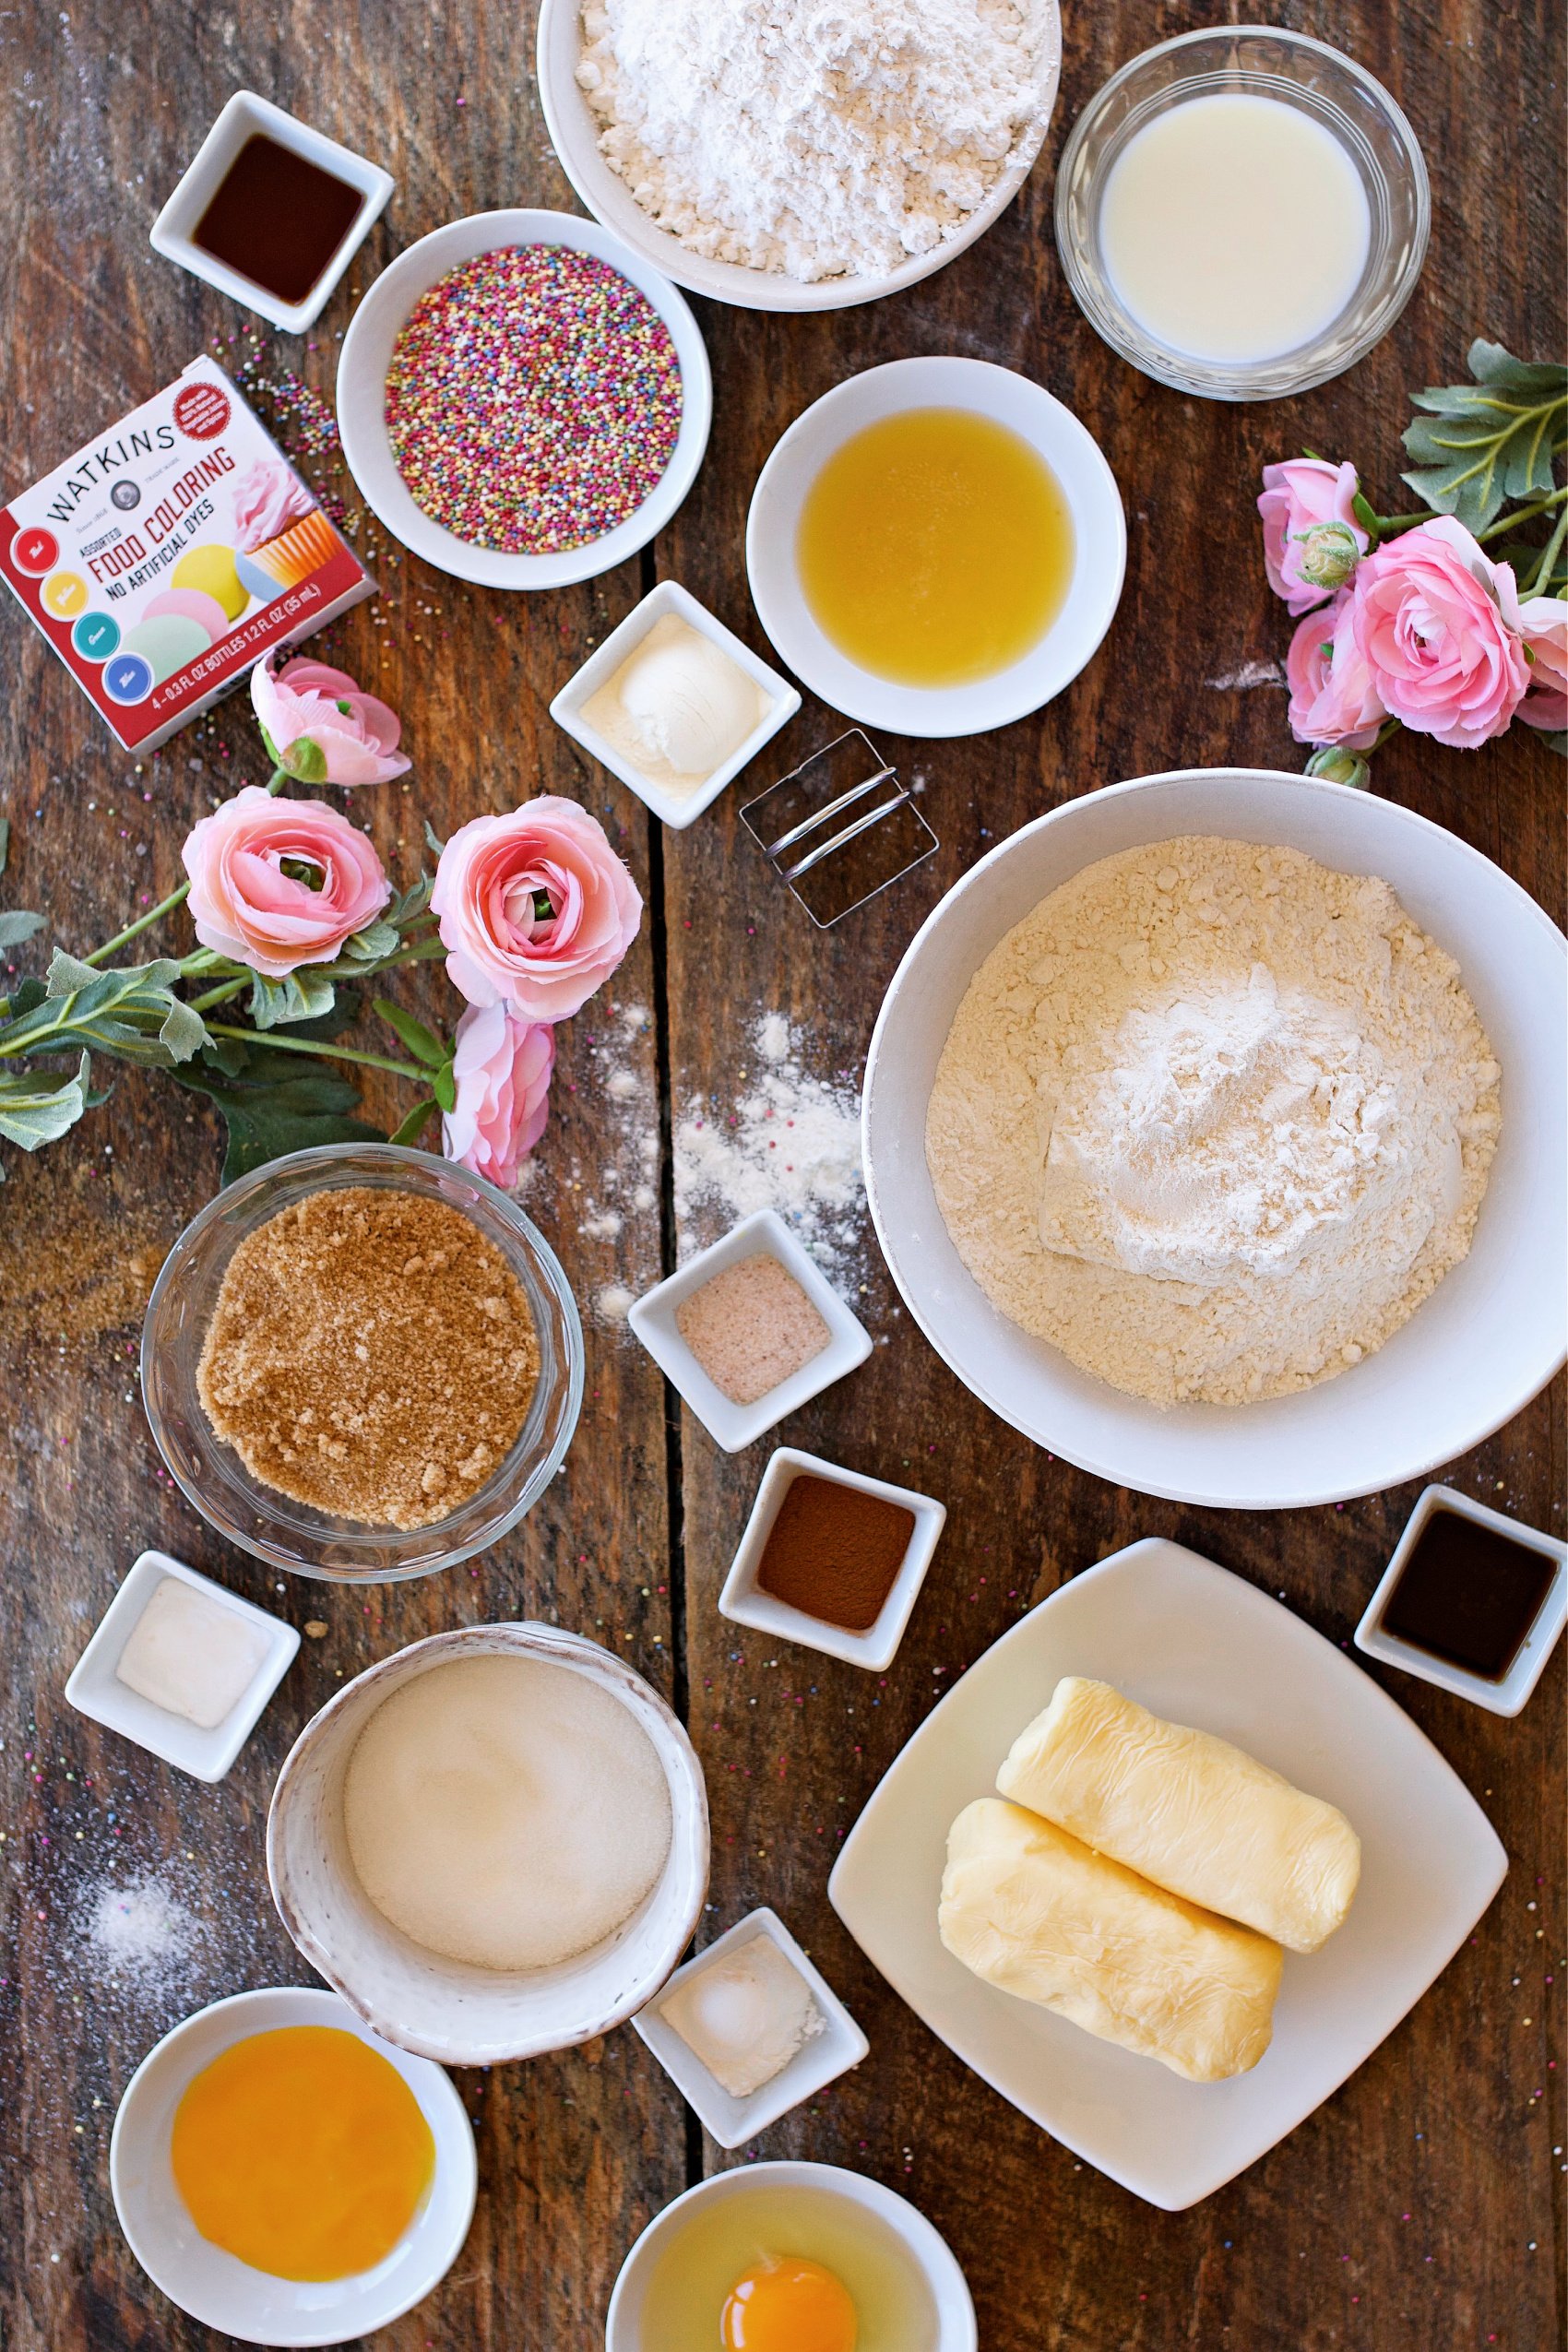
- Butter: Softened butter creates a smooth, even dough
- Egg + Egg Yolk: Adds richness and improves texture
- Cinnamon: A subtle warmth that mimics classic animal cookies
- Meringue Powder: Helps the frosting set with a smooth finish
- Natural Food Coloring: Keeps the pink frosting gentle and bright
I used the smallest square from my biscuit cutter set, but a sharp knife or pizza cutter works just as well.
Pro Tips for the Best Results
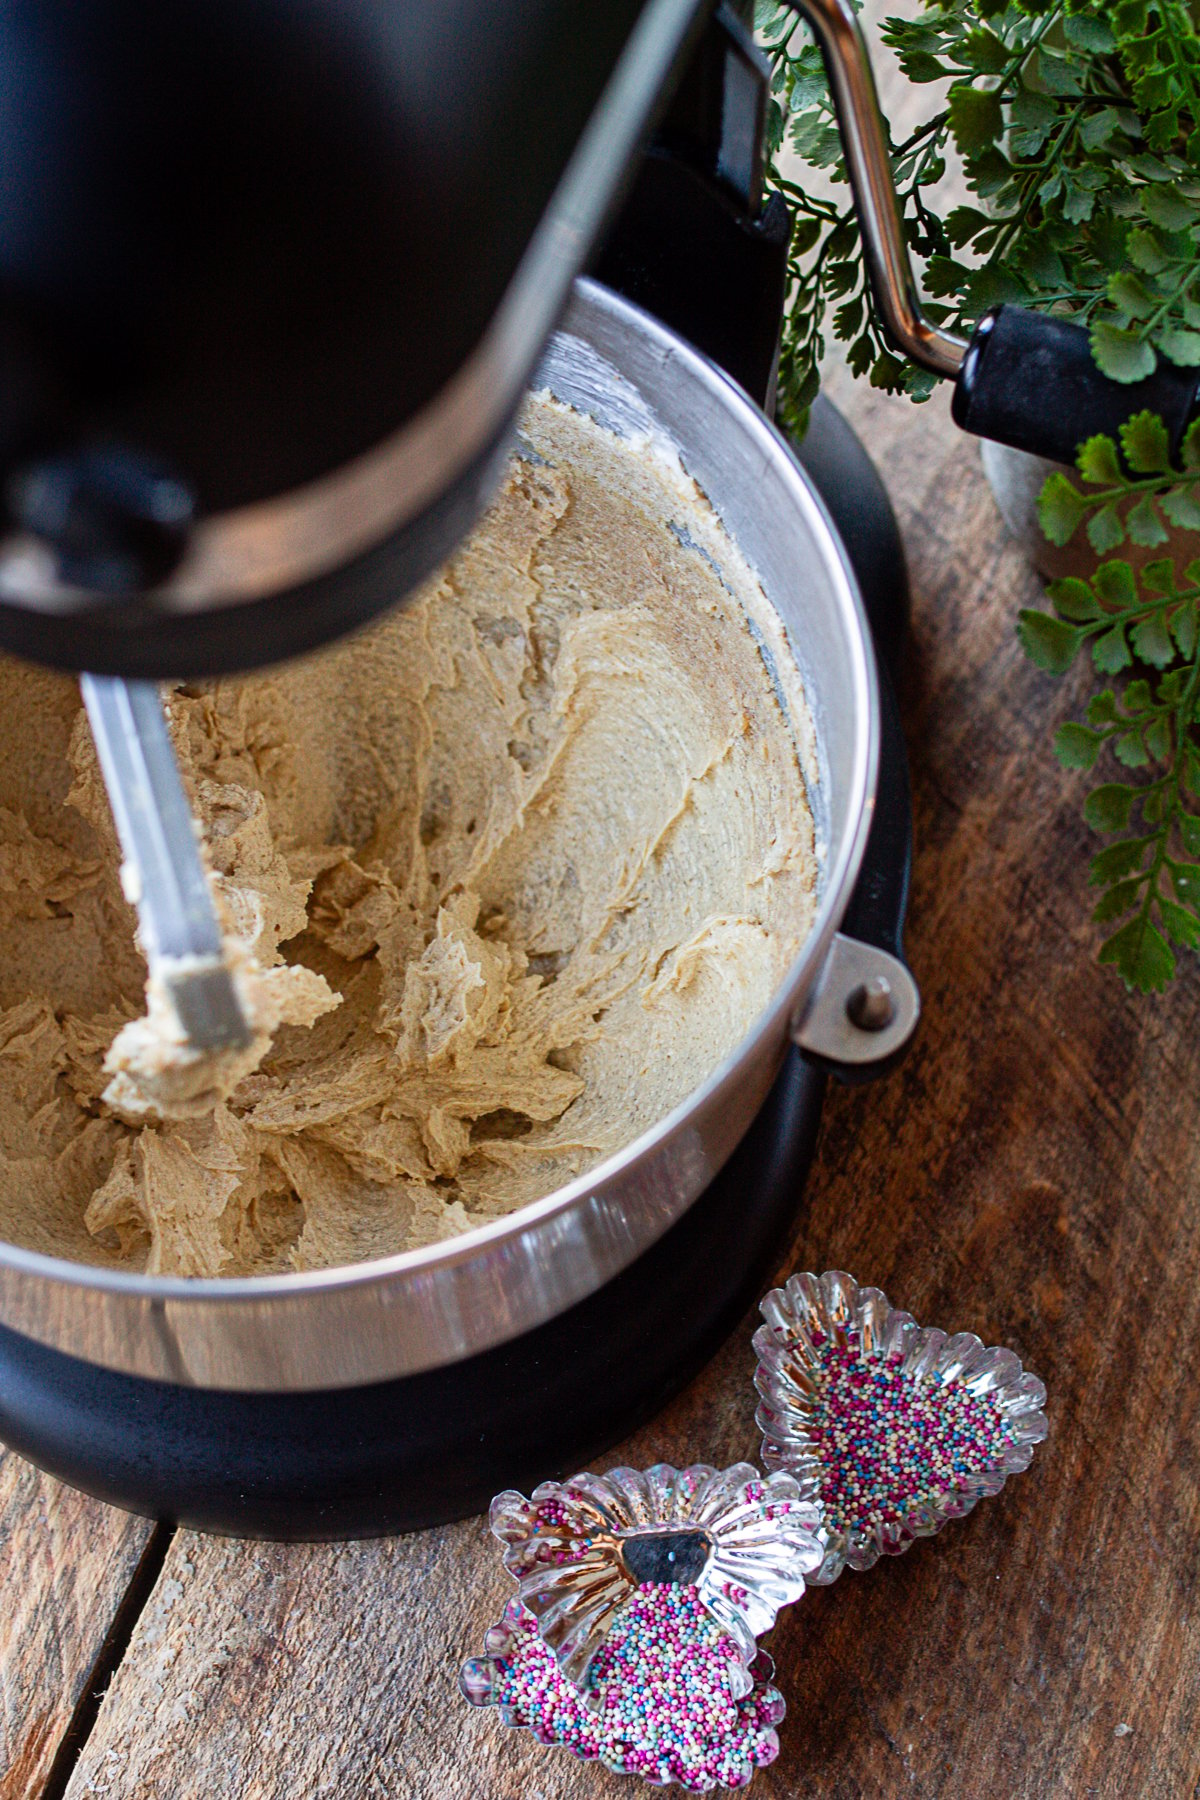
1. In the bowl of a stand mixer (or a large bowl if mixing by hand), beat the softened butter, granulated sugar, and brown sugar until light, fluffy, and fully combined. Once the mixture looks smooth and cohesive, add the egg, egg yolk, and vanilla and mix just until everything is incorporated.
At this point, slowly begin adding the dry ingredients. I like to start with about half of the flour, then add the salt, baking powder, and baking soda. Let that mix in, then add the remaining flour and mix just until a soft dough forms.

2. Turn the dough out onto a well-floured work surface and gently shape it into a disk. This dough will be a little wetter than most rollable cookie doughs, and that's exactly how it should be. Don't worry if it feels soft, using a good base of flour on the counter and rolling pin will keep it from sticking.
Roll the dough to about ¼-inch thickness, adding light dustings of flour as needed. The dough should feel soft and pliable without cracking. Once it's evenly rolled out, it's ready to be cut into small squares.
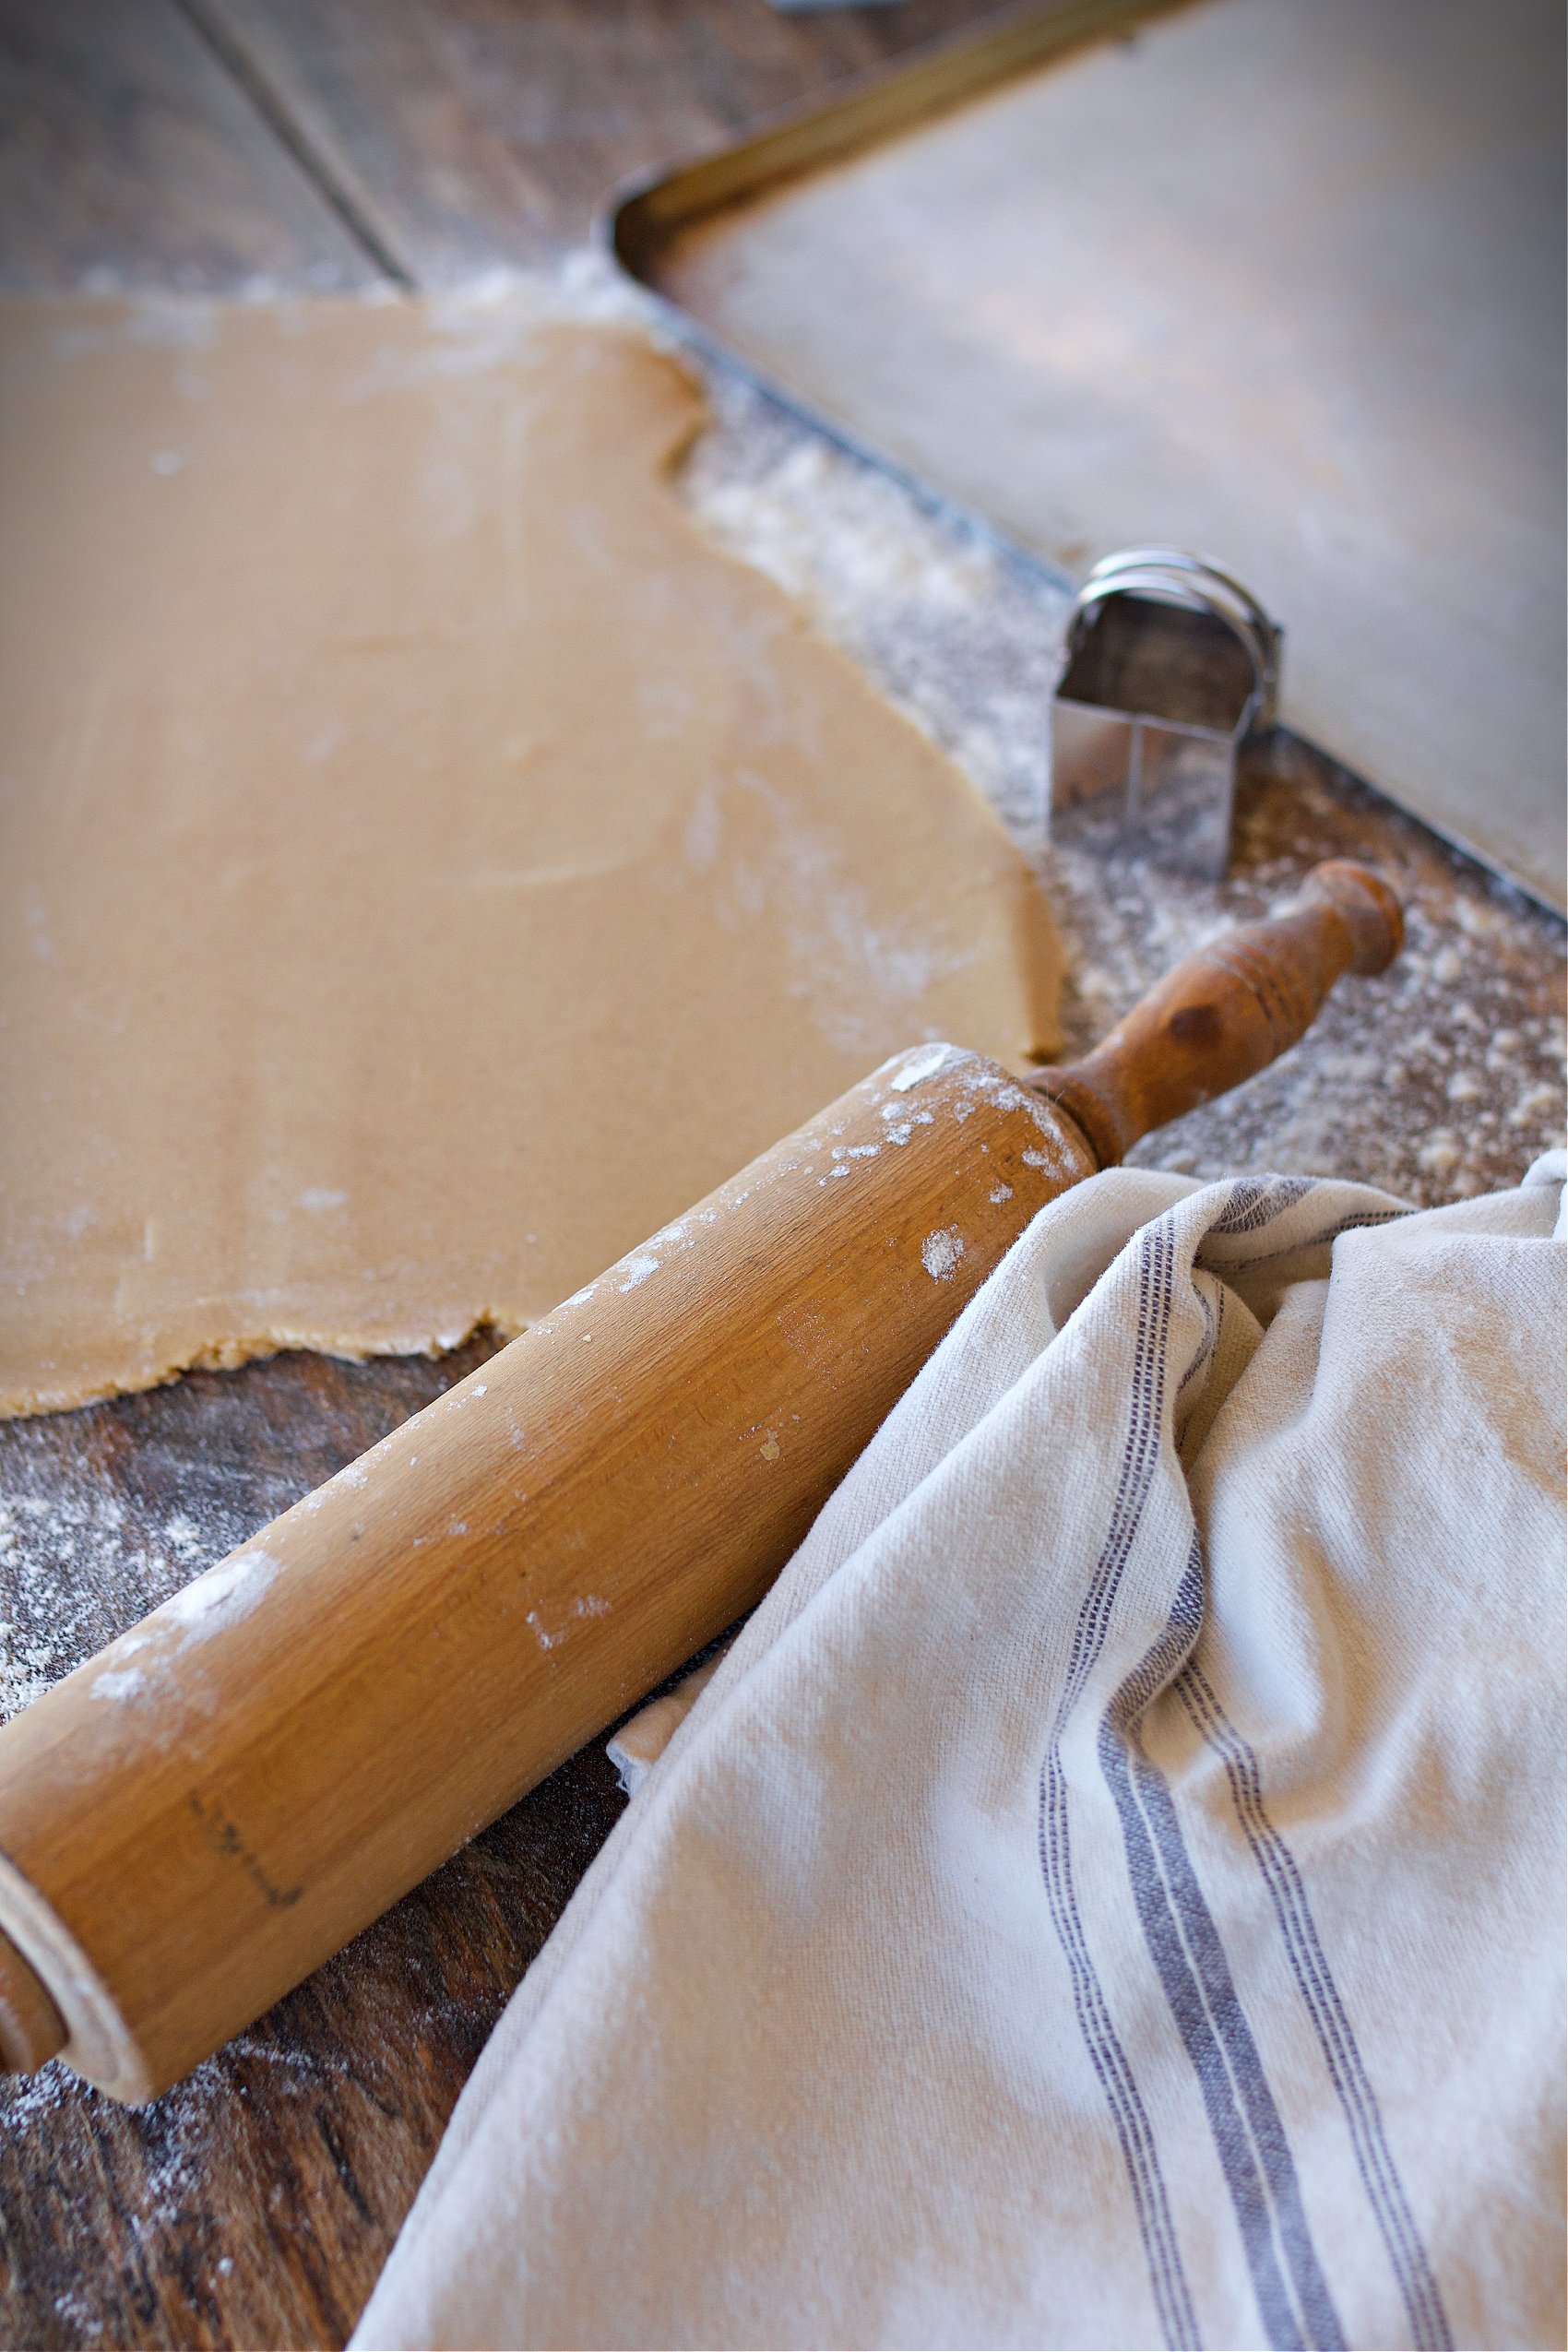
3. Cut the Cookies. Once the dough is rolled out evenly, use a sharp knife, bench scraper, or small square cutter to cut the dough into bite-sized squares.
Don't worry about perfection, these are meant to look simple and charming. Gather any scraps, gently press them back together, re-roll, and continue cutting until all the dough is used.
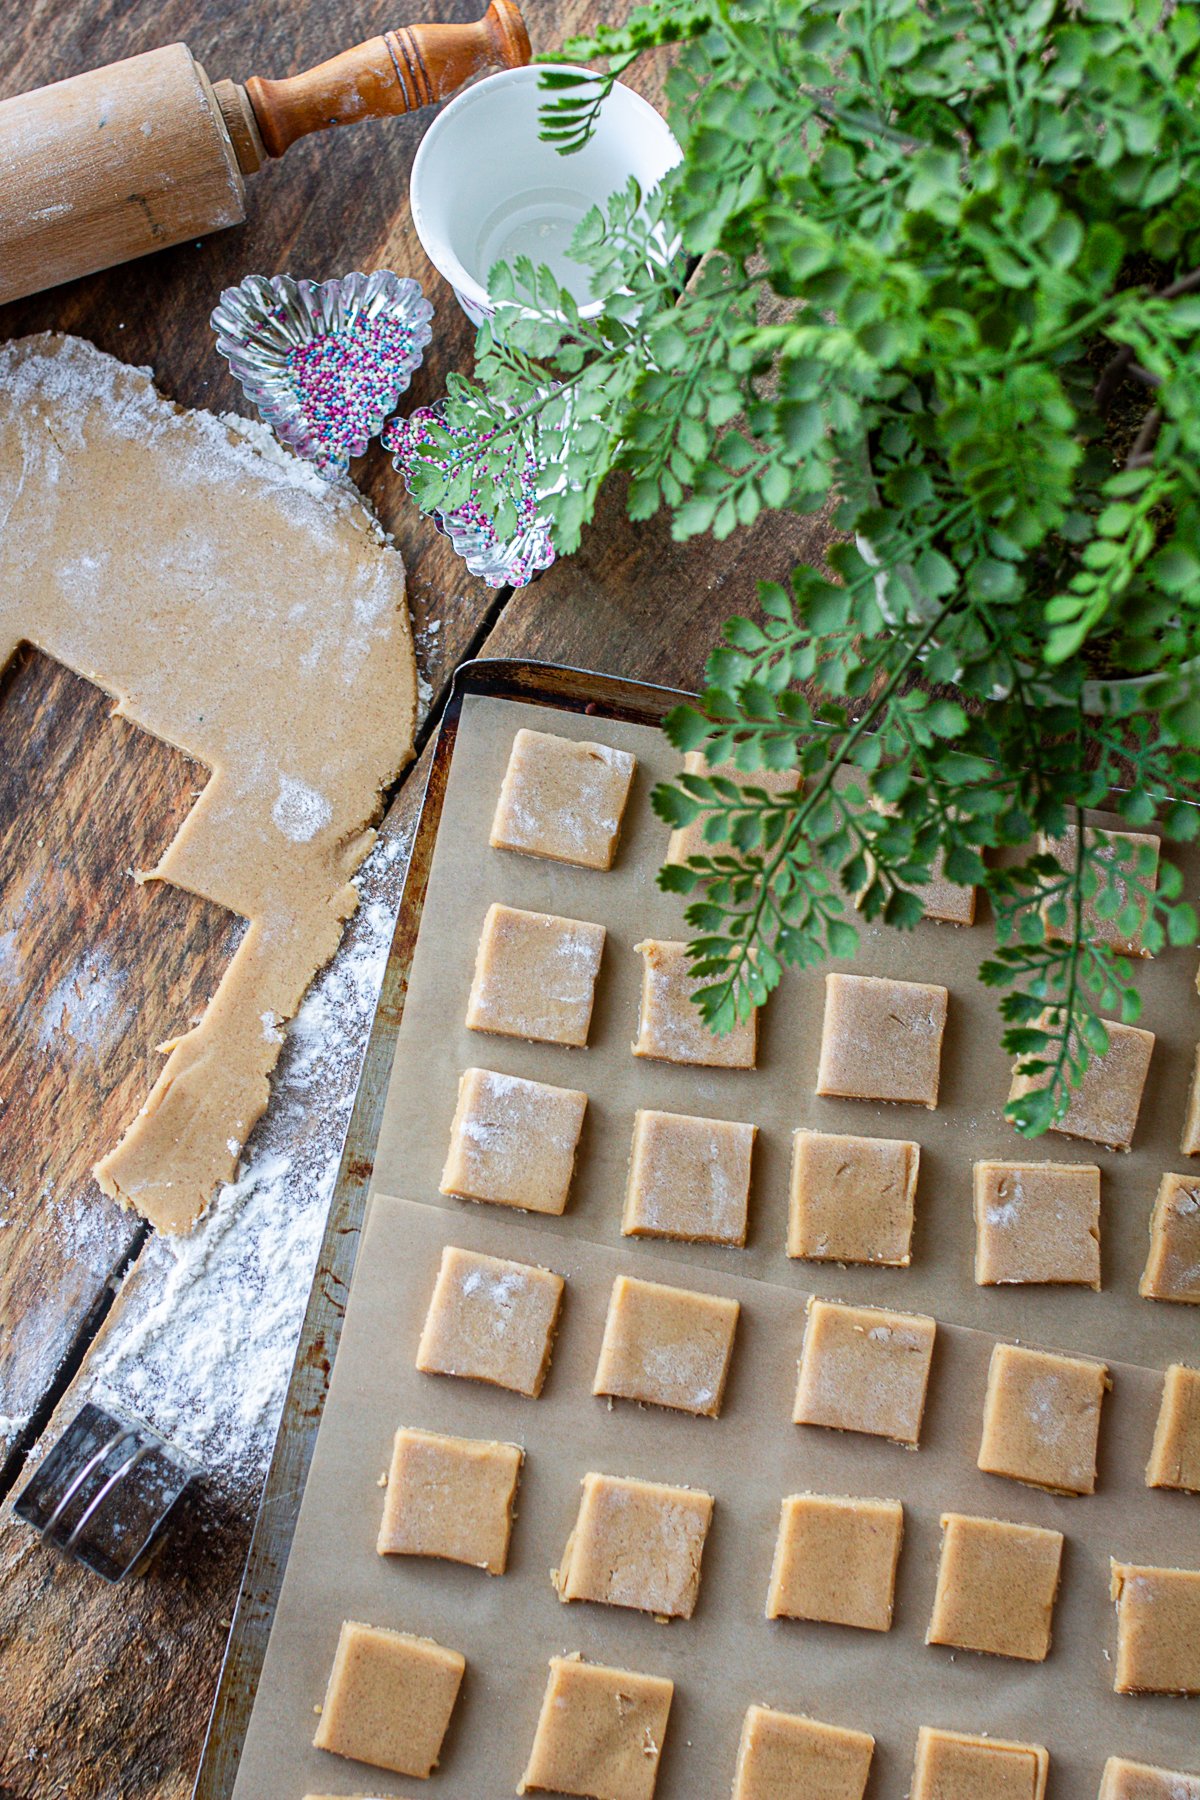
4. Transfer the squares to a parchment-lined baking sheet, leaving a little space between each cookie. They won't spread much, so you can fit quite a few on one pan.
Bake the cookies in a preheated 350°F oven for 9-10 minutes. You're looking for just a hint of color around the edges while the tops stay light. These cookies should not brown much, overbaking will make them too crisp.
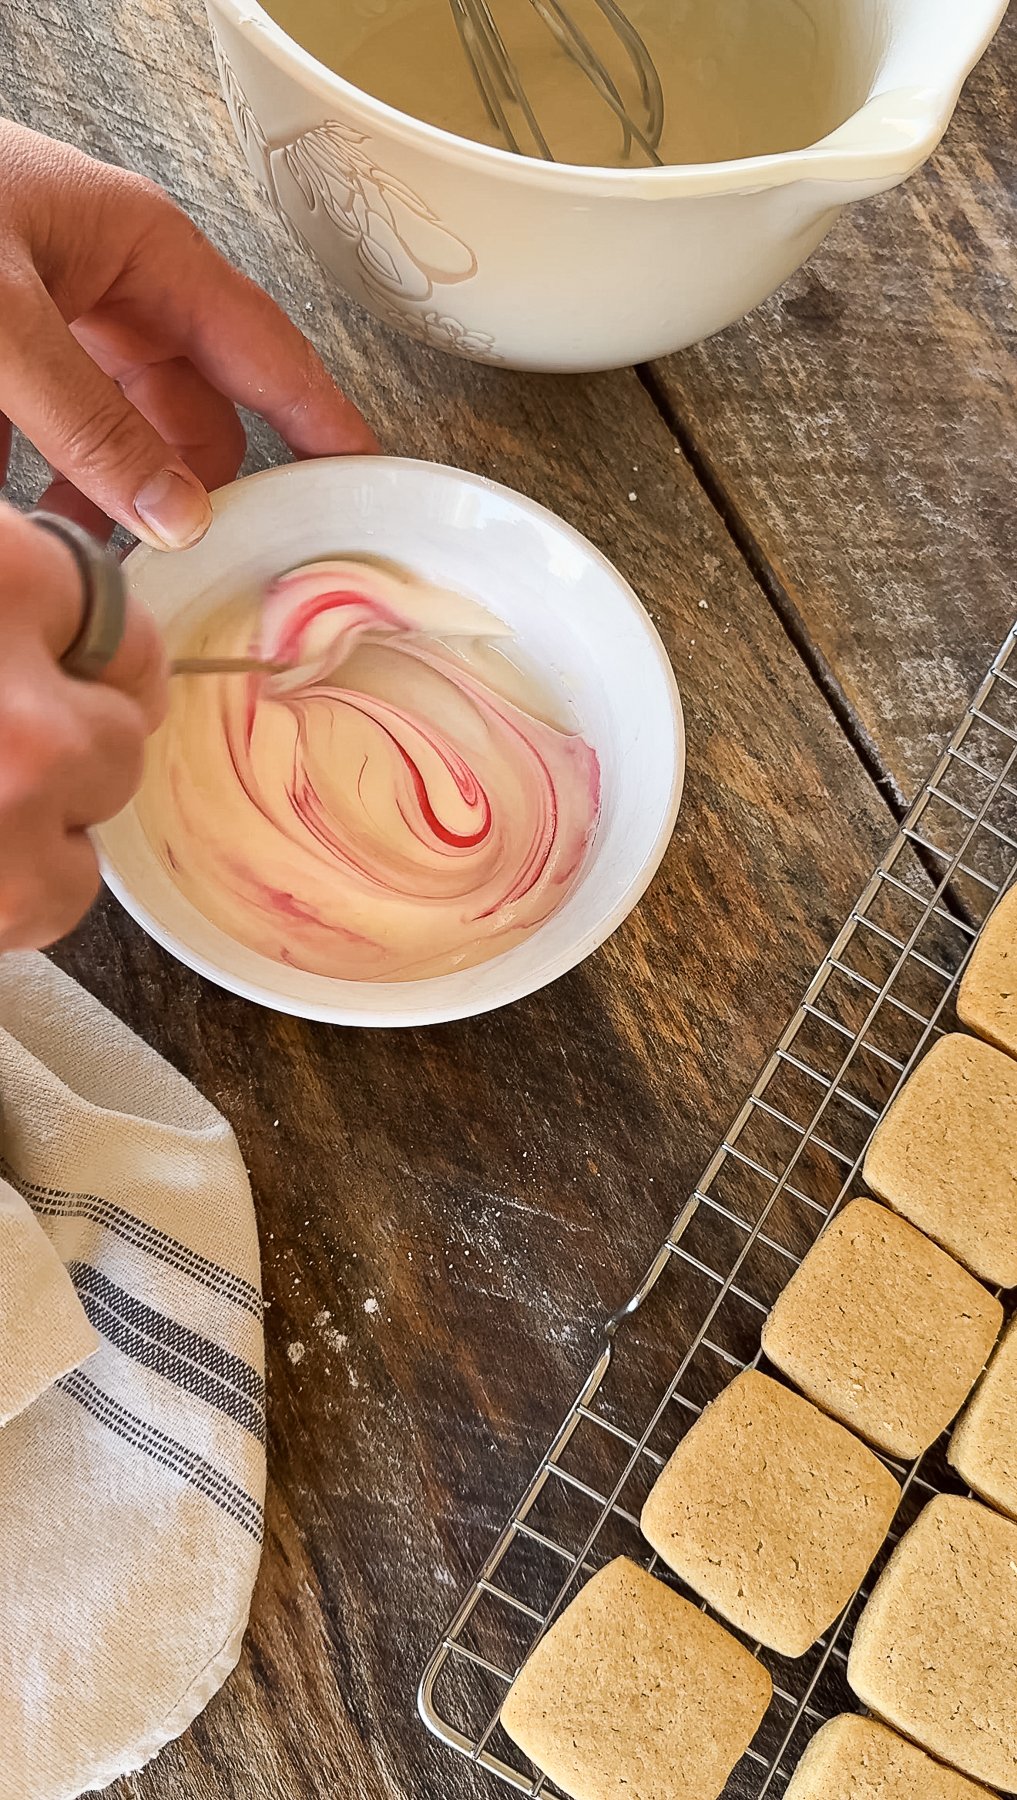
5. In a small bowl, whisk together the powdered sugar, melted butter, vanilla, milk, and meringue powder until smooth. The frosting should be thick but still dippable, not runny. Divide the frosting into two bowls if you'd like both pink and white cookies, then gently swirl in a small amount of natural food coloring to create that soft pink shade.
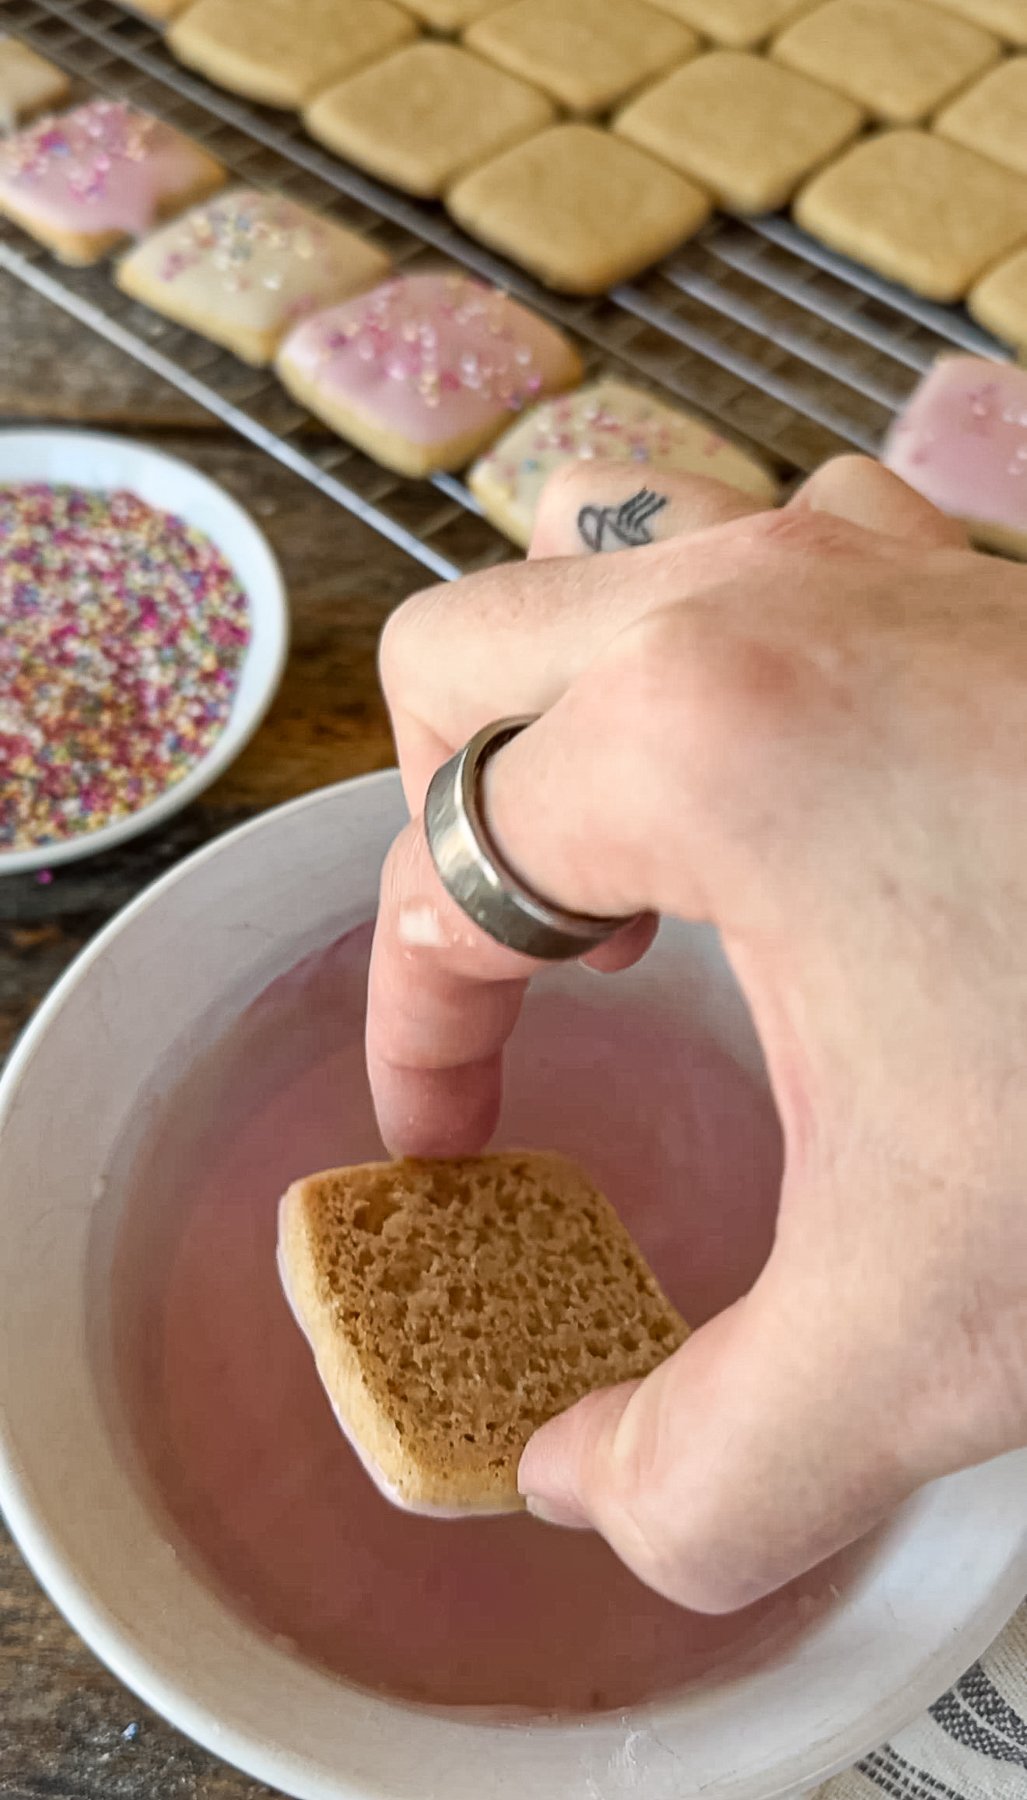
6. Once the cookies are completely cool, dip the top of each cookie into the frosting, letting the excess drip back into the bowl. Set the cookie on a wire rack and immediately add sprinkles before the frosting begins to set. The glaze will firm up as it dries, creating that classic frosted finish. Let the cookies sit undisturbed until the frosting is dry to the touch before storing or stacking.
FAQ About Cookies
Most store-bought frosted animal cookies are made with enriched flour, high-fructose corn syrup, hydrogenated vegetable oils, soy lecithin, artificial flavors, and synthetic food dyes like Red 40, Yellow 5, and Blue 1. The frosting is often finished with confectioner's glaze or waxes to create that shiny coating, along with stabilizers and preservatives to extend shelf life.
That's exactly why I prefer making these cookie bites at home. My version uses real butter, simple pantry ingredients, and naturally colored frosting, no artificial dyes, no hydrogenated oils, and no fillers. You still get the nostalgic flavor and fun sprinkles, just made in a way that actually belongs in a home kitchen.
Lightly flour your work surface and rolling pin, then roll the dough directly on the counter or a silicone mat. Use just enough flour to keep things moving without drying the dough out.
If the dough starts to feel sticky, pause and add a light dusting of flour rather than overworking it. A quick 15-20 minute chill in the fridge also helps if your kitchen is warm.
For slightly crisp cookies, roll the dough thinner and bake until the edges are lightly golden. For a softer bite, keep the dough closer to ¼-inch thick and pull the cookies from the oven when the centers still look just barely set. They'll finish firming up as they cool.
Yes, and I do recommend one. An electric mixer makes creaming the butter and sugar easier and helps create a smooth, evenly mixed dough. It's the quickest route to consistent results.
That said, this dough is forgiving and can absolutely be mixed by hand. Start with very soft butter, use a sturdy wooden spoon or spatula, and really work the butter and sugars together until the mixture looks light and cohesive before adding the eggs. Once the flour goes in, mix just until combined, overmixing by hand is easy to do and can make the cookies tougher.
You don't have to, but chilling the dough for 20-30 minutes can make it easier to handle, especially if your kitchen is warm. A short chill helps the dough cut cleanly and keeps the cookies from spreading too much in the oven.
If you want to make a second batch in advance, you can freeze the frosted cookies, but note that the frosting may soften slightly when thawed. For best results, freeze unfrosted cookies and dip them in glaze next time you want fresh ones.
Meringue powder helps create a frosting texture similar to royal icing-it sets quickly and gives the cookies that smooth, glossy finish!
Try These Fun Variations!
- White chocolate drizzle - Melt white chocolate or melted candy melts and drizzle over the cookies for extra sweetness.
- Whole wheat flour swap - For a heartier texture, use half whole wheat flour and half all-purpose flour.
- Mini chocolate chips - Add a handful of melted chocolate or chocolate chips to the frosting for a fun twist.
Did You Love These Delicious Sweet Snacks?
Let me know in the comments below if you tried this easy recipe and make sure to give it 5 starts. Also tag me over on Instagram! Don't forget to pin this mini squares cookie recipe for later!
You May Also Enjoy:

Pink & White Frosted Cookie Bites
Ingredients
- 1 cup butter softened to room temperature
- ¾ cup granulated sugar
- ½ cup brown sugar packed
- 1 large egg
- 1 egg yolk adds chewiness
- 2 teaspoon vanilla extract
- 2 ½ cups all-purpose flour or swap in whole wheat flour for a heartier texture
- 1 tsp. ground cinnamon for warmth
- 1 tsp. baking powder
- ½ tsp. baking soda
- ½ tsp. salt I use Redmond Salt with natural minerals
Frosting (Dippable Glaze!)
- 2 cups powdered sugar
- 2 tbsp. butter - melted
- ½ tsp. vanilla extract
- 4 tablespoon whole milk adjust for consistency
- 1 tablespoon meringue powder helps the frosting set like royal icing
- Natural pink food coloring or a drop of red food coloring
- Rainbow sprinkles or nonpareil sprinkles | White chocolate or candy melts optional, for extra sweetness!
Instructions
- Step 1: Make the Dough: In the bowl of a stand mixer, fitted with the paddle attachment, beat butter, granulated sugar, and brown sugar on medium speed until light and fluffy (about 2 minutes).Add the egg, egg yolk, and vanilla extract, mixing until combined.In a medium bowl, whisk together the flour, cinnamon, baking powder, baking soda, and salt.Gradually add the dry ingredients to the wet ingredients, mixing until a soft dough forms.
- Step 2: Roll and Cut the Cookies: Roll the cookie dough out on a piece of parchment paper to about ¼-inch thickness. If the dough is sticky, dust it with a little flour.Using a rolling pin, roll out the dough evenly.With a sharp knife or large cookie cutter, slice the dough into small size squares (about ½ inch to ¾ inch). If you want to purchase animals shapes cookie cutters you can grab them here. Transfer them to a prepared baking sheet lined with sheets of parchment paper.
- Step 3: Bake the Cookies: Bake at 350°F for 9-10 minutes, or until the edges turn golden brown. Keep an eye on them at the minute mark to avoid overbaking.Remove from the oven and let them cool completely on a cookie sheet before frosting.
- Step 4: Make the Dippable Frosting: In a medium bowl, whisk together powdered sugar, melted butter, vanilla extract, milk, and meringue powder until smooth. The consistency should be thick but still dippable. Add more milk if needed.Divide the frosting into two bowls. Leave one white and tint the other pink with natural food coloring or red food coloring.
- Step 5: Dip & Decorate the Cookies: Dip the top of each cookie into the frosting, letting any excess drip off.Place the cookies on a piece of parchment paper and immediately top with rainbow sprinkles or nonpareil sprinkles.Let the frosting set for about 30 minutes, or until dry to the touch.


I can’t even tell you how much joy these cookies bring me. They taste just like the animal cookies I loved as a kid, but better. Buttery, lightly spiced, and covered in that sweet frosting with sprinkles on top… it’s impossible not to smile when you eat one. I always make extra because they disappear faster than I expect!
Oh my! These look amazing. I remember those animal cookies?