French Silk Pie Recipe | Step By Step Easy Instructions
As the holidays settle in and the kitchen becomes the coziest room in the house, this French Silk Pie recipe always finds its place on our counter. The silky texture, dusted cocoa, and chilled chocolate filling are everything my son waits for each year. He skips apple, pumpkin, and fruit pies entirely. (Yes, it's shocking to me too) But this one? It's the dessert he proudly calls his holiday tradition.
While most of our holiday baking leans classic, like my Traditional Pie Crust, Chocolate Dipped Biscottis, or our soft Caramel Chews, this pie is the one recipe where we bend our usual whole-ingredient rules. He loves the regular Oreo cookie crust, so it stays.
A good, vanilla extract makes a noticeable difference here. I use my own Homemade Vanilla Extract in this pie, and its depth brings out the chocolate flavor. It gives the silky mixture that warm, rich finish that balances the crust beautifully and turns this simple dessert into something truly special.

Quick Look
- ⏱️ Time: About 30 minutes hands-on, plus chilling
- ? Cost: Moderate (chocolate + whipping cream)
- ? Cook Temp: Gently heated sugar/egg mixture to 160°F
- ? Texture: Smooth, airy texture with a classic chocolate mousse feel
- ?️ Best For: Holidays, special occasions, or the first bite of Christmas dessert
- ? Skill Level: Beginner-friendly
- ⭐ Pro Tip: Use regular Oreo cookies, double-stuffed prevents the crumb crust from setting properly because it has too much cream filling.
Why You'll Love This French Silk Pie Recipe
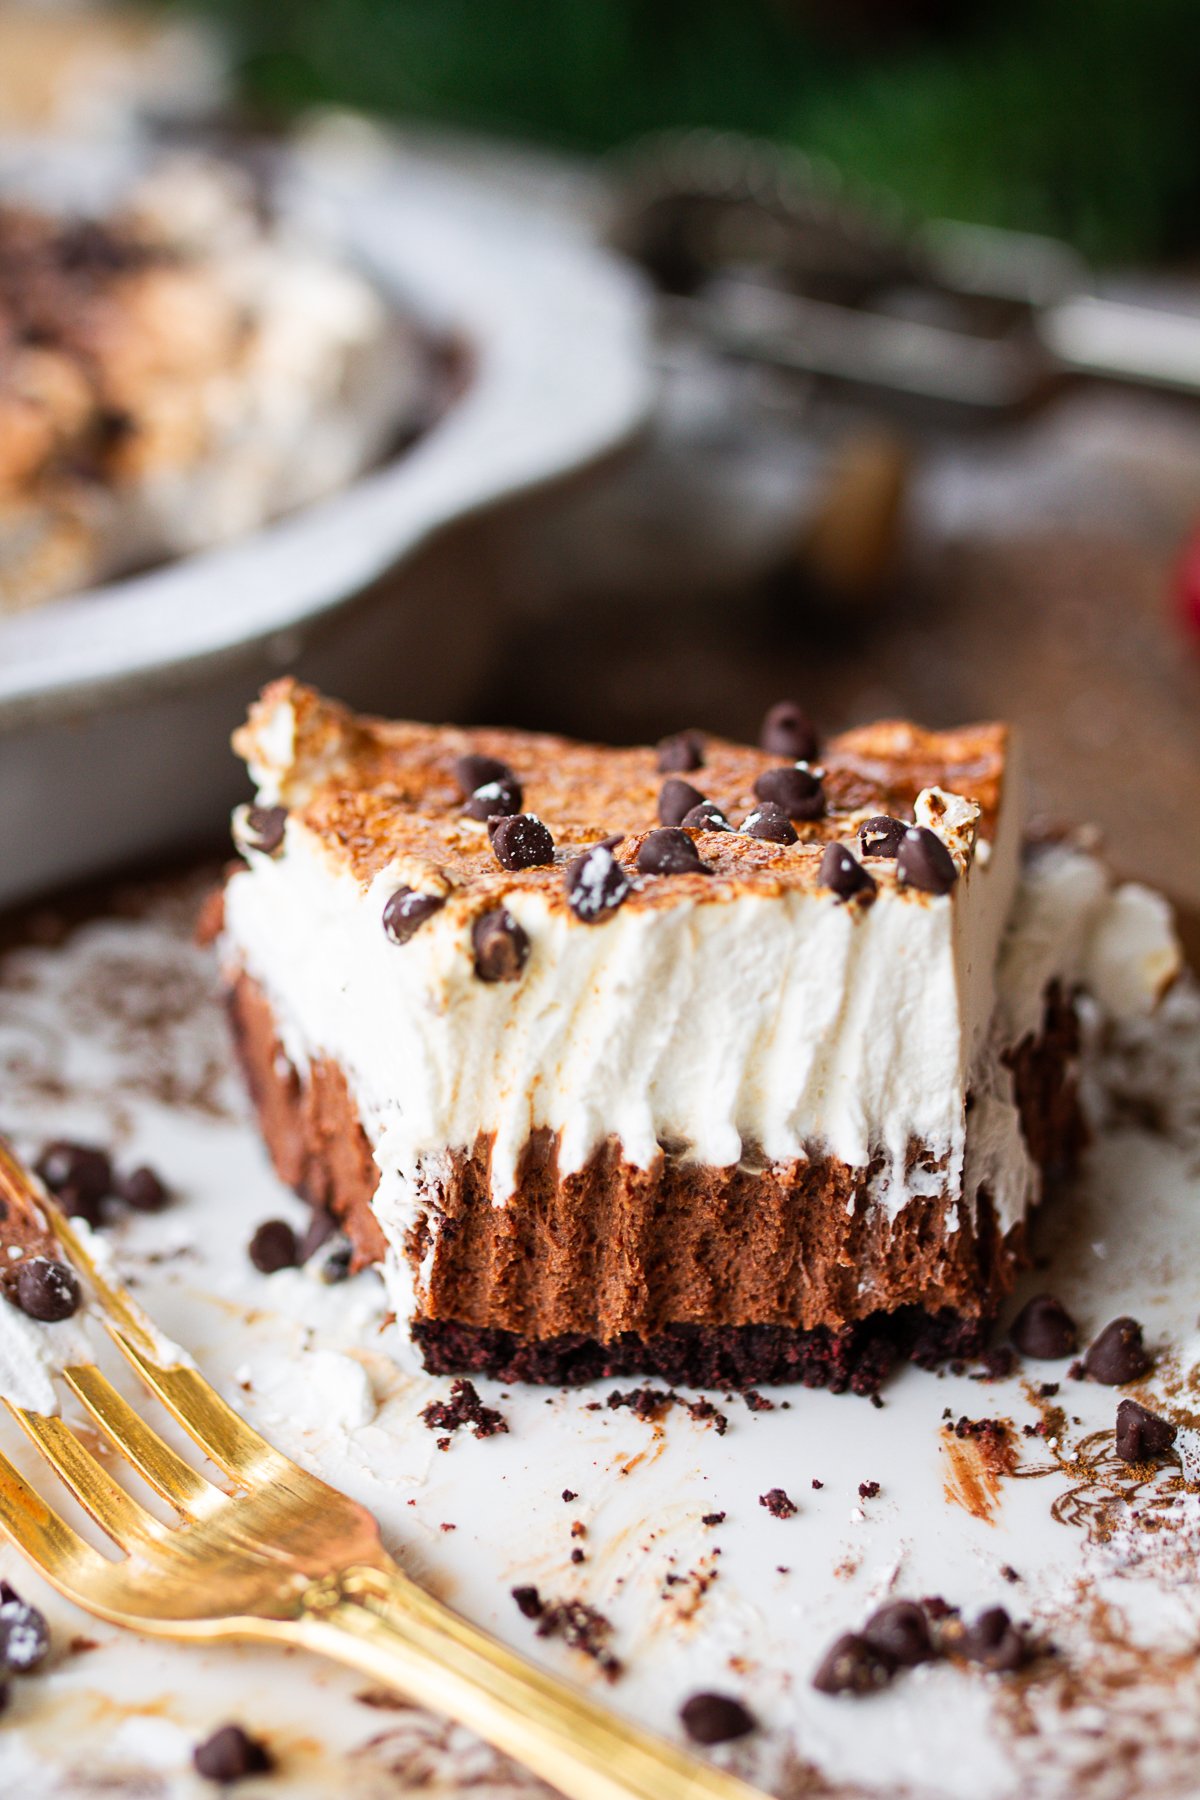
This homemade French silk pie recipe blends a classic dessert with simple technique and real ingredients. The chocolate mixture melts beautifully into the warm sugar mixture, creating a chocolate silk pie filling that tastes like a softer version of chocolate mousse. Folding in fluffy whipped cream gives it that airy texture you expect from a true French silk chocolate pie, and the chilled crumb crust adds the perfect contrast.
It feels fancy, but it truly comes together with simple pantry ingredients and the tools you already have. A sturdy mixing bowl and the bowl of a stand mixer are all you need. I rely on my 7-quart KitchenAid here, it's held up beautifully after I've admittedly burned out more than one 6-quart model over the years making bread and double batches of almost everything. No double boiler, no complicated steps, and no odd stabilizers for this recipe, just real chocolate, real cream, and good vanilla. It's the kind of classic recipe that turns into a family staple the very first slice.
Ingredient Notes + Substitutions
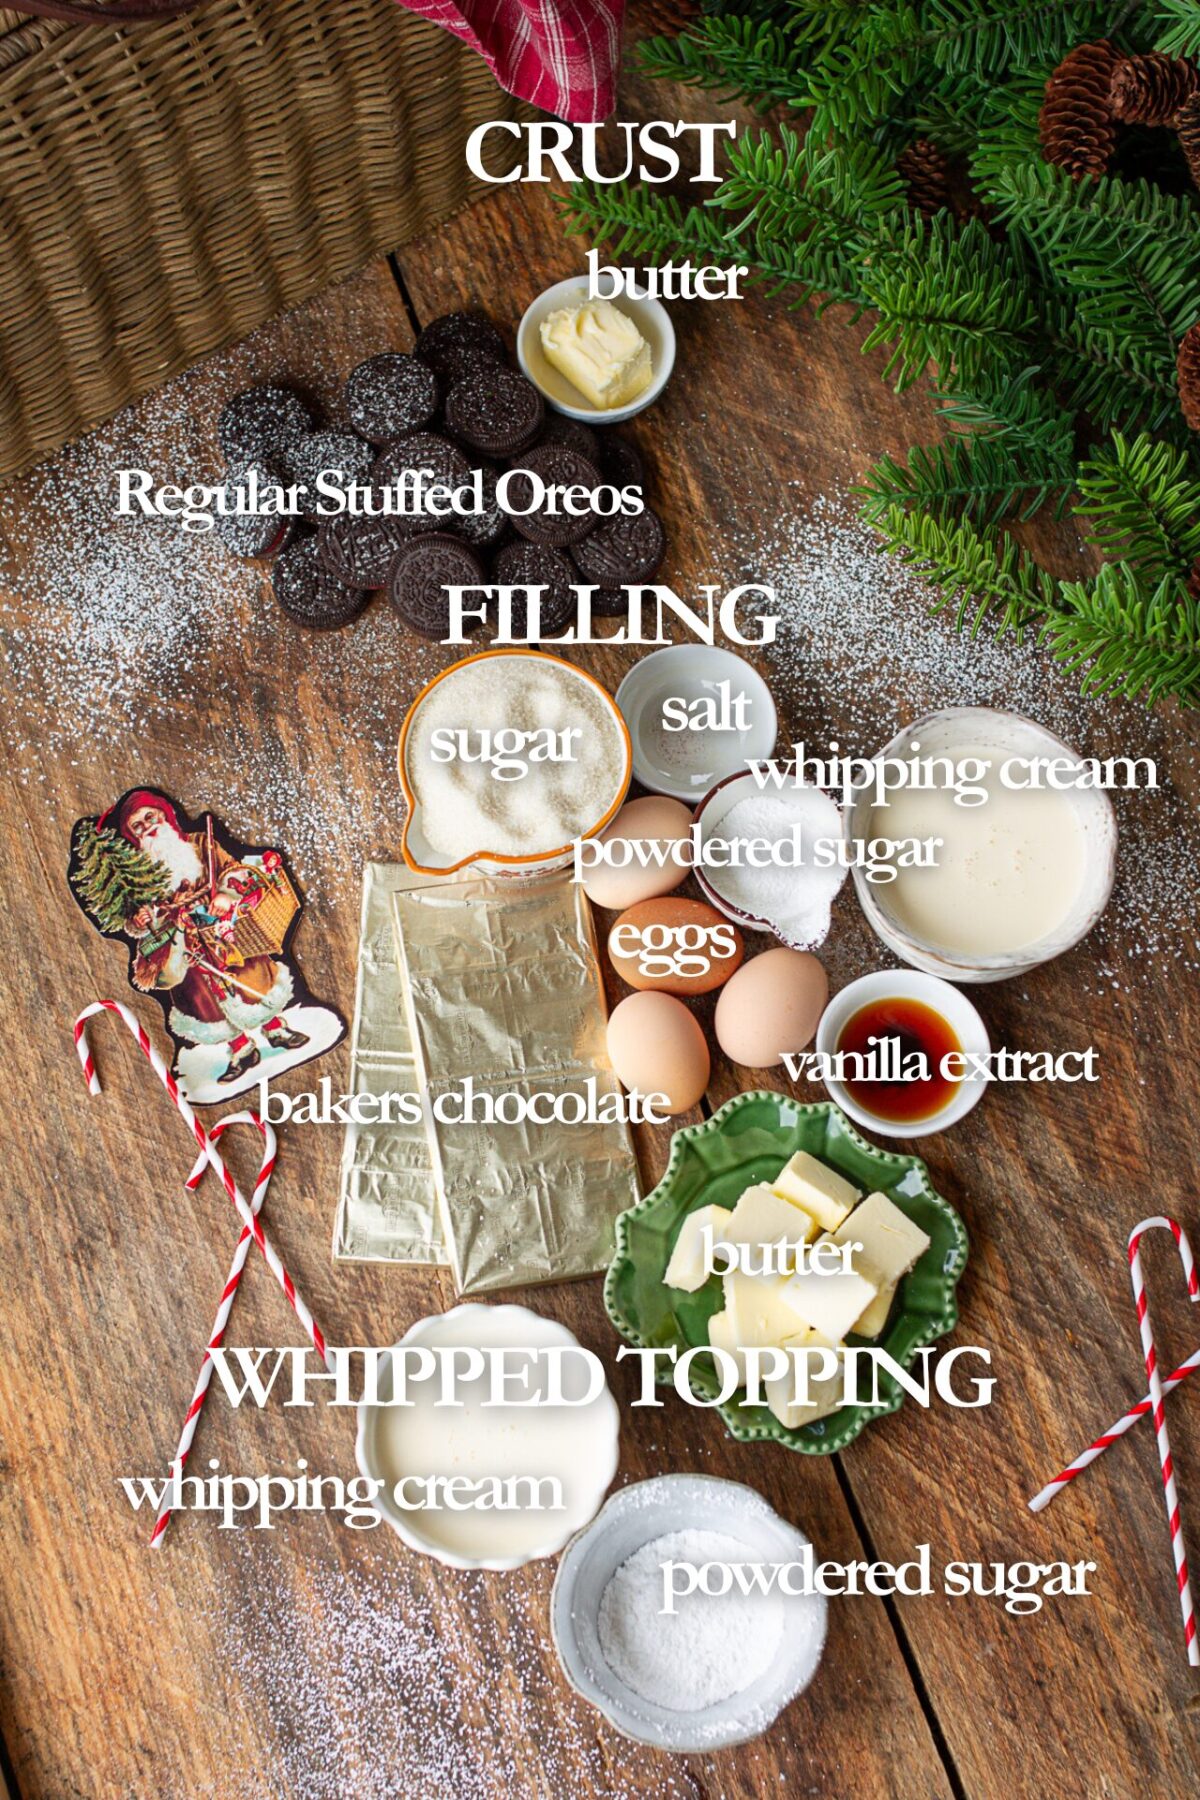
Regular Oreo cookie crust: Use standard Oreos, not double-stuffed. A double-stuffed cookie creates too much cream and prevents the crumb crust from setting. A food processor makes this step fast, but a rolling pin works too.
Bittersweet or semisweet chocolate: Both melt smoothly into the sugar mixture. Avoid chocolate chips if possible, they contain stabilizers that affect the cooling process. For a sweeter pie, semisweet works well; for a deeper flavor, use bittersweet.
Salted butter: Your butter should be room temperature for the best silky texture when beaten on high speed with the paddle attachment. I add a small pinch (¼ teaspoon) of salt to enhance the chocolate flavor.
Whipping cream: Stable, reliable, and whips to stiff peaks without overthinking it. It's folded into the chocolate filling for that signature lightness.
Good vanilla extract: Since this recipe uses real ingredients, vanilla stands out. Use a quality extract or your own Homemade Vanilla Extract for the best results.
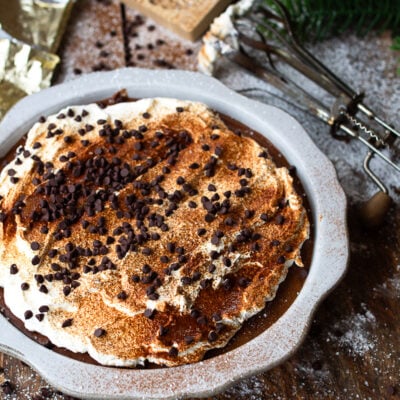
Chocolate curls or shavings: Use a vegetable peeler along the side of a chocolate bar for pretty curls on the top of the pie. Or simply dust with dutch cocoa powder for a no hassle finish.
Step-by-Step How to Make This Pie
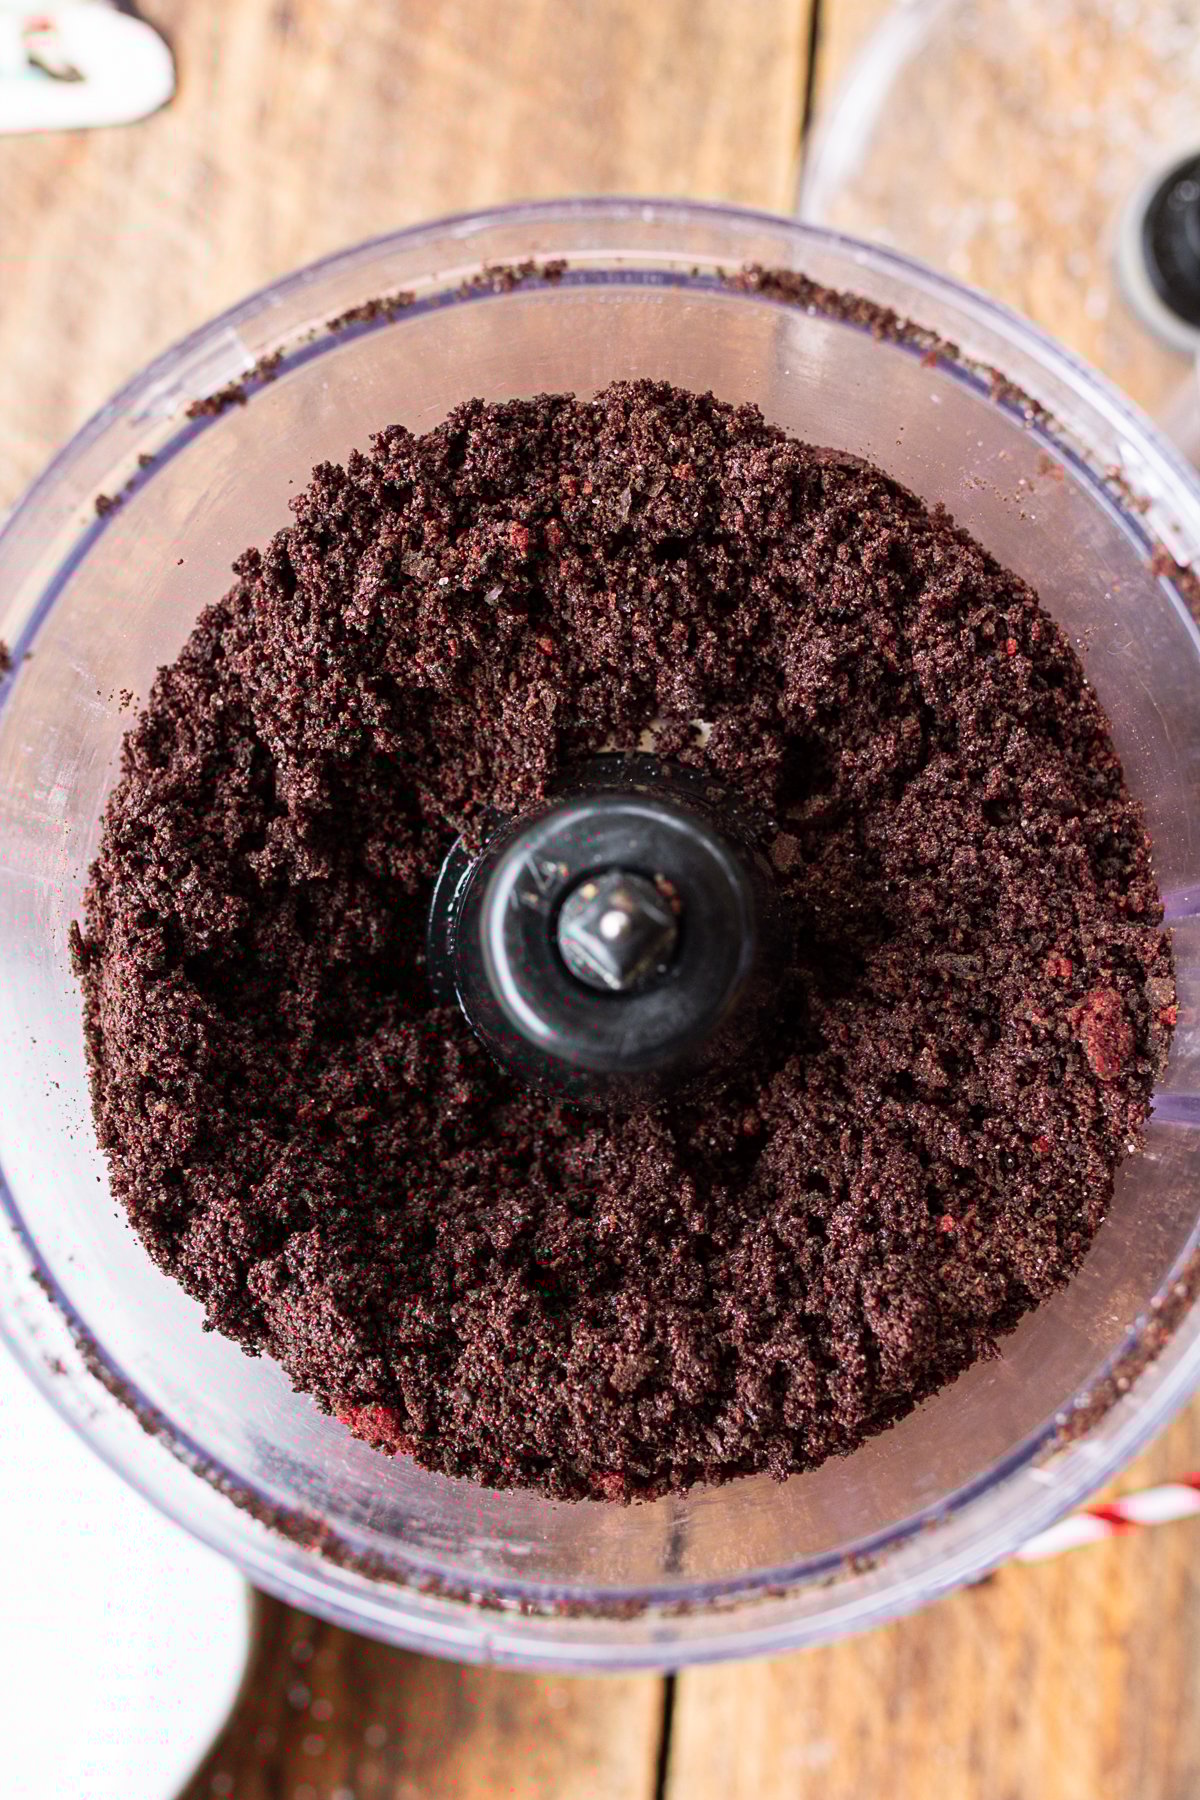
- Make the Crust: Add the regular Oreo cookies to a food processor and pulse until they become a fine, even crumb. You're looking for a texture that packs easily when pinched, no large pieces left behind.
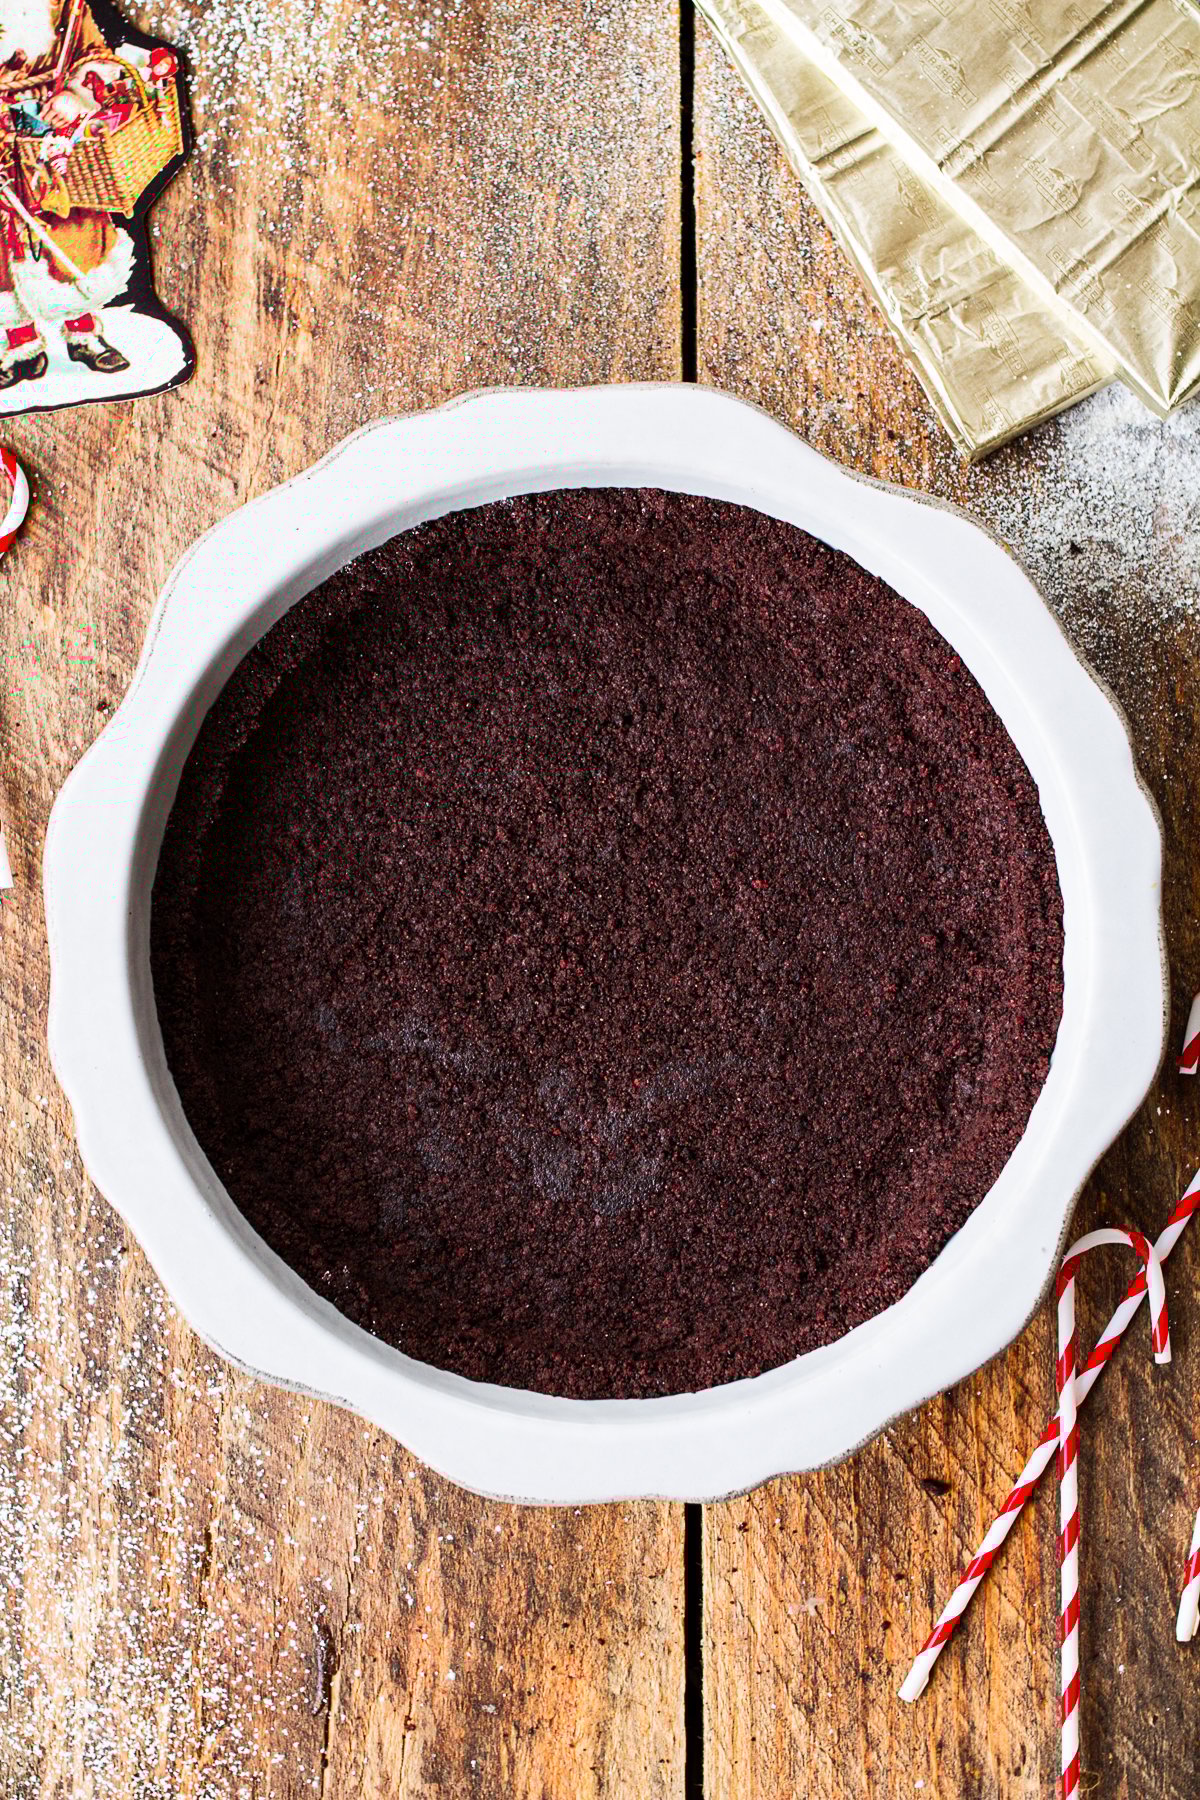
- Press Into the Pie Dish: Pour the crumbs into a deep pie pan and stir in the melted salted butter. Press the mixture firmly across the bottom and up the sides of the dish, making sure the crust is compact and even. Bake at 350°F for 10 minutes, then let it cool completely before adding the filling.
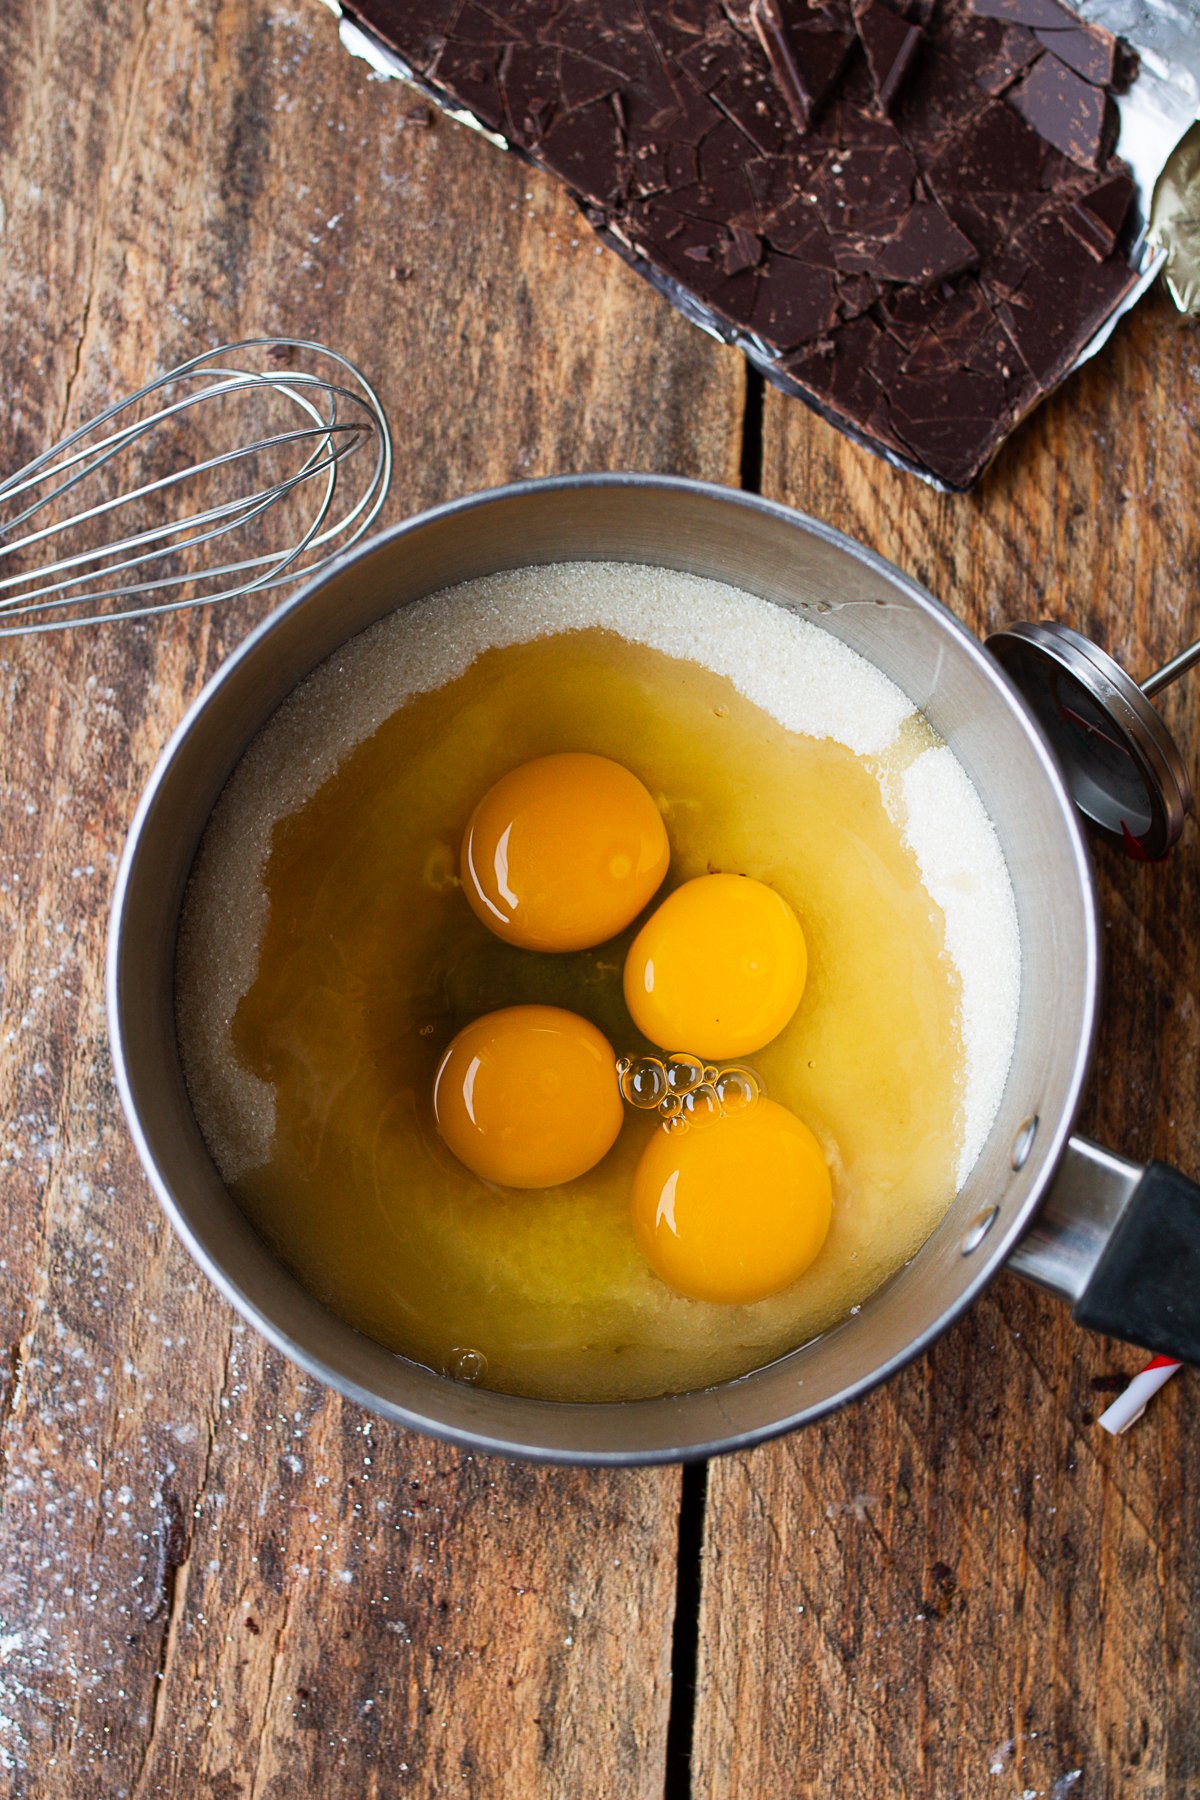
- Warm the Sugar Mixture: Add the granulated sugar and eggs to a saucepan and whisk them together. Set the pan over medium-low heat and continue whisking gently as the mixture warms.
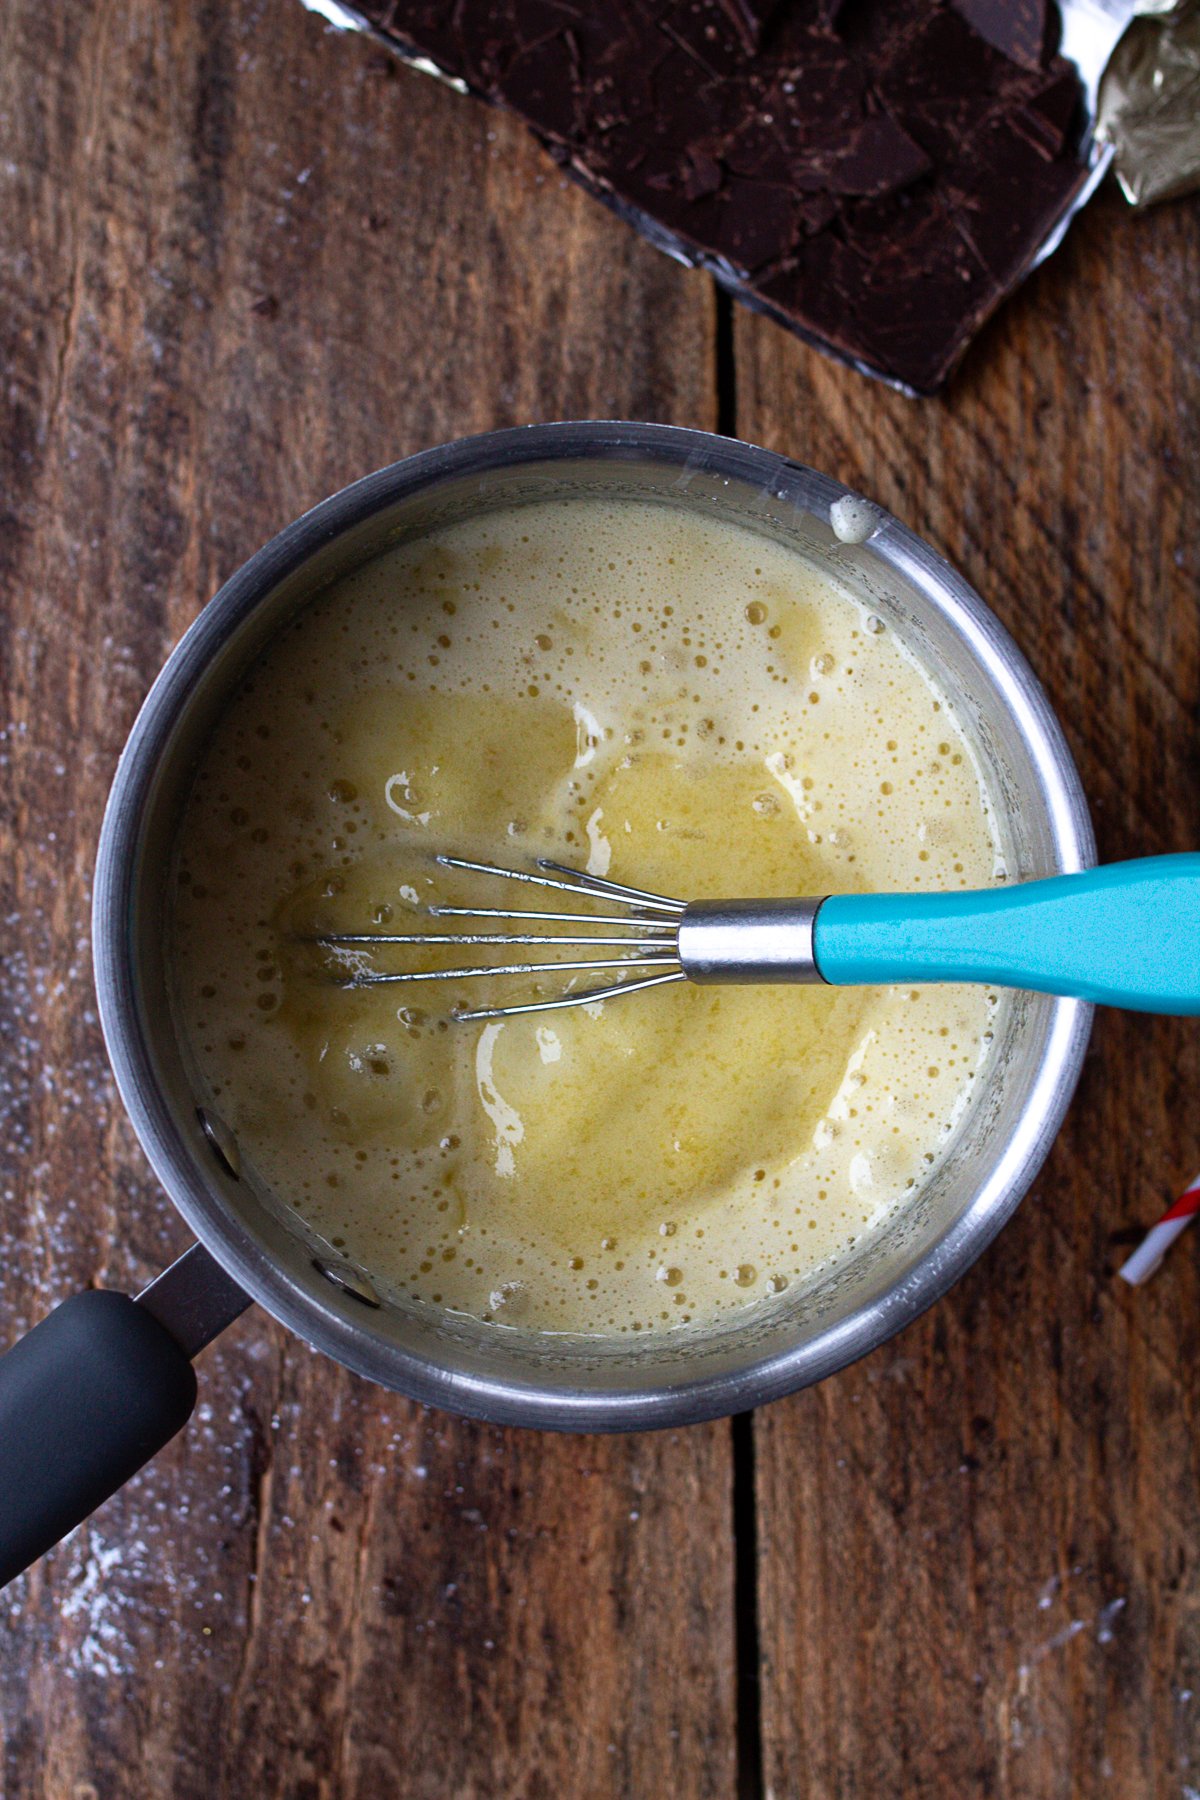
- Heat Until Thickened: Keep whisking until the sugar mixture reaches 160°F and lightly coats the back of a spoon. The mixture will look pale, slightly thickened, and smooth, ready for the chopped chocolate.

- Add the Chocolate: Break the chocolate into pieces and add it straight into the warm sugar mixture. The heat from the pan melts it gently, and a few slow stirs bring it together into a smooth, glossy base.

- Melt Until Silky: Continue whisking until every piece of chocolate has melted and the mixture looks thick and velvety. Set the pan aside to cool while you prepare the butter mixture.
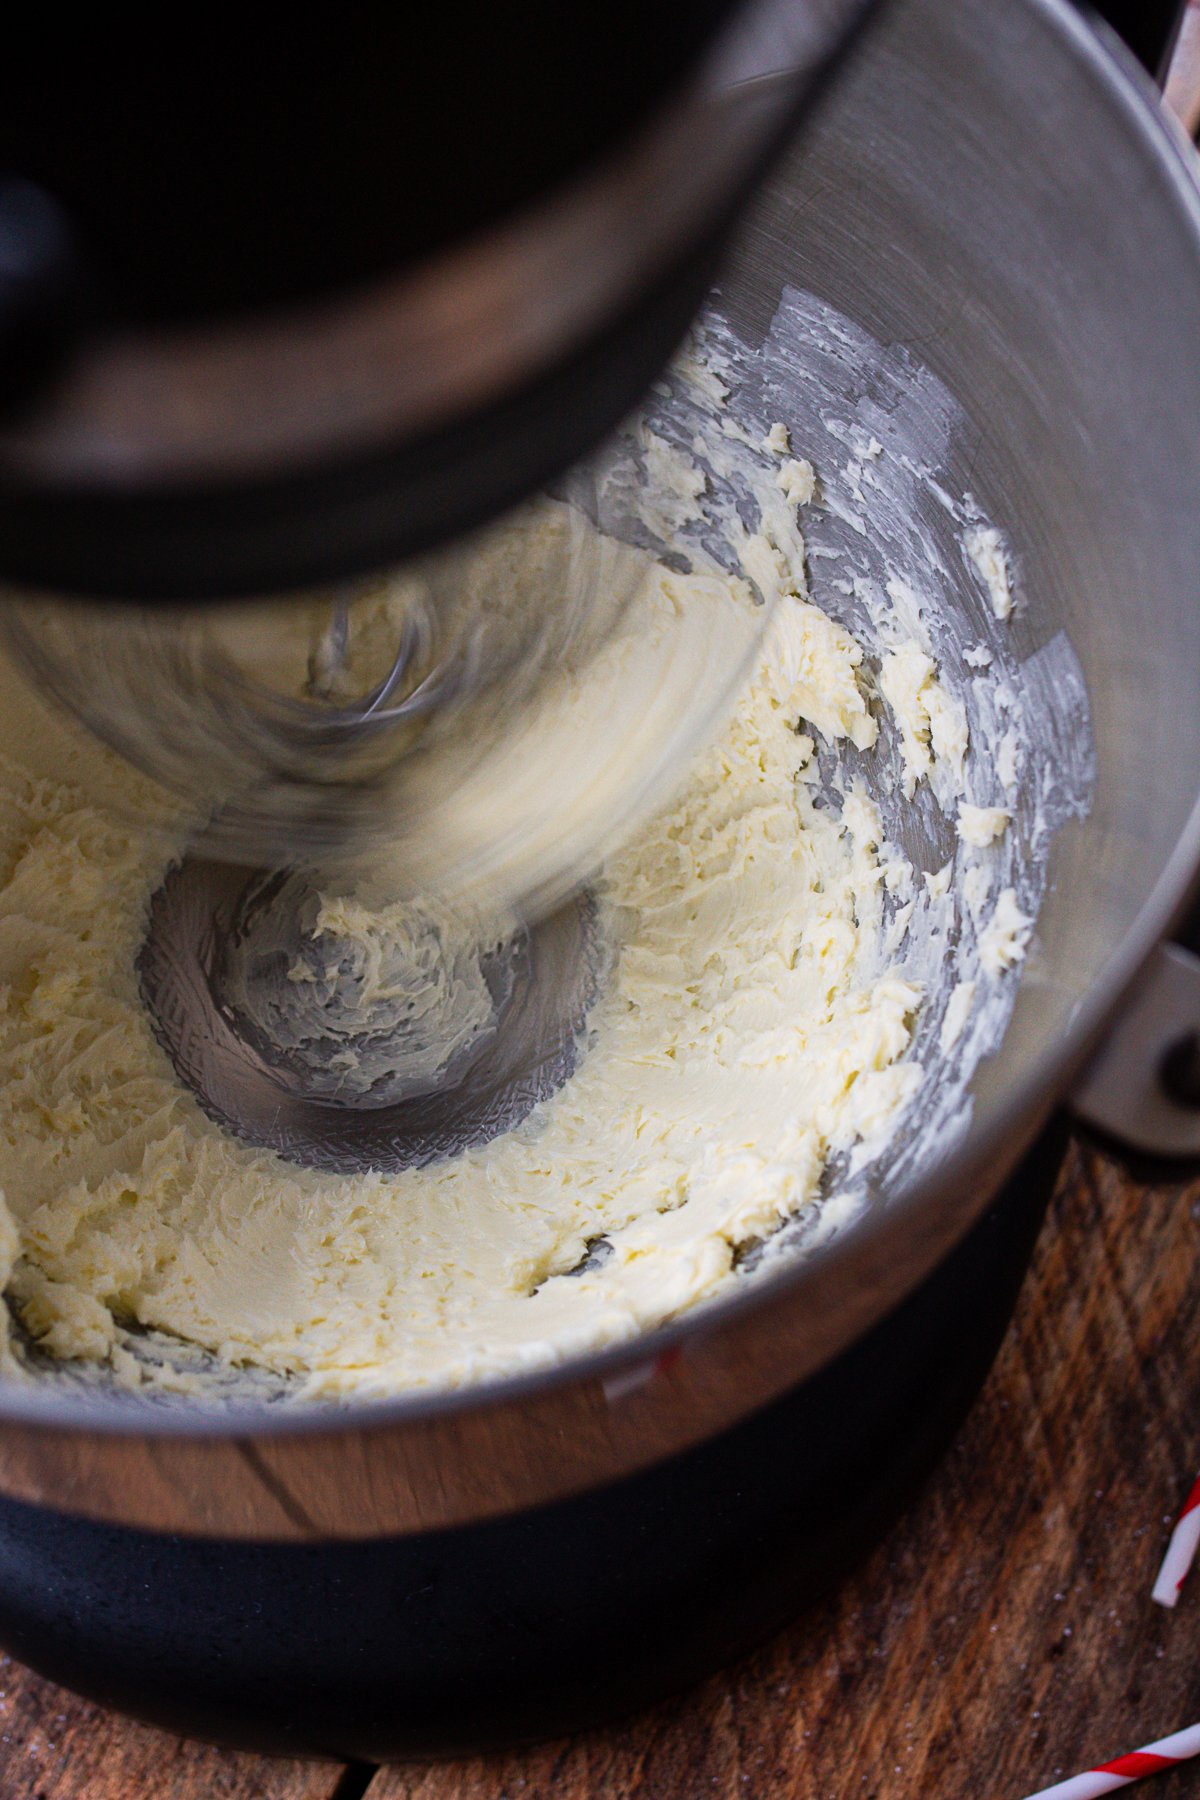
- Whip the Butter Mixture: Transfer the cooled chocolate mixture into the bowl with the whipped butter and blend until everything is smooth, glossy, and fully combined.
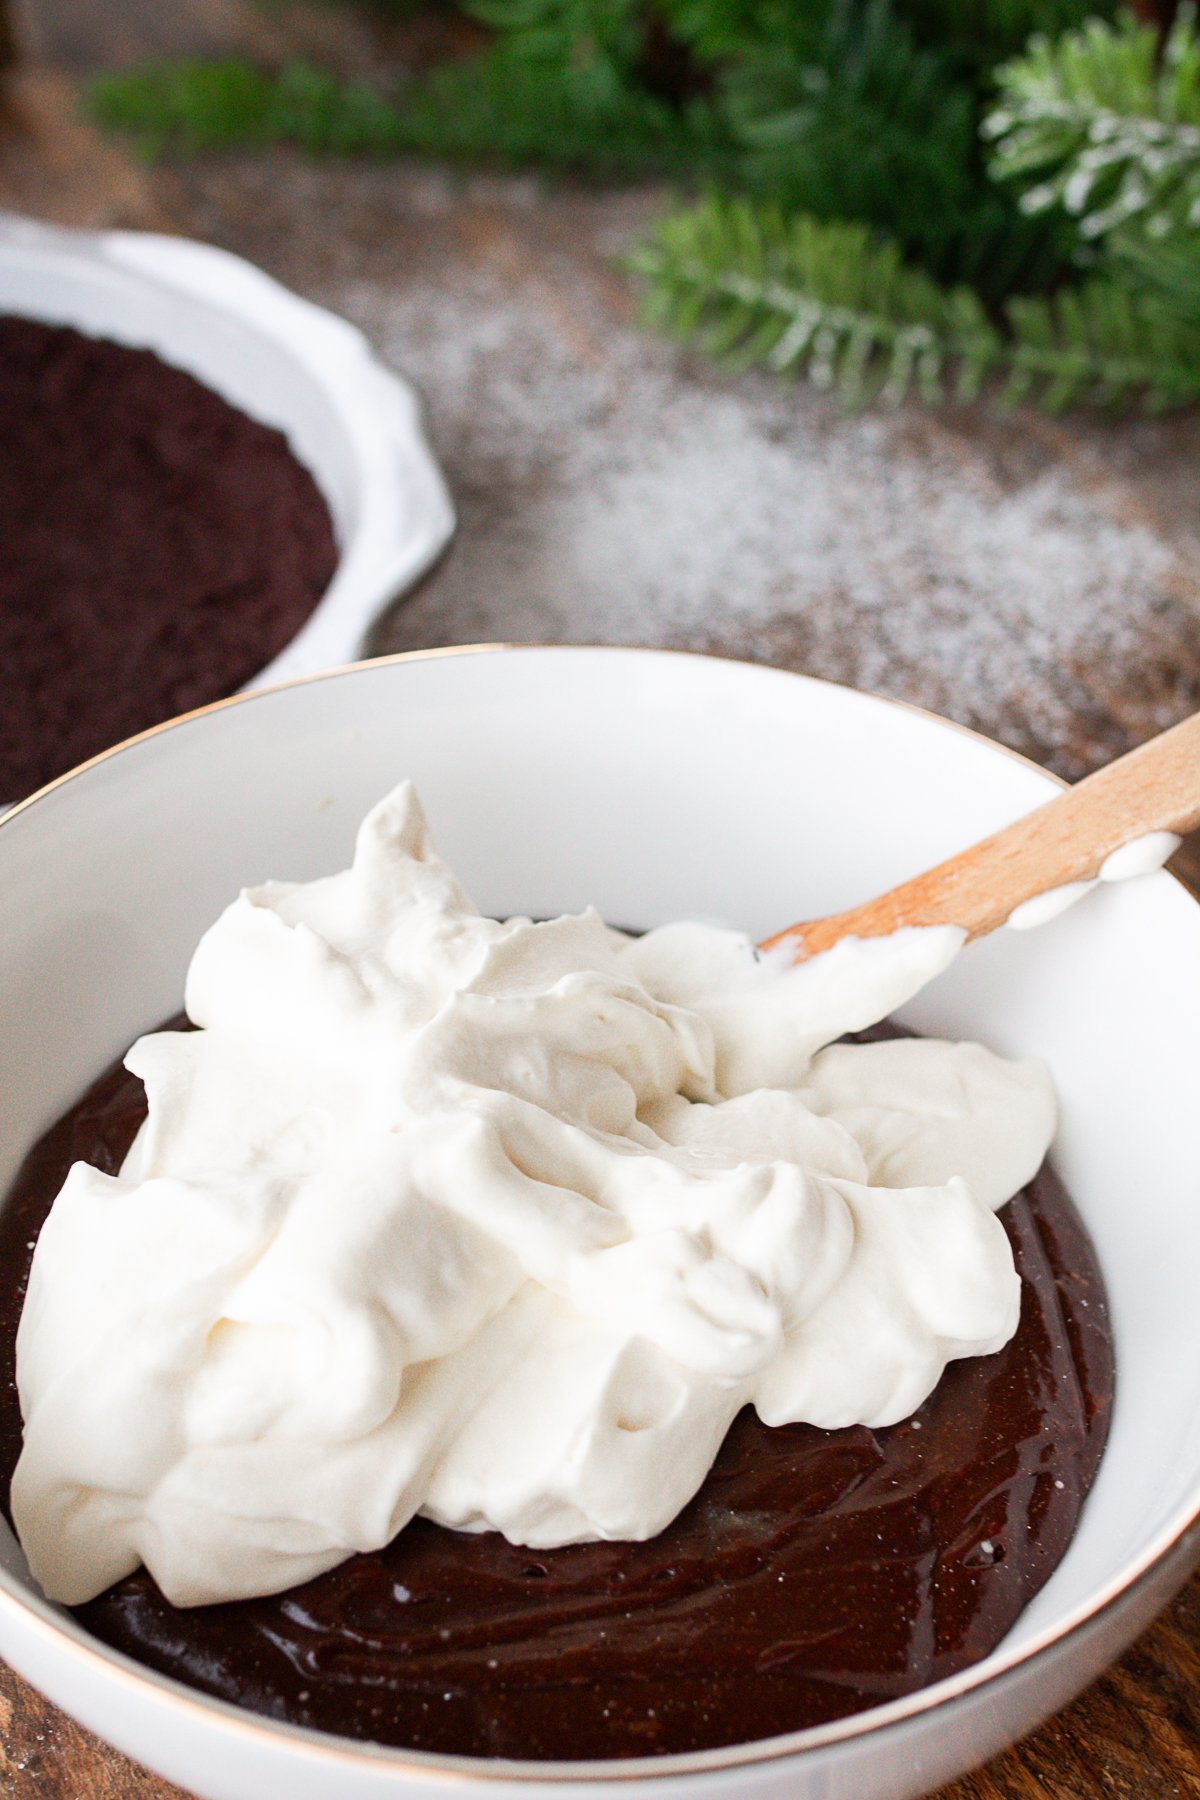
- Fold in the Whipped Cream: Add the freshly whipped cream to the chocolate base and gently fold until the mixture turns light and airy. Take your time here-this is what gives the pie its silky texture.

- Bring the Filling Together: Once the whipped cream is fully folded in, the filling will look light, smooth, and creamy-almost like chocolate mousse. It should hold soft swirls on the spoon.
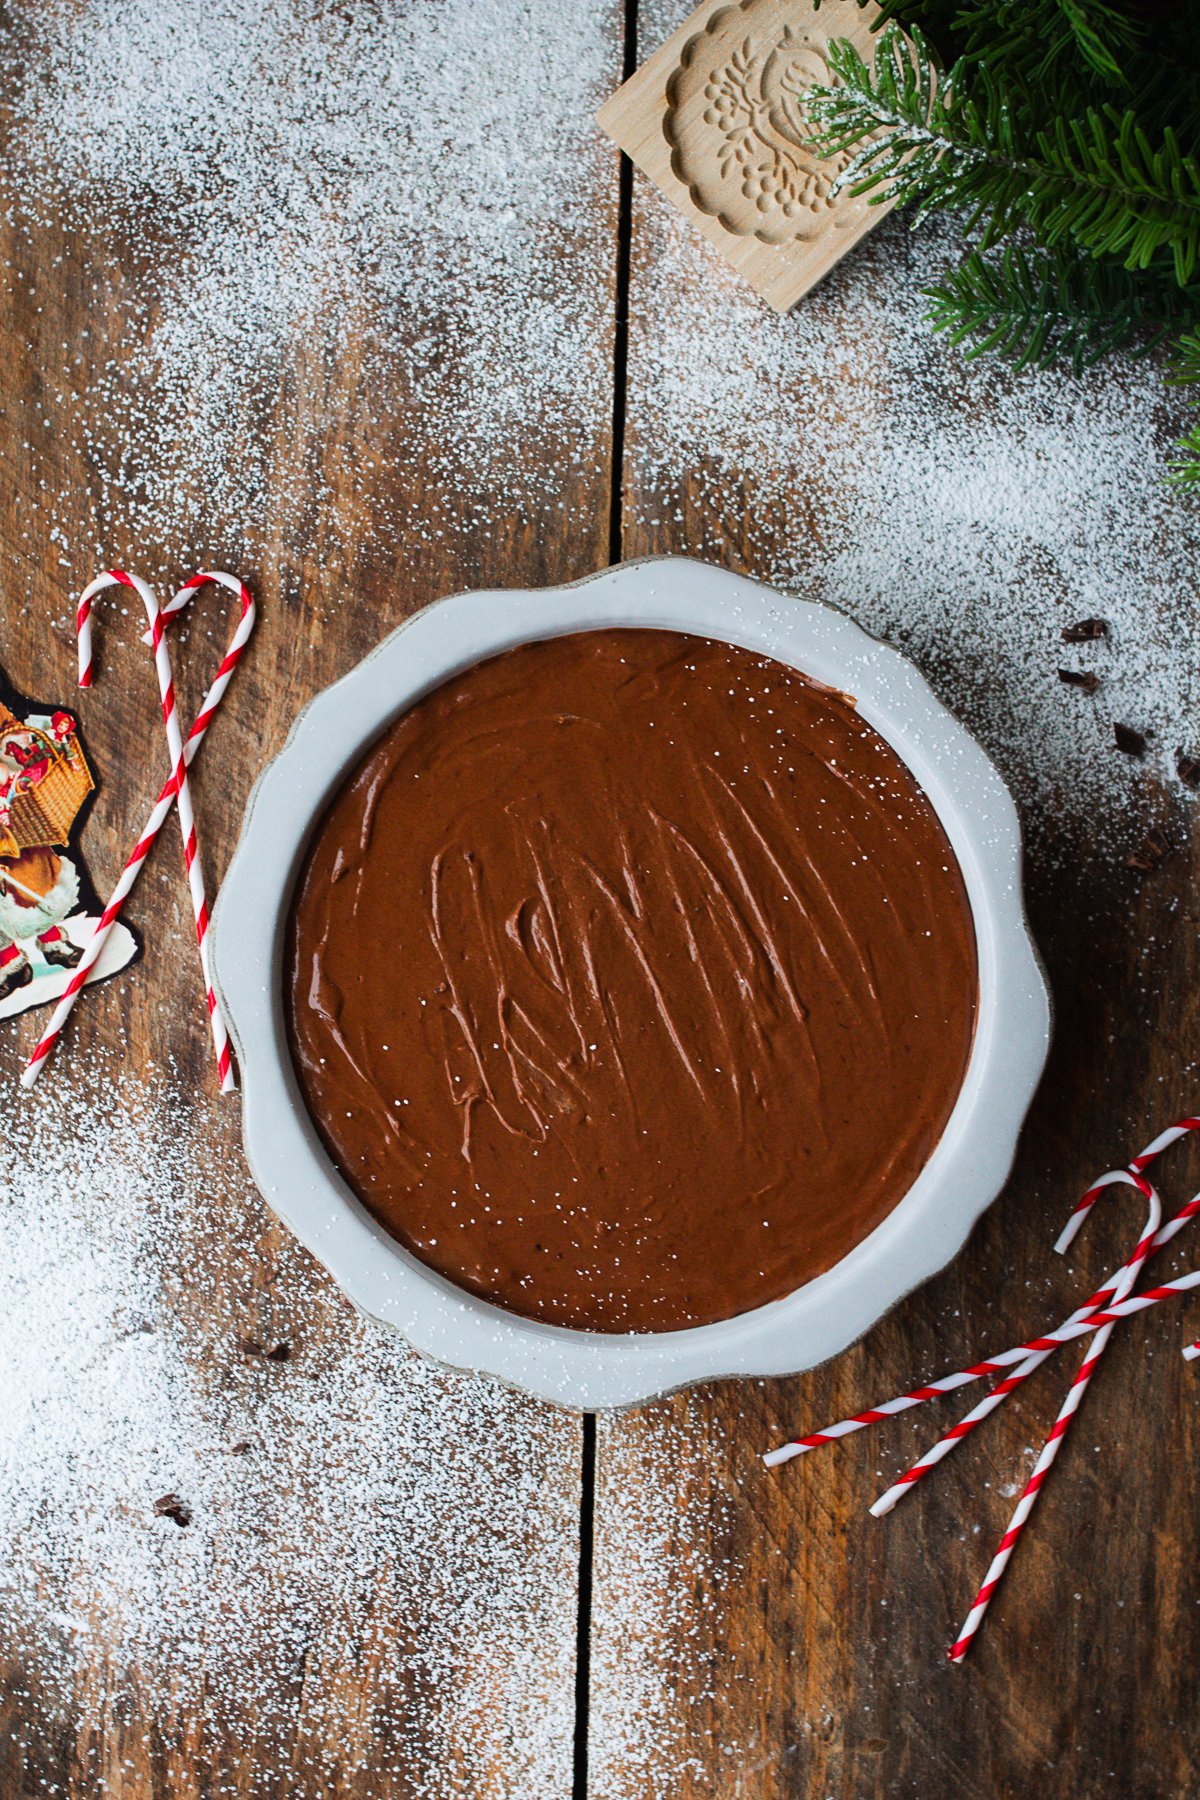
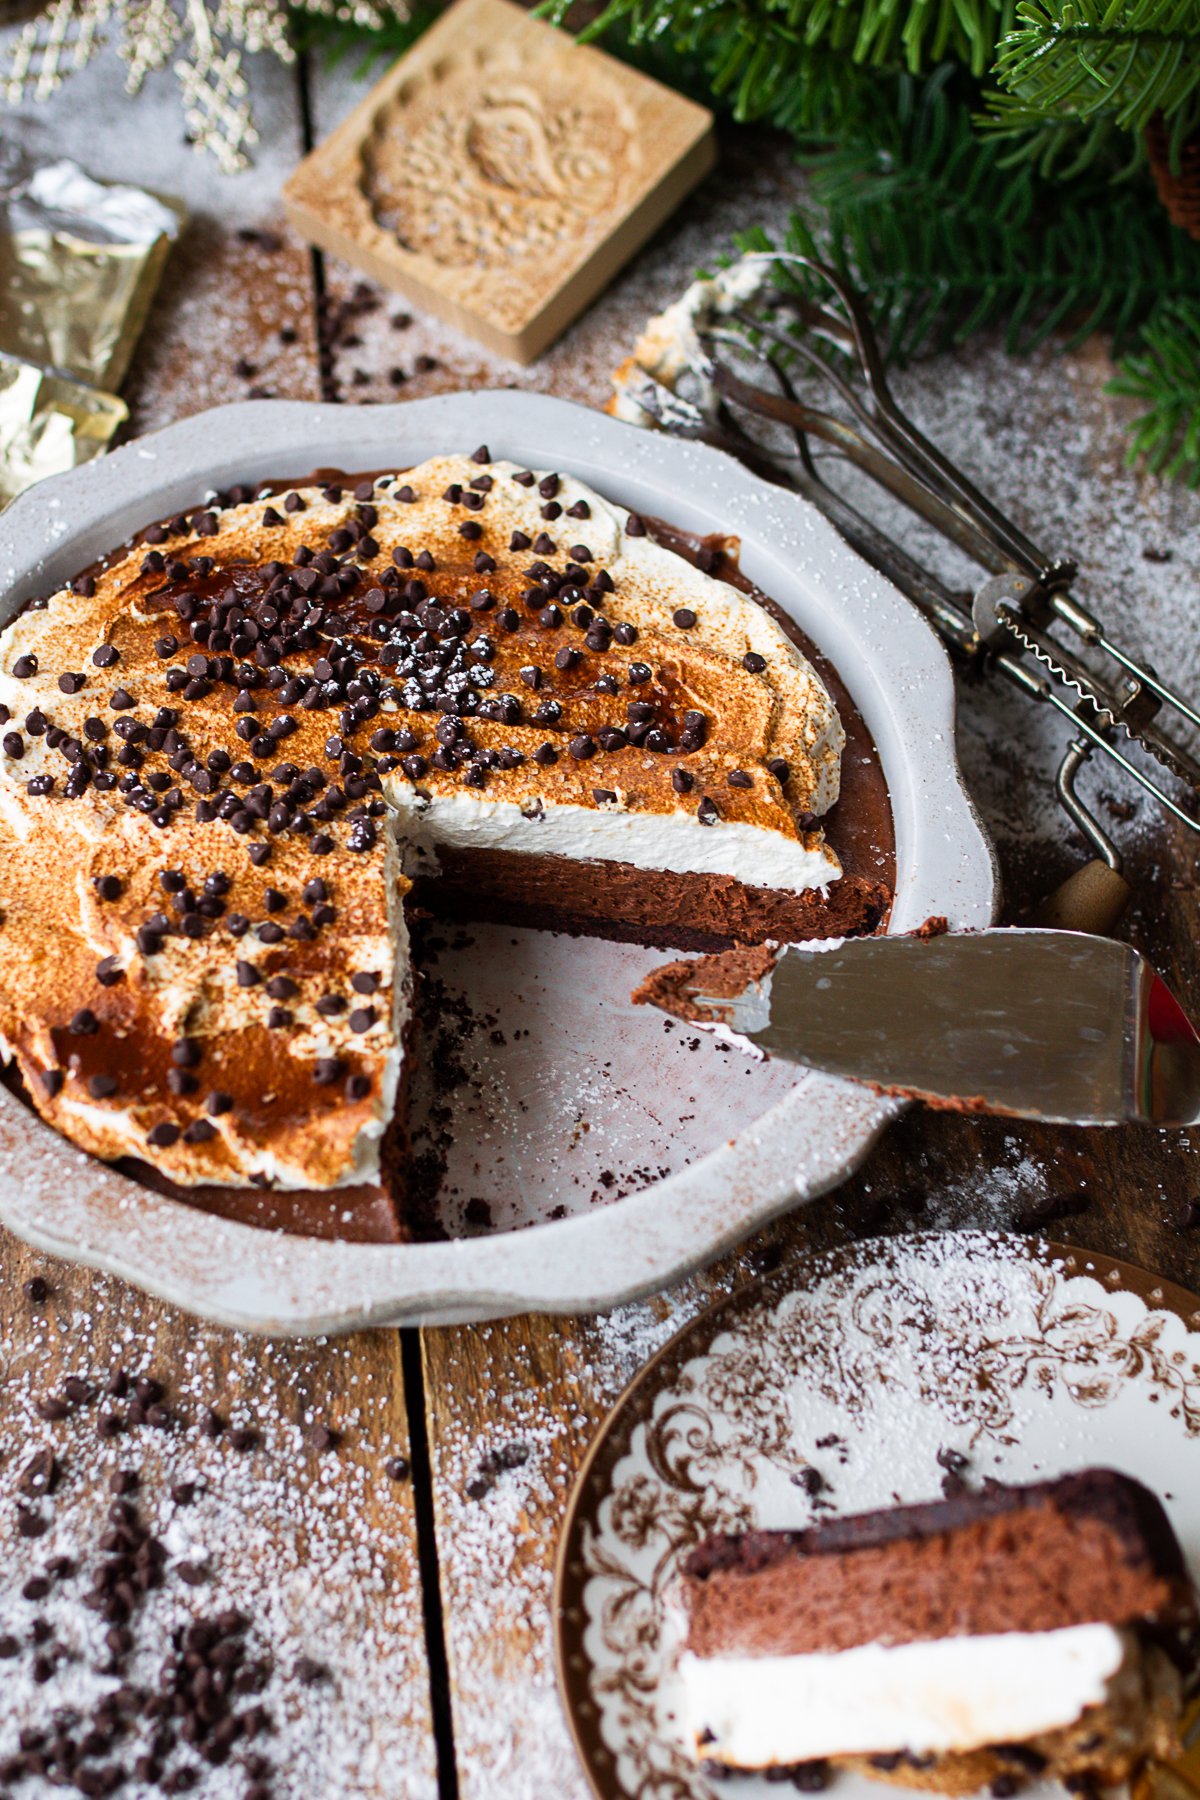
- Fill the Pie Crust: Spoon the finished filling into the cooled Oreo crust and smooth the top. Cover the pie and chill for at least 6 hours, or overnight for the cleanest slices.
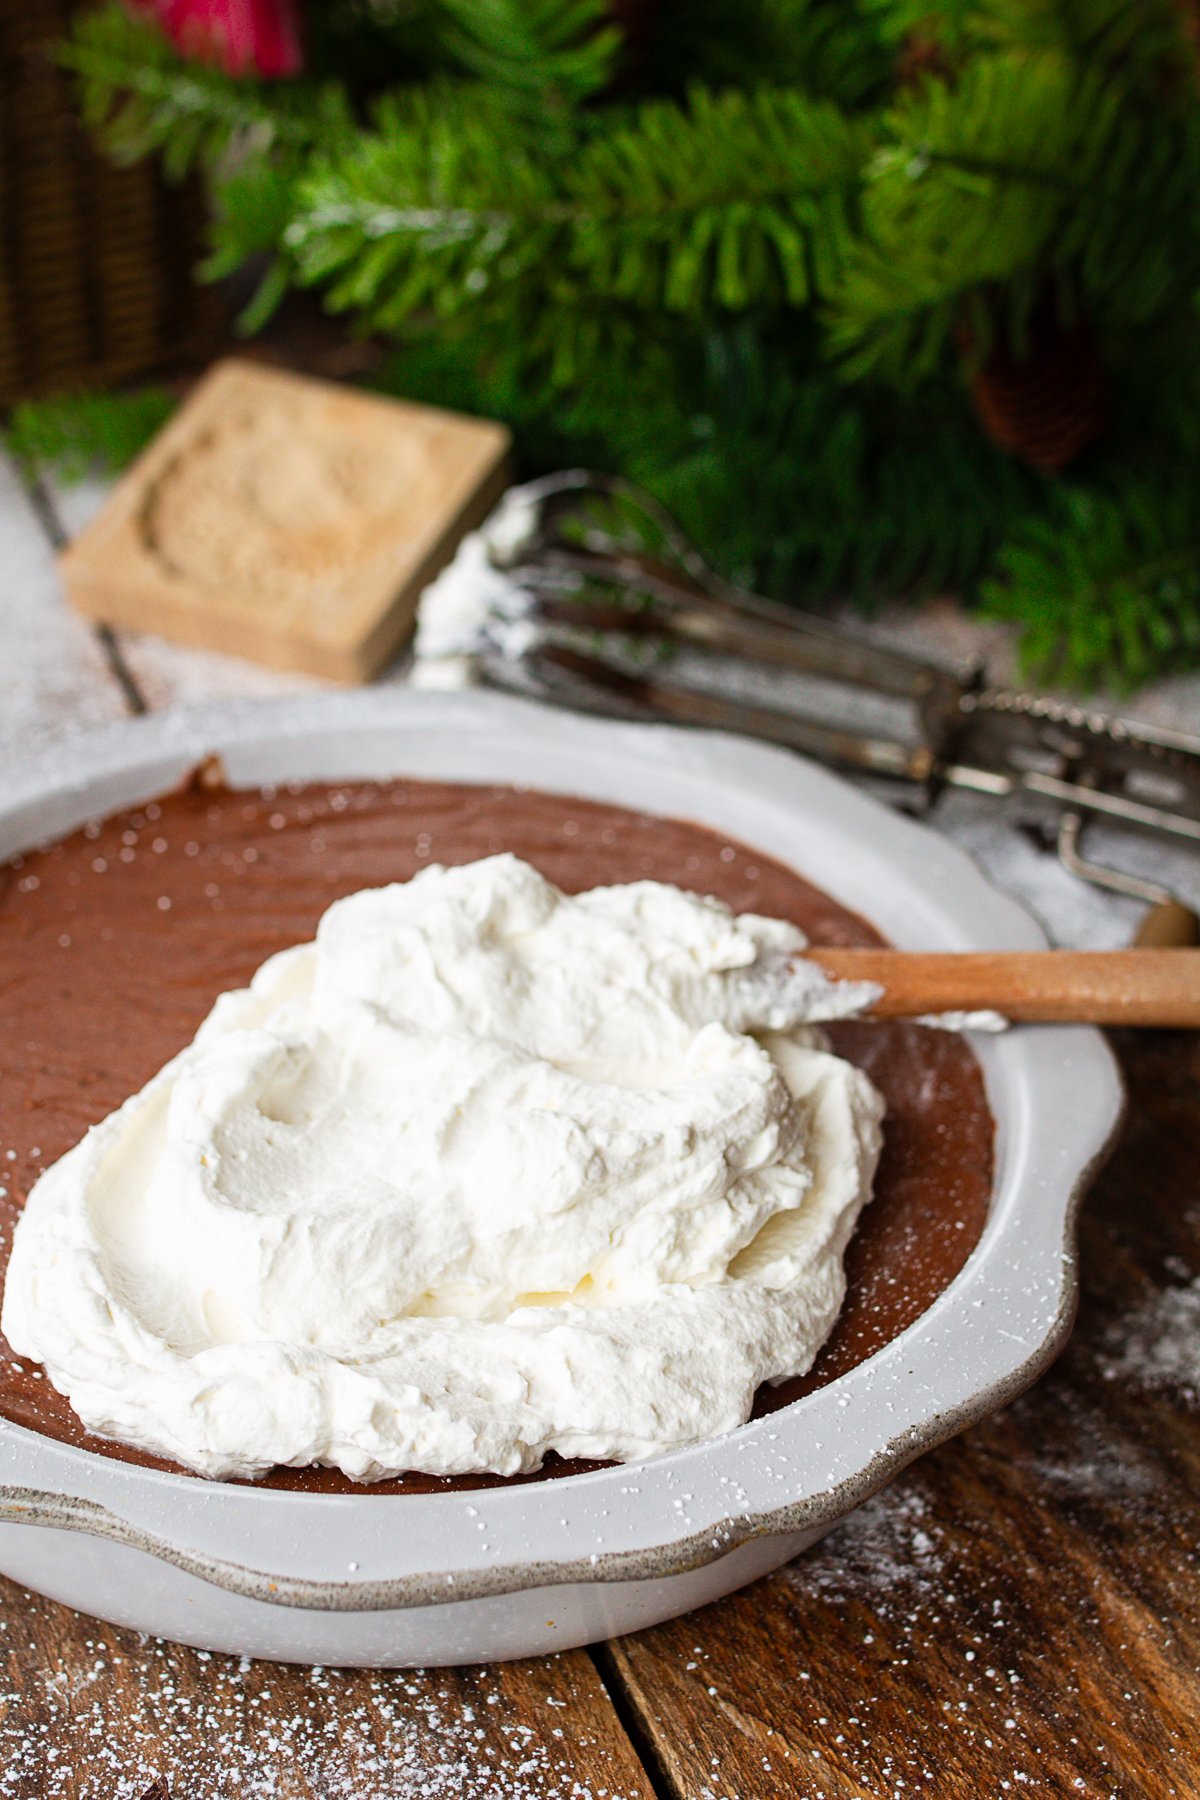
- Add the Whipped Topping: Spoon the freshly whipped cream over the chilled chocolate filling and spread it gently from the center outward, keeping the top soft and billowy.
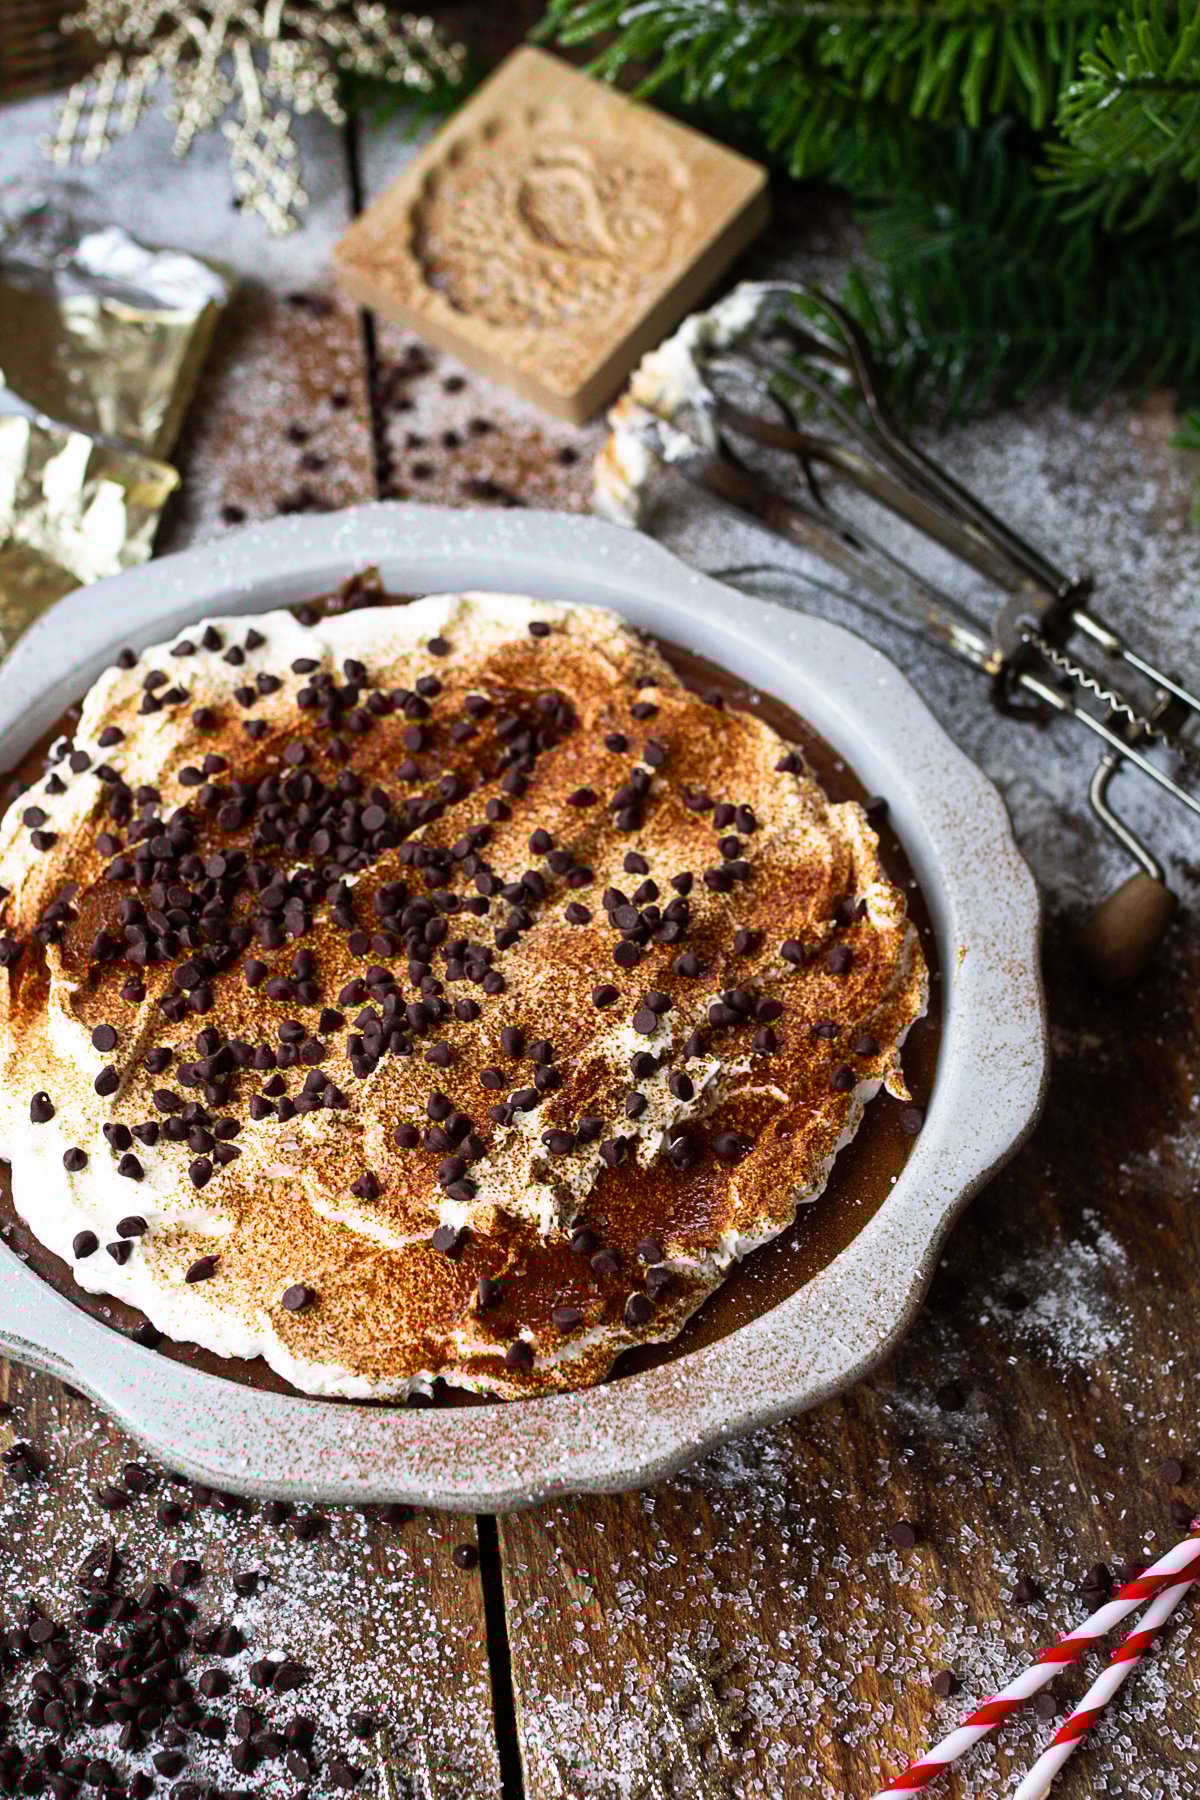
- Garnish and Serve: Finish the pie with chocolate shavings, curls, or a dusting of cocoa. Keep the pie chilled until serving, then slice and enjoy every silky bite.
Variations or Different Ways to Use It

- Chocolate cream pie: Swap the Oreo crust for a homemade butter pie crust or graham cracker crust for a different flavor profile.
- Milk chocolate version: A good choice for kids or anyone who prefers a lighter chocolate flavor.
- Unsweetened chocolate: For a deeper, more intense chocolate silk pie, just increase the powdered sugar slightly.
- Cream cheese swirl: Fold a small amount of softened cream cheese into part of the filling for a richer variation.
- Holiday topping: Add chocolate shavings, curls, or a dusting of cocoa across the top of the pie for a special occasion.
FAQ
Yes, just be sure to beat the butter long enough to create a light, whipped texture.
Absolutely. This classic recipe benefits from a long chill time and tastes even better the next day. Add the whipped cream topping right before serving.
A French silk pie is made from a smooth, whipped chocolate filling created by warming sugar and eggs, melting in chocolate, and folding in whipped cream. It's poured into a crumb crust, often Oreo or a traditional butter crust, and finished with fluffy whipped cream and chocolate curls.
A chocolate pie is usually thickened on the stovetop with cornstarch or eggs and set firmly once chilled. French silk pie is lighter and softer, with an airy chocolate filling created by whipping butter and folding in whipped cream. It slices cleanly but stays much softer than a traditional chocolate pie.
The name comes from the texture. The filling is so smooth and delicate that early bakers described it as "silky," and the name stuck. There's nothing French about its origin, it's an American recipe known for its creamy, melt-in-your-mouth texture.
The chocolate mixture likely wasn't fully cooled before folding in the whipped cream. Allowing proper cooling gives great results.
Storage Tips
Store French silk pie in an airtight container or tightly covered with plastic wrap in the refrigerator for 3-4 days; the filling stays smooth and the crust keeps its texture when chilled. Freezing isn't ideal, as the airy filling doesn't thaw well and loses its silky feel. For the cleanest slices, cut the pie straight from the fridge. In our home, we also keep it on the counter for up to three days with no issues, but chilling remains the best option for long-term freshness and the prettiest presentation.
You May Also Enjoy:
French Silk Pie Recipe
Ingredients
For The Crust
- 20 Regular Oreo cookies 230 g
- 3 tablespoons salted butter melted
For The Filling
- 1 ⅓ cups granulated sugar 266 g
- 4 large eggs
- 8 ounces bittersweet or semisweet baking chocolate, chopped 227 g
- 1 tablespoon vanilla extract
- 10 tablespoons salted butter, room temperature 142 g
- ¼ teaspoon salt
- 1 ⅓ cups whipping cream cold
- 2 tablespoon powdered sugar
For The Topping
- 1 cup whipping cream cold
- 2 tablespoons powdered sugar
- 1 teaspoon vanilla extract
- 10-12 Chocolate curls or chocolate shavings
Instructions
- Make the Crust: Crush the regular Oreo cookies in a food processor until fine.
- Stir in the melted salted butter.
- Press firmly into a deep pie pan and bake at 350°F for 10 minutes. Cool completely.
- Make the Chocolate Filling: In a medium saucepan, whisk together the sugar and eggs. Warm over medium-low heat, stirring often, until the mixture reaches 160°F and lightly coats the back of a spoon.
- Remove from heat and add the chopped chocolate. Stir until smooth. Mix in the vanilla extract and let cool.
- In the bowl of a stand mixer, beat the room-temperature salted butter with the salt until pale and fluffy.
- Add the cooled chocolate mixture and beat until silky.
- In a clean bowl, whip the cold whipping cream and powdered sugar until soft peaks form.
- Gently fold the whipped cream into the chocolate mixture.
- Spoon into the cooled crust, smooth, cover, and chill for at least 6 hours or overnight.
- Add the Topping: Whip the whipping cream, powdered sugar, and vanilla until soft peaks form.
- Spread or pipe over the chilled pie.
- Garnish with chocolate curls or shavings.


I’m so glad you’re here trying this one! It’s the pie my son requests every single holiday, and it’s become such a special tradition for us. If you make it, let me know how it turns out in your kitchen. I love hearing your variations, what your family thinks, and any little tweaks you try along the way. Happy baking!