How We Did a Stone German Schmear on Our Kitchen Wall
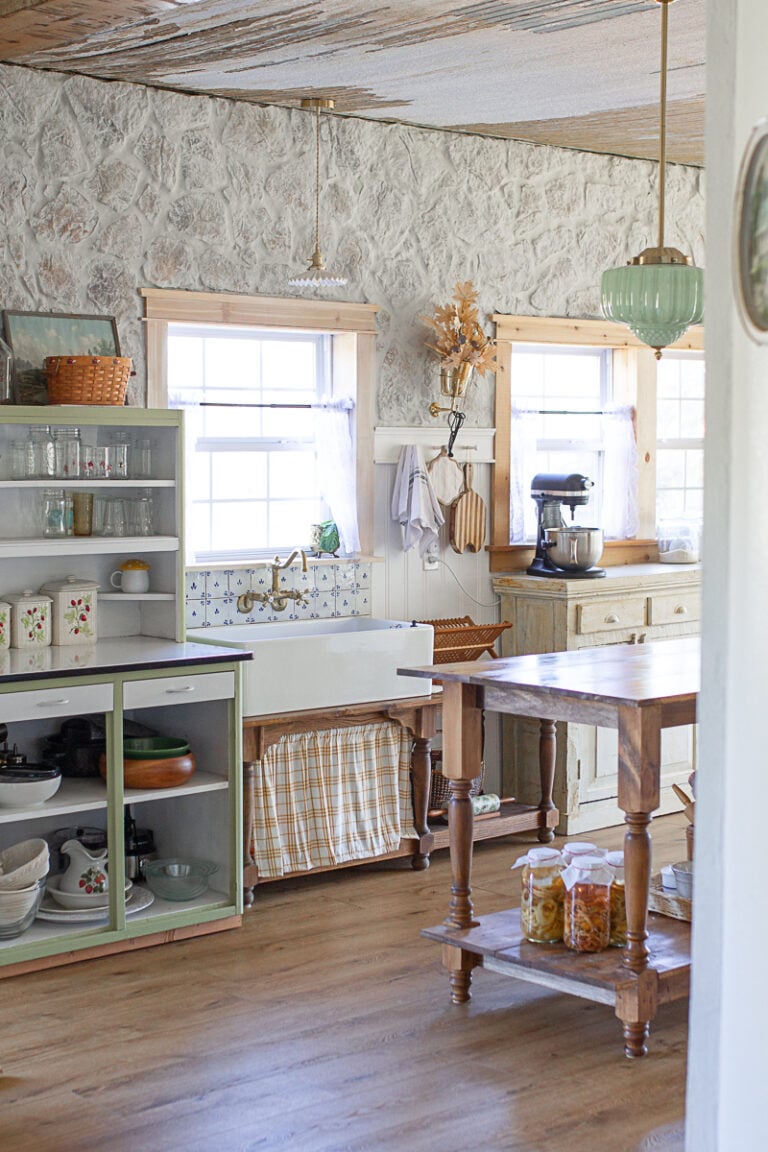
When we set out to remodel our 100-year-old farmhouse kitchen, I knew I wanted one wall to feel like it had always been there. Like it had history. Texture. That charming, old-world feel you only get in European country homes. And that's how this rock wall came to be.
Let me take you through the entire process-from tracking down the perfect stone to grouting with a German schmear technique for a soft, limewashed look. This post covers everything from DIY rock wall in kitchen basics to applying a german schmear technique that adds cozy, vintage charm.
Credit where credit's due: When I saw @jaymesquires share her dining room wall tutorial on Instagram, (Info in highlights) I immediately knew this was the look I wanted. Her space inspired me deeply, and I'm so grateful she shared the process.
If you want to see what our kitchen started out like, check out this post.
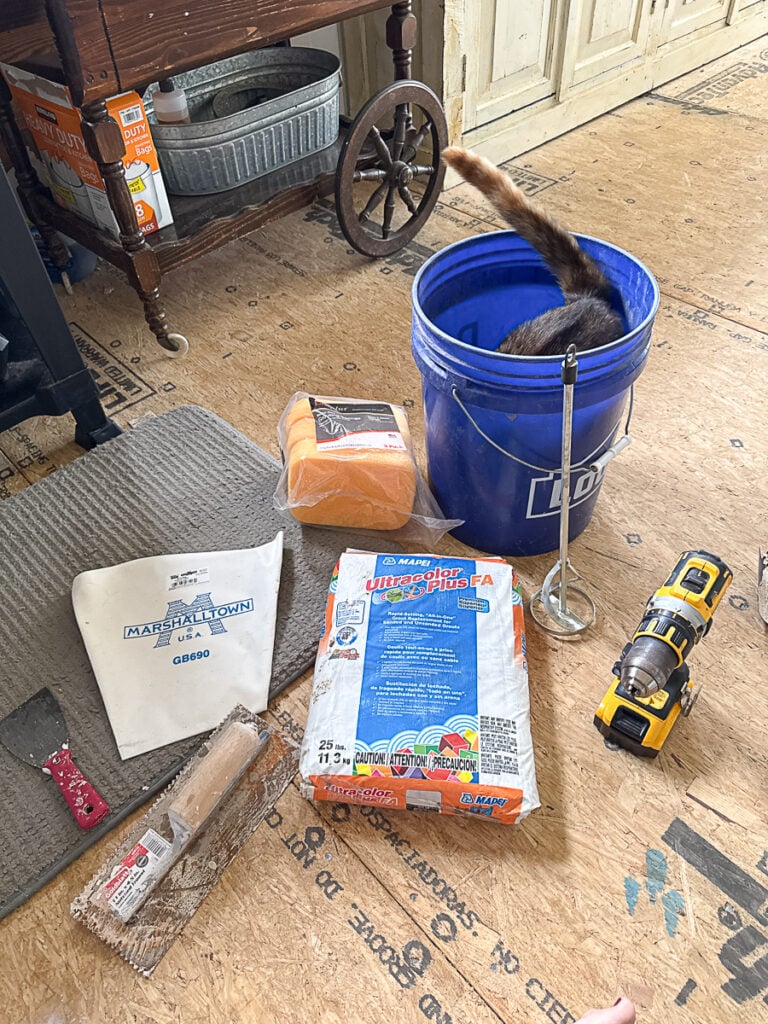
What You'll Need:
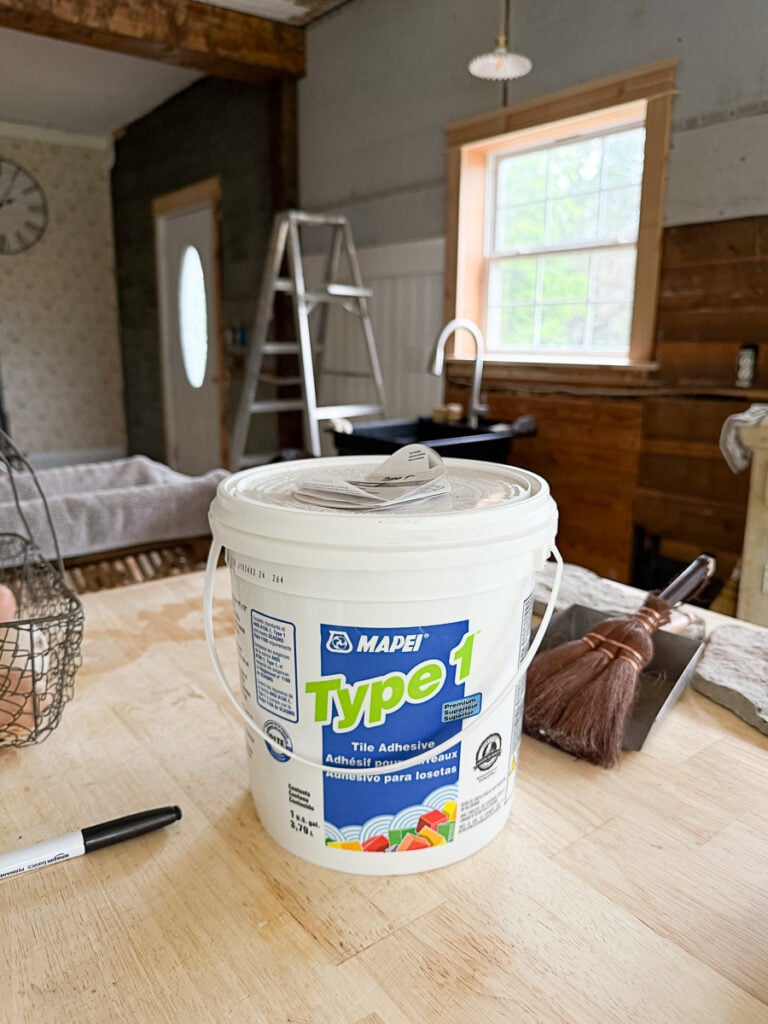
- Type 1 Mastic
- Stone Master® Gray Springbrook Manufactured Stone Veneer
- Ultracolor Plus Rapid Setting Grout in color Castle Wall
Finding the Perfect Rock (And Driving to Kentucky to Get It)
I knew from the start that Menards carried a good quality faux stone because Jayme from Instagram had used it on her wall. But, with the store being 2.5 hours away, I really hoped to find something closer. I searched everywhere for stone veneer that felt old, natural, and had that soft, light tone I wanted, but nothing nearby came close.
Real stone could be an option for some, but with the weight and the age of our 100-year-old pillar-supported home, we decided against it. In the end, we made the drive up to Kentucky to load up the Menards stone. And honestly, it was completely worth it.
These rocks are made of concrete, which makes them lighter and easier to install than natural stone. But they all varied in shape, size, and tone, which made the final look feel organic and layered, not cookie cutter. It's the perfect solution for anyone wanting a faux stone wall with grout that feels timeless. They're a great option for a stone wall or even a stone fireplace if you're looking to create a focal point in your home.
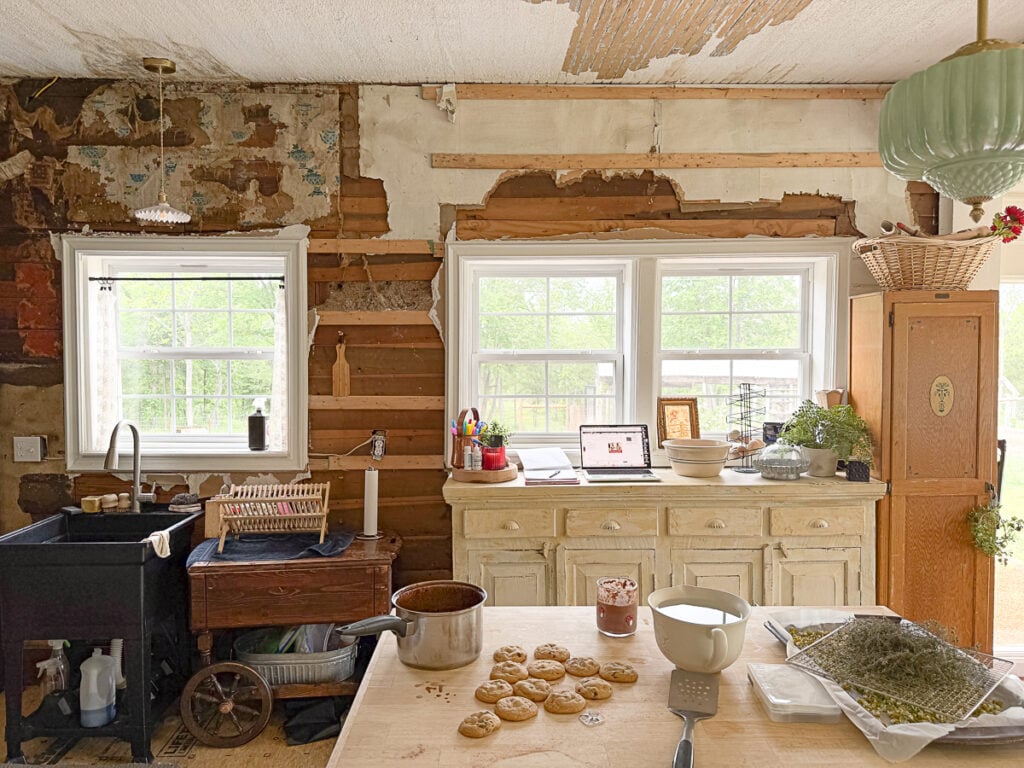
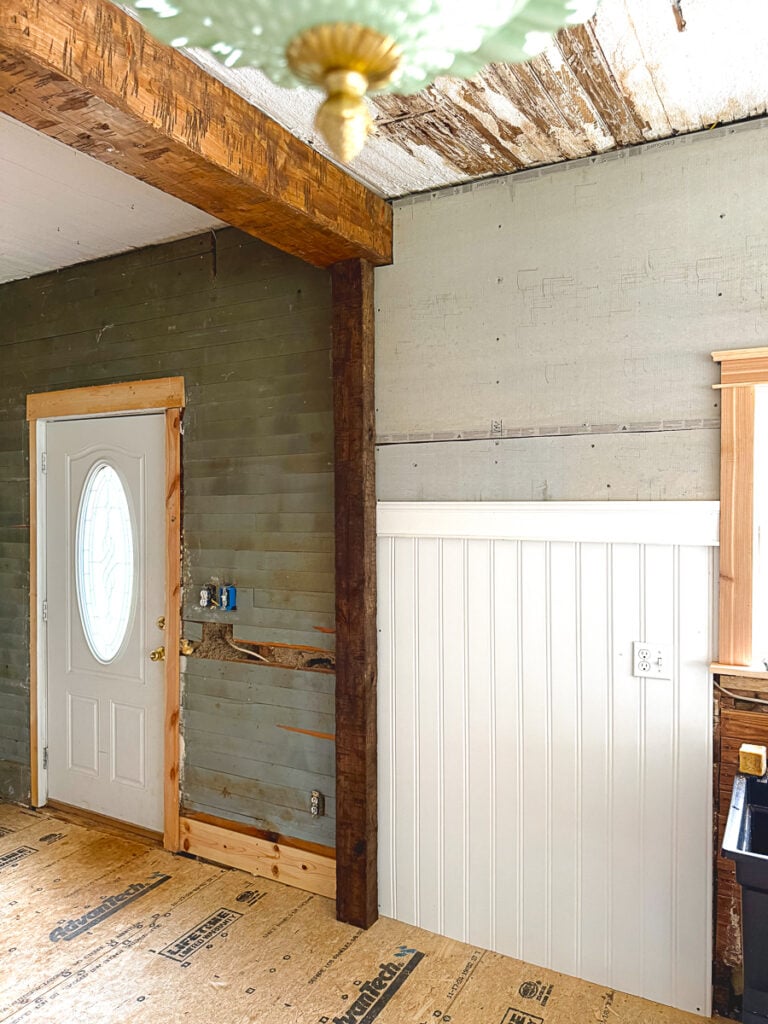
Prepping the Wall
We started with a bare wall, which we covered in cement backer board to ensure the stones had a solid surface to adhere to. Then we used Mastic from Lowe's (or Home Depot-honestly, whichever you have nearby) to set the stones. The mastic was easy to work with and held the weight of the stones perfectly.
(Wall after we took off Sheetrock, before adding concrete board.)
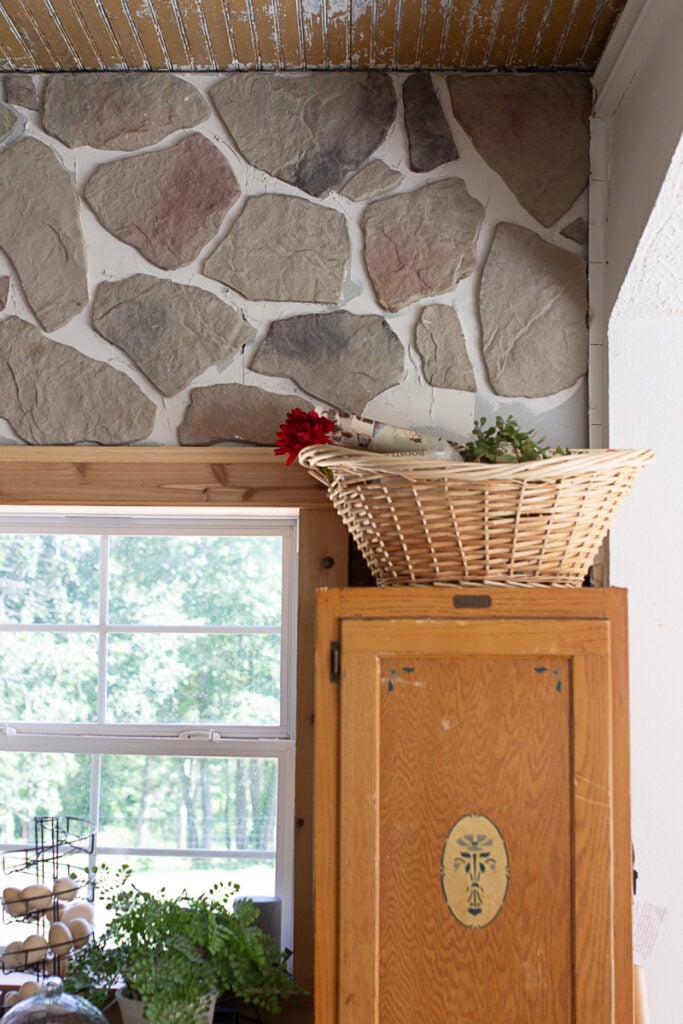
We placed them by hand, stepping back every few rows to make sure the spacing and colors stayed balanced. Because these stones are all different shapes and tones, no two sections look alike-and that's what gives it the charm of a true french farmhouse kitchen wall.
Adding Beadboard for Balance
While I love the look of a full stone wall, I also knew I didn't want it to feel overwhelming. So, to give the room visual balance, we decided to stop the rock halfway down and finish the bottom half with classic white beadboard.
To separate the rock from the beadboard, we added a simple piece of door trim horizontally across the wall. It may have been meant for something else originally, but the detail on it was perfect and brought in a quiet elegance.
And practically speaking-I wanted my unfitted kitchen cabinets to sit flush against the wall. If we had brought the stone all the way down, they may have had to sit awkwardly off the wall or risk being scratched. This solution was both pretty and practical.
That Old Ceiling
This part isn't done yet, but it's worth mentioning. Our ceiling was originally board and batten, which someone later mudded over and then eventually covered with sheetrock. We removed the sheetrock and had the mud tested (no asbestos-we were safe there!). Now I'm slowly chipping away at the old mud to expose the beautiful wood beneath. It's slow going, but I know it will be worth it.
Installing the Stone Veneer
To attach the stones, we used Mastic 1 adhesive, which worked great for this type of project. I started by applying an even coat of mastic directly onto the cement board wall using a textured trowel. Then, I buttered the back of each stone with a layer of mastic as well to ensure a strong hold.
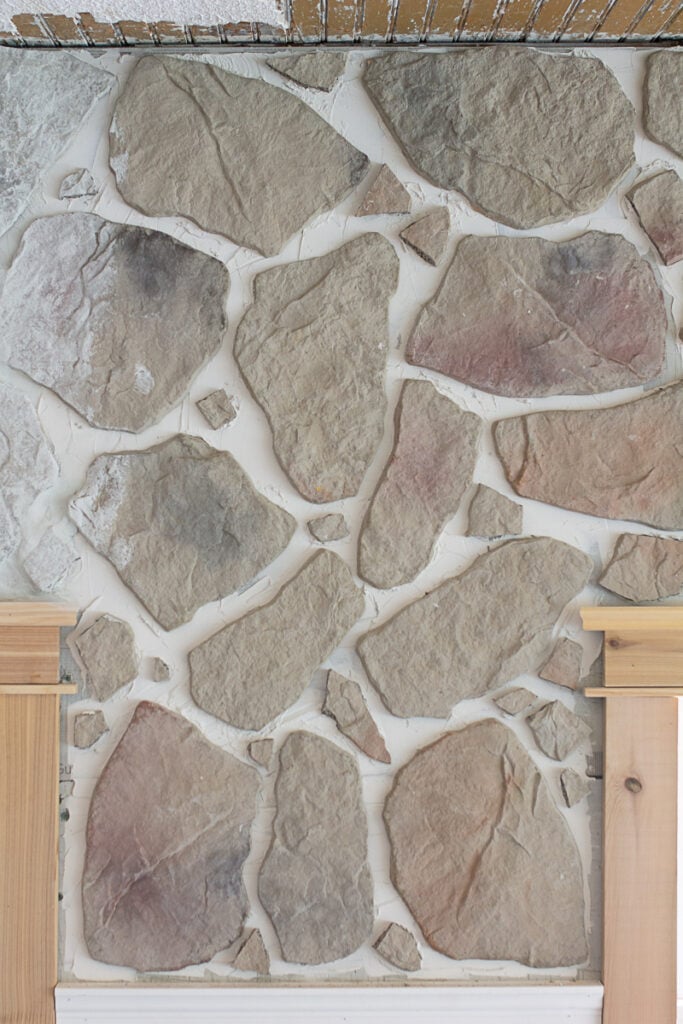
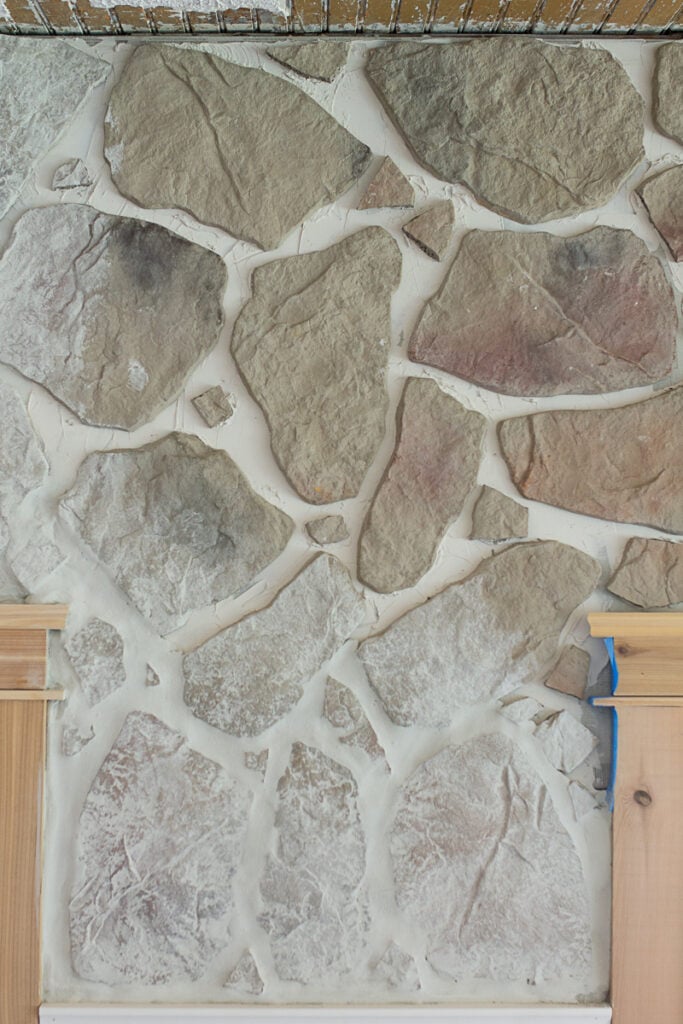
I began placing stones along the edges of the wall first, choosing pieces with at least one flat side so they sat cleanly against the adjoining walls. Once the sides were complete, I worked my way inward, filling the rest of the wall. I wasn't afraid to break stones as needed to fill gaps or create a more natural layout.
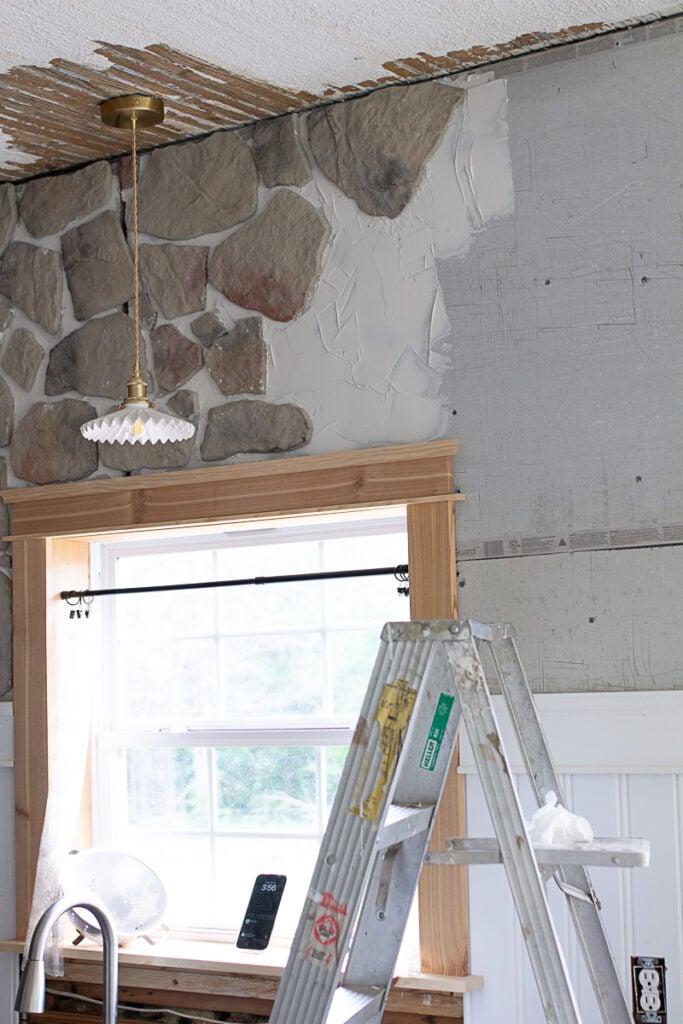
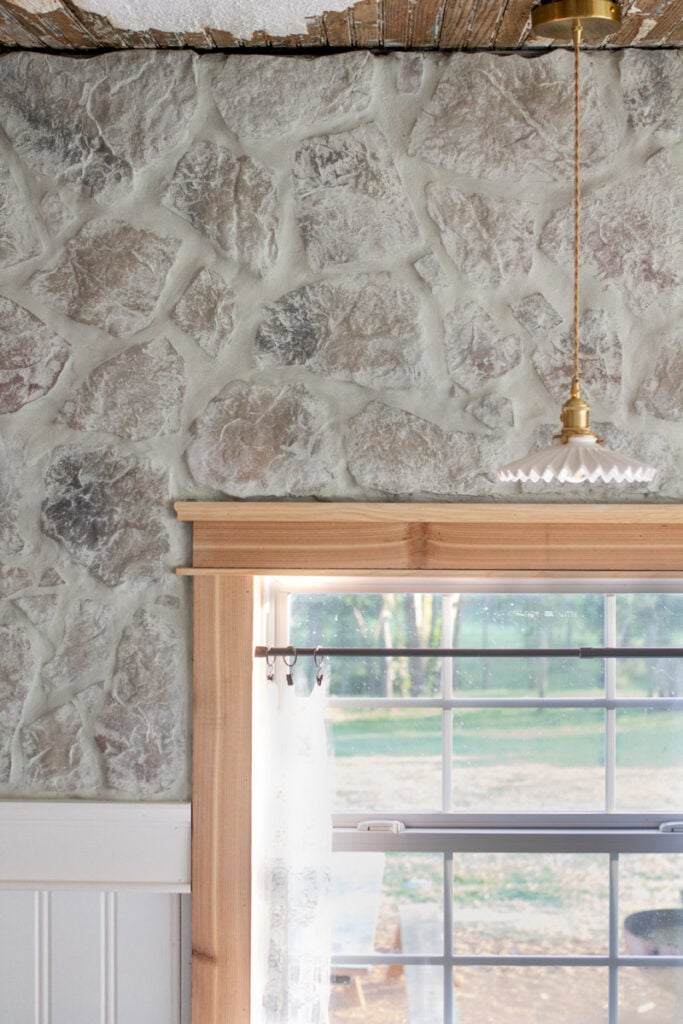
One thing I was intentional about: spacing. I kept the stones fairly far apart because I wanted thick grout lines for that old-world, heavily grouted look. This extra spacing really helps highlight the German schmear finish later on.
Grouting: German Schmear Meets Limewash
Once the stones were all up and cured, it was time to grout. We used Mapei Ultracolor Plus FA Rapid Setting Grout in the color Castle Wall-a beautiful, versatile tone that pulls everything together. This Mapei Castle Wall grout is ideal for anyone wanting to try a limewashed stone wall look without harsh contrast. You could also adapt this german schmear technique for a brick fireplace, brick wall, or german schmear fireplace if you're going for a more whitewashed look.
Step-by-Step Grouting Tutorial with German Schmear Technique
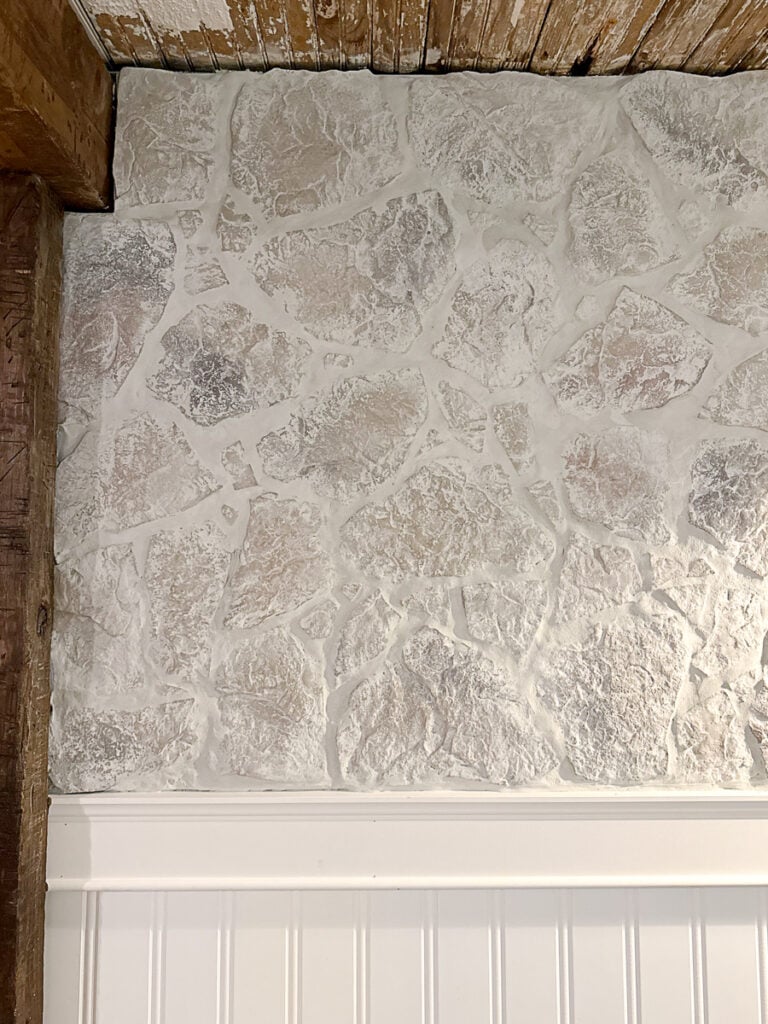
This method gave us that soft, limewashed look that makes the wall feel like it's been here forever. Here's exactly how I did it-perfect for anyone wanting a stone veneer wall tutorial or looking to learn how to german schmear stone in their own home.
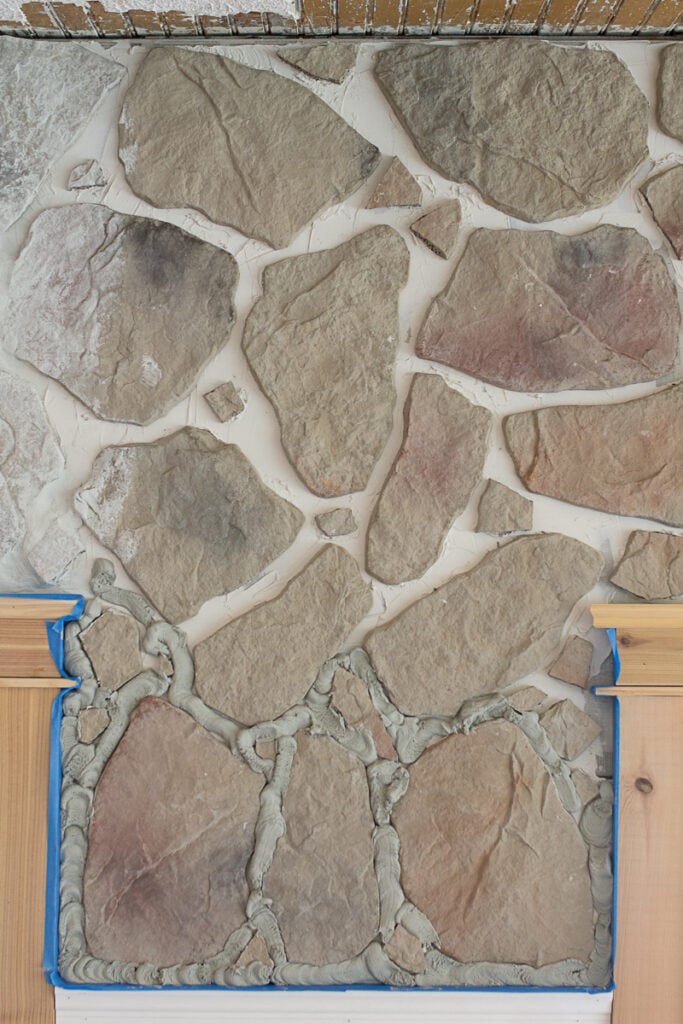
Step 1: Pipe the Grout into the Joints
Use a piping bag (or even a ziplock bag) to pipe the grout directly into the spaces between stones.
Image Placeholder: Grout bag piping grout into stone joints.
Step 2: Press and Work the Grout Between the Stones
Take a damp (not soaking) sponge and press the grout down into the joints.
Image Placeholder: Wet sponge pushing grout into joints.
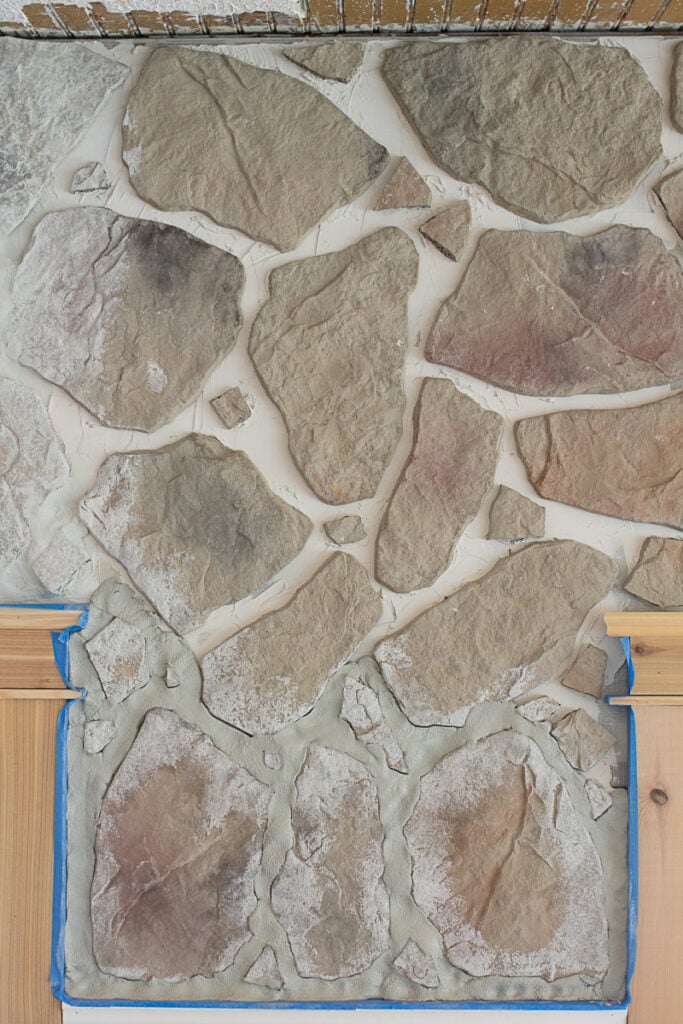
Step 3: Feather the Grout Across the Edges
After rinsing your sponge, use it to gently feather and spread grout across the stone faces to begin the German schmear look.
Image Placeholder: Sponge feathering grout onto the surface of the rocks.
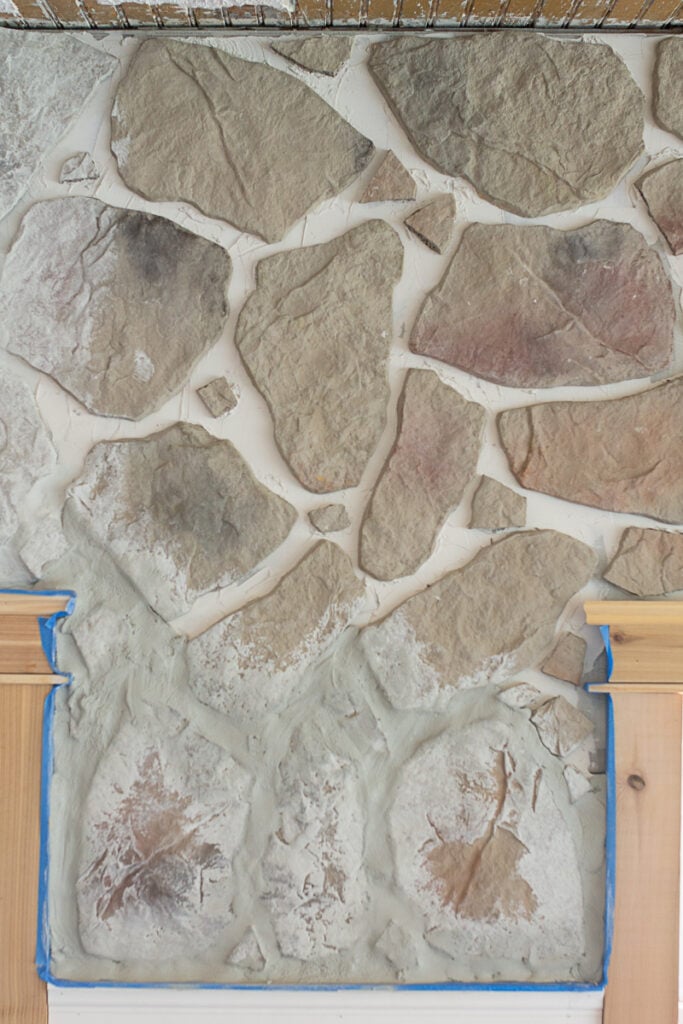
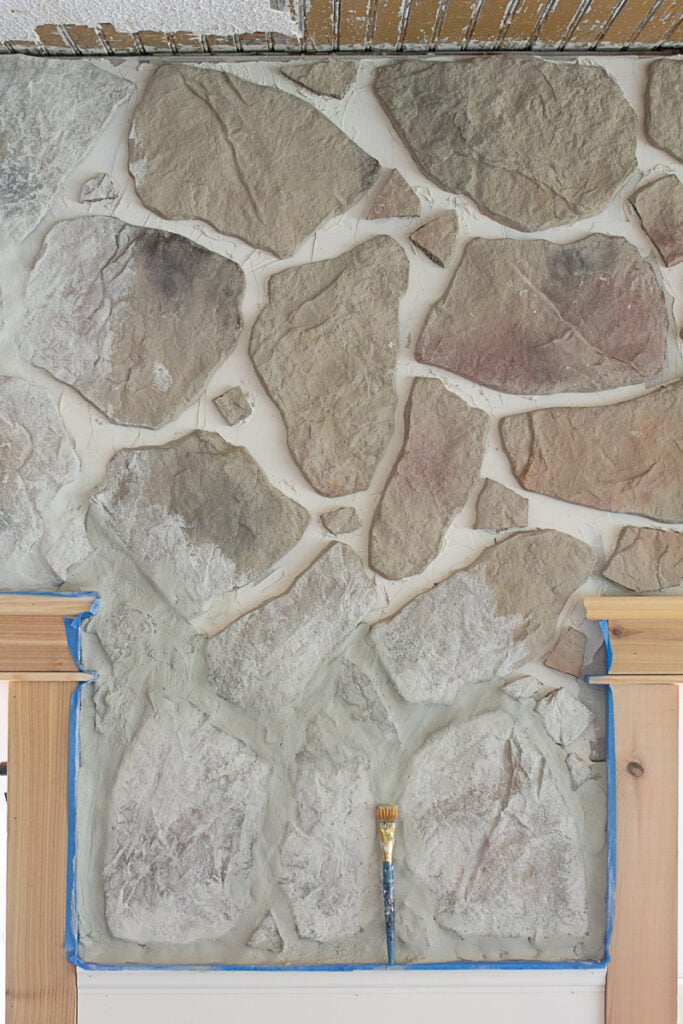
Step 4: Brush the Grout to Create a Limewashed Effect
Dip a paint brush or even a large paintbrush in clean water and brush over the stones to move the grout into texture and unify the finish.
Image Placeholder: Paintbrush applying diluted grout across the stone for a whitewashed appearance.
Step 5: Tap to Blend Out Streaks
Use a well-wrung sponge to gently tap over any sponge marks or lines you want to soften.
Step 6: Wipe with a Clean Rag
Use a clean, dry rag to remove extra grout from stones where you want more color or detail to peek through. This is all personal preference-some go heavier, others lighter.
This method would also work on mortar wash, limewashed brick, or a german smear brick finish for an indoor fireplace or living room update.
Bringing the Look into Your Own Home
This wall adds so much texture and warmth to our farmhouse kitchen, and you could bring the same feel into your own home-even in a more modern look or traditional space. Here are a few ways to adapt the look:
- Use this technique as an accent wall, brick fireplace, or stone fireplace.
- Try it on brick wall surfaces for a totally different look.
- Pair it with wood beams, vintage lighting, or neutral paint colors.
- Use a putty knife, joint compound, or latex paint to experiment with DIY versions.
The best part? There's no wrong way. It's a great way to add texture and charm.
Common Questions
Can I do this on drywall instead of cement board?
Technically, yes-but cement board is much more reliable for supporting the weight and moisture resistance of stone and grout. I wouldn't skip that step.
How do I keep the grout from drying too fast?
Work in small sections and don't mix huge batches at once. Let it slake (rest) after mixing, and use a damp sponge to help manage drying during application.
Can this work in a bathroom or behind a stove?
Yes! Just make sure you seal the stone and grout afterward if it's exposed to heavy moisture or grease.
Where did you buy the stone?
Menards! But we had to drive up to Kentucky to get it because no local stores carried it. These were real stones, and the light tone was just right for our space.
What grout color did you use?
Castle Wall by Mapei Ultracolor Plus FA.
Can I lighten the final look if it turns out too dark?
Yes! You can do a white wash, water down latex paint, or adjust your application method using a wire brush or sponge. You could also test your method with a little research on a scrap piece or a small test area.
Is this time intensive?
It's not hard, but it can be time intensive depending on how much mortar or grout you apply. Be prepared to spend a long time if you're doing a full wall or fireplace.
Can I do this even if it's my first time?
Absolutely! This blog post is for you. With some patience and the right tools-mixing attachment, wet mortar, and a paint brush-you can achieve a gorgeous result.

Final Thoughts
This wall makes me smile every time I walk into the kitchen. It took a little hunting, a bit of risk, and a whole lot of sponge-smoothing-but it was worth every second.
If you're craving texture and old-world charm, stone + grout + just the right touch of imperfection might be the project that brings your space to life. It's an approachable, beautiful way to create your own DIY rock wall in kitchen style-no matter where you live.
This limewashed brick look is trending on TikTok - make and beyond because it's the easiest way to refresh a space with warmth and texture. A german schmear or german smear technique could be exactly what your space needs.
Let me know if you try it, and if you do, make sure to tag me over on instagram where I share our home Reno and kitchen creations in real time!
MEET ERYN
Eryn Whalen is a homestead blogger and recipe developer with a lifetime of hands-on experience in gardening, home canning, animal husbandry, and traditional kitchen skills. From preserving homegrown harvests to baking sourdough from scratch, she shares her family's journey of intentional living on their 100-acre Tennessee farmstead. Recently, Eryn has expanded her homesteading life to include caring for a family milk cow, sharing the learning process and daily joys of small-scale dairying. Read more about Eryn here