Snow Garland with Cotton Balls and String | Creating a Winter Wonderland
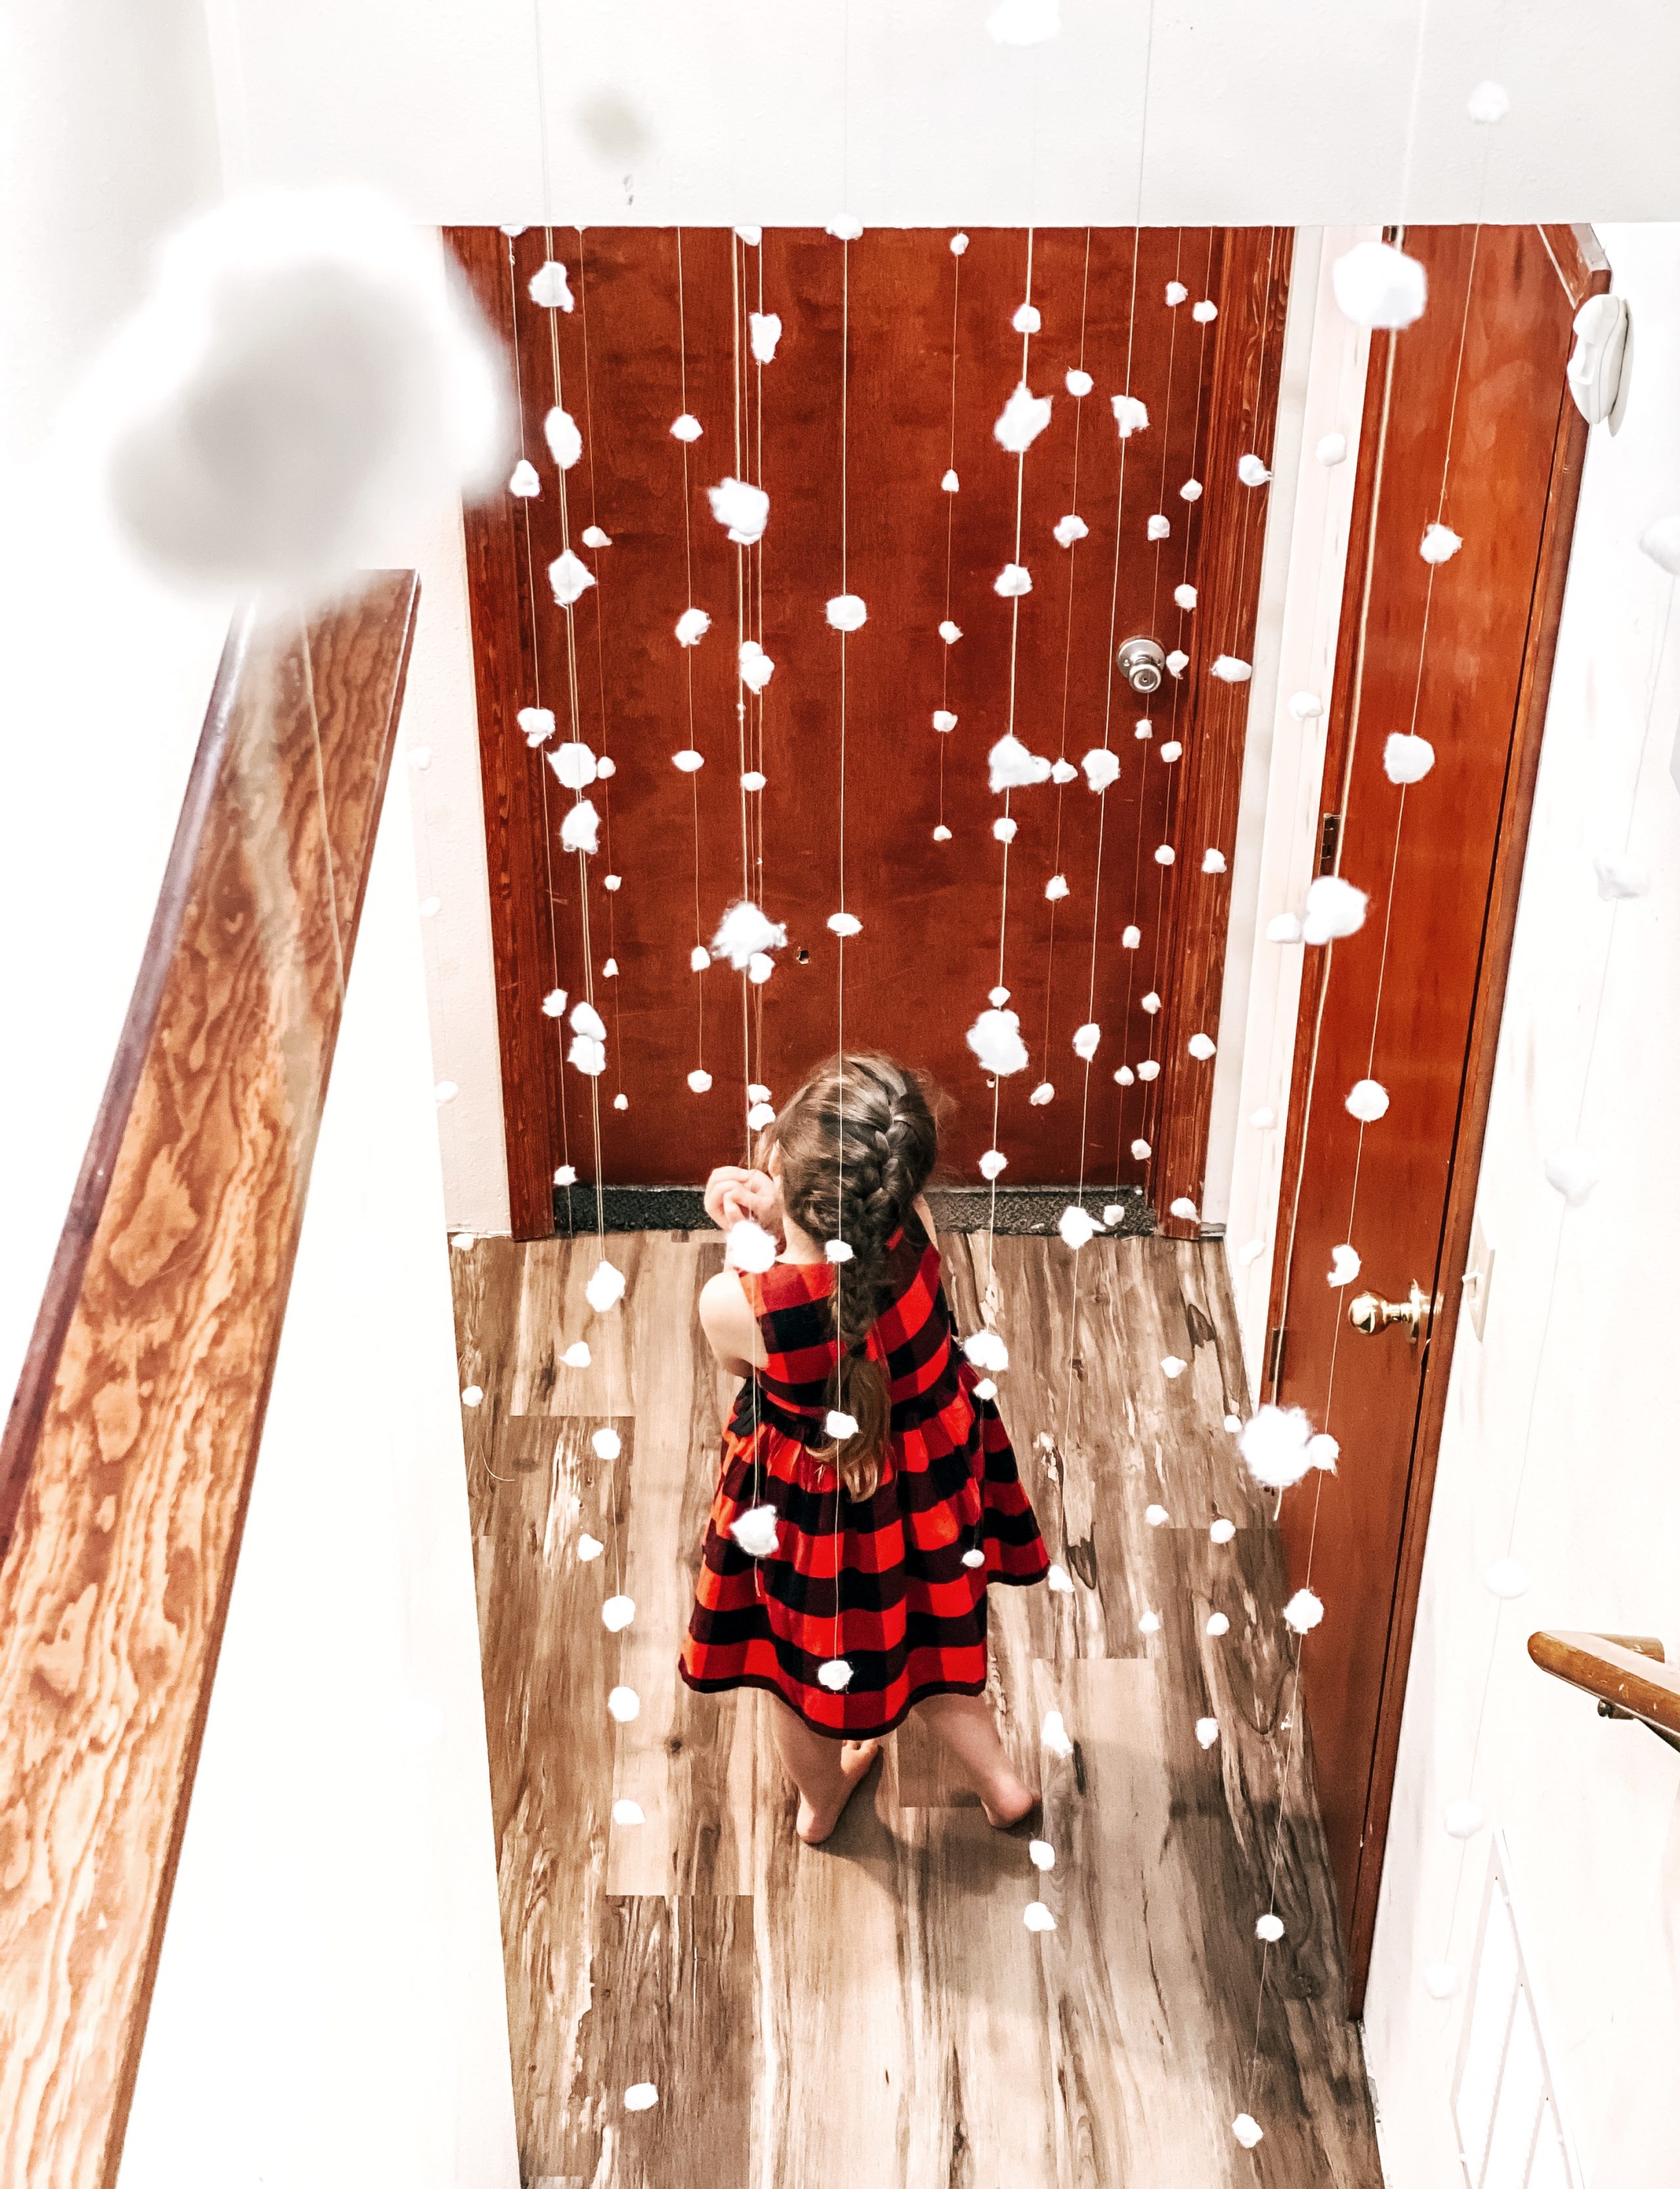
One cozy evening while watching While You Were Sleeping, I decided to try making a snow garland using just cotton balls and thread. By the time the movie ended, our basement was quietly transformed into a snowy retreat. When my daughter saw it done, she clasped her little hands together and called it a "winter wonderland" and danced in the stairwell, it's one of those small moments I won't forget.
Originally when I saw a similar garland it was made with wool balls. Making the wool balls sounded time consuming. Rolling and rolling. And Purchasing them added up fast. I saw some on Etsy selling 200 for $75. Yikes! This project only cost me $1.99, because I had the thread already on hand.
❄️ Quick Look: Snow Garland with Cotton Balls and String
⏱️ Time: About 2 hours (movie-length craft!)
? Cost: Around $1.99 - seriously budget-friendly
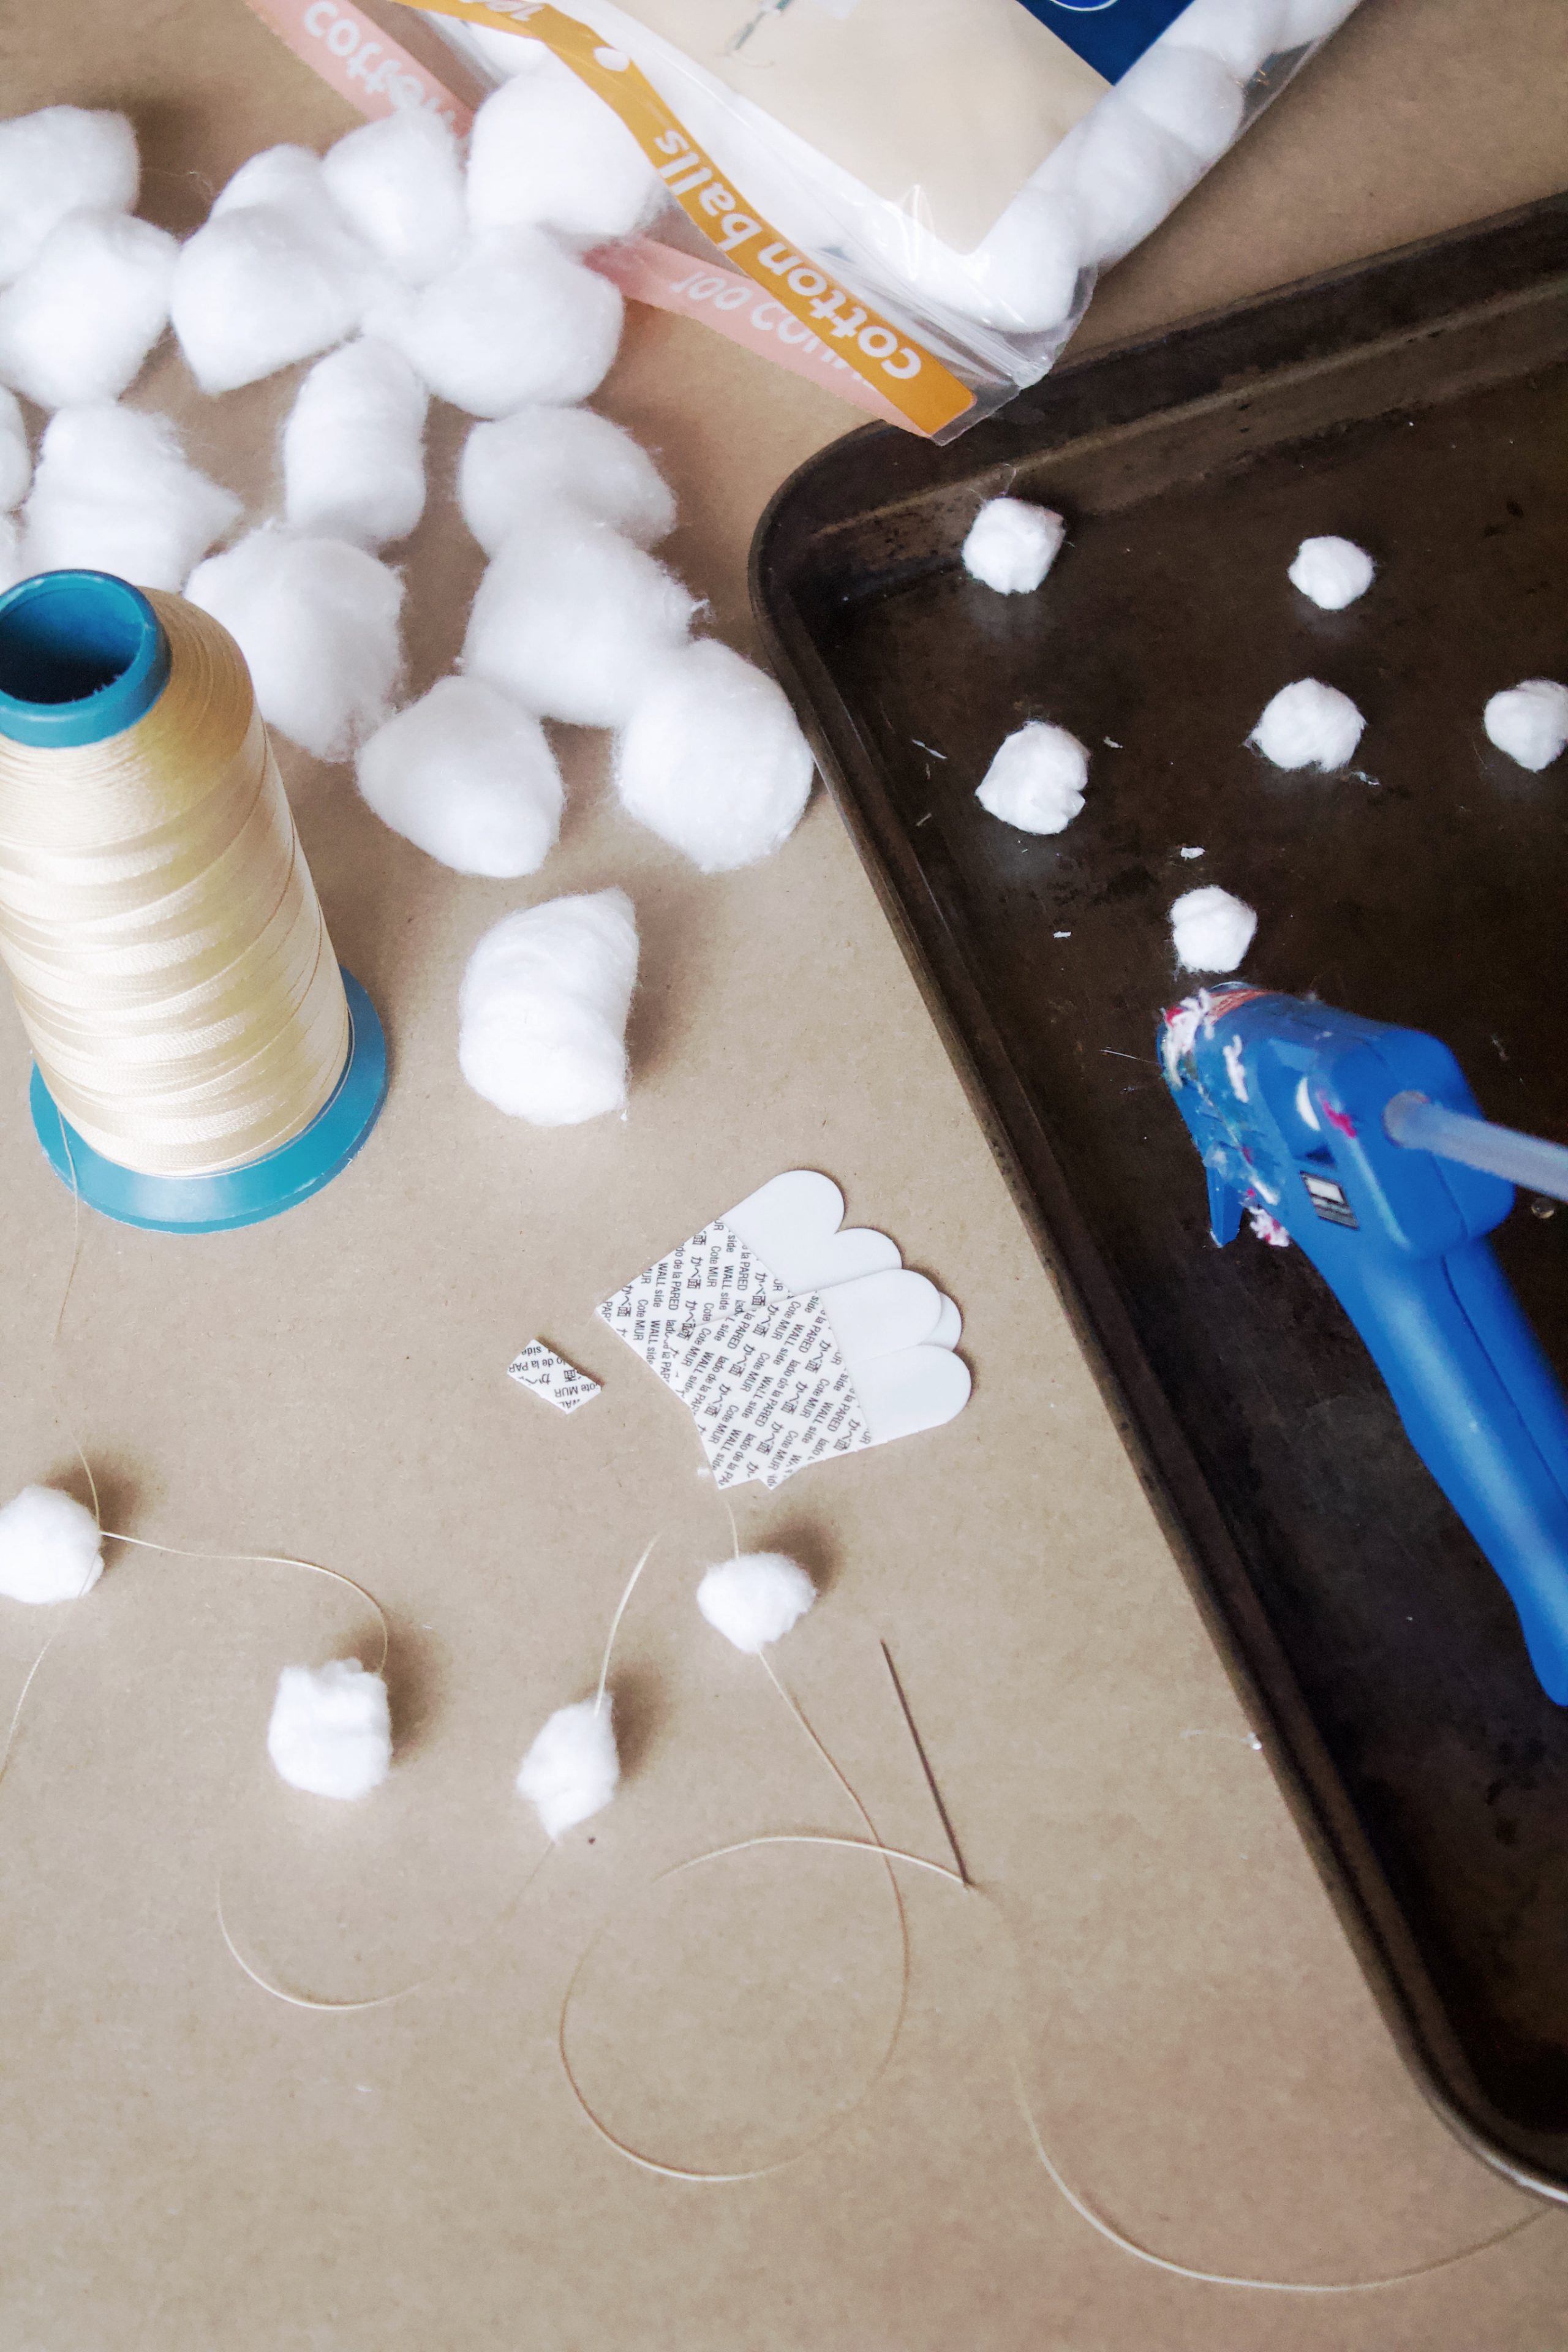
? Main Supplies: Cotton balls, nylon or thread, hot glue gun, Command strip refills
?? Skill Level: Beginner - easy and relaxing project
✨ Style: Cozy, whimsical winter decor that turns any room into a snow-filled wonderland
? Best For: Stairways, kids' rooms, basement ceilings, or holiday parties
☕ Crafting Vibe: Perfect to make with a Christmas movie and mug of cocoa
? Pro Tip: Keep garlands spaced about 1½ feet apart to prevent tangling and hang with cut Command strips for an invisible, damage-free setup.
SUMMARIZE & SAVE THIS CONTENT ON
Jump to:
- ❄️ Quick Look: Snow Garland with Cotton Balls and String
- Tips so they don't tangle
- How to hang this snow garland
- Here's what I did to attach the snow strings to the ceiling:
- Put together your snowy winter wonderland
- More Budget Friendly Holiday Crafts
- Snowball Garland
- Crafting something magical out of simple materials is at the heart of everything I share.
How to Make Cotton Ball Snow Garland
This is one of those projects that doesn't require perfection, just a little time and a cozy atmosphere. I like to prep everything before I sit down, so I can get into a good rhythm while watching a Christmas movie. You can do the same with my Decorate for the Holidays with Gift Tags, and DIY Paper Christmas Trees.
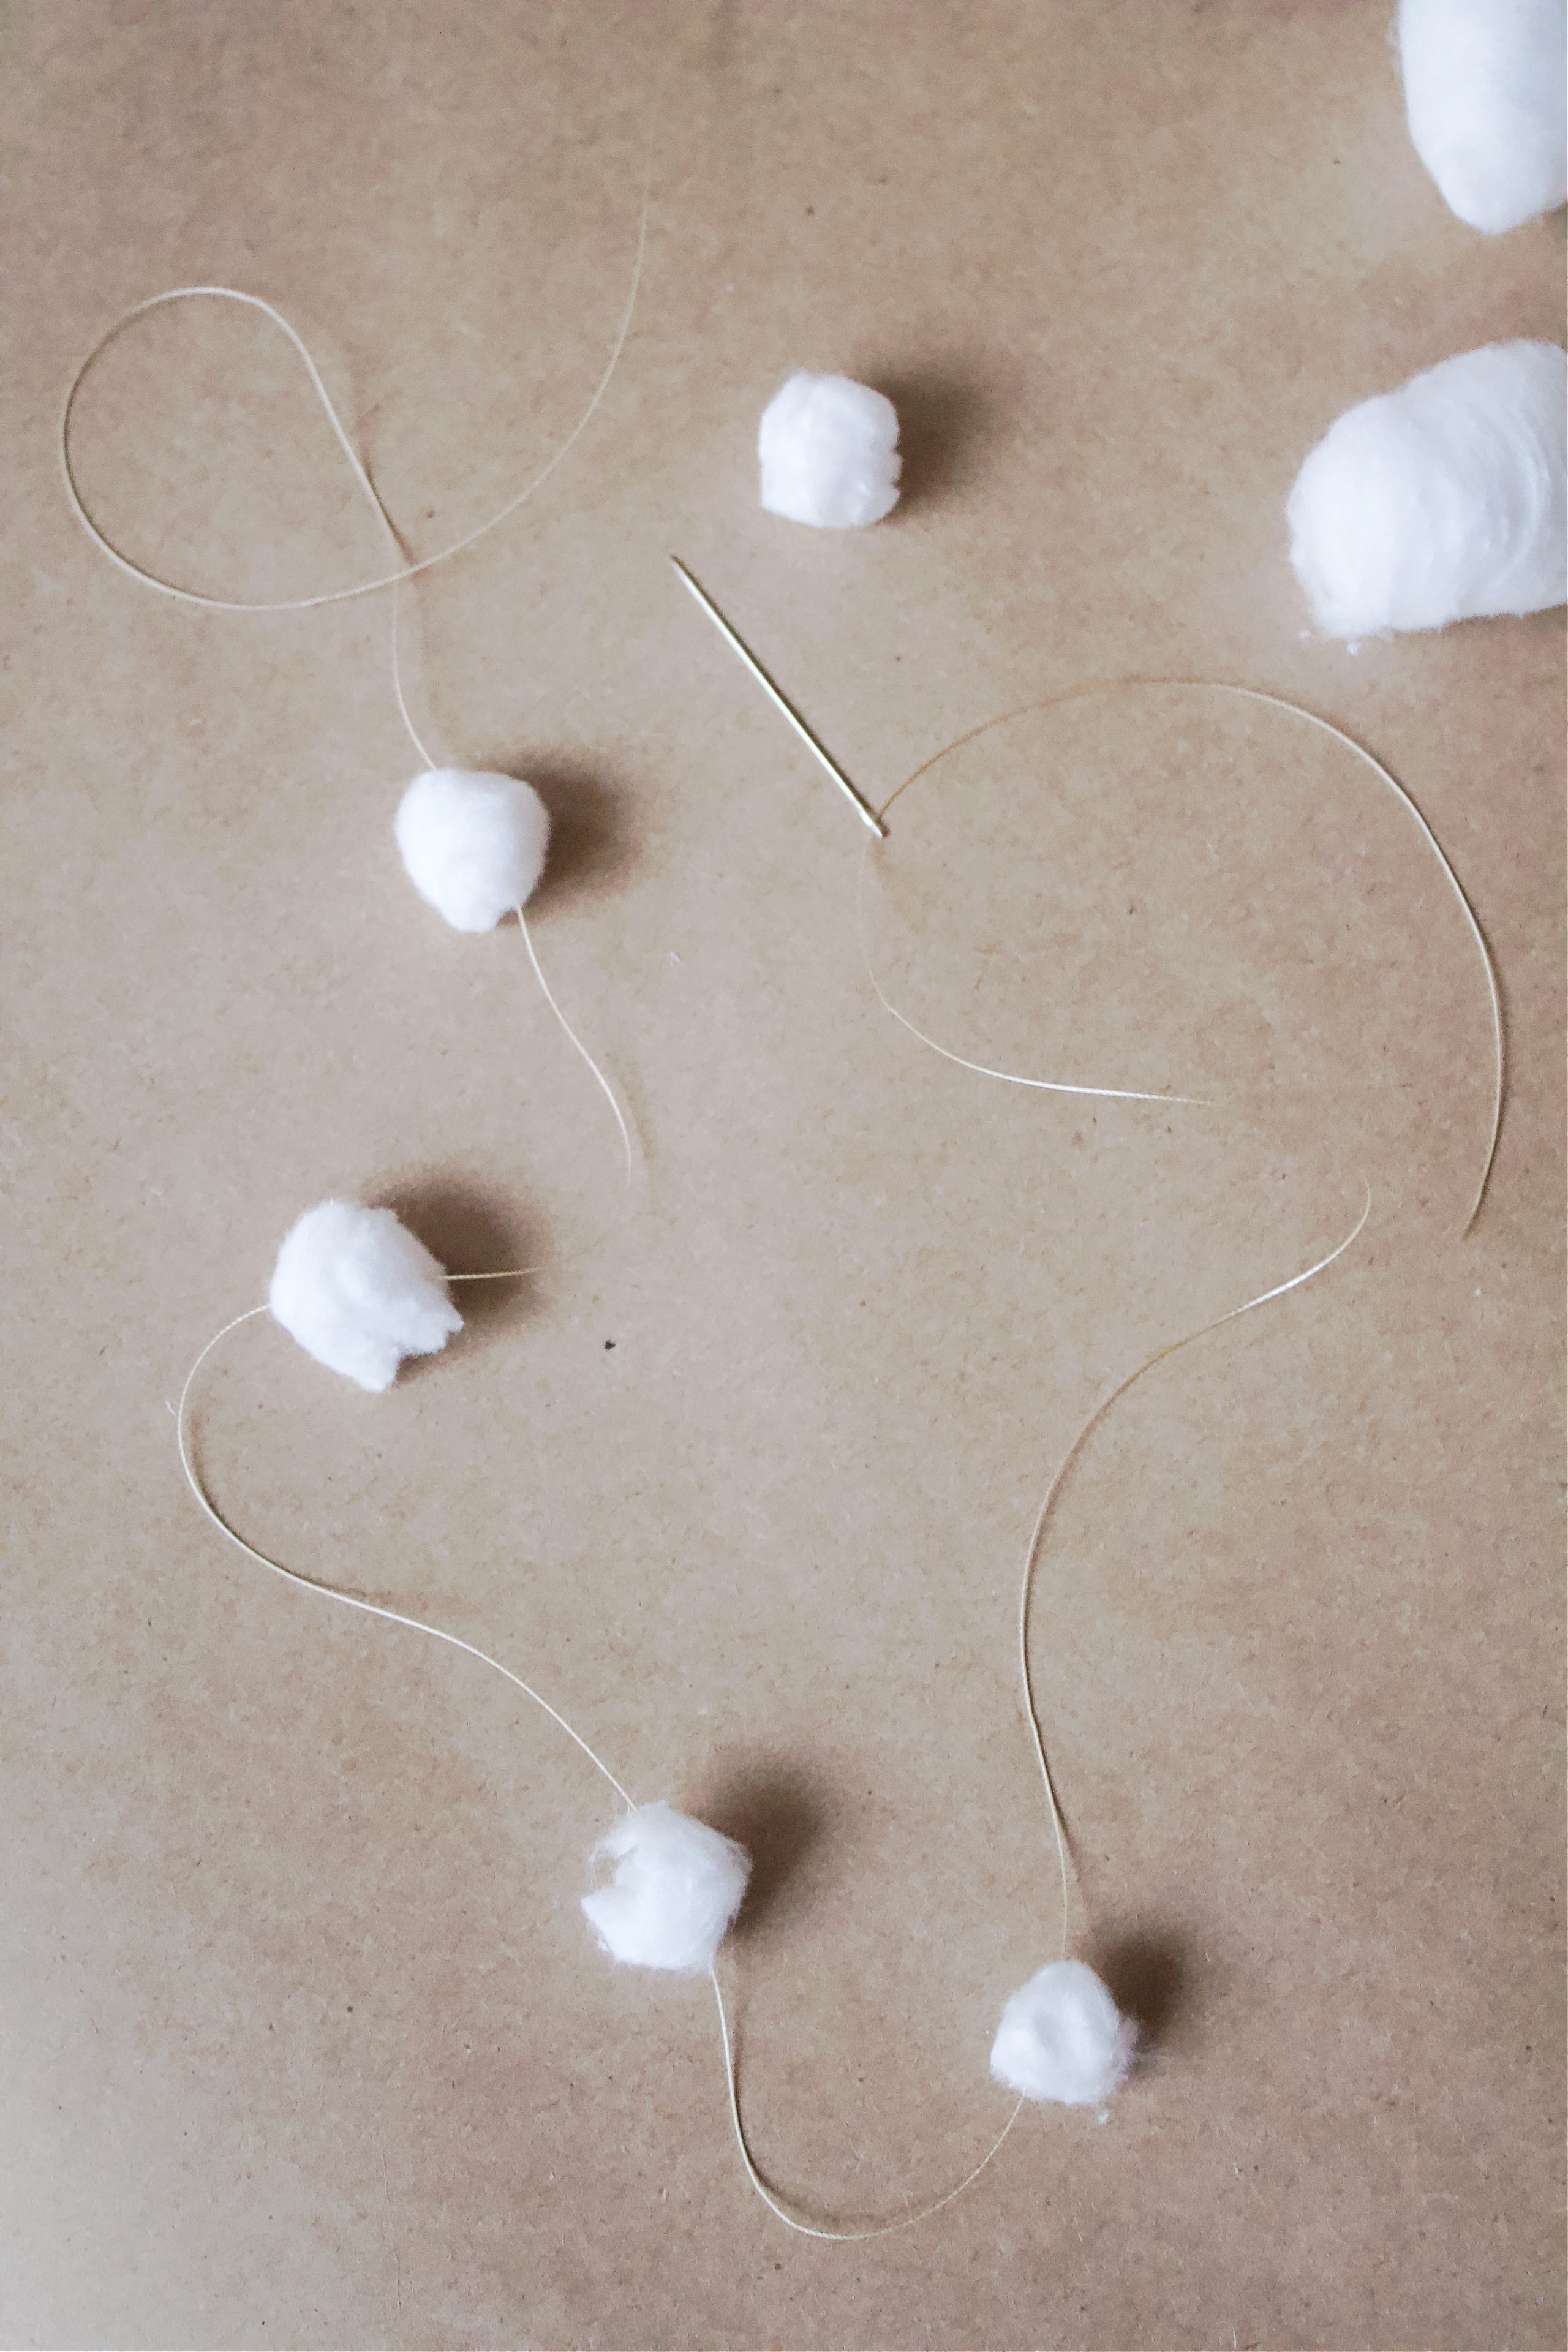
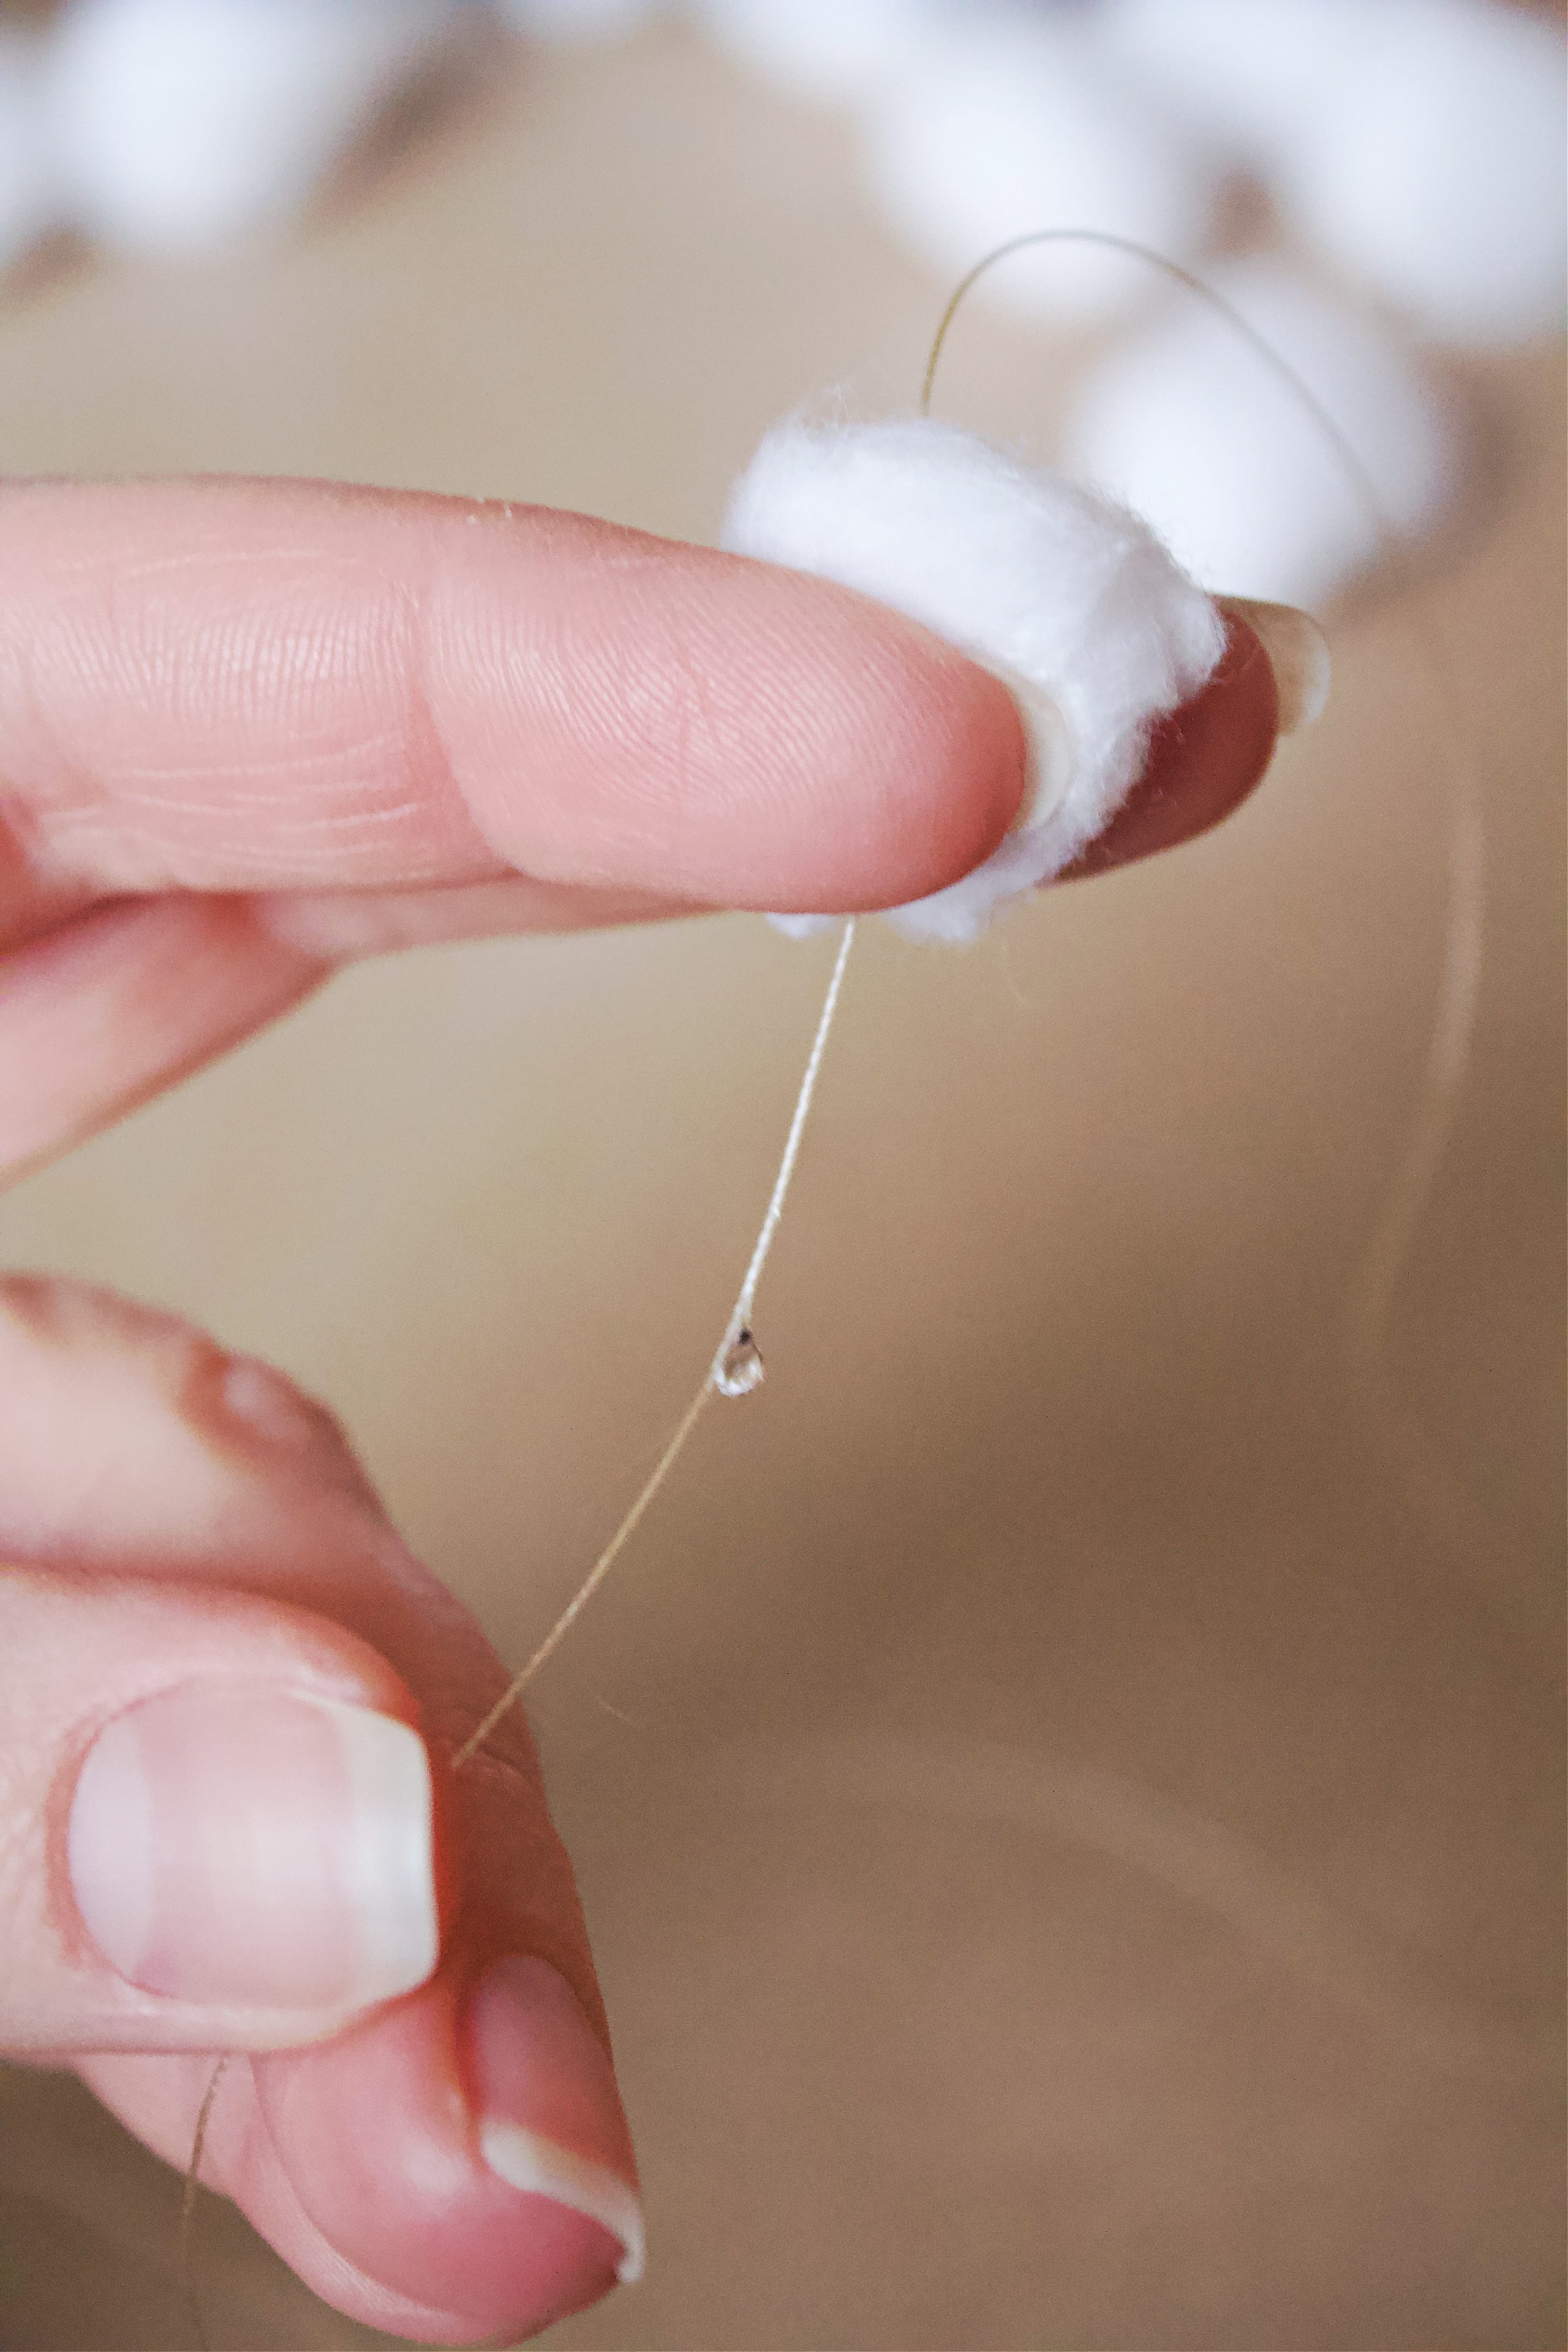
Start by cutting your string to the length you want. I had mine almost touch the floor for that full "falling snow" effect. Using a larger needle, thread the string. You won't need to tie anything yet-we'll secure the cotton with hot glue in a bit.
Next, pull apart cotton balls into four pieces and roll each one back into a mini snowball. This makes them fluffier and more natural looking than using them straight from the bag. I prepped a whole pile before threading.
Once threaded, add a small dab of hot glue on the string and press the cotton ball over it. Space them about a foot apart on the string. I used 5 to 7 per strand.
That's it! Just repeat until you've made enough to transform your space.
Tips so they don't tangle
These can tangle! I found that you don't need to hang them very close together. Keeping them around a foot and a half apart seems to be the key to making sure they fall back down straight and not become hooked together.
How to hang this snow garland
I used command strip refills. (I should have stock in command strips because I use them for alllll my crafts.) You don't need the hooks for this project, just the adhesive backs.
Because these garlands weight practically nothing, and you don't need much to get them to stick to the ceiling.
Here's what I did to attach the snow strings to the ceiling:
- Cut the command strips into fourths
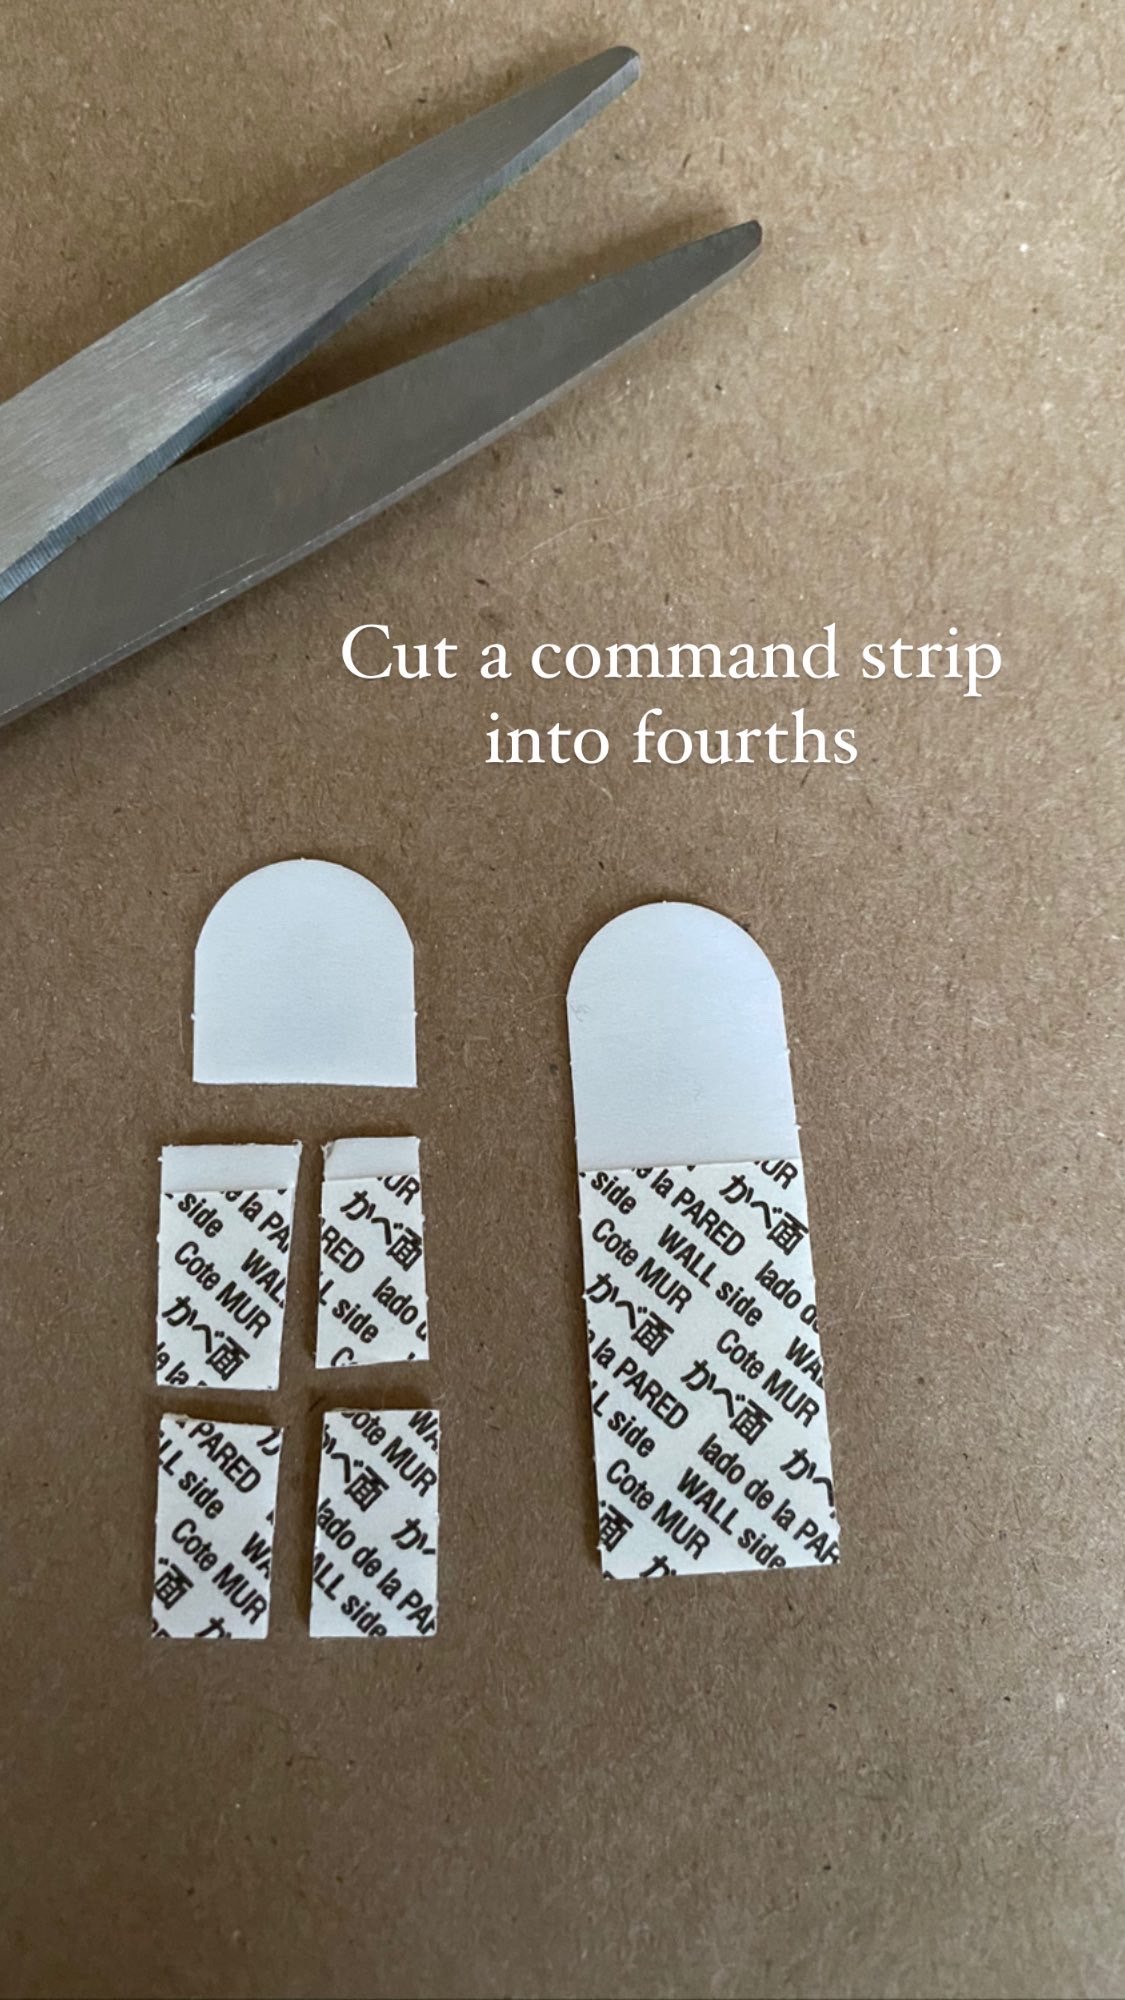
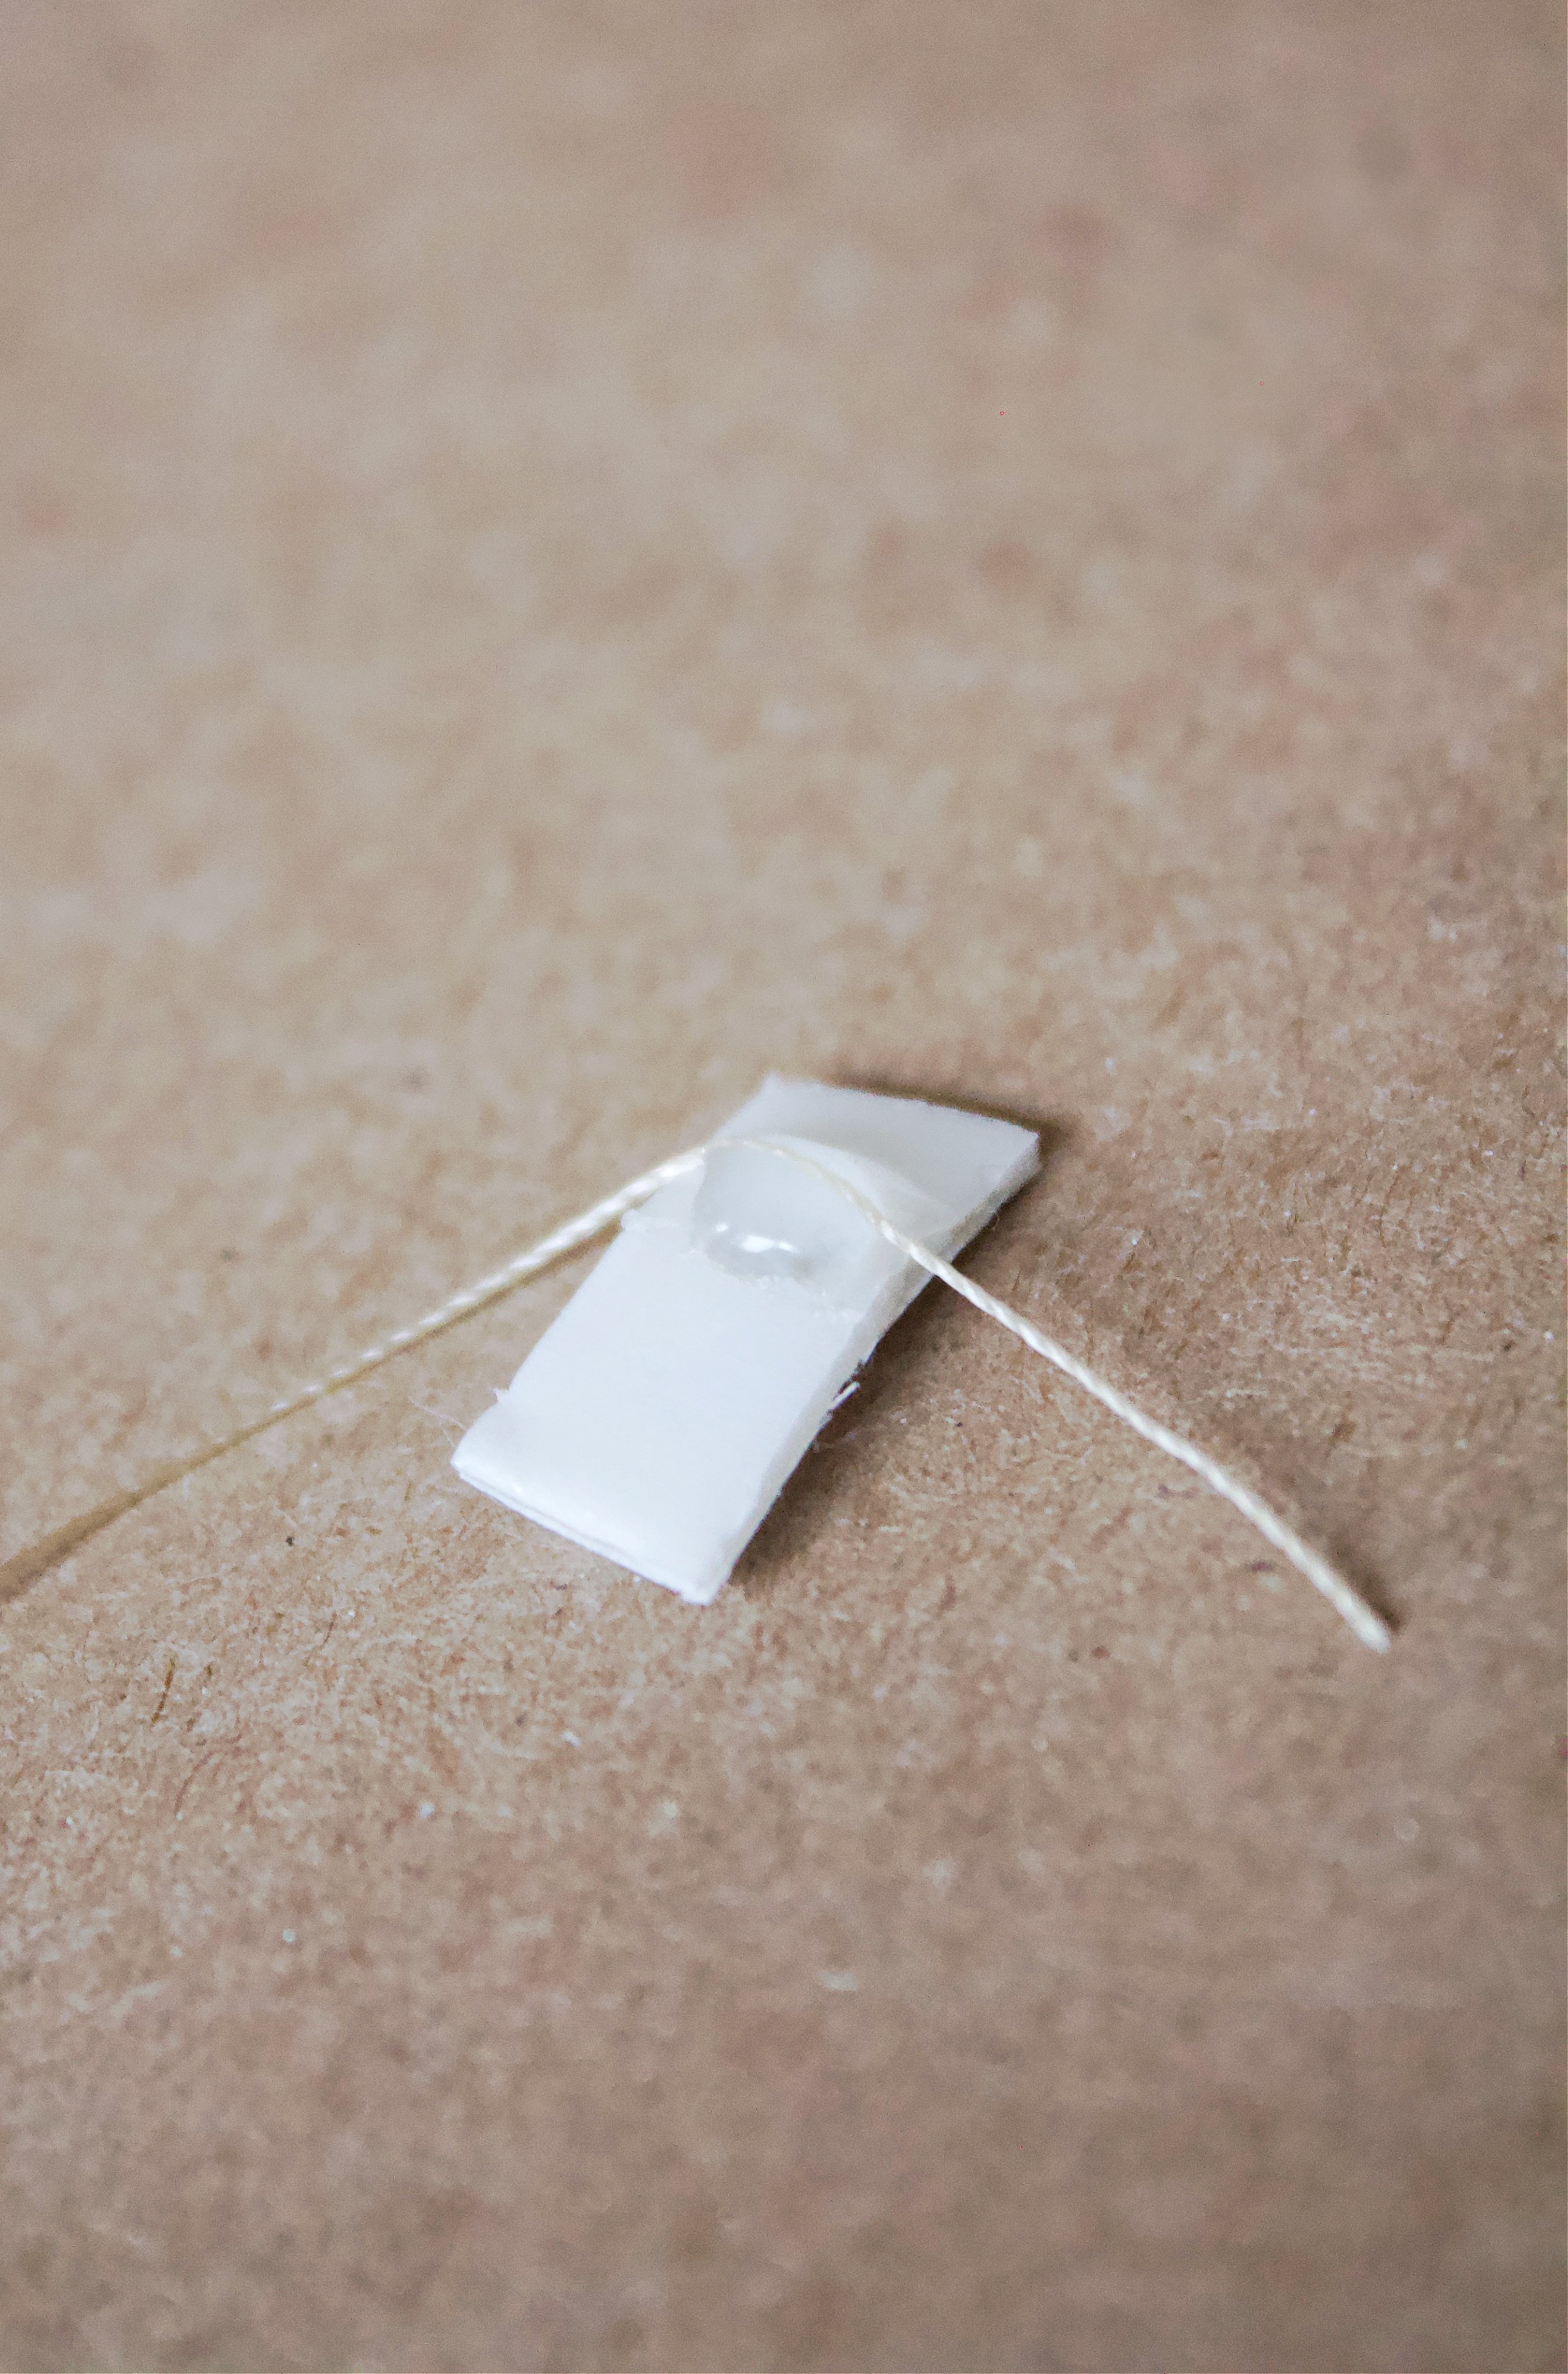
2. Remove the film from one side and attach the end of the garland string onto the sticky surface. They place a dot of hot glue over the top to make sure it's secure.
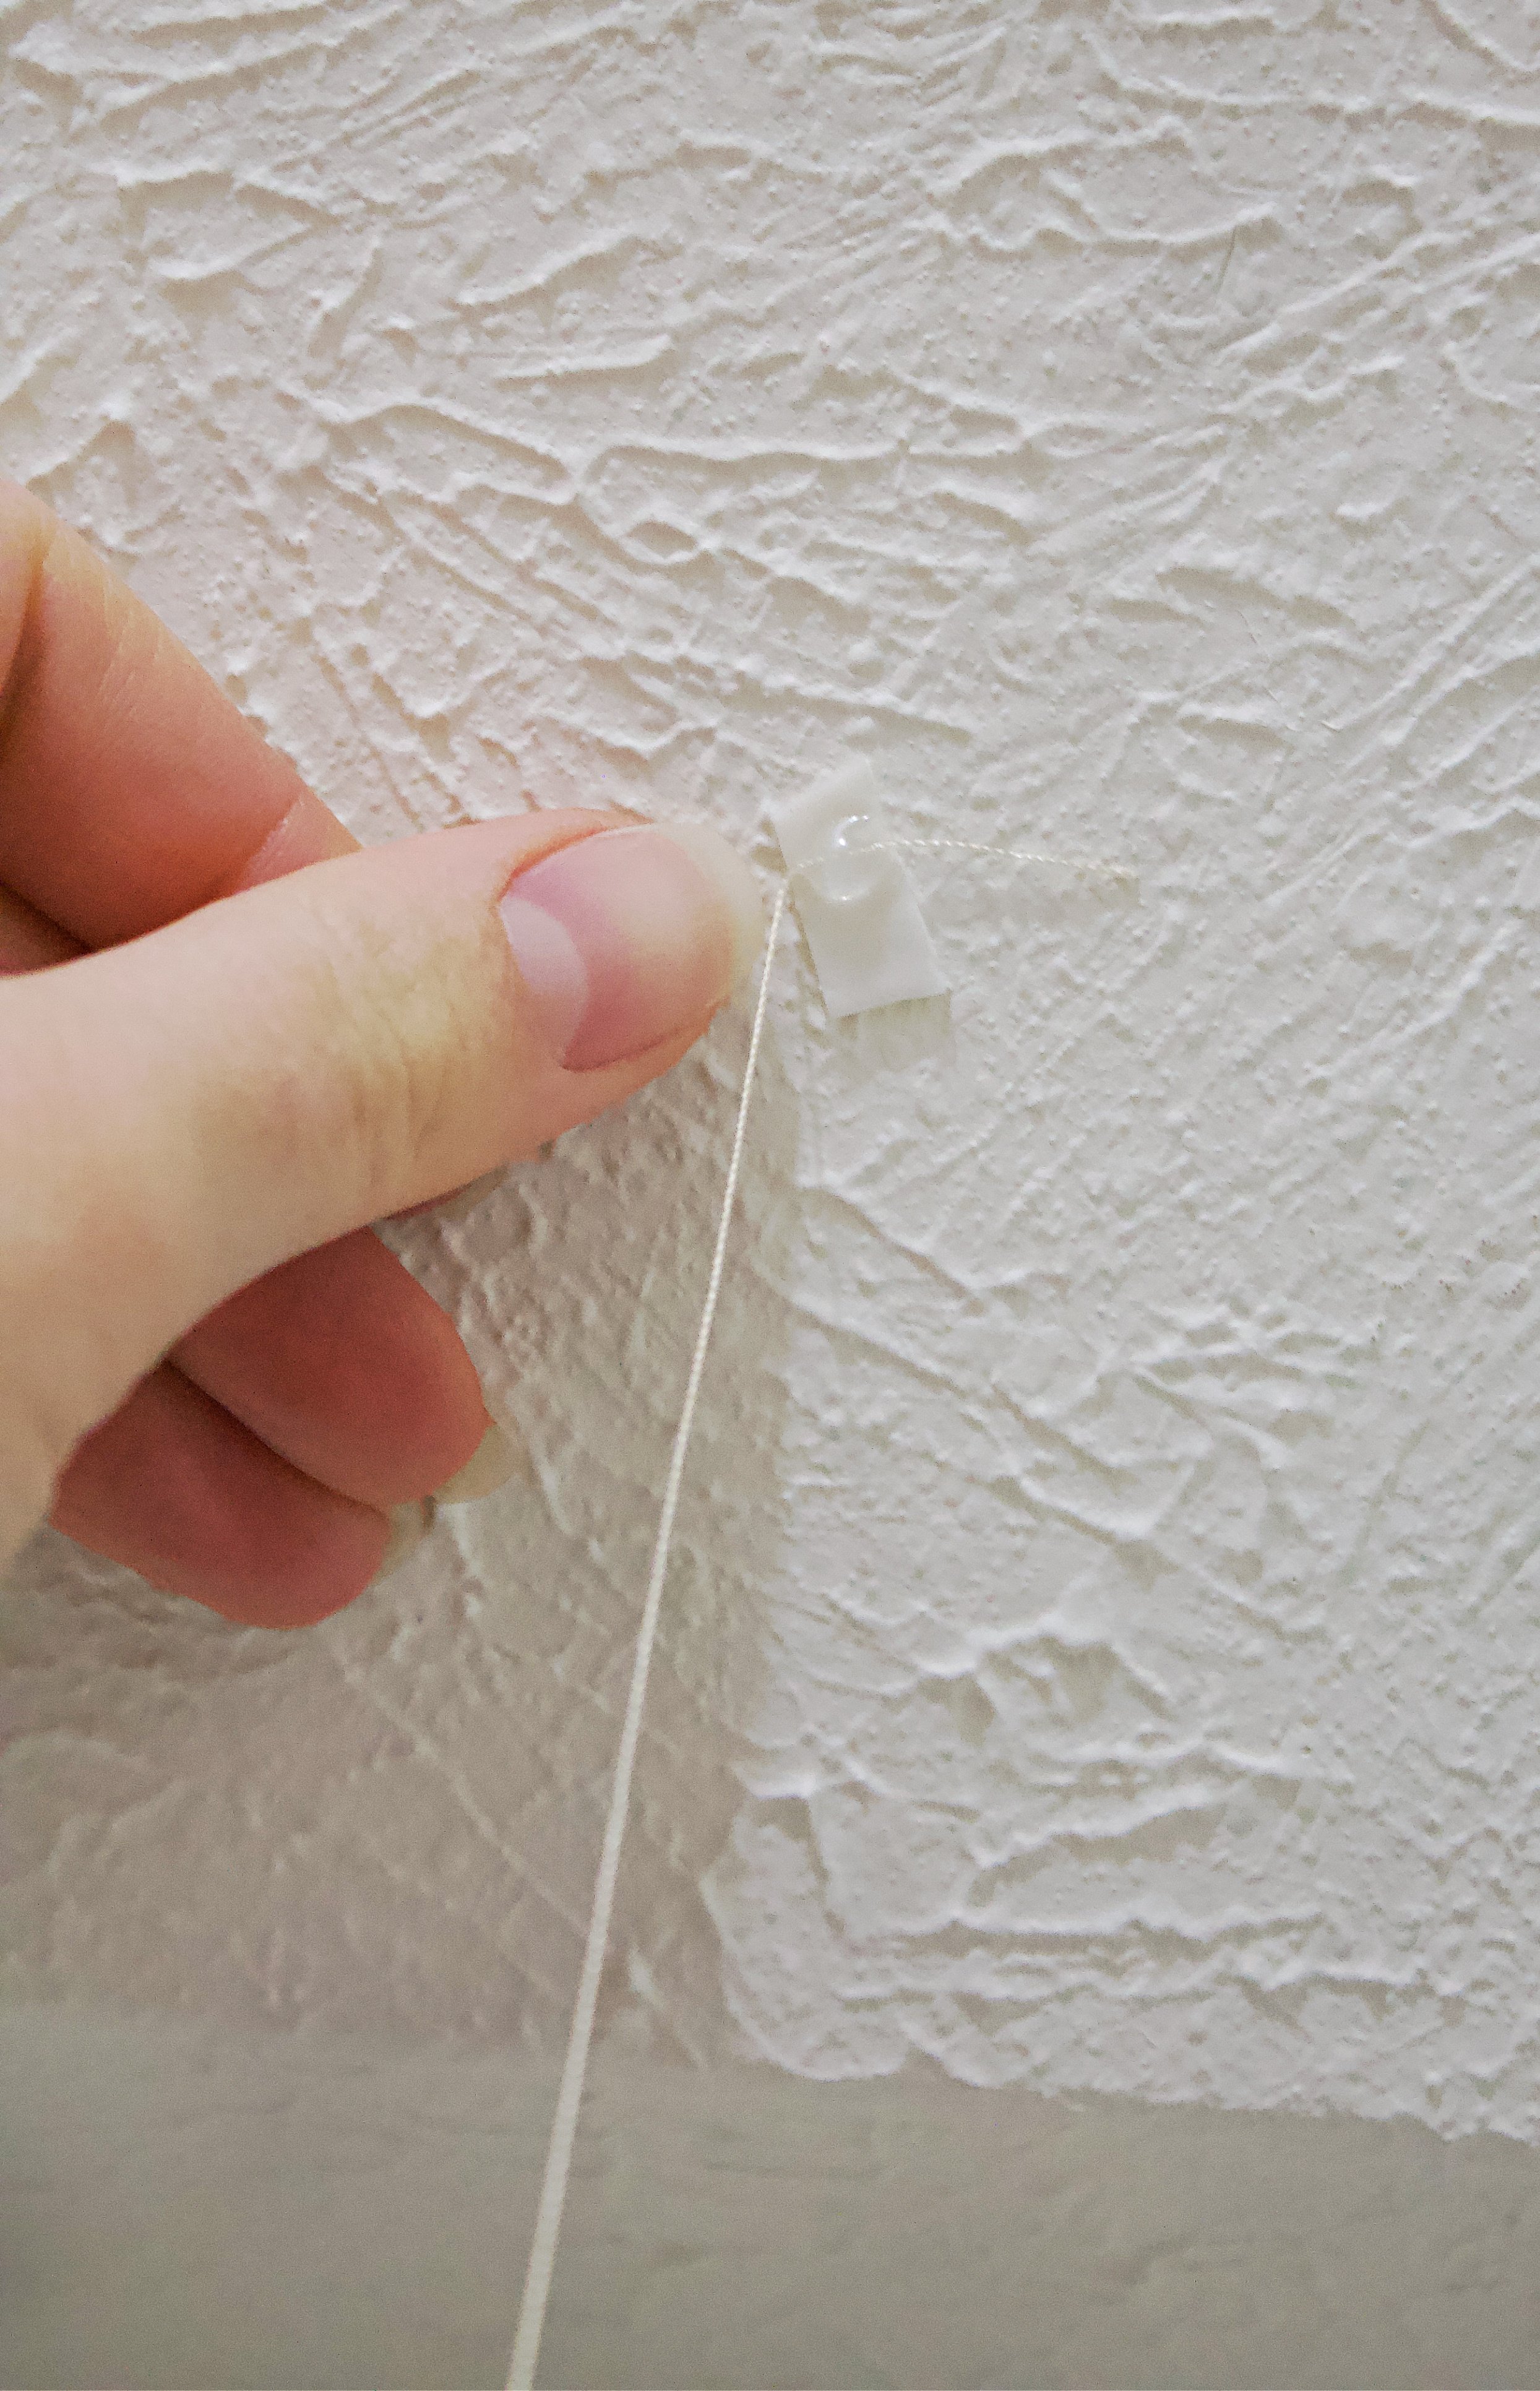
3. Once dried, remove the film backing and stick to the ceiling.
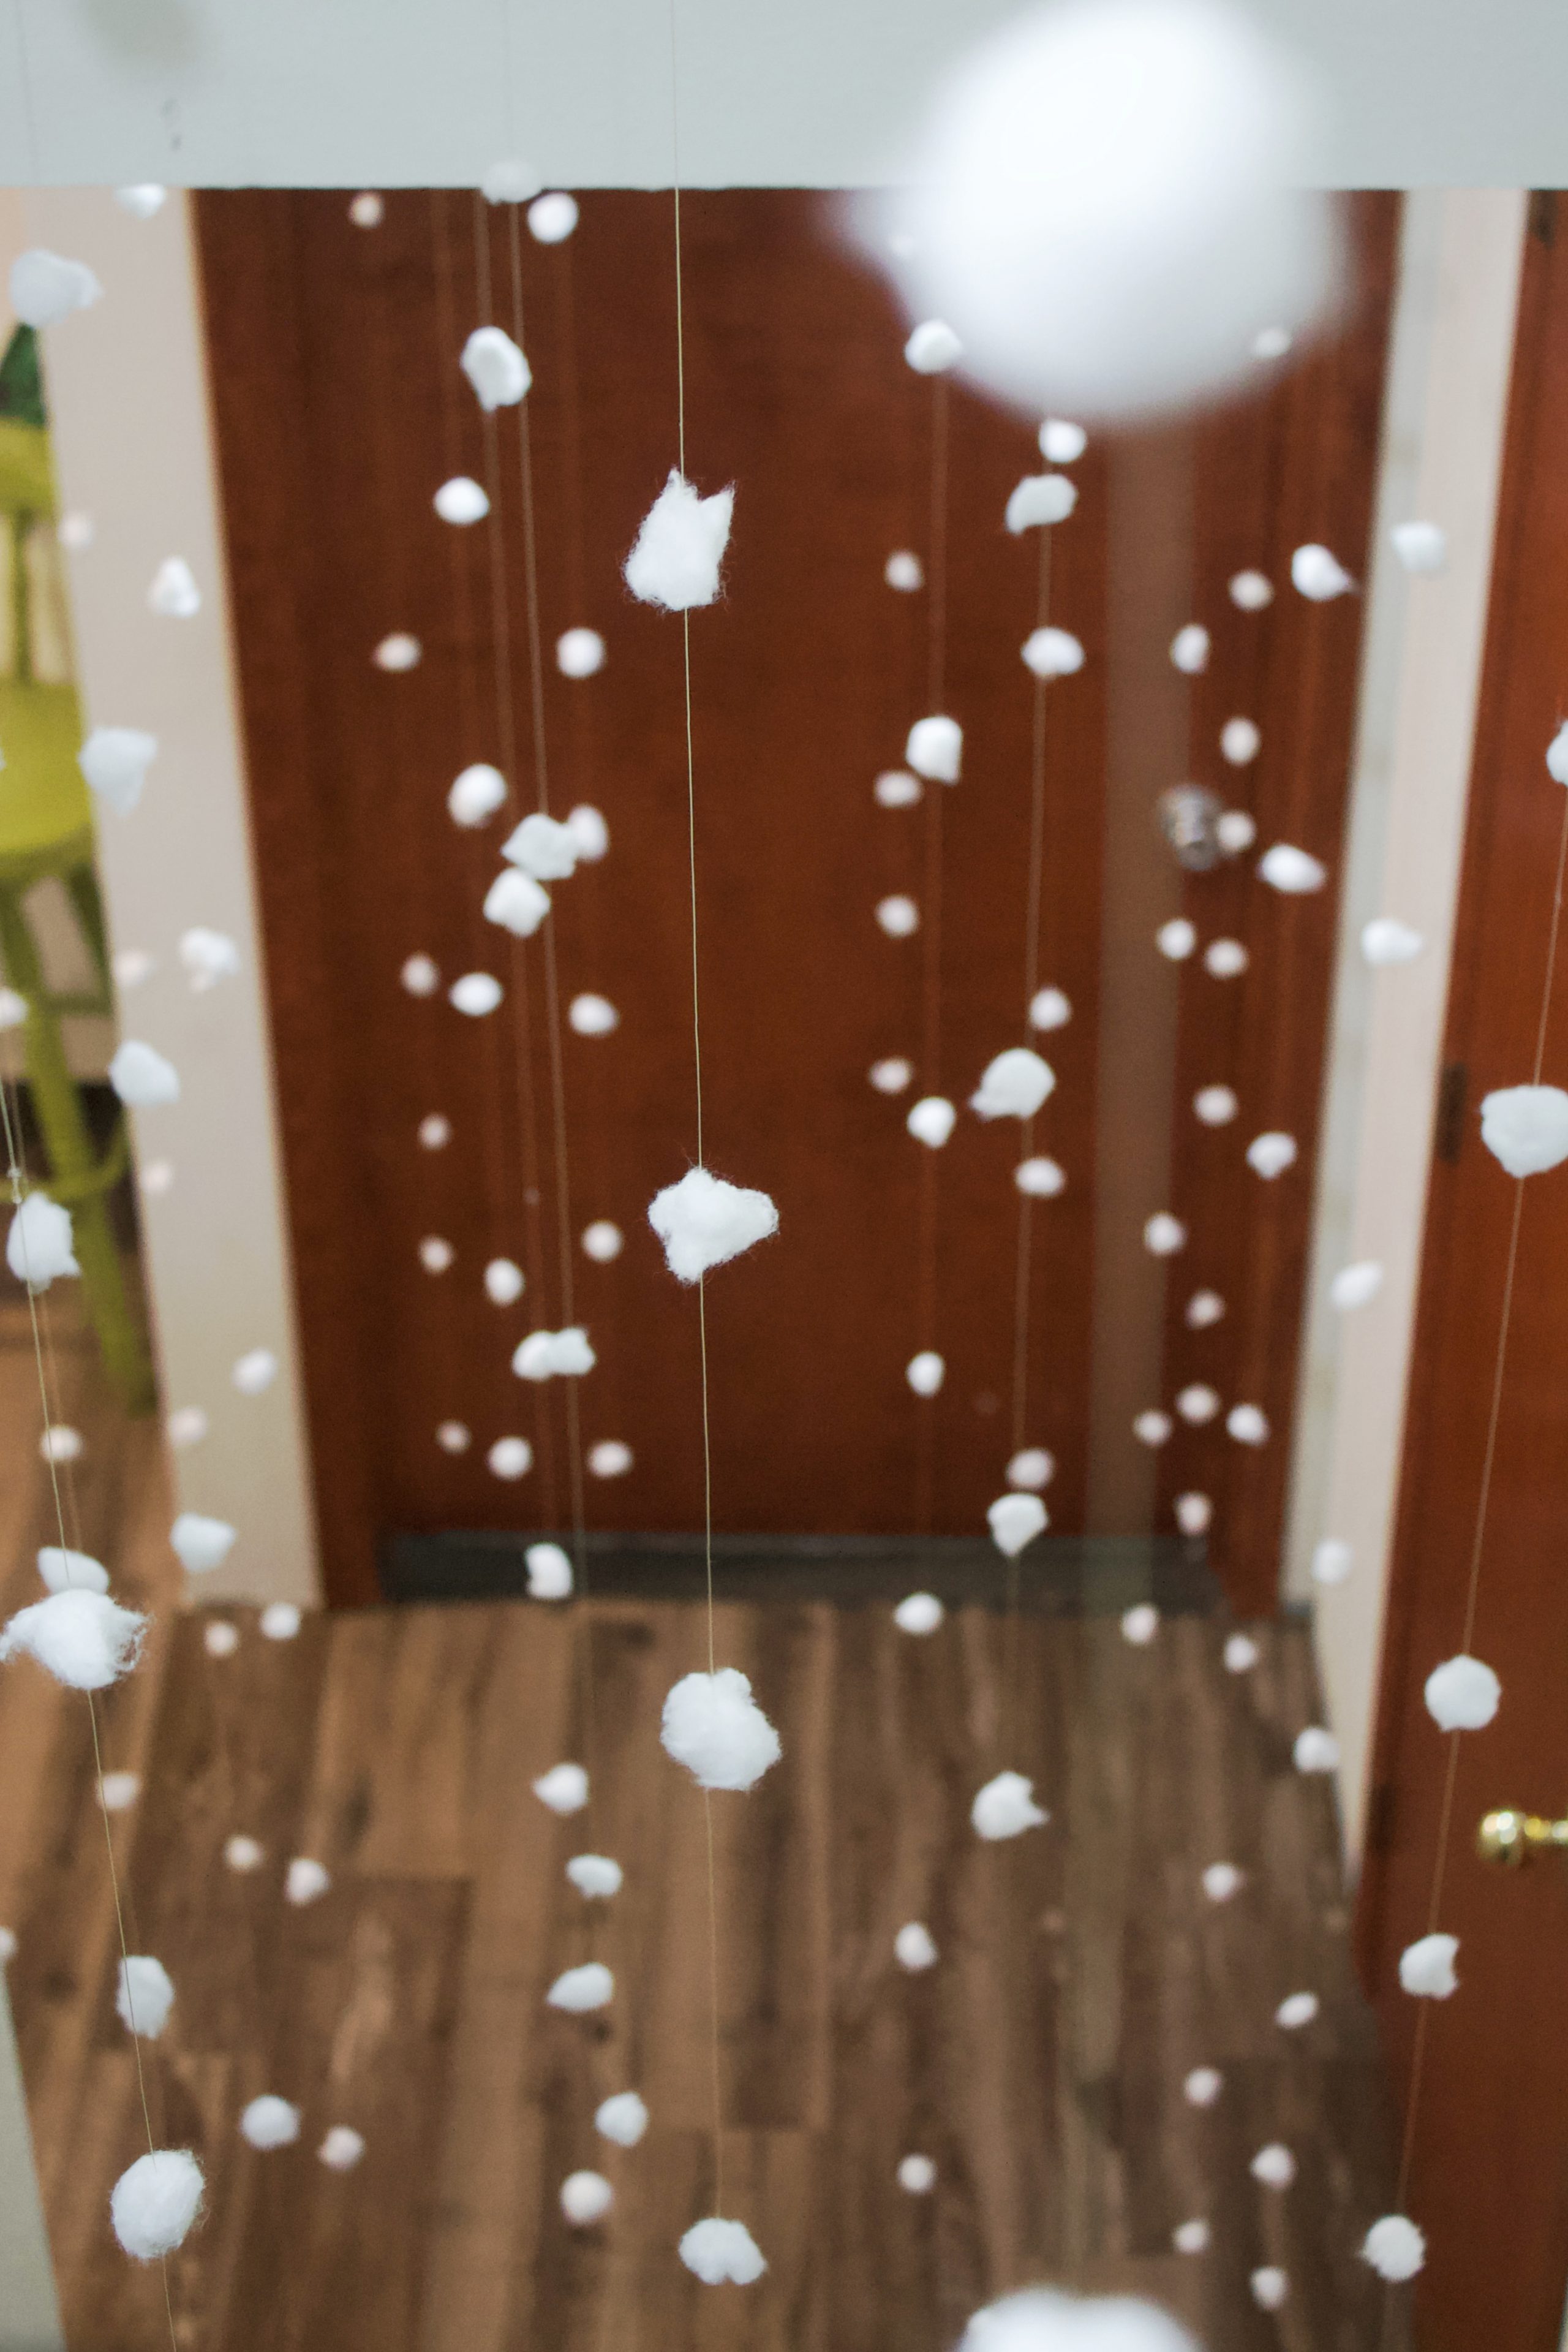
Put together your snowy winter wonderland
First, figure out how large an area you want to make your wonderland. We chose the stairs headed to the basement and the basement landing. I staggered the garlands out, standing back often to see if I was placing them evenly and not adding too much garland in one area, making it garland heavy.
I was giddy putting it up because it looked amazing! Sometimes it's the simplest things that make my heart jump for joy. Need more fake snow to help decorate your home, here is my full fake snow guide and ways to use it throughout your home.
More Budget Friendly Holiday Crafts
Want some more beautiful Christmas craft ideas that cost next to nothing but pack a big design punch? You've got to try your hand at making a dried orange garland. These easy paper Christmas trees are also stunning and so easy to personalize! And these dry mason jar snow globes have been such a hit!
Have fun crafting and making your home a winter wonderland!

Snowball Garland
Equipment
- Hot Glue Gun
- Larger needle
Ingredients
- Nylon string or any string you have on hand
- 1 bag of cotton balls
- Command strips refills only
Instructions
- Cut the String: Measure and cut each piece of string to your desired length. For a dramatic effect, let the strands hang nearly to the floor.
- Thread the Needle: Use a larger needle to thread your nylon string (or any thread you have on hand). No need to tie knots-the cotton balls will be secured with glue.
- Prep the Cotton Balls: Pull apart each cotton ball into about four pieces. Roll each piece back into a fluffy ball to create soft, varied "snowflakes." Prep a pile ahead to make threading easier.
- Thread the Snow: Thread each cotton ball piece onto the string, spacing them about 12 inches apart. Plan for 5 to 7 snowballs per strand, depending on your space.
- Secure with Hot Glue: Add a small dab of hot glue where you want each cotton ball to stay. Slide the ball over the glue and press gently. Let dry in place.
- Repeat for Each Strand: Continue threading and gluing until you have enough garland strands for your space. I made about 40 strands using just ¾ of a single bag of cotton balls.
- Hang Your Garland: Cut Command strip refills into fourths. Attach the end of each strand to a strip, secure with a dot of hot glue, let dry, then stick to the ceiling. Space strands about 1½ feet apart to prevent tangling.
Crafting something magical out of simple materials is at the heart of everything I share.
Whether it's transforming cotton balls into a snowy wonderland or bringing a cozy farmhouse feel to everyday life, each project is inspired by my love for creating beauty in the ordinary. If you've enjoyed this snow garland tutorial, I'd love for you to visit my About Eryn page to learn more about the person behind these ideas. There, I share my journey of homesteading, crafting, and building a life full of meaningful moments. It's the perfect way to get a deeper connection to the stories and inspiration that shape the projects and recipes I share here.


Honestly, this project was pure magic for how simple it was. I still remember my daughter’s face when she saw the garland. Totally worth the time spent crafting with a Christmas movie in the background. I love how easy it is to recreate, but looking back, I wish I’d taken better photos because they don’t capture how dreamy it felt in person. Still one of my favorite DIYs I’ve ever done.
I'm thinking of making these for my department holiday party. About how many balls of cotton did you thread on each string?
I sectioned out each cotton ball into about 4 snowflakes. So there was less than 2 cotton balls per each string. 🙂
Lovely idea. I found this on pinterest when I searched for ideas for my daughter's Winter party. I did not read the article first and attempted to do the project by threading and doing a loop around each "snowball"... boy oh boy. I really wish I read your article first and used the glue ??. All is well. Came out with the same beautiful results, just did A LOT more work. Thank you for the idea.
I bet the "snow" was still lovely and your daughter appreciated the gesture. Hope this post helps next time! 🙂
Love this!!! Budget friendly for sure
Thanks
Love this ! So budget friendly
Hi! Do you have a link to the needle you use for this? Such a cute project for my son’s class. Thank you!
Just a regular sewing needle you can find at any craft store! You can use a larger one with a blunt end if you're doing with Children. 🙂