Easy How To DIY Tissue Paper Garland Tutorial
How to Make a Tissue Paper Garland for Your Next Party
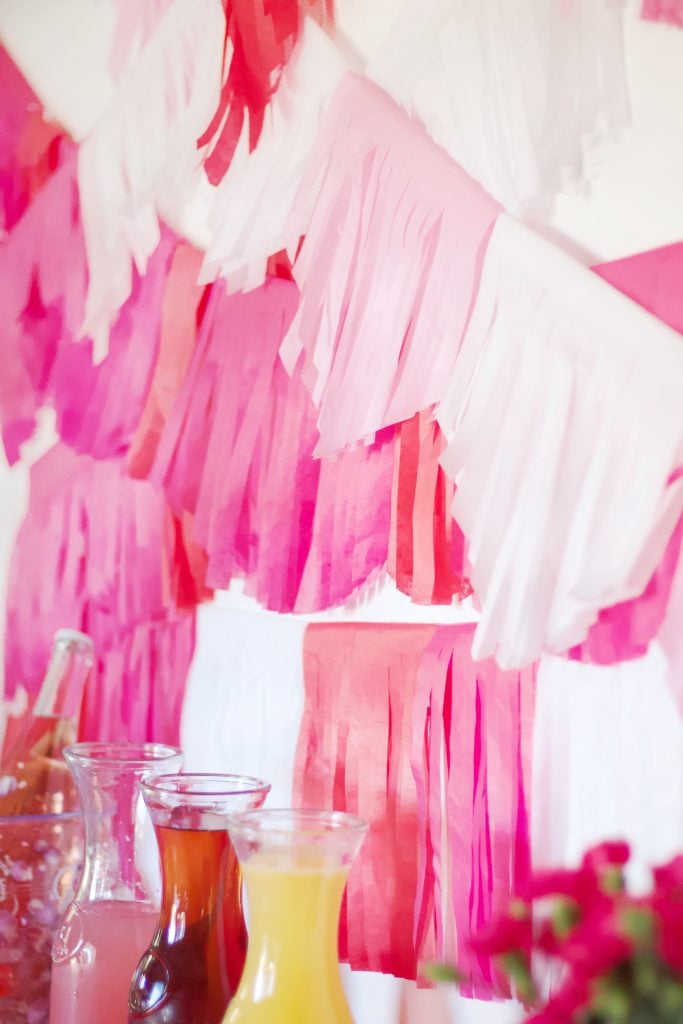
Are you in need of a cute and budget-friendly backdrop for your next party? I was in the same situation while setting up a mimosa bar for a Valentine's Day event. After some Pinterest inspiration, I discovered the perfect solution: a DIY tissue paper garland! Not only is this garland easy to make, but it also adds a pop of color and charm to any special occasion, whether it's a birthday party, baby shower, or bridal shower.
Why Tissue Paper Garland?
I love hosting parties, from Evelyn's Two-tti Fruity birthday bash to my annual Friendsgiving. But until recently, I hadn't made my own tissue tassel garlands. I was really missing out! Tissue garlands are a great way to add flair to your party decorations without spending much time or money. Plus, you can customize the garland to match any color scheme.
Fringe Garland Supplies

To create your own garland, gather these supplies:
- Tissue paper in various colors (a pack of tissue paper from the dollar store works great)
- String or thin ribbon (a piece of twine can also work)
- Nails or command hooks for hanging
- Scissors or a rotary cutter (to make cutting easier)
- Clear tape, washi tape, or a dab of glue

Step-by-Step Instructions
- Decide on the Length: Measure the area where you plan to hang the garland. Cut a piece of string to fit this space. This will be your garland base.
- Prepare the Tissue Paper: For a polished look, iron each piece of tissue paper on the lowest setting. This helps remove creases from packaging. Fold each tissue paper in half and iron along the fold line.
- Assemble the Garland:
- Take a single sheet of tissue paper and fold over one edge by ½ inch.
- Place the string or ribbon under the folded edge, securing it with a piece of tape. Continue adding more tissue paper pieces, alternating colors if desired.
- Once the string is full, cut the bottom of each tissue paper section into strips about ¼ inch wide, just below the fold. This will create the fringe effect.
- Finish the Garland: Flip the garland so the taped side faces the wall. Pin it in place using command hooks or nails.

Tips for Customization
- Tassel Length: For longer tassels, use larger sheets of tissue paper or fold less of the paper over the string.
- Color Order: Arrange the tissue paper in a specific color order to match your party theme.
- Additional Decorations: Add a little loop of washi tape or thin ribbon to the top of each tassel for extra flair.

Final Thoughts
Creating a tissue paper garland is a fun and easy DIY project that adds a personal touch to your party decor. It's perfect for holiday decor, a little girl's room, or even a Cinco de Mayo celebration. Plus, with a few tweaks, you can transform this basic design into something truly unique. Happy crafting!

Don't forget to share your creations on Instagram and tag me @eryn_whalen_online. I'd love to see your garlands in action! For more DIY projects and easy tutorials, check out the rest of my blog.

P.S.: If you're in a hurry, you can find pre-cut tissue paper sheets or tissue paper flowers at your local party store. But making your own garland is a great way to save money and get exactly what you want without the additional cost.


Easy How To DIY Tissue Paper Garland Tutorial
Equipment
- Nails or command hooks (for securing the garland)
- Scissors or rotary cutter
- Clear tape, washi tape, or glue
Ingredients
- Tissue paper various colors
- String or thin ribbon for hanging
Instructions
- Measure & Cut:
Measure the space where you plan to hang the garland. Cut a piece of string or ribbon to fit this space.
Iron the Tissue Paper:
Gently iron each sheet of tissue paper on the lowest setting to remove any creases. Fold each sheet in half and iron along the fold line.
Assemble the Garland:
Fold one edge of a tissue paper sheet over by ½ inch.
Place the string or ribbon under the folded edge and secure it with a piece of tape.
Continue adding tissue paper sheets, alternating colors as desired, until the string is full.
Create the Fringe:
Cut the bottom of each tissue paper section into strips about ¼ inch wide, just below the fold, to create the fringe effect.
Hang the Garland:
Flip the garland so the taped side is facing the wall. Use nails or command hooks to pin it in place.
Notes
Arrange tissue paper in a specific color order to match your party theme.
Add washi tape or thin ribbon loops to each tassel for added flair.

Happy garland creating friends! Make sure to tag me over on instagram and show off your creation!