The Ultimate Step By Step Guide To Make Beeswax Candles
There's something magical about creating gifts in the quiet of a winter afternoon. The soft hum of activity on our homestead slows, the kids settle into their own projects, and I get to spend a little time in the kitchen-this time, not for baking, but for candle making.

Homemade beeswax candles have become one of my favorite gifts to make and share.
They're simple yet meaningful-a gift that feels luxurious without being fussy. When you hand someone a candle you made yourself, you're giving more than wax melt and wick; you're gifting warmth, thoughtfulness, and a little piece of home. Another great gift to try your hand at is this DIY Handmade Potpourri mix.
This year, I sourced my pure beeswax locally through a nearby beekeeping group I found on Facebook. Supporting a local beekeeper makes me happy-not only because it supports those keeping our pollinator populations healthy, but also because the yellow beeswax contains allergens specific to our area, offering natural relief during allergy season.
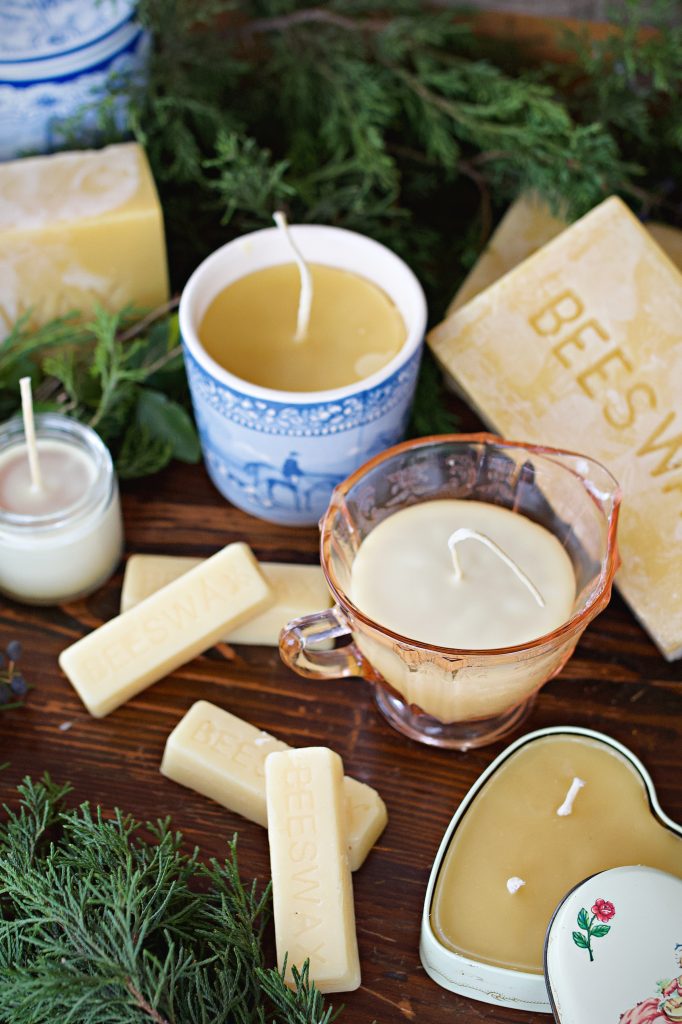
Thrift and Use Vintage Containers
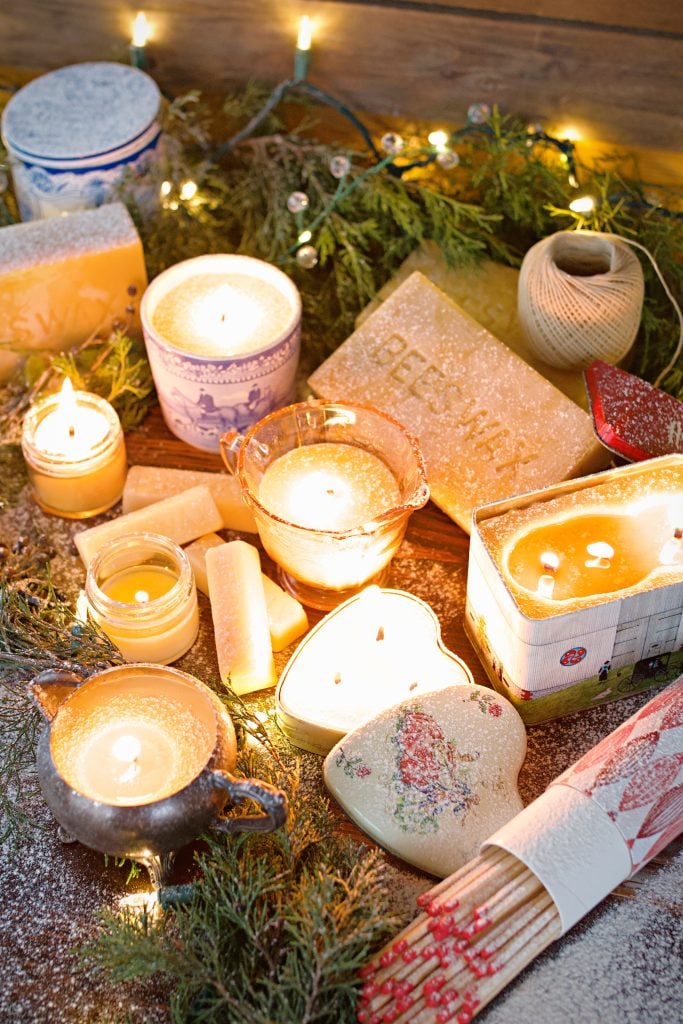
To make each candle even more special, I thrifted containers from antique shops and repurposed old candle jars and glass jars. I found some beautiful vintage treasures, like a ceramic Ralph Lauren container that feels straight out of a magazine, as well as candy tins and glass pieces.
Each one has its own story and charm, making these candles as unique as the people receiving them. Plus, the containers can be reused after the candle burns down. A little eco-friendly bonus I hope the recipients will love.
Let me show you how to make these beautiful candles. Whether it's your first time crafting candles or you're an experienced DIYer, this process is simple, rewarding, and perfect for creating gifts with heart.
Why Make Beeswax Candles?
There's a reason natural beeswax candles have stood the test of time. Unlike paraffin candles, which release toxins into the air, beeswax burns cleanly and improves indoor air quality by releasing negative ions. It has a warm, subtle honey scent that feels comforting and homey.
Another reason I love them? They're safe for almost anyone. So many people today have sensitivities to artificial perfumes used in scented candles. When you make these air-purifying candles at home, you know they're free of overpowering scents and safe for everyone to enjoy.
That said, if you know your recipient is okay with light fragrances, you can add essential oils like lavender, eucalyptus, or pine to create a customized, subtle aroma.
What You'll Need to Make Beeswax Candles
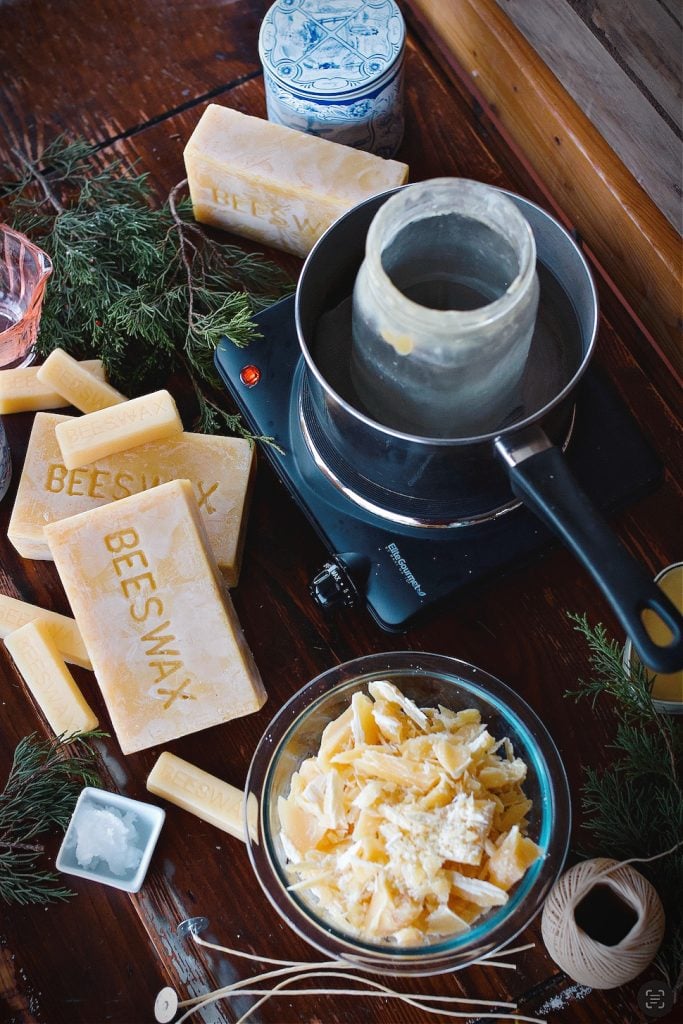
Here's a list of simple supplies to get started:
- Pure Beeswax: Look for beeswax pellets, blocks of raw beeswax, or bulk wax from a local beekeeper. You'll need about a pound of wax per batch.
- Hemp Wicks: Be sure to use the right wick size for your container. I found these wicks from Amazon worked great for me! And if you want to experiment with making taper candles, these wicks are best for that. Wick stickers make it easy to secure the wick to the bottom of the jar or mold.
- Unique Containers: Repurposed candle jars, thrifted tins, mason jars, or anything heat-safe and sturdy.
- Quart Jar: Use a quart jar as your melting pot for the wax.
- Double Boiler: A good idea for safe, even heating. (More on this below!)
- Coconut Oil (Optional): Adding 1-2 tablespoons of coconut oil per pound of beeswax helps the candle burn evenly and prevents cracks.
- Essential Oils (Optional): For lightly scented candles, use oils like lavender, pine, or eucalyptus.
- Paper Towels: To catch drips and spills. (If you have a fireplace, use these paper towels that have beeswax on them as fire starters!)
- Bamboo or Metal Skewer: Helps keep the wick centered.
- Rubber Bands: Use to secure wicks in place if needed.
Once you've mastered these candles, give your hand a go at making purple dead nettle salve also using beeswax! It's great for bug bites, burns, and dry skin!
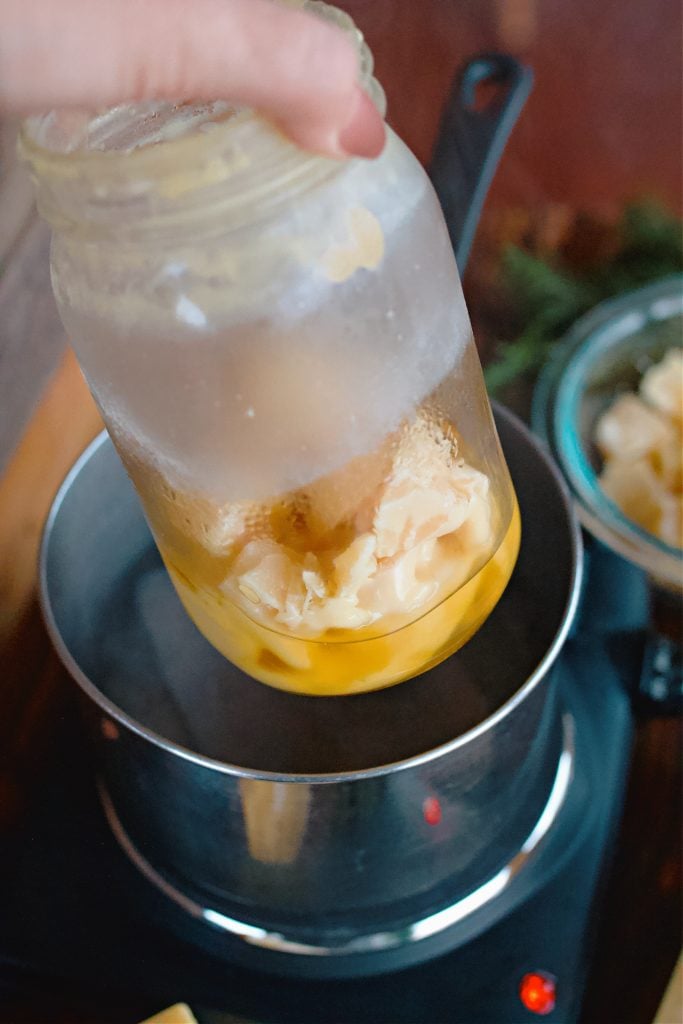
A Note on Melting Wax
For melting wax, I use a quart jar in a saucepan with water. Here's how I do it:
- Place a small cloth at the bottom of the saucepan and fill it with water until the jar is halfway submerged.
- Add the beeswax pellets or chunks of raw beeswax to the quart jar.
- Bring the water to a gentle boil, letting the wax melt slowly.
This method keeps everything contained and prevents the jar from cracking under the heat.
Just one note: Once a jar is used for melting wax, it will forever be your wax jar. Getting all the wax clean from the glass is nearly impossible, and I've decided my sanity isn't worth the effort.
Why Add Coconut Oil?
Adding a teaspoon of coconut oil to one pound of beeswax can make a big difference. It:
- Prevents Cracks: Beeswax has a high melting point, which can sometimes cause cracks as it hardens. Coconut oil softens the wax, creating a smoother surface.
- Encourages Even Burning: It helps prevent tunneling, so your candle burns all the way to the edges.
- Improves Scent Throw: Coconut oil allows essential oils to mix better, enhancing the candle's fragrance.

How to Make Beeswax Candles: Step-by-Step
Equipment
- 1 Double Boiler or Saucepan: For gently heating the wax.
- 1 Quart Jar: To use as a melting pot for the wax.
- 1 Small cloth: To place in the saucepan to protect the quart jar.
Ingredients
- 1 pound Pure Beeswax: Beeswax pellets a block of raw beeswax, or yellow beeswax (about 1 pound per batch).
- 2 wicks Cotton Wicks: Select the right wick size for your container.
- 2 wick stickers To secure the wick to the bottom of the jar or mold.
- 2 Containers Containers: Mason jars thrifted tins, vintage ceramic pieces, or glass jars.
- 1 teaspoon Coconut Oil Optional: A cup of coconut oil to soften the wax and improve the burn.
- 4 drops Essential Oils Optional: Lavender, pine, eucalyptus, or other oils for a light fragrance.
Instructions
- Prepare Your Workspace: Cover your work area with paper towels to catch any drips.Attach the wick to the bottom of the jar with wick stickers or a glue gun.
- Melt the Wax: Add a pound of beeswax to your quart jar and place it in a saucepan with a small cloth at the bottom. Melt the wax over low heat.Stir in 1-2 tablespoons of coconut oil for a smoother, longer-lasting burn.
- Optional: Add Fragrance:Once the wax has slightly cooled, add essential oils (20-30 drops per pound of wax).
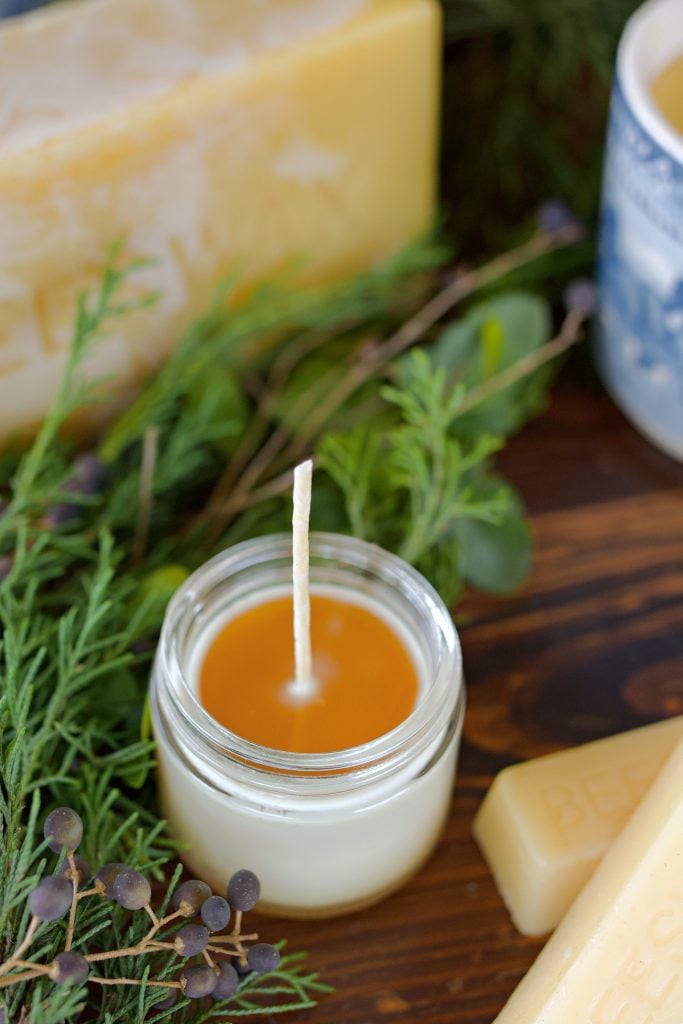
- Pour the Wax: Carefully pour the melted beeswax into your containers, leaving about ½ inch of space at the top of the jar.
- Secure the Wick: Use a bamboo skewer and rubber bands to keep the wick centered.
- Cool and Trim: Let the wax cool completely at room temperature. Once fully hardened, trim the wick to ¼ inch.
- Decorate and Gift: Add a ribbon, handwritten label, or sprig of greenery for a personalized touch.
Notes
First Burn Tip: When lighting the candle for the first time, let it burn long enough to create a full melt pool across the surface. This prevents tunneling and ensures an even burn.
Safety Reminder: Always supervise burning candles and keep them away from flammable materials, children, and pets.
Customization Ideas: Experiment with different container shapes, beeswax pellets, or essential oils to create personalized gifts.
Next Time Tip: Save any leftover wax for your next batch of candles-it can easily be remelted and reused.
Why I Love This Project
There's something deeply satisfying about lighting a candle you made yourself. For me, it's not just about the end result-it's about the process. The time spent searching my favorite antique stores for unique containers, melting the wax, and centering the wick feels like a quiet celebration of creativity and care.
When I give these candles as gifts, I'm sharing more than a practical item-I'm sharing a piece of my homestead, the beauty of slowing down, and the joy of creating something from scratch.
If you decide to make your own candles, I'd love to see them! Share your creations on Instagram and tag me so I can celebrate your work with you. And if you're curious to learn more about the girl behind the candles, check out my About Me page.


I would like some help if possible. We burn a beeswax candle at our services on special occasions. They are 1.5" diameter and 8" tall and sit in a straight sided globe in a holder. They often burn badly- they start to one sided burn and within 1 hr. are just falling apart.
I have always wondered if we do something wrong when making the candle. It is a simple process- we just melt the wax and pour into a mold with wick- part way through we put a rod down in to take care of air bubbles. Then fill at the end. Is it possible we are using the wrong wick or we put the rod down too far? There is a fair amount of draft where we burn the candles. Some fair much better than others.
Is there any product we could add to slow down the burn?
Please any advice would be helpful.
Thank you, Sincerely S. Faith Riccio
This is a very common issue with tall, narrow beeswax candles, especially in large spaces with air movement.
Beeswax burns hotter and is more sensitive to draft than other waxes. Even slight airflow can cause the flame to lean, which leads to uneven melting and a one-sided burn that can cause the candle to fail fairly quickly. Churches are particularly challenging because of subtle air currents from HVAC systems, doors, and open space.
Wick choice is usually the next thing to evaluate. Beeswax requires a larger, sturdier wick, and if it’s even slightly undersized, the flame can favor one side. Square braided cotton wicks tend to perform best for beeswax pillars and tapers, and sizing up one level often helps.
Wick centering during the pour also matters. Inserting a rod to release air bubbles can shift the wick just enough to affect the burn later, even if it appears centered at the top. Some candle makers instead pour in stages and top off as the wax contracts.
A few practical adjustments to try:
Test one wick size larger, rated for beeswax
Use a square braid wick
Pour in stages rather than inserting a rod
Keep wicks trimmed to about ¼ inch
Use a draft shield or glass chimney if possible
Pure beeswax generally performs best without additives. Adjusting wick size and reducing airflow typically produces better results than adding anything to the wax.
I hope that helps!
Eryn 🙂
This candle-making project has become something I look forward to every winter. The soft honey scent that fills the kitchen while the wax melts is so calming, and gifting these candles feels personal and heartfelt. Each one turns out a little different, especially when I use vintage containers, which makes them even more special to give.