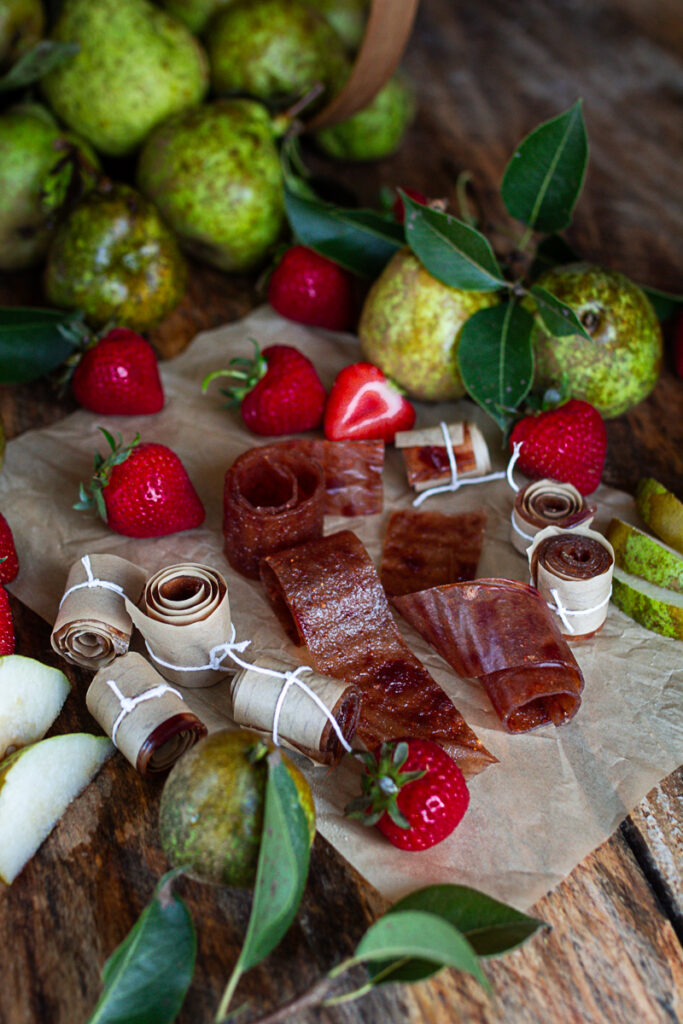
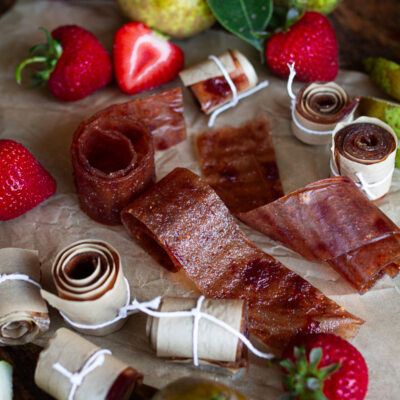
Simple Homemade Pear Fruit leather | 2 Ingredients
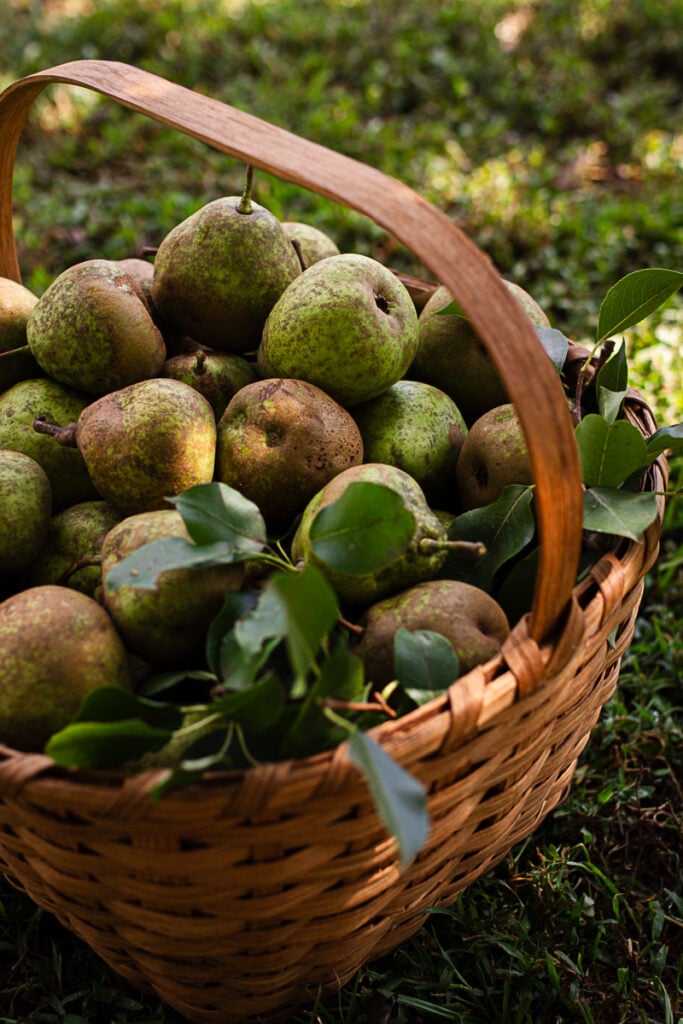
When we moved to our homestead, I spotted a hidden treasure buried at the back edge of the yard: a pear tree nearly choked out by forest undergrowth and crawling with poison ivy. It took three years of pruning, clearing, and care to bring it back to life, but this year it finally gave us an incredible harvest of ripe pears, perfect for making pear fruit leather and other preserves.
A little tart, super juicy, and loaded with flavor. My milk cow Pearl does her best to steal the low-hanging fruit, but I've managed to gather enough to start preserving in small batches.
Why You'll love This Pear Fruit Leather
- A great way to use up extra ripe fruit
- Kid-approved homemade fruit roll ups with real flavor: no dyes or preservatives
- Only two ingredients: fruit and lemon juice (plus optional sweetener or other fruits as desired)
- Simple to prep, using a food processor or immersion blender and stockpot to cook down
- Dehydrated at low heat or with a convection setting for even drying
- Stores beautifully at room temperature for longer storage
Get creative: Swirl in maple syrup, try adding blueberry or strawberry to the fruit leather mix
Ingredient Notes + Substitutions
- Fresh pears: About 8-9 medium ones will give you 4 cups of fruit purée. Bartlett or Anjou work well, but any high-pectin fruit will hold up nicely.
- Lemon juice: This prevents browning and balances the sweetness. Don't skip it!
- Strawberry jam or maple syrup (optional): Add in small amounts to enhance the flavor of the fruit or tailor the level of sweetness. Just keep an eye on how much sugar you add, especially for younger kids.
- Silicone mat or parchment paper: Line your trays with a smooth surface like these to make peeling the final product easier.
- Plastic wrap: For storage after if you find it easier
This is my favorite dehydrator. I basically keep it out on the counter all harvest season long.
Step-by-Step: How to Make Pear Fruit Leather
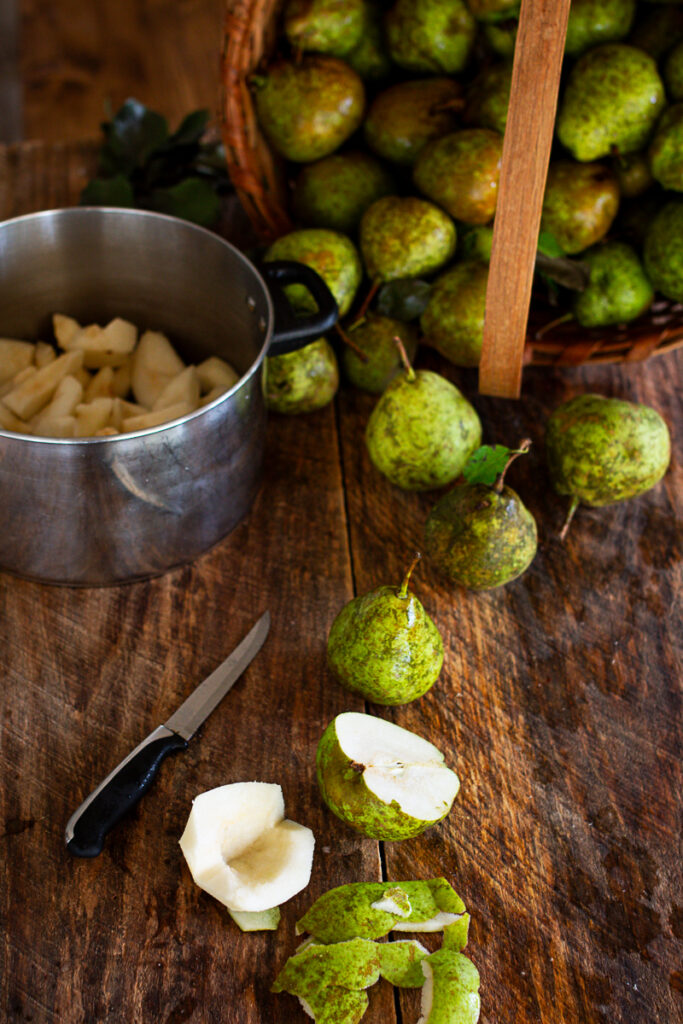
Start by washing, peeling, and removing the seed core from your pears. I slice about four at a time and place them into my food chopper to begin the puree. If you prefer a silky texture or your pears are on the fibrous side, run the mixture through a food mill or food processor for an ultra smooth fruit puree.
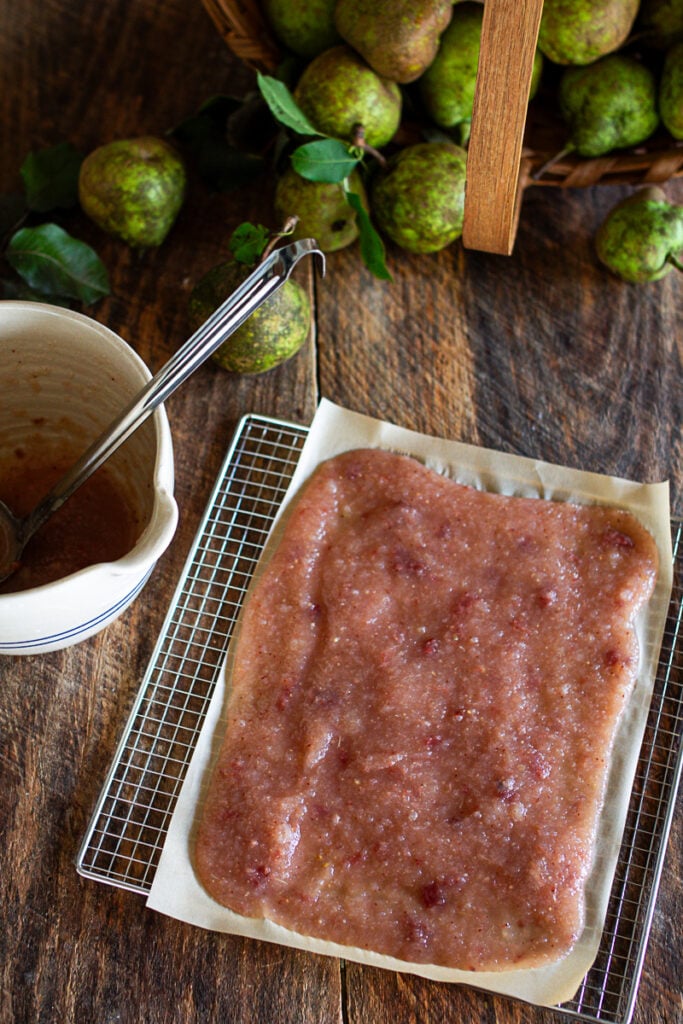
Once smooth, stir in your lemon juice, and any flavor add-ins (like strawberry jam or a dash of maple syrup). You'll want to spread this on a lined baking sheet or dehydrator tray using an offset spatula for the thinnest, most even inch thickness layer possible.
Dry in your food dehydrator set to 140°F for 8-12 hours. If using the oven, set it to the lowest temperature and leave the sides of the oven slightly propped open with a wooden spoon. This allows moisture to escape during the drying process. Don't rush it-drying takes a long time, but slow and steady gives you the best homemade fruit leather texture.
Check for doneness by gently pressing the top of the purée-it should feel tacky but not wet. Use a pizza cutter to slice the leather into strips or squares once cool.
Variations & Creative Add-ins
- Pear leather + cinnamon = fall in a bite
- Pear + blueberry fruit leather is a fun twist
- Stir in extra nutrition with chia seeds or puréed carrots
- For savory snackers: try a swirl of guajillo chile paste
- Turn into fruit snacks by cutting into fun shapes with cookie cutters
- Use in a lunch kit or snack box as a no-mess treat
Pear Fruit Leather
Ingredients
- 4 cups fruit purée about 8-9 ripe pears
- ½ teaspoon lemon juice
- ¼ cup strawberry jam This is Optional
Instructions
- Peel, core, and roughly chop your pears.
- Place them in a stockpot and bring to a gentle simmer. Use an immersion blender to puree the mixture right in the pot, then continue to cook over low heat for about an hour, stirring occasionally. This helps remove excess moisture and creates a smoother texture.
- Before spreading, stir in 2 tablespoons of lemon juice to help prevent browning during drying.
- If you'd like to add extra fruit for flavor, now's the time. I added about half a cup of strawberry jam to mine, but this part is completely optional.
- Spread the warm fruit puree into a thin, even layer on parchment paper or a silicone mat.
- Dry at 140°F in a food dehydrator or on the lowest temperature in your oven (with the door slightly propped open) for 6 to 10 hours, or until it's dry to the touch but still pliable. (Each dryer will be a bit different)
- Once cool, slice into strips using a pizza cutter. Roll in plastic wrap or parchment paper and store in an airtight container at room temperature.
Nutrition
FAQ
Can I use overripe pears for fruit leather?
Yes, overripe or slightly soft ripe fruit works beautifully, though you may need to adjust the drying time.
What's the best way to store pear leather?
After it cools, roll it in parchment paper or plastic wrap and store in an airtight container at room temperature for up to a month. For longer storage, freeze in labeled bags.
Do I need to add sugar?
No! If your pears are sweet and ripe, there's no need for added sugar. Taste your fruit puree first-sometimes I add a spoonful of maple syrup if it needs a little boost.
Can I use a cookie sheet in the oven?
Absolutely! Just be sure to line it with parchment or a silicone mat and monitor closely.
Closing Thoughts from the Homestead
It still amazes me how that old tree, once buried in brush, could become one of the most generous parts of our homestead. Making your own fruit leather is a small, sweet way to honor the harvest, even if it takes a little time and patience.
These chewy fruit roll-ups have become a pantry staple around here. And as an added bonus, they're a tasty snack that lets me sneak a little extra fruit into the kids' day. No complaints, just sticky fingers and happy smiles.
If you give this fruit leather recipe a try, leave a comment below and tag me on Instagram, I'd love to see your version!
You might also enjoy:
Meet Eryn
Eryn Whalen is a homestead blogger and recipe developer with a lifetime of hands-on experience in gardening, home canning, animal husbandry, and traditional kitchen skills. From preserving homegrown harvests to baking sourdough from scratch, she shares her family's journey of intentional living on their 100-acre Tennessee farmstead. Recently, Eryn has expanded her homesteading life to include caring for a family milk cow, sharing the learning process and daily joys of small-scale dairying. Read more about Eryn here


I’m so proud of this one, there’s something extra sweet about turning pears from our “rescued” tree into lunchbox-friendly rolls. If you make a batch, keep the purée layer thin and even (an offset spatula helps) and dry it just until tacky so it stays chewy, not brittle. We love a cinnamon swirl or a little strawberry jam mixed in for color. If you try it, tell me your favorite flavor combo, and tag me so I can cheer on your harvest snacks! ?✨