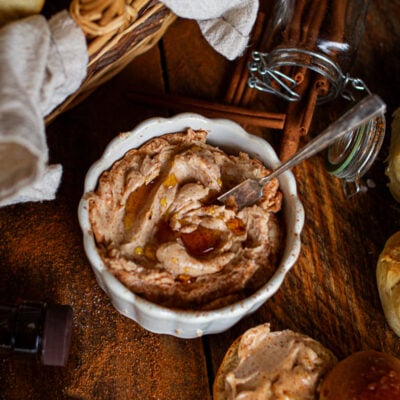
From the Homestead: Homemade Maple Butter Recipe
There's something about the first truly crisp morning of fall that makes you pause. The kettle starts to hum, firewood crackles in the stove, and the softest blanket, bonus points if it's an old quilt, makes its way onto your lap. On mornings like these, when the world is just waking up, a slice of warm bread with homemade maple butter tastes like comfort in its purest form.

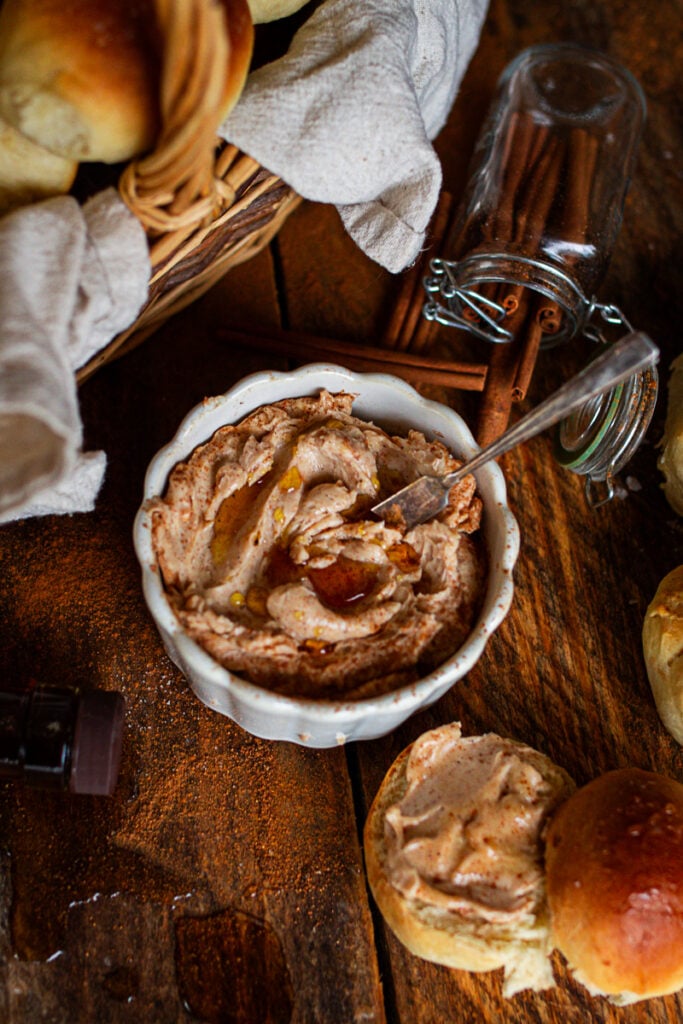
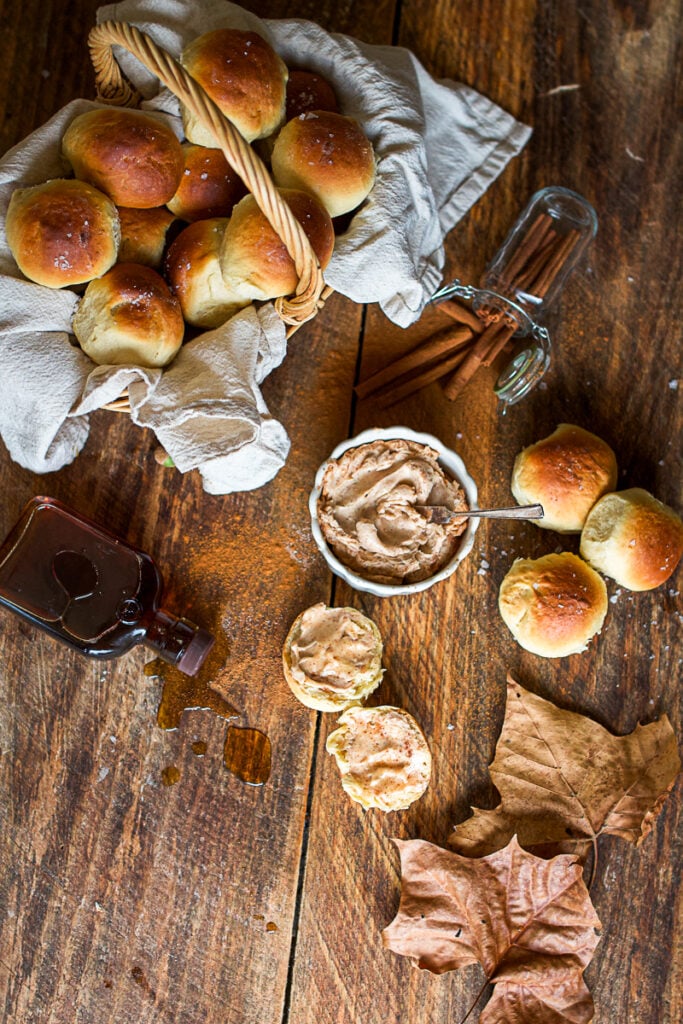
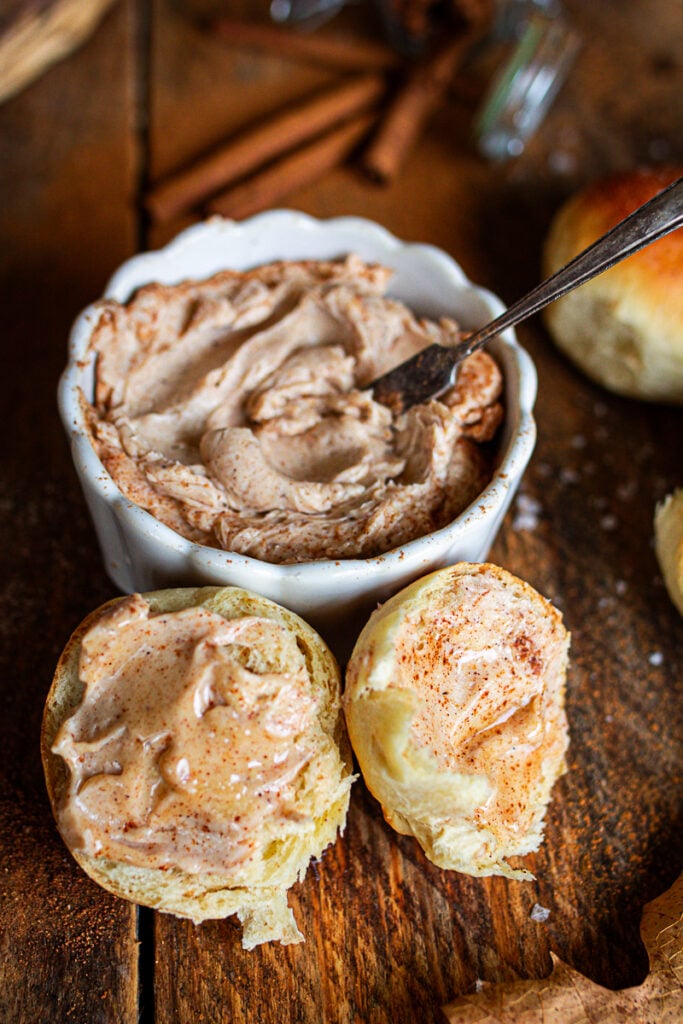
This maple butter recipe is one of those simple recipes that turns basic ingredients into something a little magical. It's rich and creamy with just the right touch of sweet maple flavor. I love slathering it over my great-grandma's dinner rolls, or spreading it on sourdough toast, pumpkin bread, apple bread, whatever's warm from the oven that day. Around here, we like to keep things simple, but always full of heart.
Why You'll Love This Maple Butter Recipe
- Made with simple ingredients you already have
- A rich, creamy texture that spreads like a dream
- Just the right sweet maple flavor with a hint of cinnamon and nutmeg
- Whips up in minutes with a stand mixer or electric hand mixer
- Stores beautifully in a mason jar or other airtight container
- Delicious on warm biscuits, french toast, english muffins, or even sweet potatoes
- Makes a great gift for the holidays or to tuck into a fall breakfast basket
Ingredient Notes + Why Quality Matters
When you're working with simple ingredients, every detail counts. That's what transforms this into more than just a spread-it becomes a nourishing, homemade maple butter you'll crave all season long.
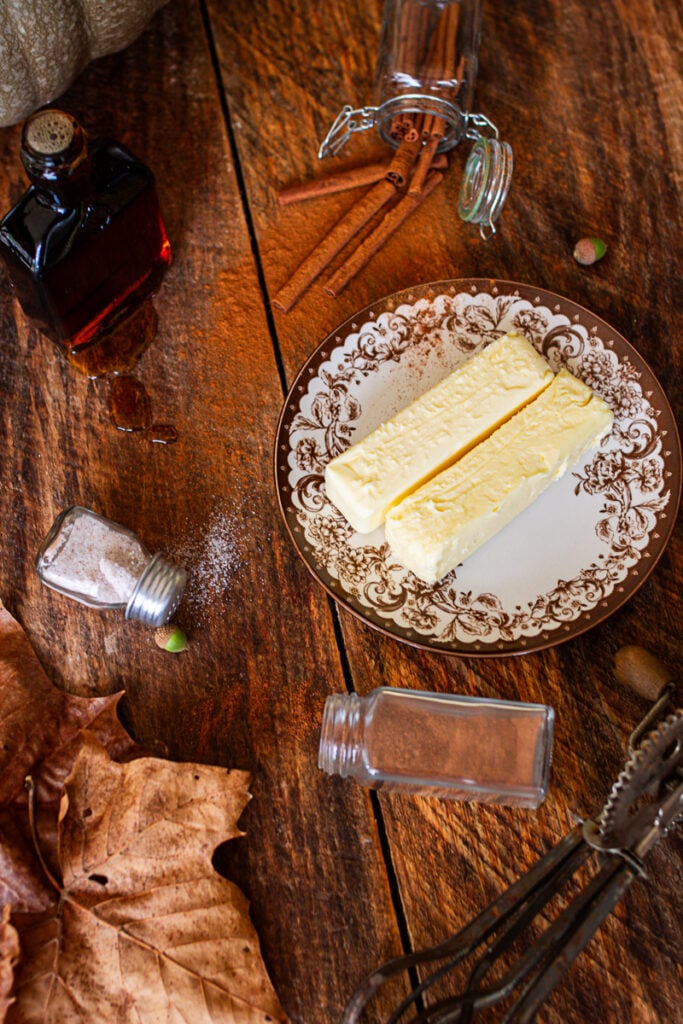
Unsalted Butter (Room Temperature)
Use unsalted butter so you can control the amount of salt to your taste. Let it soften fully at room temperature-cold butter won't whip properly. I skip the grass-fed conversation here because honestly, what matters most is choosing a butter you love the taste of. Some of the best butters come from small farms or your local grocery store, and there's nothing wrong with that.
Pure Maple Syrup (Grade B)
Look for 100% pure maple syrup, ideally Grade B (now labeled "Grade A Dark Robust"). It has the best flavor for cooking-deep, rich, and almost caramelly. This isn't the time for pancake syrup from a squeeze bottle. Real maple syrup makes a difference.
A Dash of Warm Spices
A bit of cinnamon, nutmeg, and a pinch of salt round it out. You can add 1-2 tablespoons of brown sugar for a touch more sweetness if you like, but I find the maple syrup does plenty on its own.
How to Make Homemade Maple Butter
This is such an easy maple butter to whip up-it's really just combining and whipping until smooth. Here's how I make it in my kitchen, with a few cozy tips along the way.
- Start with the right temperature: Your butter should be soft but not melted. That's key to getting that luscious, spreadable consistency.
- Use the paddle attachment on your stand mixer (or a whisk attachment or electric hand mixer if that's what you have). Low speed at first, then work your way up to whip some air in.
- Add the pure maple syrup, cinnamon, nutmeg, and salt, and keep mixing until the final product is smooth and dreamy. If it starts to separate, don't panic-just keep mixing until it comes back together.
- Taste and adjust. Add a little brown sugar for more sweetness or a bit more salt to balance it.
I usually use the bowl of a stand mixer for this, but honestly, a large bowl and a little elbow grease with a wooden spoon will do the trick if you're in a pinch.
Flavor Variations + How to Use It
This maple butter recipe is endlessly adaptable.
Try:
- A touch of vanilla or bourbon for deeper fall flavor
- A swirl of peanut butter for a nutty twist
- Mixing in a spoonful of honey butter for a more floral sweetness
Serve on:
- My great-grandma's dinner rolls
- Homemade sourdough
- Moist pumpkin bread
- Apple spice bread
- French toast or on top of pancakes
- Sweet potatoes or roasted root veggies
FAQ
Do I need a candy thermometer?
Nope! This isn't maple cream or spreadable maple syrup made by boiling and cooling. This is a whipped maple butter that comes together cold with no heat required.
How do I store homemade maple butter?
Store it in an airtight container in the fridge for up to 2 weeks. Bring to room temperature before serving so it softens again.
Can I freeze it?
Yes! Store in small jars or wrapped portions and thaw overnight in the fridge. You can also gift it frozen, just add a label and pretty twine.
Storage
Keep your maple butter in a mason jar or other airtight container in the fridge. It'll last 10-14 days, but it never lasts that long around here. Let it come to room temperature before serving so it spreads easily.
Maple Butter
Ingredients
- 1 cup 2 sticks unsalted butter, room temperature
- ¼ cup pure maple syrup
- 1 teaspoon ground cinnamon
- Dash of nutmeg
- Dash of salt
Instructions
- In the bowl of a stand mixer fitted with the paddle attachment, whip butter on medium speed until light and fluffy.
- Add maple syrup, cinnamon, nutmeg, and salt. Mix on low speed until combined, then increase to medium-high and whip until smooth.
- Transfer to an airtight container like a mason jar. Store in fridge; bring to room temp before serving for spreadable consistency.
Notes
- Use room temperature butter: Soft butter whips beautifully and creates that creamy, cloud-light texture. Cold butter won't blend evenly with the maple syrup.
- Choose pure maple syrup: Real maple syrup gives a natural caramel-like flavor that pairs perfectly with the butter - skip the imitation stuff for best results.
- Add a touch of warm spice: A sprinkle of cinnamon or pumpkin pie spice turns it into a cozy fall treat for biscuits, pancakes, or fresh rolls.
- Whip until fluffy: Mix on medium-high speed for 2-3 minutes until it looks pale and airy. A hand mixer or stand mixer with the whisk attachment both work well.
- Storage: Keep your maple butter in a small glass jar with a tight-fitting lid. It'll stay fresh at room temperature for 2-3 days, or refrigerate for up to 2 weeks.
- Bring to room temp before serving: Chilled butter firms up; letting it soften before serving brings back that spreadable, silky texture.
- Use it anywhere: Spread over homemade rolls, pancakes, or waffles, or melt it onto baked sweet potatoes or warm banana bread.
- For gifting: Spoon into small jars and add a simple tag - a thoughtful, from-scratch treat that feels special but only takes minutes to make.
Nutrition
Closing Thoughts from the Homestead
This time of year calls for little comforts: warm socks, glowing embers in the stove, and a slice of something tasty in your hand. This homemade maple butter is one of my favorite things to keep on hand. It may be simple, but it carries so much joy.
If you try this recipe, I'd love for you to leave a comment or tag me over on Instagram. And if you're wanting to try a few other new recipes for fall, here are more cozy favorites:
Meet Eryn
Eryn Whalen is a homestead blogger and recipe developer with a lifetime of hands-on experience in gardening, home canning, animal husbandry, and traditional kitchen skills. From preserving homegrown harvests to baking sourdough from scratch, she shares her family's journey of intentional living on their 100-acre Tennessee farmstead. Recently, Eryn has expanded her homesteading life to include caring for a family milk cow, sharing the learning process and daily joys of small-scale dairying. Read more about Eryn here


This maple butter is pure comfort in a jar! It whips up so creamy and smooth, with just the right touch of maple sweetness and a hint of cinnamon that makes it taste like fall mornings by the woodstove. I’ve been spreading it on everything—from sourdough toast to pumpkin bread—and it melts perfectly. I love how simple it is to make yet feels so special. Definitely a recipe I’ll be gifting all season long!