Entryway Makeover in a weekend
I'm finally sharing the entryway makeover we did a few months back. I still walk by it each day and smile. It changed the front of our house in all the best ways. And it was EASY! A two day project that made a major impact.

This post contains affiliate links. For more information, see my disclosures here.
I want family and guests to feel immediately welcome when they enter our home. For that they need to be encouraged to hang up their coats and purses, kick off their shoes, come inside and stay awhile.
The original layout of the entryway did not give off that impression. Below the best "before" photo I have.

A few of the reasons we decided to re-do our entryway:
Our family's coats fill the entire coat closet that's next to the door. It's like an explosion anytime we go to open it. There was no way guests were going to be able to store their coats in there.
The previous mirror and wall shelf felt cold and oh so nineties. To me it was waisted potential and you all know I can't handle that! 😉
I'd been dreaming of a cute entryway ever since I first saw the craze on Pinterest a few years back.
Do I need anymore reasons? I think not! It was time to get busy!
Entryway Makeover
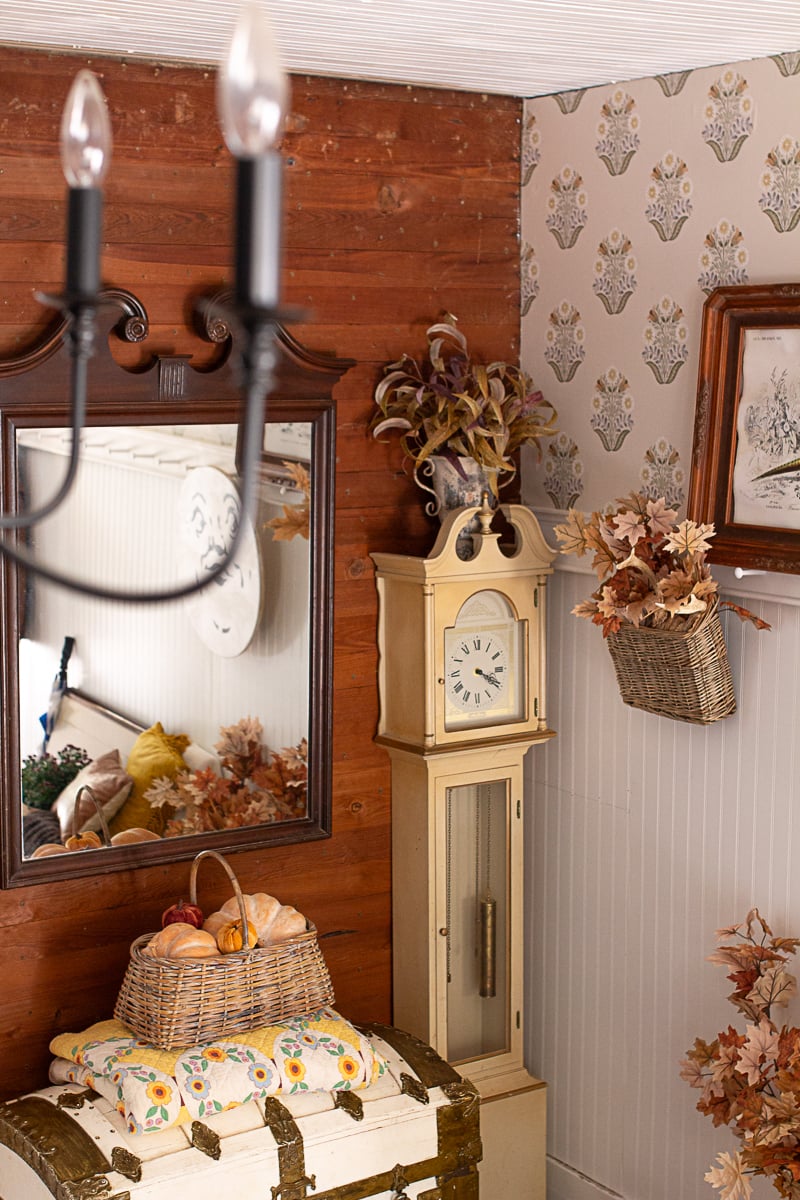
Slowly I'm removing all the orangy-wood trim and beige walls from our sweet house, who has put up with those colors for far too long! For the entryway, along with adding the wood paneling, I knew the colors around the area had to change. That door was crying for a paint job, and since I recently painted all the banisters black, I knew the door being that color would tie in nicely.

I used Sherwin Williams paint, in Tricorn Black, and gave it a good three coats. It still needs sealed at some point.

For the walls, closet door, and trim I used Sherwin Williams in High Relective White. It's literally right out of the can, I don't add any tint to it. Side note: Don't you love how the cedar from the entryway tie into the cedar accent wall I had Travis add to our dining room a few months back?
Because we've been doing projects like crazy since moving to this house, all the paint I used was from cans previously purchased for other projects.

For the wood we used tongue and groove cedar flats. Again, these were given to us from my parents who had recently flipped a house that had tons of them laying around. You don't have to use cedar or tongue and groove though. There are many cheaper alternatives to adding a shiplap feel to a wall. Liz Marie has a great tutorial on how to use Plywood for a similar effect. Also Craigslist and FaceBook Marketplace are wonderful resources for getting wood on the cheap.

The tongue and groove was fairly simple to install. Travis cut to size, hammered in place, and secured with a nail gun. This took a solid half day to complete.

The shelf
To make the shelf, we purchased black brackets, and a piece of plywood that again, Travis cut to fit the space. I'm very much a "let's just eyeball it" kind of person. I measured out how wide I wanted it that pleased me visually and Travis made it happen! Still on the fence about painting it. That may happen in the future.
Similar Brackets:


Coat hooks
The coat hooks I originally wanted were out of stock, and impatient me, I didn't want to wait. I found the ones we ended up using and were happy with them. Ours are from Hobby Lobby, but you can also find them on Amazon and in most hardware stores.

Similar Coat hooks
The wire looking set shown below are the ones I was originally in search of.
For the bench Travis made it free floating. It's in no way attached to the wall.

The bench was one piece of 4x8 Harwood, that my husband cut into pieces. I asked him for instructions to add to the post, and he said "My wife ordered a bench and I simply cut it to size and put it together." So . . . I'm out of luck sharing that info! lol!
I ended up painting the bench the same black and white from the walls and door. It tied everything together nicely. I might end up whitewashing all the cedar eventually, once we tile our floors.
All it took was a solid two days of effort and the change was amazing! Add a little decor and bam, a completely transformed entryway that's inviting and updated!

I love changing out the decor based on holiday or season. It's a great spot to set the mood for the rest of our house.
Decorate with a similar vibe:
To make the wreath pictured, click here for the tutorial.
Are you freshening up your entryway anytime soon? Is there a "have to have" feature that the space must contain?
You might also like:


I love the entryway. You absolutely nailed it. From the wood panels on the wall to the color of the door. I thought it was so funny when you shared your husbands instructions for the branch. That would totally be my husband. Lol. Great transformation!
Super cute! Nice use of the space, so much more practical. Good job!
Thank you! I completely agree, SO much more practical. It was a fun project!